

Chapter 11: Edit for Credit 231
First, AutoCAD prompts you to select the objects you want to array.
3. Select one or more objects; then press Enter.
Next, AutoCAD prompts you to choose the type of array you want:
Enter the type of array [Rectangular/Polar] <R>:
4. Type R and press Enter to create a rectangular array.
Next, you specify the number of rows and columns you want, and the distance between each of them. AutoCAD prompts:
Enter the number of rows (---) <1>:
5.Enter a value and press Enter.
AutoCAD next asks the number of columns, the distance between rows, and finally the distance between columns.
The Rows and Columns numbers include the row and column of the original objects themselves. In other words, entries of 1 don’t create any new objects in that direction.
6.Enter values for the number of columns, and the distances between adjacent rows and columns, and then press Enter.
AutoCAD creates regularly spaced copies of the selected objects in neat rows and columns.
To create regularly arrayed objects in rows and columns or arranged around a center point, you must use the command-line version of ARRAY by typing a hyphen in front of the command name. Typing ARRAY without the hyphen creates new-style associative array objects. Associative arrays, covered in Chapter 18, are more powerful and versatile, but nonassociative ones may still be adequate for many applications.
Offset
You use OFFSET to create parallel or concentric copies of lines, polylines, circles, arcs, or splines. Follow these steps to use OFFSET:
1. Click the Offset button on the Home tab’s Modify panel.
AutoCAD displays the current command settings and prompts you for the offset distance — the distance from the original object to the copy you’re creating:
Current settings: Erase source=No Layer=Source OFFSETGAPTYPE=0
Specify offset distance or [Through/Erase/Layer] <Through>:
www.it-ebooks.info
232 Part II: Let There Be Lines
2.Type an offset distance and press Enter.
Alternatively, you can indicate an offset distance by picking two points on the screen. If you choose this method, you should normally use object snaps to specify a precise distance from one existing object to another.
AutoCAD prompts you to select the object from which you want to create an offset copy:
Select object to offset or [Exit/Undo] <Exit>:
3. Select a single object, such as a line, a polyline, or an arc.
Note that you can select only one object at a time with the OFFSET command. AutoCAD asks where you want the offset object:
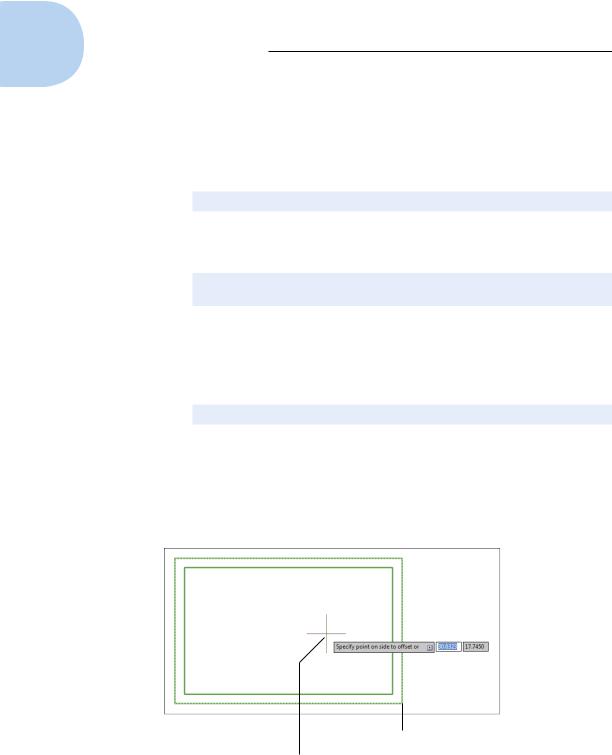
Specify point on side to offset or [Exit/Multiple/
Undo] <Exit>:
4.Point to one side or the other of the object and then click.
It doesn’t matter how far away from the object the crosshairs are when you click. You’re simply indicating a direction.
AutoCAD repeats the Select object prompt, in case you want to offset other objects by the same distance:
Select object to offset or [Exit/Undo] <Exit>:
5.Go back to Step 3 if you want to offset another object or press Enter if you’re finished offsetting objects for now.
Figure 11-6 shows the OFFSET command in progress. For information on the command options — and Multiple, Erase, and Layer are all useful options — look up OFFSET in the online help’s Command Reference section.
Object to offset
Point on side of offset
Figure 11-6: Offsetting a polyline.
www.it-ebooks.info