

Chapter 2: Le Tour de AutoCAD 2013 |
43 |
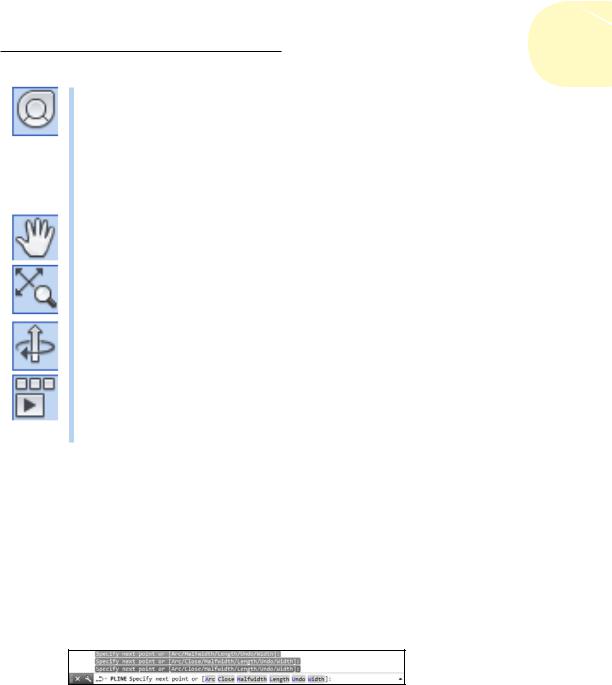
SteeringWheels: You were probably wondering when this motoring metaphor was going to pay off, right? Well, believe it or not, there really is an AutoCAD function called the SteeringWheel! (We’re still looking for the Gas Pedal . . . oops, we mean GasPedal.) A SteeringWheel is described in the online help as a tracking menu — the idea here is that you combine a number of display operations into a single input “device.” We mention SteeringWheels in Chapter 12 but point out here that it’s of little use in 2D drafting — which, unfortunately, is all that AutoCAD LT users can do with it.
Pan and Zoom: These buttons provide access to two commonly used display commands, PAN and ZOOM. PAN moves you around your drawing without changing your viewing distance; ZOOM brings the drawing objects closer so you can see more detail, or farther away so you can see more of the drawing area. These and other display commands are described in Chapter 12.
Orbit: The Orbit tool (not available in AutoCAD LT) is an interactive device for viewing your 3D models from any angle. We describe this tool with the other 3D viewing options in Chapter 21.
ShowMotion: The ShowMotion tool starts a rudimentary animation program. As the online help describes it, you can generate effects similar to those in TV commercials to dress up motion studies of your designs. ShowMotion isn’t included in AutoCAD LT and is beyond — well beyond — the scope of this book.
Let your fingers do the talking: The command window
The infamous command window (or command line, or command prompt, or command area, whatever you want to call it), shown in Figure 2-9, is a throwback to the dark ages of AutoCAD. It puzzles newcomers and delights AutoCAD aficionados. Despite the promise of AutoCAD’s heads-up Dynamic
Input, for now at least, the hard truth is that you have to come to like — or at least tolerate — the command window if you want to become at all comfortable using AutoCAD.
Figure 2-9: You will obey the command window; that is an order.
You should cotton on and cozy up to the command window because it’s still AutoCAD’s primary communications conduit with you. AutoCAD sometimes displays prompts, warnings, and error messages in the command window that Dynamic Input doesn’t show — there simply isn’t room in the Dynamic
www.it-ebooks.info
44 Part I: AutoCAD 101
Input tooltip to show as much information as you get at the command window. True, when using Dynamic Input, you can press the down-arrow key to see more options. But which is less efficient: Moving your eyes down the screen to glance at the command window, or taking your eyes right off the screen to find the down-arrow key on your keyboard? The most common mantra chanted by instructors to students is, “When all else fails, read the command line!”
The command line has gone through a major overhaul in AutoCAD 2013. It is no longer an opaque region at the bottom of the screen. Instead the command line is a semitransparent toolbar that can float anywhere on screen,
allowing your drawing to show through it. This recovers some of the drawing window area that was lost to the Ribbon. Hey, Microsoft, screens are getting wider, not taller! By default it displays one command input line plus the last three input prompts, but you can change the number of input prompts that are displayed.
As a command is running, the command line will often display several options that can be invoked during the command. You invoke an option by entering the uppercase letter shown in each option. This is usually the first letter, but not always. For example, you usually enter an upper-case X to eXit from a command.
Starting with AutoCAD 2013, you don’t even need to type in the option letter. You can invoke an option by selecting it in the command line.
The key(board) to AutoCAD success
Despite (or is it because of?) AutoCAD’s long heritage as the most successful CAD software for personal computers, newcomers are still astonished at the amount of typing they have to do. Modern programs have much less dependency on the keyboard than AutoCAD, but as you get used to it, you’ll
find that no other input method gives you as much flexibility as pounding the ivories . . . oops, wrong keyboard!
Typing at your computer’s keyboard is an efficient way to run some commands, and the only way to run a few others. Instead of clicking a button or choosing from a menu, you can start a command by typing the command name and then pressing Enter. Even better, for most common commands, you can type the short form for a command name and press Enter. Most of the short forms (called aliases) of command names are just one or two letters — for example, L for the LINE command, C is for CIRCLE, and CP for
the COPY command. Most people who discover how to use the aliases for the commands that they run most frequently find that their AutoCAD productivity improves noticeably. If you ever watch high-speed superusers in action, they nearly always run with one hand on the mouse and the other on the keyboard. Even if you’re not worried about increasing your productivity with this technique, several everyday commands are nowhere to be found on the Ribbon. If you want to run those commands, you have to type them!
www.it-ebooks.info
Chapter 2: Le Tour de AutoCAD 2013 |
45 |
AutoCAD 2013’s Autocomplete feature helps you to become a keyboard jockey. Start typing a command name, and a list appears at the cursor showing all commands and options that start with the letters so far. You can continue until only your command appears, or you can scroll down the list and select another command. Aliases are also displayed for those commands that have them, so you soon learn the ones you use most often. Hands up, everyone who’d rather type APPLY than APPLYGLOBALCAPACITIES!
Not all command aliases are as obvious as L for LINE: For example, CP for COPY or — believe it or not — T for MTEXT. To see a complete list of command aliases, look in the AutoCAD (or the AutoCAD LT) Program Parameters (PGP) file by going to the Manage tab and clicking Edit Aliases on the Customization panel. When Windows Notepad opens with the acad.pgp (or acadlt.pgp) file loaded, scroll down to the Sample Aliases for AutoCAD Commands section. We don’t recommend changing anything here, but it’s a good idea to print this file and pin up the aliases section over your desk.
After you start a command — whether from a Ribbon panel tool button, or by typing — the Dynamic Input tooltip and the command window are where AutoCAD prompts you with options for that command. You activate one of these options by typing the uppercase letter(s) in the option and then pressing Enter.
In many cases, you can activate a command’s options by right-clicking in the drawing area and choosing the desired option from the menu that appears, instead of by typing the letter(s) for the option and pressing Enter.
We like Dynamic Input. Really, we do. But sometimes it fights with normal command input, and that can make things really confusing. In the following chapters, we tell you when to be wary.
The following sequence demonstrates how you use the keyboard to run commands and view and select options. If you have Dynamic Input toggled on, your results are going to be different from what we say, so we suggest you click Dynamic Input on the status bar to turn it off, temporarily at least. In the following steps, watch the command window, and pay attention to messages from AutoCAD:
1. Type L and then press Enter.
AutoCAD starts the LINE command and displays the following prompt in the command window:
LINE Specify first point:
2. Click a point anywhere in the drawing area.
The command window prompt changes to
Specify next point or [Undo]:
www.it-ebooks.info
46 Part I: AutoCAD 101
3.Click another point anywhere in the drawing area.
AutoCAD draws the first line segment.
4.Click a third point anywhere in the drawing area.
AutoCAD draws the second line segment and prompts
Specify next point or [Close/Undo]:
The command line now displays two options: Close and Undo enclosed in square brackets. To activate an option, type the blue letter(s) shown in uppercase and then press Enter. You can type the option letter(s) in lowercase or uppercase.
New in AutoCAD 2013, you can also simply click the desired option in the command line.
5.Type U and then press Enter.
AutoCAD undoes the second line segment.
6.Type 3,2 (without any spaces) and then press Enter.
AutoCAD draws a new line segment to the point whose X coordinate is 3 and Y coordinate is 2.
7.Click several more points anywhere in the drawing area.
AutoCAD draws additional line segments.
8.Type X and then press Enter.
X isn’t a valid option of the LINE command, so AutoCAD displays an error message and prompts you again for another point:
Point or option keyword required.
Specify next point or [Close/Undo]:
Option keyword is programmer jargon for the letter(s) shown in uppercase that activate a command option. This error message is AutoCAD’s way of saying, “Huh? I don’t understand what you mean by typing X.
Either specify a point, or type a letter that I do understand.”
9. Type C and then press Enter.
AutoCAD draws a final line segment, which creates a closed figure and ends the LINE command. A blank command line returns, indicating that AutoCAD is ready for the next command:
Command:
10.Press F2.
AutoCAD displays the AutoCAD Text Window, which is simply an enlarged, scrollable version of the command window, as shown in the left half of Figure 2-10.
www.it-ebooks.info
Chapter 2: Le Tour de AutoCAD 2013 |
47 |
The normal three-line command window usually shows you what you need to see, but occasionally you want to review a larger chunk of command-line history. (“What was AutoCAD trying to tell me a minute ago?!”)
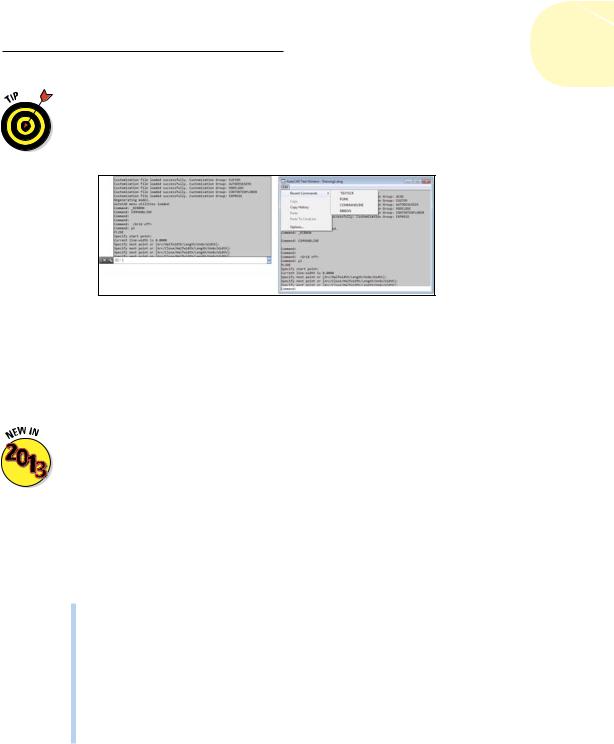
Figure 2-10: My, how you’ve grown: F2 (left side) or Ctrl-F2 (right side) expands the command line to a command text window.
11.Press F2 again.
AutoCAD closes the AutoCAD Text Window.
AutoCAD 2013 added a new variation. Pressing F2 produces the scrollable text screen shown in the left half of Figure 2-10, while pressing Ctrl+F2 produces the version shown in the right half of Figure 2-10. The contents of both variants are the same. The difference is that the Ctrl+F2 version includes an Edit button. Selecting it brings up additional functions, including a fly-out list of recent commands, as shown in the right half of Figure 2-10. Selecting a previous command from the list runs it again. It doesn’t matter if you opened the text window by pressing F2 or Ctrl+2; it closes when you press F2.
Here are a few other tips and tricks for effective keyboarding:
Use the Esc key to bail out of the current operation. Sometimes you might get confused about what you’re doing in AutoCAD and/or what you’re seeing in the command window or the Dynamic Input tooltip. If you need to bail out of the current operation, just press Esc one or more times until you see a blank command line — Command: at the bottom of the command window, with nothing after it. As in most other Windows programs, Esc is the cancel key. Unlike many other Windows programs, AutoCAD keeps you well informed of whether an operation is in progress. The blank command line indicates that AutoCAD is resting, waiting for your next command.
www.it-ebooks.info
48 Part I: AutoCAD 101
Press Enter to accept the default action. Some command prompts include a default action in angled brackets. For example, the first prompt of the POLYGON command is
Enter number of sides <4>:
The default here is four sides, and you can accept it simply by pressing
Enter. (That is, you don’t have to type 4 first.)
AutoCAD uses two kinds of brackets when it prompts.
•Command options appear in regular square brackets: [Close Undo].
To activate a command option, type the letter(s) that appear in uppercase and then press Enter. The Dynamic Input tooltip doesn’t display options in brackets; instead, you press the down-arrow key to display additional command options in rows next to the crosshairs.
•A default value or option appears in angled brackets: <4>.
To choose the default value or option, simply press Enter. Default values in angled brackets appear in both the Dynamic Input tooltip and the command-line prompts.
You don’t always have to press Enter to forward your input to AutoCAD. Depending on what you’re doing, you can often right-click and choose Enter from the top of the right-click menu. And most efficient of all, even for the most inept typists, you can use the spacebar as an Enter key — as long as you’re not entering text. That’s why we said in Step 6 in the first exercise to type the entry without spaces.
Watch the command line. You can discover a lot about how to use the command line simply by watching it after each action that you take. When you click a toolbar button or menu choice, AutoCAD displays the name of the command in the Dynamic Input tooltip and at the command line. If you’re watching the command line, you’ll absorb the command names more or less naturally.
When AutoCAD echoes commands automatically in response to your toolbar and menu clicks, it usually adds one or two extra characters to the front of the command name:
•AutoCAD usually puts an underscore in front of the command name: for example, _LINE instead of LINE. The underscore is an Autodesk programmers’ trick that enables non-English language versions of AutoCAD to understand the English command names that are embedded in the menus.
•AutoCAD sometimes puts an apostrophe in front of the command name and any underscore (for example, '_ZOOM instead of ZOOM). The apostrophe indicates a transparent command; you can run a transparent command in the middle of another command without
www.it-ebooks.info
Chapter 2: Le Tour de AutoCAD 2013 |
49 |
canceling the first command. For example, you can start the LINE command, run the ZOOM command transparently, and then pick up where you left off with the LINE command.
Leave the command line in the default configuration. The command window, like most other parts of the AutoCAD screen, is resizable and movable. The default location (docked at the bottom of the AutoCAD screen) and size (one line in the command window and three semitransparent lines extending up into the drawing area) work well for most people. Resist the temptation to mess with the command window’s appearance — at least until you’re comfortable with using the command line. AutoCAD 2013 adds many more configuration and display options for the command prompt, but as the popular Canadian comedian Red Green says, “If it ain’t broke, you ain’t tryin’ hard enough.”
Right-click in the command window for options. If you right-click in the command window, you see a menu with some useful choices, including Recent Commands — the last six commands that you ran.
Press the upand down-arrow keys to cycle through the stack of commands that you’ve used recently. This is another handy way to recall and rerun a command. Press the leftand right-arrow keys to edit the command-line text that you’ve typed or recalled.
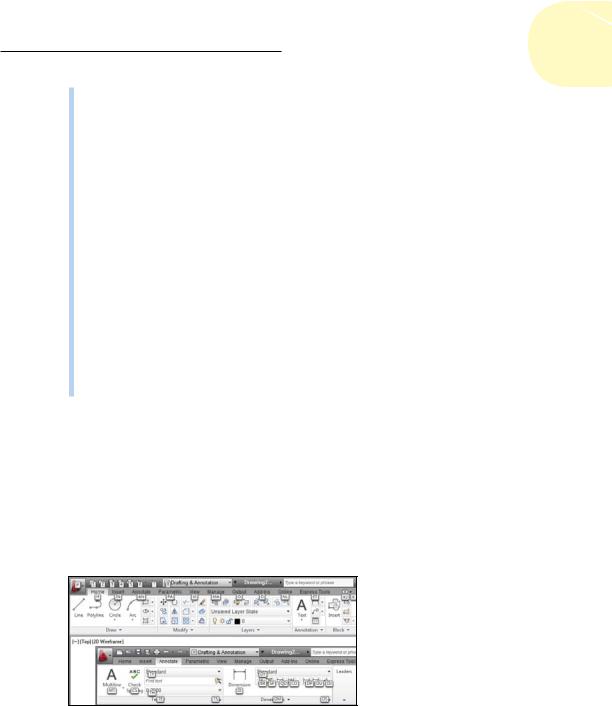
Most Windows users are familiar with Alt-key shortcuts. Press the Alt key in traditional Windows programs, and your menu bar lights up with one character of each menu item underlined. You type the underlined letter to open the menu or execute the command. AutoCAD’s implementation of Microsoft’s Fluent User Interface has an equivalent — KeyTips — which works in much the same way. In Figure 2-11, I just pressed the Alt key and AutoCAD displayed
boxed letter icons that are equivalent to the underlining in traditional Windows programs. If I now enter AN, the Annotate tab will open with a new set of KeyTips, and I can keep entering the keys to execute a specific command.
Figure 2-11: Hold down the Alt key to display a kazillion
KeyTips.
www.it-ebooks.info