

- •brief contents
- •about this book
- •The Windows Forms namespace
- •Part 1: Hello Windows Forms
- •Part 2: Basic Windows Forms
- •Part 3: Advanced Windows Forms
- •Who should read this book?
- •Conventions
- •Action
- •Result
- •Source code downloads
- •Author online
- •acknowledgments
- •about .NET
- •Casting the .NET
- •Windows Forms overview
- •about the cover illustration
- •Hello Windows Forms
- •1.1 Programming in C#
- •1.1.1 Namespaces and classes
- •1.1.2 Constructors and methods
- •1.1.3 C# types
- •1.1.4 The entry point
- •1.1.5 The Application class
- •1.1.6 Program execution
- •1.2 Adding controls
- •1.2.1 Shortcuts and fully qualified names
- •1.2.2 Fields and properties
- •1.2.3 The Controls property
- •1.3 Loading files
- •1.3.1 Events
- •1.3.2 The OpenFileDialog class
- •1.3.3 Bitmap images
- •1.4 Resizing forms
- •1.4.1 Desktop layout properties
- •1.4.2 The Anchor property
- •1.4.3 The Dock property
- •1.5 Recap
- •2.1 Programming with Visual Studio .NET
- •2.1.1 Creating a project
- •Action
- •Result
- •2.1.2 Executing a program
- •Action
- •Result
- •2.1.3 Viewing the source code
- •View the code generated by Visual Studio .NET
- •Action
- •Result
- •2.2 Adding controls
- •2.2.1 The AssemblyInfo file
- •Action
- •Results
- •2.2.2 Renaming a form
- •Action
- •Result
- •2.2.3 The Toolbox window
- •Action
- •Result
- •2.3 Loading files
- •2.3.1 Event handlers in Visual Studio .NET
- •Action
- •Result
- •2.3.2 Exception handling
- •Action
- •Result
- •Action
- •Results and Comments
- •2.4 Resizing forms
- •2.4.1 Assign the Anchor property
- •Action
- •Result
- •2.4.2 Assign the MinimumSize property
- •Action
- •Result
- •2.5 Recap
- •Basic Windows Forms
- •Menus
- •Action
- •Result
- •Action
- •Result
- •Action
- •Result
- •Action
- •Result
- •3.3 Click events
- •Action
- •Result
- •Action
- •Result
- •Action
- •Result
- •Action
- •Result
- •Action
- •Result
- •Action
- •Result
- •3.5 Context menus
- •Action
- •Result
- •Action
- •Result
- •3.6 Recap
- •Status bars
- •4.1 The Control class
- •4.2 The StatusBar class
- •Action
- •Result
- •Action
- •Result
- •4.3.1 Adding panels to a status bar
- •Action
- •Result
- •Action
- •Result
- •Action
- •Result
- •Action
- •Result
- •4.5 Recap
- •Reusable libraries
- •5.1 C# classes and interfaces
- •5.2 Class libraries
- •Action
- •Result
- •Action
- •Result
- •Action
- •Result
- •Action
- •Result
- •Action
- •Result
- •Action
- •Result
- •Action
- •Result
- •Action
- •Result
- •Action
- •Result
- •5.3 Interfaces revisited
- •Action
- •Result
- •Action
- •Result
- •Action
- •Result
- •5.4 Robustness issues
- •Action
- •Result
- •Action
- •Result
- •Action
- •Result
- •Action
- •Result
- •Action
- •Result
- •Action
- •Result
- •Common file dialogs
- •Action
- •Results
- •Action
- •Result
- •Action
- •Result
- •Action
- •Result
- •Action
- •Result
- •6.3 Paint events
- •Action
- •Result
- •Action
- •Result
- •6.4 Context menus revisited
- •Action
- •Result
- •Action
- •Result
- •6.5 Files and paths
- •Action
- •Result
- •Action
- •Result
- •Action
- •Result
- •6.6 Save file dialogs
- •Action
- •Result
- •Action
- •Result
- •Action
- •Result
- •Action
- •Result
- •Action
- •Result
- •6.7 Open file dialogs
- •Action
- •Result
- •Action
- •Result
- •6.8 Recap
- •Drawing and scrolling
- •7.1 Form class hierarchy
- •Action
- •Result
- •Action
- •Result
- •Action
- •Result
- •Action
- •Result
- •Action
- •Result
- •Action
- •Result
- •Action
- •Result
- •Action
- •Result
- •Action
- •Result
- •Action
- •Result
- •Action
- •Result
- •Action
- •Result
- •7.4 Panels
- •Action
- •Result
- •Action
- •Result
- •Action
- •Result
- •Action
- •Result
- •Action
- •Result
- •Dialog boxes
- •8.1 Message boxes
- •Action
- •Result
- •Action
- •Result
- •8.1.4 Creating A YesNoCancel dialog
- •Action
- •Result
- •Action
- •Result
- •8.2 The Form.Close method
- •8.2.1 The relationship between Close and Dispose
- •Action
- •Result
- •8.3 Modal dialog boxes
- •Action
- •Result
- •Action
- •Result
- •8.3.2 Preserving caption values
- •Action
- •Result
- •Action
- •Result
- •Action
- •Result
- •Action
- •Result
- •Action
- •Result
- •Action
- •Result
- •Action
- •Result
- •Action
- •Result
- •Action
- •Result
- •Action
- •Result
- •Action
- •Result
- •Action
- •Result
- •Action
- •Result
- •Action
- •Result
- •Action
- •Result
- •Action
- •Result
- •Action
- •Result
- •Basic controls
- •Action
- •Result
- •Action
- •Result
- •Action
- •Result
- •9.1.2 Creating a derived form
- •Action
- •Result
- •9.2 Labels and text boxes
- •Action
- •Result
- •Action
- •Result
- •Action
- •Result
- •Action
- •Result
- •Action
- •Result
- •Action
- •Result
- •Action
- •Result
- •Action
- •Result
- •Action
- •Result
- •Action
- •Result
- •Action
- •Result
- •Action
- •Result
- •Action
- •Result
- •Action
- •Result
- •Action
- •Result
- •Action
- •Result
- •Action
- •Result
- •Action
- •Result
- •9.3.6 Adding AlbumEditDlg to our main form
- •Action
- •Result
- •Action
- •Result
- •9.4 Recap
- •List controls
- •10.1 List boxes
- •Action
- •Result
- •Action
- •Result
- •Action
- •Result
- •Action
- •Result
- •10.2 Multiselection list boxes
- •10.2.1 Enabling multiple selection
- •Action
- •Result
- •Action
- •Result
- •Action
- •Result
- •Action
- •Result
- •10.3 Combo boxes
- •Action
- •Result
- •Action
- •Result
- •10.4 Combo box edits
- •Action
- •Result
- •Action
- •Result
- •Action
- •Result
- •10.5 Owner-drawn lists
- •Action
- •Result
- •Action
- •Result
- •Action
- •Result
- •Action
- •Result
- •More controls
- •Action
- •Result
- •Action
- •Result
- •11.2 Tab pages
- •Action
- •Result
- •Action
- •Result
- •11.3.1 Dates and times
- •Action
- •Result
- •Action
- •Result
- •Action
- •Result
- •Action
- •Result
- •Action
- •Result
- •Action
- •Result
- •11.5 Recap
- •A .NET assortment
- •12.1 Keyboard events
- •Action
- •Result
- •Action
- •Result
- •12.2 Mouse events
- •Action
- •Result
- •Action
- •Result
- •Action
- •Result
- •12.3 Image buttons
- •Action
- •Result
- •Action
- •Result
- •Action
- •Result
- •Action
- •Result
- •Action
- •Result
- •Action
- •Result
- •Action
- •Result
- •Action
- •Result
- •Action
- •Result
- •12.4 Icons
- •Action
- •Result
- •Action
- •Result
- •Action
- •Result
- •12.5 Recap
- •Toolbars and tips
- •13.1 Toolbars
- •Action
- •Result
- •Action
- •Result
- •Action
- •Result
- •Action
- •Result
- •Action
- •Result
- •Action
- •Result
- •Action
- •Result
- •Action
- •Result
- •Action
- •Result
- •13.4.2 Creating tool tips
- •Action
- •Result
- •Action
- •Result
- •Advanced Windows Forms
- •List views
- •14.2 The ListView class
- •Action
- •Result
- •Action
- •Result
- •Action
- •Result
- •Action
- •Result
- •14.2.3 Populating a ListView
- •Action
- •Result
- •Action
- •14.3 ListView columns
- •Action
- •Result
- •Action
- •Result
- •Action
- •Result
- •Action
- •Result
- •Action
- •Result
- •Action
- •Result
- •Action
- •Result
- •Action
- •Result
- •Action
- •Result
- •Action
- •Result
- •Action
- •Result
- •Action
- •Result
- •Action
- •Result
- •Action
- •Result
- •Action
- •Result
- •Action
- •Result
- •Action
- •Result
- •Action
- •Result
- •Action
- •Result
- •14.6 Recap
- •Tree views
- •Action
- •Result
- •Action
- •Result
- •Action
- •Result
- •15.3 Dynamic tree nodes
- •Action
- •Result
- •Action
- •Result
- •Action
- •Result
- •Action
- •Result
- •Action
- •Result
- •15.4 Node selection
- •Action
- •Result
- •Action
- •Result
- •Action
- •Result
- •Action
- •Result
- •Action
- •Result
- •15.5 Fun with tree views
- •Action
- •Result
- •Action
- •Result
- •Action
- •Result
- •Multiple document interfaces
- •Action
- •Result
- •Action
- •Result
- •Action
- •Result
- •16.3 Merged menus
- •Action
- •Result
- •Action
- •Result
- •Action
- •Result
- •Action
- •Result
- •16.4 MDI children
- •Action
- •Result
- •Action
- •Result
- •Action
- •Result
- •Action
- •Result
- •Action
- •Result
- •Action
- •Result
- •Action
- •Result
- •Action
- •Result
- •Action
- •Result
- •Action
- •Result
- •16.5 MDI child window management
- •Action
- •Result
- •Action
- •Result
- •16.6 Recap
- •Data binding
- •17.1 Data grids
- •Action
- •Result
- •Action
- •Result
- •17.2 Data grid customization
- •Action
- •Result
- •Action
- •Result
- •Action
- •Result
- •Action
- •Result
- •Action
- •Result
- •Action
- •Result
- •Action
- •Result
- •Action
- •Result
- •Action
- •Result
- •Action
- •Result
- •Action
- •Result
- •Odds and ends .NET
- •Action
- •Result
- •Action
- •Result
- •Action
- •Result
- •Action
- •Result
- •18.2 Timers
- •Action
- •Result
- •Action
- •Result
- •18.3 Drag and drop
- •Action
- •Result
- •Action
- •Result
- •18.4 ActiveX controls
- •Action
- •Result
- •Action
- •Result
- •Action
- •Result
- •Action
- •Result
- •Action
- •Result
- •18.5 Recap
- •C# primer
- •A.1 C# programs
- •A.1.1 Assemblies
- •A.1.2 Namespaces
- •A.2 Types
- •A.2.1 Classes
- •A.2.2 Structures
- •A.2.3 Interfaces
- •A.2.4 Enumerations
- •A.2.5 Delegates
- •A.3 Language elements
- •A.3.1 Built-in types
- •A.3.2 Operators
- •A.3.3 Keywords
- •A.4 Special features
- •A.4.1 Exceptions
- •A.4.2 Arrays
- •A.4.3 Main
- •A.4.4 Boxing
- •A.4.5 Documentation
- •.NET namespaces
- •B.1 System.Collections
- •B.2 System.ComponentModel
- •B.3 System.Data
- •B.4 System.Drawing
- •B.5 System.Globalization
- •B.6 System.IO
- •B.7 System.Net
- •B.8 System.Reflection
- •B.9 System.Resources
- •B.10 System.Security
- •B.11 System.Threading
- •B.12 System.Web
- •B.13 System.Windows.Forms
- •B.14 System.XML
- •Visual index
- •C.1 Objects
- •C.2 Marshal by reference objects
- •C.3 Components
- •C.4 Common dialogs
- •C.7 Event data
- •C.8 Enumerations
- •For more information
- •bibliography
- •Symbols
- •Index

CREATE THE PIXELDLG CLASS (continued)
Action |
Result |
5Add a Button object to the base of the form and set its properties.
Settings
Property Value
(Name) btnClose
Text &Close
The code generated here is very similar to the code we saw earlier in this chapter for the CaptionDlg class, so we will not look at this code in detail. Instead, we will move on to the internal class members required by this new form.
8.4.2ADDING CLASS MEMBERS TO PIXELDLG
There really isn’t a lot of work to do here. We need to allow our main application to modify the display values, and make sure the dialog exits when the Close button is clicked. We will use properties for the display values, and handle the Click event to close the form.
You may recall that we did not handle any events for our CaptionDlg form. Since this was a modal dialog, we took advantage of the DialogResult property in the Button class. When the corresponding button is clicked and a modal dialog is displayed via the ShowDialog method, this property closes the form and returns the assigned result to the caller. Here, such a scheme is not possible since we are creating a modeless dialog. Thus our need for a Click event handler.
The steps here are similar to what we have done before, so let’s get to it.
ADD THE REQUIRED PIXELDLG CLASS MEMBERS
|
Action |
Result |
|
|
|
1 |
In the PixelDlg.cs [Design] |
protected void btnClose_Click |
|
window, add a Click handler |
(object sender, System.EventArgs e) |
|
for the Close button. |
{ |
|
|
|
|
|
|
2 |
Implement this method to |
Close(); |
|
close the form. |
} |
|
|
|
3 |
Add an XVal property to set |
public int XVal |
|
the value for the X label. |
{ |
|
|
set { lblXVal.Text = value.ToString(); } |
|
|
} |
|
|
|
MODELESS DIALOGS |
255 |
ADD THE REQUIRED PIXELDLG CLASS MEMBERS (continued)
|
Action |
Result |
|
|
|
4 |
Add a YVal property to set the |
public int YVal |
|
value for the Y label. |
{ |
|
|
set { lblYVal.Text = value.ToString(); } |
|
|
} |
|
|
|
5 |
Add RedVal, GreenVal, and |
public int RedVal |
|
BlueVal properties for their |
{ |
|
respective labels. |
set { lblRedVal.Text = value.ToString(); } |
|
} |
|
|
|
|
|
|
public int GreenVal |
|
|
{ |
|
|
set { lblGreenVal.Text = value.ToString(); } |
|
|
} |
|
|
public int BlueVal |
|
|
{ |
|
|
set { lblBlueVal.Text = value.ToString(); } |
|
|
} |
|
|
|
This ensures our dialog can be closed, and provides the properties necessary to update the labels from our main form. Note how the Form.Close method is used to close the form, just like in the Exit menu handler for our main application window. The
.NET framework keeps track of which form is the top-level application window, so the Close method here closes just the PixelDlg window and not the entire application. As you’ll recall, this method disposes of any nonmemory resources allocated by the form as well.
One other change we should make is to allow the standard keyboard shortcuts to close the dialog. Since there is a single button on our form, we will support both the Enter and Esc keys for this purpose. Continuing the previous steps:
SUPPORT KEYBOARD SHORTCUTS TO CLOSE PIXELDLG FORM
Action |
Result |
6In the PixelDlg.cs [Design] window, display the properties for the PixelDlg form.
7Set both the AcceptButton The properties are set in the InitializeComponent property and the CancelButton method of the PixelDlg.cs source file.
property to btnClose.
Our PixelDlg form is ready to go. Next we need to invoke this form from the main window.
8.4.3DISPLAYING THE MODELESS PIXELDLG FORM
For our CaptionDlg form, we displayed it as a modal dialog box using the Form.ShowDialog method. This method displays the form and waits until it exits,
256 |
CHAPTER 8 DIALOG BOXES |
preventing the parent form from accepting any external input until this occurs. For a modeless dialog a different method is required that will allow the parent form to continue execution.
The Form.Show method is used for this purpose. The Show method is inherited from the Control class and sets a control’s Visible property to true. For a Form, this means it displays in a modeless fashion. The Show method is a void method since no immediate result is returned.
As for our modal dialog, we will display the form from an item on the menu bar.
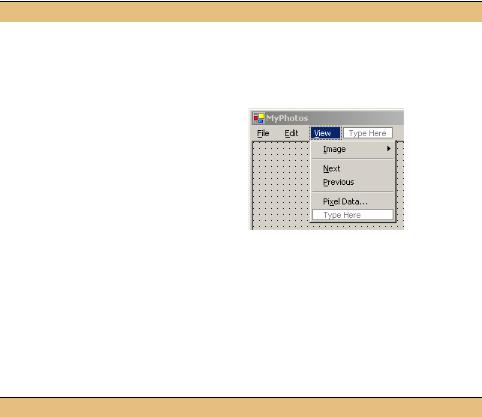
ADD PIXEL DATA MENU TO INVOKE THE PIXELDLG FORM
|
|
Action |
Result |
||
|
|
|
|
|
|
1 |
Display the View menu in the |
|
|||
|
MainForm.cs [Design] window. |
|
|||
|
|
|
|
|
|
2 |
Add a separator at the end of the menu. |
|
|||
|
|
|
|
|
|
3 |
Add a Pixel Data menu item. |
|
|||
|
|
Settings |
|
||
|
|
|
|
|
|
|
|
Property |
Value |
|
|
|
|
(Name) |
menuPixelData |
|
|
|
|
Text |
Pi&xel Data… |
|
|
|
|
|
|
|
|
Before we use this to display the dialog, let’s ponder what support we need for our new dialog. Since this is a modeless dialog, it will display while the main form is displayed. So the user may change which photo is displayed, or modify the display mode used. Such changes will require that we modify what is displayed in the dialog.
To facilitate this, we will track whether the dialog is currently displayed, and which photo is currently represented by the dialog. Let’s continue the previous steps and add these class members.
ADD CLASS MEMBERS TO TRACK PIXELDLG SETTINGS
|
Action |
Result |
|
|
|
4 |
In the MainForm.cs |
private PixelDlg _dlgPixel = null; |
|
window, add a private |
|
|
member to hold the |
|
|
PixelDlg form object. |
|
|
|
|
5 |
Also add an integer to hold |
private int _nPixelDlgIndex; |
|
the current photo |
|
|
represented in this form. |
|
|
|
|
MODELESS DIALOGS |
257 |

These members will be used to update the dialog as the main window changes. In particular, we can use these members to create the dialog in the menu handler.
IMPLEMENT MENUPIXELDATA_CLICK EVENT HANDLER
|
Action |
Result |
|
|
|
6 |
Add a click handler for the |
protected void menuPixelData_Click |
|
Pixel Data menu. |
(object sender, System.EventArgs e) |
|
|
{ |
|
|
|
7 |
If the dialog has not been |
if (_dlgPixel == null || _dlgPixel.IsDisposed) |
|
created or the existing |
{ |
|
dialog has been disposed, |
_dlgPixel = new PixelDlg(); |
|
_dlgPixel.Owner = this; |
|
|
create a new dialog. |
|
|
} |
|
|
|
Note: The Owner property used here ensures that the |
|
|
PixelDlg form is minimized and maximized along with |
|
|
the parent form. |
|
|
|
8 |
Assign the initial data to |
_nPixelDlgIndex = _album.CurrentPosition; |
|
display in the dialog. |
Point p = pnlPhoto.PointToClient( |
|
|
Form.MousePosition); |
|
|
UpdatePixelData(p.X, p.Y); |
|
|
|
9 |
Finally, display the dialog. |
_dlgPixel.Show(); |
|
|
} |
|
|
|
The code to create and display the dialog should seem familiar, but what about that code in step 8 of our task. Let’s talk about it.
The first line in step 8 simply assigns the current photo index to the variable. No problem there.
_nPixelDlgIndex = _album.CurrentIndex;
The next line converts the current screen coordinates of the mouse pointer to its coordinates within in the main Panel object. This uses the static Form.MousePosition property to retrieve the screen coordinates of the mouse pointer as a Point instance. This point contains the current X and Y position of the pointer on the screen in pixels.
The location on the screen is not what we need. We need to know the location of the mouse pointer within the main Panel object. That is, in the pnlPhoto control. This can then be used to calculate what part of the image is at that location.
The PointToClient method does this conversion. It accepts a point in screen coordinates and returns the same point in client coordinates. If the given point happens to be outside the control, the returned Point will contain values outside the display area of the control.
Point p = pnlPhoto.PointToClient(Form.MousePosition);
The final line calls an as-yet-undefined UpdatePixelData method. We will write this method in the next section to accept the current position of the mouse pointer in Panel coordinates and fill in the appropriate values of the PixelDlg form.
UpdatePixelData(p.X, p.Y);
258 |
CHAPTER 8 DIALOG BOXES |