

- •brief contents
- •about this book
- •The Windows Forms namespace
- •Part 1: Hello Windows Forms
- •Part 2: Basic Windows Forms
- •Part 3: Advanced Windows Forms
- •Who should read this book?
- •Conventions
- •Action
- •Result
- •Source code downloads
- •Author online
- •acknowledgments
- •about .NET
- •Casting the .NET
- •Windows Forms overview
- •about the cover illustration
- •Hello Windows Forms
- •1.1 Programming in C#
- •1.1.1 Namespaces and classes
- •1.1.2 Constructors and methods
- •1.1.3 C# types
- •1.1.4 The entry point
- •1.1.5 The Application class
- •1.1.6 Program execution
- •1.2 Adding controls
- •1.2.1 Shortcuts and fully qualified names
- •1.2.2 Fields and properties
- •1.2.3 The Controls property
- •1.3 Loading files
- •1.3.1 Events
- •1.3.2 The OpenFileDialog class
- •1.3.3 Bitmap images
- •1.4 Resizing forms
- •1.4.1 Desktop layout properties
- •1.4.2 The Anchor property
- •1.4.3 The Dock property
- •1.5 Recap
- •2.1 Programming with Visual Studio .NET
- •2.1.1 Creating a project
- •Action
- •Result
- •2.1.2 Executing a program
- •Action
- •Result
- •2.1.3 Viewing the source code
- •View the code generated by Visual Studio .NET
- •Action
- •Result
- •2.2 Adding controls
- •2.2.1 The AssemblyInfo file
- •Action
- •Results
- •2.2.2 Renaming a form
- •Action
- •Result
- •2.2.3 The Toolbox window
- •Action
- •Result
- •2.3 Loading files
- •2.3.1 Event handlers in Visual Studio .NET
- •Action
- •Result
- •2.3.2 Exception handling
- •Action
- •Result
- •Action
- •Results and Comments
- •2.4 Resizing forms
- •2.4.1 Assign the Anchor property
- •Action
- •Result
- •2.4.2 Assign the MinimumSize property
- •Action
- •Result
- •2.5 Recap
- •Basic Windows Forms
- •Menus
- •Action
- •Result
- •Action
- •Result
- •Action
- •Result
- •Action
- •Result
- •3.3 Click events
- •Action
- •Result
- •Action
- •Result
- •Action
- •Result
- •Action
- •Result
- •Action
- •Result
- •Action
- •Result
- •3.5 Context menus
- •Action
- •Result
- •Action
- •Result
- •3.6 Recap
- •Status bars
- •4.1 The Control class
- •4.2 The StatusBar class
- •Action
- •Result
- •Action
- •Result
- •4.3.1 Adding panels to a status bar
- •Action
- •Result
- •Action
- •Result
- •Action
- •Result
- •Action
- •Result
- •4.5 Recap
- •Reusable libraries
- •5.1 C# classes and interfaces
- •5.2 Class libraries
- •Action
- •Result
- •Action
- •Result
- •Action
- •Result
- •Action
- •Result
- •Action
- •Result
- •Action
- •Result
- •Action
- •Result
- •Action
- •Result
- •Action
- •Result
- •5.3 Interfaces revisited
- •Action
- •Result
- •Action
- •Result
- •Action
- •Result
- •5.4 Robustness issues
- •Action
- •Result
- •Action
- •Result
- •Action
- •Result
- •Action
- •Result
- •Action
- •Result
- •Action
- •Result
- •Common file dialogs
- •Action
- •Results
- •Action
- •Result
- •Action
- •Result
- •Action
- •Result
- •Action
- •Result
- •6.3 Paint events
- •Action
- •Result
- •Action
- •Result
- •6.4 Context menus revisited
- •Action
- •Result
- •Action
- •Result
- •6.5 Files and paths
- •Action
- •Result
- •Action
- •Result
- •Action
- •Result
- •6.6 Save file dialogs
- •Action
- •Result
- •Action
- •Result
- •Action
- •Result
- •Action
- •Result
- •Action
- •Result
- •6.7 Open file dialogs
- •Action
- •Result
- •Action
- •Result
- •6.8 Recap
- •Drawing and scrolling
- •7.1 Form class hierarchy
- •Action
- •Result
- •Action
- •Result
- •Action
- •Result
- •Action
- •Result
- •Action
- •Result
- •Action
- •Result
- •Action
- •Result
- •Action
- •Result
- •Action
- •Result
- •Action
- •Result
- •Action
- •Result
- •Action
- •Result
- •7.4 Panels
- •Action
- •Result
- •Action
- •Result
- •Action
- •Result
- •Action
- •Result
- •Action
- •Result
- •Dialog boxes
- •8.1 Message boxes
- •Action
- •Result
- •Action
- •Result
- •8.1.4 Creating A YesNoCancel dialog
- •Action
- •Result
- •Action
- •Result
- •8.2 The Form.Close method
- •8.2.1 The relationship between Close and Dispose
- •Action
- •Result
- •8.3 Modal dialog boxes
- •Action
- •Result
- •Action
- •Result
- •8.3.2 Preserving caption values
- •Action
- •Result
- •Action
- •Result
- •Action
- •Result
- •Action
- •Result
- •Action
- •Result
- •Action
- •Result
- •Action
- •Result
- •Action
- •Result
- •Action
- •Result
- •Action
- •Result
- •Action
- •Result
- •Action
- •Result
- •Action
- •Result
- •Action
- •Result
- •Action
- •Result
- •Action
- •Result
- •Action
- •Result
- •Basic controls
- •Action
- •Result
- •Action
- •Result
- •Action
- •Result
- •9.1.2 Creating a derived form
- •Action
- •Result
- •9.2 Labels and text boxes
- •Action
- •Result
- •Action
- •Result
- •Action
- •Result
- •Action
- •Result
- •Action
- •Result
- •Action
- •Result
- •Action
- •Result
- •Action
- •Result
- •Action
- •Result
- •Action
- •Result
- •Action
- •Result
- •Action
- •Result
- •Action
- •Result
- •Action
- •Result
- •Action
- •Result
- •Action
- •Result
- •Action
- •Result
- •Action
- •Result
- •9.3.6 Adding AlbumEditDlg to our main form
- •Action
- •Result
- •Action
- •Result
- •9.4 Recap
- •List controls
- •10.1 List boxes
- •Action
- •Result
- •Action
- •Result
- •Action
- •Result
- •Action
- •Result
- •10.2 Multiselection list boxes
- •10.2.1 Enabling multiple selection
- •Action
- •Result
- •Action
- •Result
- •Action
- •Result
- •Action
- •Result
- •10.3 Combo boxes
- •Action
- •Result
- •Action
- •Result
- •10.4 Combo box edits
- •Action
- •Result
- •Action
- •Result
- •Action
- •Result
- •10.5 Owner-drawn lists
- •Action
- •Result
- •Action
- •Result
- •Action
- •Result
- •Action
- •Result
- •More controls
- •Action
- •Result
- •Action
- •Result
- •11.2 Tab pages
- •Action
- •Result
- •Action
- •Result
- •11.3.1 Dates and times
- •Action
- •Result
- •Action
- •Result
- •Action
- •Result
- •Action
- •Result
- •Action
- •Result
- •Action
- •Result
- •11.5 Recap
- •A .NET assortment
- •12.1 Keyboard events
- •Action
- •Result
- •Action
- •Result
- •12.2 Mouse events
- •Action
- •Result
- •Action
- •Result
- •Action
- •Result
- •12.3 Image buttons
- •Action
- •Result
- •Action
- •Result
- •Action
- •Result
- •Action
- •Result
- •Action
- •Result
- •Action
- •Result
- •Action
- •Result
- •Action
- •Result
- •Action
- •Result
- •12.4 Icons
- •Action
- •Result
- •Action
- •Result
- •Action
- •Result
- •12.5 Recap
- •Toolbars and tips
- •13.1 Toolbars
- •Action
- •Result
- •Action
- •Result
- •Action
- •Result
- •Action
- •Result
- •Action
- •Result
- •Action
- •Result
- •Action
- •Result
- •Action
- •Result
- •Action
- •Result
- •13.4.2 Creating tool tips
- •Action
- •Result
- •Action
- •Result
- •Advanced Windows Forms
- •List views
- •14.2 The ListView class
- •Action
- •Result
- •Action
- •Result
- •Action
- •Result
- •Action
- •Result
- •14.2.3 Populating a ListView
- •Action
- •Result
- •Action
- •14.3 ListView columns
- •Action
- •Result
- •Action
- •Result
- •Action
- •Result
- •Action
- •Result
- •Action
- •Result
- •Action
- •Result
- •Action
- •Result
- •Action
- •Result
- •Action
- •Result
- •Action
- •Result
- •Action
- •Result
- •Action
- •Result
- •Action
- •Result
- •Action
- •Result
- •Action
- •Result
- •Action
- •Result
- •Action
- •Result
- •Action
- •Result
- •Action
- •Result
- •14.6 Recap
- •Tree views
- •Action
- •Result
- •Action
- •Result
- •Action
- •Result
- •15.3 Dynamic tree nodes
- •Action
- •Result
- •Action
- •Result
- •Action
- •Result
- •Action
- •Result
- •Action
- •Result
- •15.4 Node selection
- •Action
- •Result
- •Action
- •Result
- •Action
- •Result
- •Action
- •Result
- •Action
- •Result
- •15.5 Fun with tree views
- •Action
- •Result
- •Action
- •Result
- •Action
- •Result
- •Multiple document interfaces
- •Action
- •Result
- •Action
- •Result
- •Action
- •Result
- •16.3 Merged menus
- •Action
- •Result
- •Action
- •Result
- •Action
- •Result
- •Action
- •Result
- •16.4 MDI children
- •Action
- •Result
- •Action
- •Result
- •Action
- •Result
- •Action
- •Result
- •Action
- •Result
- •Action
- •Result
- •Action
- •Result
- •Action
- •Result
- •Action
- •Result
- •Action
- •Result
- •16.5 MDI child window management
- •Action
- •Result
- •Action
- •Result
- •16.6 Recap
- •Data binding
- •17.1 Data grids
- •Action
- •Result
- •Action
- •Result
- •17.2 Data grid customization
- •Action
- •Result
- •Action
- •Result
- •Action
- •Result
- •Action
- •Result
- •Action
- •Result
- •Action
- •Result
- •Action
- •Result
- •Action
- •Result
- •Action
- •Result
- •Action
- •Result
- •Action
- •Result
- •Odds and ends .NET
- •Action
- •Result
- •Action
- •Result
- •Action
- •Result
- •Action
- •Result
- •18.2 Timers
- •Action
- •Result
- •Action
- •Result
- •18.3 Drag and drop
- •Action
- •Result
- •Action
- •Result
- •18.4 ActiveX controls
- •Action
- •Result
- •Action
- •Result
- •Action
- •Result
- •Action
- •Result
- •Action
- •Result
- •18.5 Recap
- •C# primer
- •A.1 C# programs
- •A.1.1 Assemblies
- •A.1.2 Namespaces
- •A.2 Types
- •A.2.1 Classes
- •A.2.2 Structures
- •A.2.3 Interfaces
- •A.2.4 Enumerations
- •A.2.5 Delegates
- •A.3 Language elements
- •A.3.1 Built-in types
- •A.3.2 Operators
- •A.3.3 Keywords
- •A.4 Special features
- •A.4.1 Exceptions
- •A.4.2 Arrays
- •A.4.3 Main
- •A.4.4 Boxing
- •A.4.5 Documentation
- •.NET namespaces
- •B.1 System.Collections
- •B.2 System.ComponentModel
- •B.3 System.Data
- •B.4 System.Drawing
- •B.5 System.Globalization
- •B.6 System.IO
- •B.7 System.Net
- •B.8 System.Reflection
- •B.9 System.Resources
- •B.10 System.Security
- •B.11 System.Threading
- •B.12 System.Web
- •B.13 System.Windows.Forms
- •B.14 System.XML
- •Visual index
- •C.1 Objects
- •C.2 Marshal by reference objects
- •C.3 Components
- •C.4 Common dialogs
- •C.7 Event data
- •C.8 Enumerations
- •For more information
- •bibliography
- •Symbols
- •Index

SAVE A PHOTO’S SETTINGS ONLY WHEN NECESSARY
|
Action |
Result |
|
|
|
12 |
Create a variable to hold |
private bool _modifiedTxtNotes; |
|
whether the notes value has |
|
|
changed. |
|
|
|
|
13 |
Modify the SetOriginals |
protected void SetOriginals() |
|
method to reset this variable. |
{ |
|
|
. . . |
|
|
if (photo != null) |
|
|
{ |
|
|
. . . |
|
|
_modifiedTxtNotes = false; |
|
|
} |
|
|
} |
|
|
|
14 |
Add a TextChanged event |
private void txtNotes_TextChanged |
|
handler for the Notes text box |
(object sender, System.EventArgs e) |
|
to update this variable |
{ |
|
if (txtNotes.Focused) |
|
|
whenever the user changes |
|
|
_modifiedTxtNotes = true; |
|
|
the text. |
} |
|
|
|
15 |
Create a NewControlValues |
protected bool NewControlValues() |
|
method to determine if any of |
{ |
|
photograph’s controls have |
bool result = |
|
((_origCaption != txtCaption.Text) |
|
|
been modified. |
|
|
|| (_origDateTaken != dtpDateTaken.Value) |
|
|
|
|| (_origPhotographer != |
|
|
cmbxPhotographer.Text) |
|
|
|| (_modifiedTxtNotes)); |
|
|
return result; |
|
|
} |
|
|
|
16 |
Add a variable to track whether |
private bool _hasChanged = false; |
|
any changes have been saved. |
|
|
|
|
17 |
Modify the SaveSettings |
protected override bool SaveSettings() |
|
method to save the changes |
{ |
|
made to the photograph. |
if (NewControlValues()) |
|
{ |
|
|
|
|
|
Note: The _hasChanged field |
// Save the photograph’s settings |
|
is required to track whether |
Photograph photo = _album[_index]; |
|
|
|
|
any photograph has been |
if (photo != null) |
|
modified, as opposed to the |
{ |
|
current photo displayed. |
photo.Caption = txtCaption.Text; |
|
|
photo.DateTaken = dtpDateTaken.Value; |
|
|
photo.Photographer |
|
|
= cmbxPhotographer.Text; |
|
|
photo.Notes = txtNotes.Text; |
|
|
_hasChanged = true; |
|
|
} |
|
|
} |
|
|
return true; |
|
|
} |
|
|
|
18 |
Add a HasChanged property so |
public bool HasChanged |
|
a caller can determine if any |
{ |
|
photographs were saved. |
get { return _hasChanged; } |
|
} |
|
|
|
|
|
|
|
IMAGE BUTTONS |
397 |
With these changes in place, we can finally add the click handlers for our buttons.
HANDLE THE CLICK EVENT FOR THE NEXT AND PREV BUTTONS
|
Action |
Result |
|
|
|
19 |
Add a Click handler for the |
private void btnNext_Click |
|
Next button. |
(object sender, System.EventArgs e) |
|
|
{ |
|
|
SaveSettings(); |
|
|
if (_index < _album.Count - 1) |
|
|
{ |
|
|
_index ++; |
|
|
ResetSettings(); |
|
|
SetOriginals(); |
|
|
} |
|
|
} |
|
|
|
20 |
Add a Click handler for the |
private void btnPrev_Click |
|
Prev button. |
(object sender, System.EventArgs e) |
|
|
{ |
|
|
SaveSettings(); |
|
|
if (_index > 0) |
|
|
{ |
|
|
_index --; |
|
|
ResetSettings(); |
|
|
SetOriginals(); |
|
|
} |
|
|
} |
|
|
|
As we said at the start of all this, these buttons required more changes than you might initially expect. As a final change, we need to modify the Click handler for our Photo Properties menu to account for the new changes.
Set the version number of the MyPhotos application to 12.3.
UPDATE THE CLICK HANDLER TO DISPLAY THE DIALOG
|
Action |
Result |
|
|
|
21 |
Update the Click handler for |
private void menuPhotoProp_Click |
|
the menuPhotoProp control |
(object sender, System.EventArgs e) |
|
to use the HasChanged |
{ |
|
if (_album.CurrentPhoto == null) |
|
|
property. |
|
|
return; |
|
|
|
using (PhotoEditDlg dlg |
|
|
= new PhotoEditDlg(_album)) |
|
|
{ |
|
|
if (dlg.ShowDialog() == DialogResult.OK) |
|
|
{ |
|
|
_bAlbumChanged = dlg.HasChanged; |
|
|
if (_bAlbumChanged) |
|
|
{ |
|
|
// Redraw to pick up any changes |
|
|
this.Invalidate(); |
|
|
} |
|
|
} |
|
|
} |
|
|
} |
|
|
|
398 |
CHAPTER 12 A .NET ASSORTMENT |
Our buttons are now ready to go. Compile and run your code to make sure the buttons work as expected. Our next topic is the creation of bitmap objects for these buttons.
12.3.2DRAWING BITMAPS FOR OUR BUTTONS
The creation of graphics for a new product is typically left to the graphic designers and marketing folks. Still, you never know when you may feel the urge to draw a bitmap or icon yourself, so let’s look at how to create them from scratch. Fortunately, Microsoft provides a fairly extensive collection of bitmaps, cursors, and icons that can be used within our application. We’ll talk about where to find these in a moment.
A bitmap is created much like any other item in a project. We will begin by creating a bitmap object for our Next button. Later in this section we’ll create another bitmap for our Prev button.
|
CREATE THE NEXT BUTTON BITMAP |
|
|
|
|
|
Action |
Result |
|
|
|
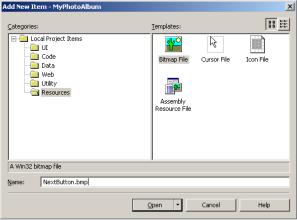
1 |
In the Solution Explorer |
|
|
window, add a bitmap file |
|
|
“NextButton.bmp” to the |
|
|
MyPhotoAlbum project. |
|
|
How-to |
|
|
a. Right-click the MyPhoto- |
|
|
Album project name. |
|
|
b. Open the Add submenu. |
|
|
c. Select Add New Item to |
|
|
display the Add New |
|
|
Item dialog box. |
|
|
d. Click Resources from |
|
|
the list of Categories |
|
|
e. Click Bitmap File from |
|
|
the available Templates. |
|
|
f. Enter “NextButton.bmp” |
|
|
as the name. |
|
|
Alternately |
|
|
The Add New Item dialog |
|
|
can be displayed using the |
|
|
keyboard shortcut |
|
|
Ctrl+Shift+A. |
|
|
|
|
2 |
Click the Open button to |
The new file appears in Solution Explorer. |
|
create the new file. |
The Bitmap Editor appears in the main window and displays |
|
|
|
|
|
the new bitmap with the default size, which is normally 48×48 |
|
|
pixels. |
|
|
Note: The new file and Bitmap Editor are shown in |
|
|
figure 12.3. |
|
|
|
IMAGE BUTTONS |
399 |
|
CREATE THE NEXT BUTTON BITMAP |
(continued) |
|
|
|
|
|
|
Action |
|
Result |
|
|
|
|
3 |
Modify the bitmap to have |
|
|
|
size 18 ×18 pixels. |
|
|
|
How-to |
|
|
|
a. Right-click within the Bit- |
|
|
|
map Editor window. |
|
|
|
b. Select the Properties item |
|
|
|
c. Set the Height and Width |
|
|
|
items to 18. |
|
|
|
|
Note: The Colors property here is used to select between |
|
|
|
Monochrome, 16 Color, 256 Color, and True Color images. |
|
|
|
For our purposes, the default of 16 Color is fine. |
|
|
|
|
|
4 |
Edit the pixels for the |
|
|
|
bitmap to create a right- |
|
|
|
direction arrow. |
|
|
|
How-to |
|
|
|
Copy the graphic shown |
|
|
|
here, or create your own |
|
|
|
version of this arrow. |
|
|
|
|
|
|
This completes our Next button. Figure 12.3 shows Visual Studio .NET with this button displayed. If you are feeling creative, the editor supports a wide range of drawing controls, in many ways similar to the Microsoft Paint application installed with the Windows operating systems. In the figure, the drawing controls are available in the bottom row of toolbar buttons, and the Colors window is shown on the left side of the window. If not shown, the Colors window is displayed by right-clicking within the Bitmap Editor window and selecting the Show Colors Window item.
A bitmap for the Prev button can be created in a similar manner as described in the previous table. An alternate method of creating this file is used in the following steps:
CREATE THE PREV BUTTON BITMAP
|
Action |
Result |
|
|
|
5 |
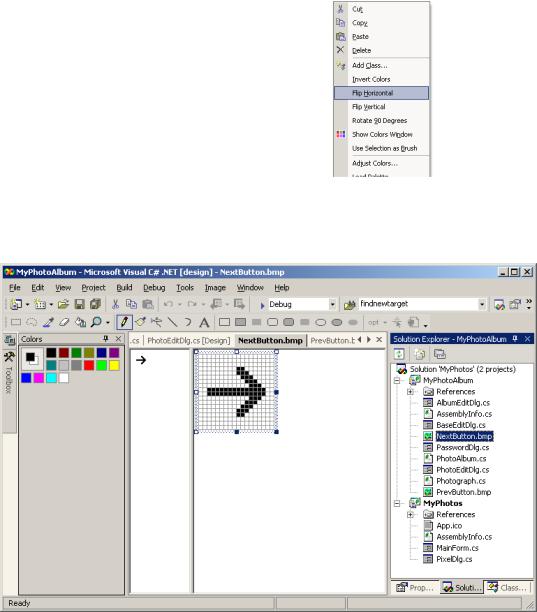
Make a copy of the NextButton.bmp file. |
A new bitmap file called “Copy of |
|
How-to |
NextButton.bmp” is added to the project. |
|
|
|
|
a. Right-click on the file and select Copy. |
|
|
b. Right-click on the MyPhotoAlbum project |
|
|
name and select Paste. |
|
|
|
|
6 |
Rename this file to “PrevButton.bmp.” |
|
|
|
|
400 |
CHAPTER 12 A .NET ASSORTMENT |
|
CREATE THE PREV BUTTON BITMAP |
(continued) |
|
|
|
|
|
|
Action |
|
Result |
|
|
|
|
7 |
Flip the existing bitmap horizontally to create a |
|
|
|
left-pointing arrow. |
|
|
|
How-to |
|
|
|
a. Double-click on the PrevButton.bmp file |
|
|
|
name to display the Bitmap Editor window. |
|
|
|
b. Right-click within the window to display its |
|
|
|
popup menu. |
|
|
|
c. Select the Flip Horizontal item. |
|
|
|
|
|
|
Our two bitmaps are now ready for use. The next step is to assign these bitmaps to the buttons on our form.
Figure 12.3 The Bitmap Editor window displays both an actual size and a per-pixel view of the bitmap.
IMAGE BUTTONS |
401 |