

- •brief contents
- •about this book
- •The Windows Forms namespace
- •Part 1: Hello Windows Forms
- •Part 2: Basic Windows Forms
- •Part 3: Advanced Windows Forms
- •Who should read this book?
- •Conventions
- •Action
- •Result
- •Source code downloads
- •Author online
- •acknowledgments
- •about .NET
- •Casting the .NET
- •Windows Forms overview
- •about the cover illustration
- •Hello Windows Forms
- •1.1 Programming in C#
- •1.1.1 Namespaces and classes
- •1.1.2 Constructors and methods
- •1.1.3 C# types
- •1.1.4 The entry point
- •1.1.5 The Application class
- •1.1.6 Program execution
- •1.2 Adding controls
- •1.2.1 Shortcuts and fully qualified names
- •1.2.2 Fields and properties
- •1.2.3 The Controls property
- •1.3 Loading files
- •1.3.1 Events
- •1.3.2 The OpenFileDialog class
- •1.3.3 Bitmap images
- •1.4 Resizing forms
- •1.4.1 Desktop layout properties
- •1.4.2 The Anchor property
- •1.4.3 The Dock property
- •1.5 Recap
- •2.1 Programming with Visual Studio .NET
- •2.1.1 Creating a project
- •Action
- •Result
- •2.1.2 Executing a program
- •Action
- •Result
- •2.1.3 Viewing the source code
- •View the code generated by Visual Studio .NET
- •Action
- •Result
- •2.2 Adding controls
- •2.2.1 The AssemblyInfo file
- •Action
- •Results
- •2.2.2 Renaming a form
- •Action
- •Result
- •2.2.3 The Toolbox window
- •Action
- •Result
- •2.3 Loading files
- •2.3.1 Event handlers in Visual Studio .NET
- •Action
- •Result
- •2.3.2 Exception handling
- •Action
- •Result
- •Action
- •Results and Comments
- •2.4 Resizing forms
- •2.4.1 Assign the Anchor property
- •Action
- •Result
- •2.4.2 Assign the MinimumSize property
- •Action
- •Result
- •2.5 Recap
- •Basic Windows Forms
- •Menus
- •Action
- •Result
- •Action
- •Result
- •Action
- •Result
- •Action
- •Result
- •3.3 Click events
- •Action
- •Result
- •Action
- •Result
- •Action
- •Result
- •Action
- •Result
- •Action
- •Result
- •Action
- •Result
- •3.5 Context menus
- •Action
- •Result
- •Action
- •Result
- •3.6 Recap
- •Status bars
- •4.1 The Control class
- •4.2 The StatusBar class
- •Action
- •Result
- •Action
- •Result
- •4.3.1 Adding panels to a status bar
- •Action
- •Result
- •Action
- •Result
- •Action
- •Result
- •Action
- •Result
- •4.5 Recap
- •Reusable libraries
- •5.1 C# classes and interfaces
- •5.2 Class libraries
- •Action
- •Result
- •Action
- •Result
- •Action
- •Result
- •Action
- •Result
- •Action
- •Result
- •Action
- •Result
- •Action
- •Result
- •Action
- •Result
- •Action
- •Result
- •5.3 Interfaces revisited
- •Action
- •Result
- •Action
- •Result
- •Action
- •Result
- •5.4 Robustness issues
- •Action
- •Result
- •Action
- •Result
- •Action
- •Result
- •Action
- •Result
- •Action
- •Result
- •Action
- •Result
- •Common file dialogs
- •Action
- •Results
- •Action
- •Result
- •Action
- •Result
- •Action
- •Result
- •Action
- •Result
- •6.3 Paint events
- •Action
- •Result
- •Action
- •Result
- •6.4 Context menus revisited
- •Action
- •Result
- •Action
- •Result
- •6.5 Files and paths
- •Action
- •Result
- •Action
- •Result
- •Action
- •Result
- •6.6 Save file dialogs
- •Action
- •Result
- •Action
- •Result
- •Action
- •Result
- •Action
- •Result
- •Action
- •Result
- •6.7 Open file dialogs
- •Action
- •Result
- •Action
- •Result
- •6.8 Recap
- •Drawing and scrolling
- •7.1 Form class hierarchy
- •Action
- •Result
- •Action
- •Result
- •Action
- •Result
- •Action
- •Result
- •Action
- •Result
- •Action
- •Result
- •Action
- •Result
- •Action
- •Result
- •Action
- •Result
- •Action
- •Result
- •Action
- •Result
- •Action
- •Result
- •7.4 Panels
- •Action
- •Result
- •Action
- •Result
- •Action
- •Result
- •Action
- •Result
- •Action
- •Result
- •Dialog boxes
- •8.1 Message boxes
- •Action
- •Result
- •Action
- •Result
- •8.1.4 Creating A YesNoCancel dialog
- •Action
- •Result
- •Action
- •Result
- •8.2 The Form.Close method
- •8.2.1 The relationship between Close and Dispose
- •Action
- •Result
- •8.3 Modal dialog boxes
- •Action
- •Result
- •Action
- •Result
- •8.3.2 Preserving caption values
- •Action
- •Result
- •Action
- •Result
- •Action
- •Result
- •Action
- •Result
- •Action
- •Result
- •Action
- •Result
- •Action
- •Result
- •Action
- •Result
- •Action
- •Result
- •Action
- •Result
- •Action
- •Result
- •Action
- •Result
- •Action
- •Result
- •Action
- •Result
- •Action
- •Result
- •Action
- •Result
- •Action
- •Result
- •Basic controls
- •Action
- •Result
- •Action
- •Result
- •Action
- •Result
- •9.1.2 Creating a derived form
- •Action
- •Result
- •9.2 Labels and text boxes
- •Action
- •Result
- •Action
- •Result
- •Action
- •Result
- •Action
- •Result
- •Action
- •Result
- •Action
- •Result
- •Action
- •Result
- •Action
- •Result
- •Action
- •Result
- •Action
- •Result
- •Action
- •Result
- •Action
- •Result
- •Action
- •Result
- •Action
- •Result
- •Action
- •Result
- •Action
- •Result
- •Action
- •Result
- •Action
- •Result
- •9.3.6 Adding AlbumEditDlg to our main form
- •Action
- •Result
- •Action
- •Result
- •9.4 Recap
- •List controls
- •10.1 List boxes
- •Action
- •Result
- •Action
- •Result
- •Action
- •Result
- •Action
- •Result
- •10.2 Multiselection list boxes
- •10.2.1 Enabling multiple selection
- •Action
- •Result
- •Action
- •Result
- •Action
- •Result
- •Action
- •Result
- •10.3 Combo boxes
- •Action
- •Result
- •Action
- •Result
- •10.4 Combo box edits
- •Action
- •Result
- •Action
- •Result
- •Action
- •Result
- •10.5 Owner-drawn lists
- •Action
- •Result
- •Action
- •Result
- •Action
- •Result
- •Action
- •Result
- •More controls
- •Action
- •Result
- •Action
- •Result
- •11.2 Tab pages
- •Action
- •Result
- •Action
- •Result
- •11.3.1 Dates and times
- •Action
- •Result
- •Action
- •Result
- •Action
- •Result
- •Action
- •Result
- •Action
- •Result
- •Action
- •Result
- •11.5 Recap
- •A .NET assortment
- •12.1 Keyboard events
- •Action
- •Result
- •Action
- •Result
- •12.2 Mouse events
- •Action
- •Result
- •Action
- •Result
- •Action
- •Result
- •12.3 Image buttons
- •Action
- •Result
- •Action
- •Result
- •Action
- •Result
- •Action
- •Result
- •Action
- •Result
- •Action
- •Result
- •Action
- •Result
- •Action
- •Result
- •Action
- •Result
- •12.4 Icons
- •Action
- •Result
- •Action
- •Result
- •Action
- •Result
- •12.5 Recap
- •Toolbars and tips
- •13.1 Toolbars
- •Action
- •Result
- •Action
- •Result
- •Action
- •Result
- •Action
- •Result
- •Action
- •Result
- •Action
- •Result
- •Action
- •Result
- •Action
- •Result
- •Action
- •Result
- •13.4.2 Creating tool tips
- •Action
- •Result
- •Action
- •Result
- •Advanced Windows Forms
- •List views
- •14.2 The ListView class
- •Action
- •Result
- •Action
- •Result
- •Action
- •Result
- •Action
- •Result
- •14.2.3 Populating a ListView
- •Action
- •Result
- •Action
- •14.3 ListView columns
- •Action
- •Result
- •Action
- •Result
- •Action
- •Result
- •Action
- •Result
- •Action
- •Result
- •Action
- •Result
- •Action
- •Result
- •Action
- •Result
- •Action
- •Result
- •Action
- •Result
- •Action
- •Result
- •Action
- •Result
- •Action
- •Result
- •Action
- •Result
- •Action
- •Result
- •Action
- •Result
- •Action
- •Result
- •Action
- •Result
- •Action
- •Result
- •14.6 Recap
- •Tree views
- •Action
- •Result
- •Action
- •Result
- •Action
- •Result
- •15.3 Dynamic tree nodes
- •Action
- •Result
- •Action
- •Result
- •Action
- •Result
- •Action
- •Result
- •Action
- •Result
- •15.4 Node selection
- •Action
- •Result
- •Action
- •Result
- •Action
- •Result
- •Action
- •Result
- •Action
- •Result
- •15.5 Fun with tree views
- •Action
- •Result
- •Action
- •Result
- •Action
- •Result
- •Multiple document interfaces
- •Action
- •Result
- •Action
- •Result
- •Action
- •Result
- •16.3 Merged menus
- •Action
- •Result
- •Action
- •Result
- •Action
- •Result
- •Action
- •Result
- •16.4 MDI children
- •Action
- •Result
- •Action
- •Result
- •Action
- •Result
- •Action
- •Result
- •Action
- •Result
- •Action
- •Result
- •Action
- •Result
- •Action
- •Result
- •Action
- •Result
- •Action
- •Result
- •16.5 MDI child window management
- •Action
- •Result
- •Action
- •Result
- •16.6 Recap
- •Data binding
- •17.1 Data grids
- •Action
- •Result
- •Action
- •Result
- •17.2 Data grid customization
- •Action
- •Result
- •Action
- •Result
- •Action
- •Result
- •Action
- •Result
- •Action
- •Result
- •Action
- •Result
- •Action
- •Result
- •Action
- •Result
- •Action
- •Result
- •Action
- •Result
- •Action
- •Result
- •Odds and ends .NET
- •Action
- •Result
- •Action
- •Result
- •Action
- •Result
- •Action
- •Result
- •18.2 Timers
- •Action
- •Result
- •Action
- •Result
- •18.3 Drag and drop
- •Action
- •Result
- •Action
- •Result
- •18.4 ActiveX controls
- •Action
- •Result
- •Action
- •Result
- •Action
- •Result
- •Action
- •Result
- •Action
- •Result
- •18.5 Recap
- •C# primer
- •A.1 C# programs
- •A.1.1 Assemblies
- •A.1.2 Namespaces
- •A.2 Types
- •A.2.1 Classes
- •A.2.2 Structures
- •A.2.3 Interfaces
- •A.2.4 Enumerations
- •A.2.5 Delegates
- •A.3 Language elements
- •A.3.1 Built-in types
- •A.3.2 Operators
- •A.3.3 Keywords
- •A.4 Special features
- •A.4.1 Exceptions
- •A.4.2 Arrays
- •A.4.3 Main
- •A.4.4 Boxing
- •A.4.5 Documentation
- •.NET namespaces
- •B.1 System.Collections
- •B.2 System.ComponentModel
- •B.3 System.Data
- •B.4 System.Drawing
- •B.5 System.Globalization
- •B.6 System.IO
- •B.7 System.Net
- •B.8 System.Reflection
- •B.9 System.Resources
- •B.10 System.Security
- •B.11 System.Threading
- •B.12 System.Web
- •B.13 System.Windows.Forms
- •B.14 System.XML
- •Visual index
- •C.1 Objects
- •C.2 Marshal by reference objects
- •C.3 Components
- •C.4 Common dialogs
- •C.7 Event data
- •C.8 Enumerations
- •For more information
- •bibliography
- •Symbols
- •Index
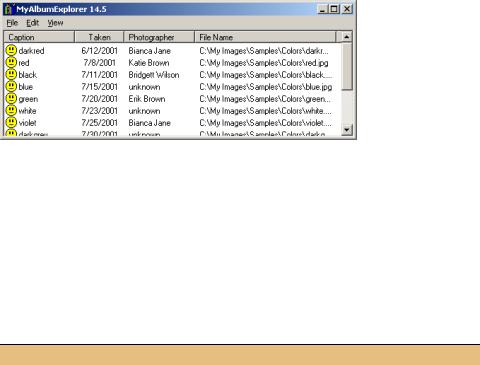
Figure 14.6
In this detailed view of Photographs, note how three dots automatically appear when the text length exceeds the width of the column.
14.5.1HANDLING ITEM ACTIVATION
The ultimate goal here is to display either the list of albums or the list of photos in an album within our ListView control. To do this, we must keep track of whether albums or photographs are currently shown in the view, and whether the PhotoAlbum object corresponds to the view when photographs are displayed. The following
steps create private fields in our Form to track this information, and also implement an event handler for the ItemActivate event. Once these are available, we will look at the additional steps required to fully support activation.
Set the version number of the MyAlbumExplorer application to 14.5.
HANDLE THE ITEMACTIVATE EVENT FOR THE LIST VIEW
|
Action |
Result |
|
|
|
1 |
Add private fields to track the |
private bool _albumsShown = true; |
|
current ListView control contents |
private PhotoAlbum _album = null; |
|
in the MainForm.cs code window. |
|
|
|
|
2 |
Add an ItemActivate event |
private void listViewMain_ItemActivate |
|
handler to the ListView control. |
(object sender, System.EventArgs e) |
|
|
{ |
|
|
|
3 |
If albums are currently shown and |
if (_albumsShown && |
|
an item is selected, then open the |
listViewMain.SelectedItems.Count > 0) |
|
album corresponding to the |
{ |
|
ListViewItem item |
|
|
selected item. |
|
|
= listViewMain.SelectedItems[0]; |
|
|
|
string fileName = item.Tag as string; |
|
|
// Open the album for this item |
|
|
PhotoAlbum album = null; |
|
|
if (fileName != null) |
|
|
album = OpenAlbum(fileName); |
|
|
if (album == null) |
|
|
{ |
|
|
MessageBox.Show("The photographs for " |
|
|
+ "this album cannot be displayed."); |
|
|
return; |
|
|
} |
|
|
|
4 |
If the album loads successfully, |
// Switch to a photograph view |
|
load the album’s photographs into |
LoadPhotoData(album); |
|
the list view. |
} |
|
} |
|
|
|
|
|
|
|
ITEM ACTIVATION |
473 |

Of course, we need to implement the LoadPhotoData method that appears in this code. This method should set up the view to display photographs, including an appropriate set of columns, and reset the list of items to hold the set of photographs. Once this is done, there is also the support we created for our albums that must now be implemented for photographs. To help us keep our facts straight, let’s make a list of the tasks we need to perform here.
•Define new columns for displaying photographs.
•Populate the ListView control with the photographs in the album.
•Support column sorting.
•Display the photo properties dialog.
•Support item editing on photographs.
•Allow the user to select the desired view, albums or photos.
We will cover each of these topics in a separate section, in the same order as shown here.
14.5.2DEFINING NEW COLUMNS
As you’ll recall, we defined the list of columns for our control using the ColumnHeader Collection Editor dialog in Visual Studio .NET. Now that we need to display different columns depending on what is displayed, this method no longer makes sense. Instead, we will create the columns programmatically in the LoadAlbumData method. Our new LoadPhotoData method we have yet to implement will define the columns for displaying photographs.
The easiest way to add columns to a ListView control programmatically is through the Columns property. The following steps remove the columns we created in Visual Studio and will add them via the LoadAlbumData method.
CREATE THE ALBUM COLUMNS PROGRAMMATICALLY
|
Action |
Result |
|
|
|
1 |
In the MainForm.cs [Design] |
Note: This is not strictly required since we clear the |
|
window, remove the four |
contents of the list, including the column defini- |
|
columns currently defined for |
tions, as part of the next step. Reducing unneces- |
|
the Columns property. |
sary clutter in your code is always a good idea, so |
|
How-to |
performing this step makes sense. |
|
|
|
|
Use the ColumnHeader |
|
|
Collection Editor dialog. |
|
|
|
|
2 |
Modify the LoadAlbumData |
private void LoadAlbumData(string dir) |
|
method to initially clear the |
{ |
|
existing contents of the control. |
listViewMain.Clear(); |
|
|
|
|
|
|
3 |
Reset the fields that track the |
_albumsShown = true; |
|
current album. |
if (_album != null) |
|
|
{ |
|
|
_album.Dispose(); |
|
|
_album = null; |
|
|
} |
|
|
|
474 |
CHAPTER 14 LIST VIEWS |

CREATE THE ALBUM COLUMNS PROGRAMMATICALLY (continued)
|
Action |
Result |
|
|
|
4 |
Define the columns for the |
// Define the columns |
|
control before the album items |
listViewMain.Columns.Add("Name", |
|
are loaded. |
80, HorizontalAlignment.Left); |
|
listViewMain.Columns.Add("Title", |
|
|
|
|
|
How-to |
100, HorizontalAlignment.Left); |
|
Use the Add method available |
listViewMain.Columns.Add("Pwd", |
|
40, HorizontalAlignment.Center); |
|
|
through the Columns property |
|
|
listViewMain.Columns.Add("Size", |
|
|
for the control. |
40, HorizontalAlignment.Right); |
|
|
// Load the albums into the control |
|
|
. . . |
|
|
} |
|
|
|
The Columns property refers to a ColumnHeaderCollection object. This collection class includes an Add method that creates a new column for the control. One version of this method simply accepts a ColumnHeader class instance. Our code uses a slightly more convenient form, with the following signature:
void Add(string columnText, int width, HorizontalAlignment align);
We can use this same method to add columns when photographs are displayed. The following table summarizes the columns we will use for this purpose.
Columns for displaying photographs
Column |
Text |
Description |
|
|
|
0 |
Caption |
The caption for this photo. |
1 |
Taken |
The date the photograph was taken. |
2 |
Photographer |
The photographer for this photo. |
3 |
File Name |
The fully qualified image file name. |
|
|
|
The following table defines constants for our new albums as well as the beginnings of our LoadPhotoData implementation. This table continues our previous steps.
CREATE THE PHOTO COLUMNS PROGRAMMATICALLY
|
Action |
Result |
|
|
|
5 |
In the MainForm.cs code |
private const int PhotoCaptionColumn = 0; |
|
window, create constants to |
private const int PhotoDateTakenColumn = 1; |
|
hold the positions of the |
private const int PhotoPhotographerColumn = 2; |
|
private const int PhotoFileNameColumn = 3; |
|
|
columns when photographs are |
|
|
|
|
|
displayed. |
|
|
|
|
6 |
Add a private LoadPhotoData |
private void LoadPhotoData(PhotoAlbum album) |
|
method. |
{ |
|
|
|
ITEM ACTIVATION |
475 |
CREATE THE PHOTO COLUMNS PROGRAMMATICALLY (continued)
|
Action |
Result |
|
|
|
7 |
To implement this method, clear |
listViewMain.Clear(); |
|
the list and set the album fields. |
if (_album != null && album != _album) |
|
|
_album.Dispose(); |
|
|
_albumsShown = false; |
|
|
_album = album; |
|
|
Note: Disposing and assigning the _album field as |
|
|
shown is not strictly required here. This will come in |
|
|
useful in chapter 15 when we call this method with |
|
|
an album other than the default _album used in this |
|
|
chapter. |
|
|
|
8 |
Define the columns required for |
// Define the columns |
|
displaying photographs. |
listViewMain.Columns.Add("Caption", |
|
|
100, HorizontalAlignment.Left); |
|
|
listViewMain.Columns.Add("Taken", |
|
|
70, HorizontalAlignment.Center); |
|
|
listViewMain.Columns.Add("Photographer", |
|
|
100, HorizontalAlignment.Left); |
|
|
listViewMain.Columns.Add("File Name", |
|
|
200, HorizontalAlignment.Left); |
|
|
} |
|
|
|
This code defines the four columns required to display photographs. We are now ready to populate the list view with the photos from a selected album.
14.5.3POPULATING THE LISTVIEW
This section completes the implementation of the LoadPhotoData method by creating the ListViewItem objects for the control. The following steps add an item to our control for each Photograph in the album, and define the subitems associated with each item.
In the course of implementing support for photographs, we will need the tograph object itself. We had a similar requirement for PhotoAlbum objects, and were able to use the file name setting to load the album into memory. While the file name is available for our photos as well, our PhotoAlbum class does not provide a good mechanism for locating a Photograph in an album based on the file name.
The most convenient means for locating a specific photograph is based on the index. What we need, then, is a way to look up the index. This value will be stored in the Tag property for our list view item, in a manner similar to how we used this property for photo albums.
Of course, an alternate technique here would be to derive a new class from the ListView class as we discussed at the end of section 14.4. The Tag property is fine for our purposes. In your application, you can use whichever technique seems appropriate for your current and expected requirements.
476 |
CHAPTER 14 LIST VIEWS |