

- •brief contents
- •about this book
- •The Windows Forms namespace
- •Part 1: Hello Windows Forms
- •Part 2: Basic Windows Forms
- •Part 3: Advanced Windows Forms
- •Who should read this book?
- •Conventions
- •Action
- •Result
- •Source code downloads
- •Author online
- •acknowledgments
- •about .NET
- •Casting the .NET
- •Windows Forms overview
- •about the cover illustration
- •Hello Windows Forms
- •1.1 Programming in C#
- •1.1.1 Namespaces and classes
- •1.1.2 Constructors and methods
- •1.1.3 C# types
- •1.1.4 The entry point
- •1.1.5 The Application class
- •1.1.6 Program execution
- •1.2 Adding controls
- •1.2.1 Shortcuts and fully qualified names
- •1.2.2 Fields and properties
- •1.2.3 The Controls property
- •1.3 Loading files
- •1.3.1 Events
- •1.3.2 The OpenFileDialog class
- •1.3.3 Bitmap images
- •1.4 Resizing forms
- •1.4.1 Desktop layout properties
- •1.4.2 The Anchor property
- •1.4.3 The Dock property
- •1.5 Recap
- •2.1 Programming with Visual Studio .NET
- •2.1.1 Creating a project
- •Action
- •Result
- •2.1.2 Executing a program
- •Action
- •Result
- •2.1.3 Viewing the source code
- •View the code generated by Visual Studio .NET
- •Action
- •Result
- •2.2 Adding controls
- •2.2.1 The AssemblyInfo file
- •Action
- •Results
- •2.2.2 Renaming a form
- •Action
- •Result
- •2.2.3 The Toolbox window
- •Action
- •Result
- •2.3 Loading files
- •2.3.1 Event handlers in Visual Studio .NET
- •Action
- •Result
- •2.3.2 Exception handling
- •Action
- •Result
- •Action
- •Results and Comments
- •2.4 Resizing forms
- •2.4.1 Assign the Anchor property
- •Action
- •Result
- •2.4.2 Assign the MinimumSize property
- •Action
- •Result
- •2.5 Recap
- •Basic Windows Forms
- •Menus
- •Action
- •Result
- •Action
- •Result
- •Action
- •Result
- •Action
- •Result
- •3.3 Click events
- •Action
- •Result
- •Action
- •Result
- •Action
- •Result
- •Action
- •Result
- •Action
- •Result
- •Action
- •Result
- •3.5 Context menus
- •Action
- •Result
- •Action
- •Result
- •3.6 Recap
- •Status bars
- •4.1 The Control class
- •4.2 The StatusBar class
- •Action
- •Result
- •Action
- •Result
- •4.3.1 Adding panels to a status bar
- •Action
- •Result
- •Action
- •Result
- •Action
- •Result
- •Action
- •Result
- •4.5 Recap
- •Reusable libraries
- •5.1 C# classes and interfaces
- •5.2 Class libraries
- •Action
- •Result
- •Action
- •Result
- •Action
- •Result
- •Action
- •Result
- •Action
- •Result
- •Action
- •Result
- •Action
- •Result
- •Action
- •Result
- •Action
- •Result
- •5.3 Interfaces revisited
- •Action
- •Result
- •Action
- •Result
- •Action
- •Result
- •5.4 Robustness issues
- •Action
- •Result
- •Action
- •Result
- •Action
- •Result
- •Action
- •Result
- •Action
- •Result
- •Action
- •Result
- •Common file dialogs
- •Action
- •Results
- •Action
- •Result
- •Action
- •Result
- •Action
- •Result
- •Action
- •Result
- •6.3 Paint events
- •Action
- •Result
- •Action
- •Result
- •6.4 Context menus revisited
- •Action
- •Result
- •Action
- •Result
- •6.5 Files and paths
- •Action
- •Result
- •Action
- •Result
- •Action
- •Result
- •6.6 Save file dialogs
- •Action
- •Result
- •Action
- •Result
- •Action
- •Result
- •Action
- •Result
- •Action
- •Result
- •6.7 Open file dialogs
- •Action
- •Result
- •Action
- •Result
- •6.8 Recap
- •Drawing and scrolling
- •7.1 Form class hierarchy
- •Action
- •Result
- •Action
- •Result
- •Action
- •Result
- •Action
- •Result
- •Action
- •Result
- •Action
- •Result
- •Action
- •Result
- •Action
- •Result
- •Action
- •Result
- •Action
- •Result
- •Action
- •Result
- •Action
- •Result
- •7.4 Panels
- •Action
- •Result
- •Action
- •Result
- •Action
- •Result
- •Action
- •Result
- •Action
- •Result
- •Dialog boxes
- •8.1 Message boxes
- •Action
- •Result
- •Action
- •Result
- •8.1.4 Creating A YesNoCancel dialog
- •Action
- •Result
- •Action
- •Result
- •8.2 The Form.Close method
- •8.2.1 The relationship between Close and Dispose
- •Action
- •Result
- •8.3 Modal dialog boxes
- •Action
- •Result
- •Action
- •Result
- •8.3.2 Preserving caption values
- •Action
- •Result
- •Action
- •Result
- •Action
- •Result
- •Action
- •Result
- •Action
- •Result
- •Action
- •Result
- •Action
- •Result
- •Action
- •Result
- •Action
- •Result
- •Action
- •Result
- •Action
- •Result
- •Action
- •Result
- •Action
- •Result
- •Action
- •Result
- •Action
- •Result
- •Action
- •Result
- •Action
- •Result
- •Basic controls
- •Action
- •Result
- •Action
- •Result
- •Action
- •Result
- •9.1.2 Creating a derived form
- •Action
- •Result
- •9.2 Labels and text boxes
- •Action
- •Result
- •Action
- •Result
- •Action
- •Result
- •Action
- •Result
- •Action
- •Result
- •Action
- •Result
- •Action
- •Result
- •Action
- •Result
- •Action
- •Result
- •Action
- •Result
- •Action
- •Result
- •Action
- •Result
- •Action
- •Result
- •Action
- •Result
- •Action
- •Result
- •Action
- •Result
- •Action
- •Result
- •Action
- •Result
- •9.3.6 Adding AlbumEditDlg to our main form
- •Action
- •Result
- •Action
- •Result
- •9.4 Recap
- •List controls
- •10.1 List boxes
- •Action
- •Result
- •Action
- •Result
- •Action
- •Result
- •Action
- •Result
- •10.2 Multiselection list boxes
- •10.2.1 Enabling multiple selection
- •Action
- •Result
- •Action
- •Result
- •Action
- •Result
- •Action
- •Result
- •10.3 Combo boxes
- •Action
- •Result
- •Action
- •Result
- •10.4 Combo box edits
- •Action
- •Result
- •Action
- •Result
- •Action
- •Result
- •10.5 Owner-drawn lists
- •Action
- •Result
- •Action
- •Result
- •Action
- •Result
- •Action
- •Result
- •More controls
- •Action
- •Result
- •Action
- •Result
- •11.2 Tab pages
- •Action
- •Result
- •Action
- •Result
- •11.3.1 Dates and times
- •Action
- •Result
- •Action
- •Result
- •Action
- •Result
- •Action
- •Result
- •Action
- •Result
- •Action
- •Result
- •11.5 Recap
- •A .NET assortment
- •12.1 Keyboard events
- •Action
- •Result
- •Action
- •Result
- •12.2 Mouse events
- •Action
- •Result
- •Action
- •Result
- •Action
- •Result
- •12.3 Image buttons
- •Action
- •Result
- •Action
- •Result
- •Action
- •Result
- •Action
- •Result
- •Action
- •Result
- •Action
- •Result
- •Action
- •Result
- •Action
- •Result
- •Action
- •Result
- •12.4 Icons
- •Action
- •Result
- •Action
- •Result
- •Action
- •Result
- •12.5 Recap
- •Toolbars and tips
- •13.1 Toolbars
- •Action
- •Result
- •Action
- •Result
- •Action
- •Result
- •Action
- •Result
- •Action
- •Result
- •Action
- •Result
- •Action
- •Result
- •Action
- •Result
- •Action
- •Result
- •13.4.2 Creating tool tips
- •Action
- •Result
- •Action
- •Result
- •Advanced Windows Forms
- •List views
- •14.2 The ListView class
- •Action
- •Result
- •Action
- •Result
- •Action
- •Result
- •Action
- •Result
- •14.2.3 Populating a ListView
- •Action
- •Result
- •Action
- •14.3 ListView columns
- •Action
- •Result
- •Action
- •Result
- •Action
- •Result
- •Action
- •Result
- •Action
- •Result
- •Action
- •Result
- •Action
- •Result
- •Action
- •Result
- •Action
- •Result
- •Action
- •Result
- •Action
- •Result
- •Action
- •Result
- •Action
- •Result
- •Action
- •Result
- •Action
- •Result
- •Action
- •Result
- •Action
- •Result
- •Action
- •Result
- •Action
- •Result
- •14.6 Recap
- •Tree views
- •Action
- •Result
- •Action
- •Result
- •Action
- •Result
- •15.3 Dynamic tree nodes
- •Action
- •Result
- •Action
- •Result
- •Action
- •Result
- •Action
- •Result
- •Action
- •Result
- •15.4 Node selection
- •Action
- •Result
- •Action
- •Result
- •Action
- •Result
- •Action
- •Result
- •Action
- •Result
- •15.5 Fun with tree views
- •Action
- •Result
- •Action
- •Result
- •Action
- •Result
- •Multiple document interfaces
- •Action
- •Result
- •Action
- •Result
- •Action
- •Result
- •16.3 Merged menus
- •Action
- •Result
- •Action
- •Result
- •Action
- •Result
- •Action
- •Result
- •16.4 MDI children
- •Action
- •Result
- •Action
- •Result
- •Action
- •Result
- •Action
- •Result
- •Action
- •Result
- •Action
- •Result
- •Action
- •Result
- •Action
- •Result
- •Action
- •Result
- •Action
- •Result
- •16.5 MDI child window management
- •Action
- •Result
- •Action
- •Result
- •16.6 Recap
- •Data binding
- •17.1 Data grids
- •Action
- •Result
- •Action
- •Result
- •17.2 Data grid customization
- •Action
- •Result
- •Action
- •Result
- •Action
- •Result
- •Action
- •Result
- •Action
- •Result
- •Action
- •Result
- •Action
- •Result
- •Action
- •Result
- •Action
- •Result
- •Action
- •Result
- •Action
- •Result
- •Odds and ends .NET
- •Action
- •Result
- •Action
- •Result
- •Action
- •Result
- •Action
- •Result
- •18.2 Timers
- •Action
- •Result
- •Action
- •Result
- •18.3 Drag and drop
- •Action
- •Result
- •Action
- •Result
- •18.4 ActiveX controls
- •Action
- •Result
- •Action
- •Result
- •Action
- •Result
- •Action
- •Result
- •Action
- •Result
- •18.5 Recap
- •C# primer
- •A.1 C# programs
- •A.1.1 Assemblies
- •A.1.2 Namespaces
- •A.2 Types
- •A.2.1 Classes
- •A.2.2 Structures
- •A.2.3 Interfaces
- •A.2.4 Enumerations
- •A.2.5 Delegates
- •A.3 Language elements
- •A.3.1 Built-in types
- •A.3.2 Operators
- •A.3.3 Keywords
- •A.4 Special features
- •A.4.1 Exceptions
- •A.4.2 Arrays
- •A.4.3 Main
- •A.4.4 Boxing
- •A.4.5 Documentation
- •.NET namespaces
- •B.1 System.Collections
- •B.2 System.ComponentModel
- •B.3 System.Data
- •B.4 System.Drawing
- •B.5 System.Globalization
- •B.6 System.IO
- •B.7 System.Net
- •B.8 System.Reflection
- •B.9 System.Resources
- •B.10 System.Security
- •B.11 System.Threading
- •B.12 System.Web
- •B.13 System.Windows.Forms
- •B.14 System.XML
- •Visual index
- •C.1 Objects
- •C.2 Marshal by reference objects
- •C.3 Components
- •C.4 Common dialogs
- •C.7 Event data
- •C.8 Enumerations
- •For more information
- •bibliography
- •Symbols
- •Index

This completes our rather long discussion of bitmap images. Personally, I am the kind of programmer who keeps good graphic artists employed, so we will not do any more hand-drawing of images or other graphics in this book. Fortunately for us, Microsoft provides a fairly large collection of images that can be imported into your programs. These are installed by default along with Visual Studio .NET, and they normally appear in the directory “C:\Program Files\Microsoft Visual Studio .NET\Common7\ Graphics.” There are subdirectories for bitmaps, cursors, icons, metafiles, and even some videos.1
For the purposes of our discussions, we will use the term common image directory to refer to this directory rather than using the full directory name every time. In particular, we will use this directory for our next topic, which is icons.
12.4ICONS
As long as we are talking about images, let’s take a quick look at icons as well. An icon is an image used to represent an object in the operating system, typically an application or other program. Icons are much like bitmaps, except they provide transparency, meaning that a certain color in the icon will blend in with the background when it is displayed. If the icon is displayed on a red background, the transparent areas appear red as well. If the icon is displayed on a purple background, the transparent areas appear purple. This behavior permits Windows icons to appear on the desktop and in file system windows as if they do not have a border. In fact, all icons are rectangular in shape.
The System.Drawing namespace provides an Icon class to create and manipulate icons in your programs. It’s a fine class, but we are not going to discuss it. Instead, we are going to focus on how to assign icons to your project and to specific forms. We will look at the Icon property of the Form class, and discuss how icons can be created and assigned to this property.
Before we do, it is worth mentioning that icons can be included in a project just like any other object. You can create new icons from the Add New Item dialog and edit them in Visual Studio as we did for our bitmap files earlier in the chapter. Unlike bitmaps, icons store multiple image types, or image sizes, in a single file. The most typical types are 16×16 and 32×32 pixels, so you should generally stick with these formats. New icons in Visual Studio are created with these two types by default, using 16 available colors, and the Icon Editor permits types to be deleted and custom types of various sizes and colors to be assigned.
1 Of course, if you customized your installation settings when installing Visual Studio .NET, or modified the installation directory, then these files may not exist on your machine or might be in an alternate directory. You can reinstall Visual Studio .NET to add these graphics in order to follow the text, or use alternate graphics in place of the ones we use in the remainder of the book.
ICONS |
405 |
12.4.1REPLACING THE ICON ON A FORM
So let’s talk icons. In the MyPhotos project, we will assign a new icon to our main form. By default, Visual Studio uses the graphic at the left as the icon on all forms.
This icon has been fine so far, but it would be nice to have a custom icon that represents a photo album in some manner. One such image is shown as the icon in figure 12.4. Microsoft provides this icon in the common image directory discussed at the end of the previous section.
Figure 12.4
By default, an application displays the small image associated with an icon in its title bar.
The following steps assign this icon to our form.
Set the version number of the MyPhotos application to 12.4.
ASSIGN A NEW ICON TO THE MAIN FORM
Action |
Result |
1In the Properties window for the MainForm form, locate the Icon entry in the list of properties.
406 |
CHAPTER 12 A .NET ASSORTMENT |
|
ASSIGN A NEW ICON TO THE MAIN FORM |
(continued) |
|
|
|
|
|
|
Action |
|
Result |
|
|
|
|
2 |
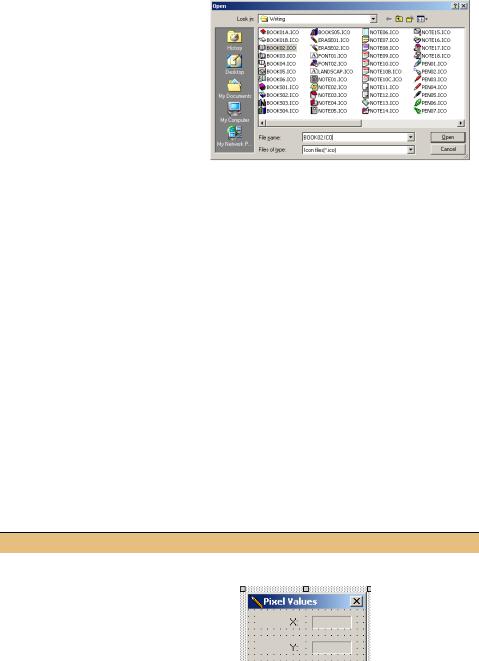
Assign the icon file “icons/ |
|
|
|
Writing/BOOKS02.ICO” from the |
|
|
|
common image directory as the |
|
|
|
icon for the form. |
|
|
|
How-to |
|
|
|
a. Click the … button in the Icon |
|
|
|
entry for the form’s properties. |
|
|
|
b. In the resulting file dialog, |
|
|
|
locate the common image |
|
|
|
directory, namely the |
|
|
|
Common7\Graphics directory |
|
|
|
under the Visual Studio .NET |
|
|
|
installation directory. |
|
|
|
c. Open the indicated file. |
|
|
|
|
|
|
The selected icon is shown in the designer window, and will now be used whenever the application executes. The code generated here is very similar to the code we saw for our bitmap images.
private void InitializeComponent()
{
System.Resources.ResourceManager resources = new
System.Resources.ResourceManager(typeof(MainForm));
. . .
this.Icon = ((System.Drawing.Icon) (resources.GetObject("$this.Icon")));
. . .
}
If you look in the MyPhotos project directory in the file system, you will see a MainForm.resx file in which the icon data is specified. As we discussed in section 12.3, this is compiled into the MyPhotos.MainForm.resources file when the program is compiled, and the data from this file is included in the MainForm.exe executable assembly for the program.
In a similar manner, we can assign an icon for the PixelDlg form in the project.
ASSIGN A NEW ICON TO THE PIXEL DIALOG FORM
|
Action |
Result |
|
|
|
3 |
In the Properties window for the |
|
|
PixelDlg form, set the Icon property |
|
|
for this dialog to contain the icons/ |
|
|
Writing/PENCIL02.ICO icon from the |
|
|
common image directory. |
|
|
|
|
ICONS |
407 |

Compile and run the application to verify that these icons now appear on their respective forms. This method can be used to assign an existing icon to any form. Of course, a custom icon can be created and assigned to a form as well. We discuss this in the next section.
At times you may prefer that an icon not appear in a form. The ControlBox property for the Form class removes the icon as well as the system menu and its shortcuts from the title bar. As an alternate method, we saw in chapter 8 how setting the form’s FormBorderStyle property to FixedDialog removes the icon without affecting the presence of the system menu. Either technique may be used in your applications, depending on the desired behavior.
12.4.2REPLACING THE APPLICATION ICON
You might think that the icon for the application is based on the icon assigned to the main form, namely the form containing the Main entry point for the assembly. A fine notion, but not true. In fact, the application icon is totally separate from the icons assigned to any forms within the application. One reason for this is that applications will not always contain a main form, and console applications and libraries may not contain any forms at all.
By default, Visual Studio creates an application icon as part of all Windows Forms projects. This is the App.ico file we first saw back in chapter 2. Double-clicking on this file in the Solution Explorer window will display the Icon Editor window, and permit the icon to be edited much like we edited bitmaps earlier in the chapter. Since icons contain multiple image types, you need to edit each image type when you alter the default or any other icon file. You can select the image type to display in the Icon Window by selecting the Current Icon Image Types submenu from the Icon Editor window’s popup menu.
For our purposes, we will simply select an icon from the set of images provided by Microsoft in the common image directory. The current application icon, visible by double-clicking the App.ico file or looking at the MyPhotos.exe file in the MyPhotos project’s bin directory, looks a bit like this:
We would prefer to use the same icon we assigned to the MainForm window as the application icon, so let’s see exactly how to do this.
ASSIGN A NEW APPLICATION ICON TO THE MYPHOTOS PROJECT
|
Action |
Result |
|
|
|
1 |
In the Solution Explorer |
The file is deleted permanently. |
|
window, delete the Apps.ico |
|
|
icon file from the MyPhotos |
|
|
project. |
|
|
|
|
408 |
CHAPTER 12 A .NET ASSORTMENT |