

- •brief contents
- •about this book
- •The Windows Forms namespace
- •Part 1: Hello Windows Forms
- •Part 2: Basic Windows Forms
- •Part 3: Advanced Windows Forms
- •Who should read this book?
- •Conventions
- •Action
- •Result
- •Source code downloads
- •Author online
- •acknowledgments
- •about .NET
- •Casting the .NET
- •Windows Forms overview
- •about the cover illustration
- •Hello Windows Forms
- •1.1 Programming in C#
- •1.1.1 Namespaces and classes
- •1.1.2 Constructors and methods
- •1.1.3 C# types
- •1.1.4 The entry point
- •1.1.5 The Application class
- •1.1.6 Program execution
- •1.2 Adding controls
- •1.2.1 Shortcuts and fully qualified names
- •1.2.2 Fields and properties
- •1.2.3 The Controls property
- •1.3 Loading files
- •1.3.1 Events
- •1.3.2 The OpenFileDialog class
- •1.3.3 Bitmap images
- •1.4 Resizing forms
- •1.4.1 Desktop layout properties
- •1.4.2 The Anchor property
- •1.4.3 The Dock property
- •1.5 Recap
- •2.1 Programming with Visual Studio .NET
- •2.1.1 Creating a project
- •Action
- •Result
- •2.1.2 Executing a program
- •Action
- •Result
- •2.1.3 Viewing the source code
- •View the code generated by Visual Studio .NET
- •Action
- •Result
- •2.2 Adding controls
- •2.2.1 The AssemblyInfo file
- •Action
- •Results
- •2.2.2 Renaming a form
- •Action
- •Result
- •2.2.3 The Toolbox window
- •Action
- •Result
- •2.3 Loading files
- •2.3.1 Event handlers in Visual Studio .NET
- •Action
- •Result
- •2.3.2 Exception handling
- •Action
- •Result
- •Action
- •Results and Comments
- •2.4 Resizing forms
- •2.4.1 Assign the Anchor property
- •Action
- •Result
- •2.4.2 Assign the MinimumSize property
- •Action
- •Result
- •2.5 Recap
- •Basic Windows Forms
- •Menus
- •Action
- •Result
- •Action
- •Result
- •Action
- •Result
- •Action
- •Result
- •3.3 Click events
- •Action
- •Result
- •Action
- •Result
- •Action
- •Result
- •Action
- •Result
- •Action
- •Result
- •Action
- •Result
- •3.5 Context menus
- •Action
- •Result
- •Action
- •Result
- •3.6 Recap
- •Status bars
- •4.1 The Control class
- •4.2 The StatusBar class
- •Action
- •Result
- •Action
- •Result
- •4.3.1 Adding panels to a status bar
- •Action
- •Result
- •Action
- •Result
- •Action
- •Result
- •Action
- •Result
- •4.5 Recap
- •Reusable libraries
- •5.1 C# classes and interfaces
- •5.2 Class libraries
- •Action
- •Result
- •Action
- •Result
- •Action
- •Result
- •Action
- •Result
- •Action
- •Result
- •Action
- •Result
- •Action
- •Result
- •Action
- •Result
- •Action
- •Result
- •5.3 Interfaces revisited
- •Action
- •Result
- •Action
- •Result
- •Action
- •Result
- •5.4 Robustness issues
- •Action
- •Result
- •Action
- •Result
- •Action
- •Result
- •Action
- •Result
- •Action
- •Result
- •Action
- •Result
- •Common file dialogs
- •Action
- •Results
- •Action
- •Result
- •Action
- •Result
- •Action
- •Result
- •Action
- •Result
- •6.3 Paint events
- •Action
- •Result
- •Action
- •Result
- •6.4 Context menus revisited
- •Action
- •Result
- •Action
- •Result
- •6.5 Files and paths
- •Action
- •Result
- •Action
- •Result
- •Action
- •Result
- •6.6 Save file dialogs
- •Action
- •Result
- •Action
- •Result
- •Action
- •Result
- •Action
- •Result
- •Action
- •Result
- •6.7 Open file dialogs
- •Action
- •Result
- •Action
- •Result
- •6.8 Recap
- •Drawing and scrolling
- •7.1 Form class hierarchy
- •Action
- •Result
- •Action
- •Result
- •Action
- •Result
- •Action
- •Result
- •Action
- •Result
- •Action
- •Result
- •Action
- •Result
- •Action
- •Result
- •Action
- •Result
- •Action
- •Result
- •Action
- •Result
- •Action
- •Result
- •7.4 Panels
- •Action
- •Result
- •Action
- •Result
- •Action
- •Result
- •Action
- •Result
- •Action
- •Result
- •Dialog boxes
- •8.1 Message boxes
- •Action
- •Result
- •Action
- •Result
- •8.1.4 Creating A YesNoCancel dialog
- •Action
- •Result
- •Action
- •Result
- •8.2 The Form.Close method
- •8.2.1 The relationship between Close and Dispose
- •Action
- •Result
- •8.3 Modal dialog boxes
- •Action
- •Result
- •Action
- •Result
- •8.3.2 Preserving caption values
- •Action
- •Result
- •Action
- •Result
- •Action
- •Result
- •Action
- •Result
- •Action
- •Result
- •Action
- •Result
- •Action
- •Result
- •Action
- •Result
- •Action
- •Result
- •Action
- •Result
- •Action
- •Result
- •Action
- •Result
- •Action
- •Result
- •Action
- •Result
- •Action
- •Result
- •Action
- •Result
- •Action
- •Result
- •Basic controls
- •Action
- •Result
- •Action
- •Result
- •Action
- •Result
- •9.1.2 Creating a derived form
- •Action
- •Result
- •9.2 Labels and text boxes
- •Action
- •Result
- •Action
- •Result
- •Action
- •Result
- •Action
- •Result
- •Action
- •Result
- •Action
- •Result
- •Action
- •Result
- •Action
- •Result
- •Action
- •Result
- •Action
- •Result
- •Action
- •Result
- •Action
- •Result
- •Action
- •Result
- •Action
- •Result
- •Action
- •Result
- •Action
- •Result
- •Action
- •Result
- •Action
- •Result
- •9.3.6 Adding AlbumEditDlg to our main form
- •Action
- •Result
- •Action
- •Result
- •9.4 Recap
- •List controls
- •10.1 List boxes
- •Action
- •Result
- •Action
- •Result
- •Action
- •Result
- •Action
- •Result
- •10.2 Multiselection list boxes
- •10.2.1 Enabling multiple selection
- •Action
- •Result
- •Action
- •Result
- •Action
- •Result
- •Action
- •Result
- •10.3 Combo boxes
- •Action
- •Result
- •Action
- •Result
- •10.4 Combo box edits
- •Action
- •Result
- •Action
- •Result
- •Action
- •Result
- •10.5 Owner-drawn lists
- •Action
- •Result
- •Action
- •Result
- •Action
- •Result
- •Action
- •Result
- •More controls
- •Action
- •Result
- •Action
- •Result
- •11.2 Tab pages
- •Action
- •Result
- •Action
- •Result
- •11.3.1 Dates and times
- •Action
- •Result
- •Action
- •Result
- •Action
- •Result
- •Action
- •Result
- •Action
- •Result
- •Action
- •Result
- •11.5 Recap
- •A .NET assortment
- •12.1 Keyboard events
- •Action
- •Result
- •Action
- •Result
- •12.2 Mouse events
- •Action
- •Result
- •Action
- •Result
- •Action
- •Result
- •12.3 Image buttons
- •Action
- •Result
- •Action
- •Result
- •Action
- •Result
- •Action
- •Result
- •Action
- •Result
- •Action
- •Result
- •Action
- •Result
- •Action
- •Result
- •Action
- •Result
- •12.4 Icons
- •Action
- •Result
- •Action
- •Result
- •Action
- •Result
- •12.5 Recap
- •Toolbars and tips
- •13.1 Toolbars
- •Action
- •Result
- •Action
- •Result
- •Action
- •Result
- •Action
- •Result
- •Action
- •Result
- •Action
- •Result
- •Action
- •Result
- •Action
- •Result
- •Action
- •Result
- •13.4.2 Creating tool tips
- •Action
- •Result
- •Action
- •Result
- •Advanced Windows Forms
- •List views
- •14.2 The ListView class
- •Action
- •Result
- •Action
- •Result
- •Action
- •Result
- •Action
- •Result
- •14.2.3 Populating a ListView
- •Action
- •Result
- •Action
- •14.3 ListView columns
- •Action
- •Result
- •Action
- •Result
- •Action
- •Result
- •Action
- •Result
- •Action
- •Result
- •Action
- •Result
- •Action
- •Result
- •Action
- •Result
- •Action
- •Result
- •Action
- •Result
- •Action
- •Result
- •Action
- •Result
- •Action
- •Result
- •Action
- •Result
- •Action
- •Result
- •Action
- •Result
- •Action
- •Result
- •Action
- •Result
- •Action
- •Result
- •14.6 Recap
- •Tree views
- •Action
- •Result
- •Action
- •Result
- •Action
- •Result
- •15.3 Dynamic tree nodes
- •Action
- •Result
- •Action
- •Result
- •Action
- •Result
- •Action
- •Result
- •Action
- •Result
- •15.4 Node selection
- •Action
- •Result
- •Action
- •Result
- •Action
- •Result
- •Action
- •Result
- •Action
- •Result
- •15.5 Fun with tree views
- •Action
- •Result
- •Action
- •Result
- •Action
- •Result
- •Multiple document interfaces
- •Action
- •Result
- •Action
- •Result
- •Action
- •Result
- •16.3 Merged menus
- •Action
- •Result
- •Action
- •Result
- •Action
- •Result
- •Action
- •Result
- •16.4 MDI children
- •Action
- •Result
- •Action
- •Result
- •Action
- •Result
- •Action
- •Result
- •Action
- •Result
- •Action
- •Result
- •Action
- •Result
- •Action
- •Result
- •Action
- •Result
- •Action
- •Result
- •16.5 MDI child window management
- •Action
- •Result
- •Action
- •Result
- •16.6 Recap
- •Data binding
- •17.1 Data grids
- •Action
- •Result
- •Action
- •Result
- •17.2 Data grid customization
- •Action
- •Result
- •Action
- •Result
- •Action
- •Result
- •Action
- •Result
- •Action
- •Result
- •Action
- •Result
- •Action
- •Result
- •Action
- •Result
- •Action
- •Result
- •Action
- •Result
- •Action
- •Result
- •Odds and ends .NET
- •Action
- •Result
- •Action
- •Result
- •Action
- •Result
- •Action
- •Result
- •18.2 Timers
- •Action
- •Result
- •Action
- •Result
- •18.3 Drag and drop
- •Action
- •Result
- •Action
- •Result
- •18.4 ActiveX controls
- •Action
- •Result
- •Action
- •Result
- •Action
- •Result
- •Action
- •Result
- •Action
- •Result
- •18.5 Recap
- •C# primer
- •A.1 C# programs
- •A.1.1 Assemblies
- •A.1.2 Namespaces
- •A.2 Types
- •A.2.1 Classes
- •A.2.2 Structures
- •A.2.3 Interfaces
- •A.2.4 Enumerations
- •A.2.5 Delegates
- •A.3 Language elements
- •A.3.1 Built-in types
- •A.3.2 Operators
- •A.3.3 Keywords
- •A.4 Special features
- •A.4.1 Exceptions
- •A.4.2 Arrays
- •A.4.3 Main
- •A.4.4 Boxing
- •A.4.5 Documentation
- •.NET namespaces
- •B.1 System.Collections
- •B.2 System.ComponentModel
- •B.3 System.Data
- •B.4 System.Drawing
- •B.5 System.Globalization
- •B.6 System.IO
- •B.7 System.Net
- •B.8 System.Reflection
- •B.9 System.Resources
- •B.10 System.Security
- •B.11 System.Threading
- •B.12 System.Web
- •B.13 System.Windows.Forms
- •B.14 System.XML
- •Visual index
- •C.1 Objects
- •C.2 Marshal by reference objects
- •C.3 Components
- •C.4 Common dialogs
- •C.7 Event data
- •C.8 Enumerations
- •For more information
- •bibliography
- •Symbols
- •Index

REIMPLEMENT THE ITEMACTIVATE EVENT HANDLER (continued)
|
Action |
Result |
|
|
|
9 |
If an item is selected, locate the file |
if (listViewMain.SelectedItems.Count > 0) |
|
name associated with this item. |
{ |
|
|
// Find the file path for selected item |
|
How-to |
string fileName = null; |
|
a. If albums are displayed, the Tag |
ListViewItem item |
|
= listViewMain.SelectedItems[0]; |
|
|
property contains the album |
|
|
if (_albumsShown) |
|
|
path. |
{ |
|
b. If photographs are displayed, the |
// Get the file for this album |
|
fileName = item.Tag as string; |
|
|
Tag property contains the index |
|
|
} |
|
|
of this photo in the album. |
else if (item.Tag is int) |
|
|
{ |
|
|
// Use the index of the photograph |
|
|
int index = (int)item.Tag; |
|
|
fileName = _album[index].FileName; |
|
|
} |
|
|
|
10 |
If no file name is present, the item |
if (fileName == null) |
|
cannot be activated. |
{ |
|
|
MessageBox.Show("This item cannot " |
|
|
+ "be opened."); |
|
|
return; |
|
|
} |
|
|
|
11 |
If a file name is found, locate the |
// Find tree node with identical path |
|
TreeNode corresponding to this |
TreeNode node |
|
item. |
= FindNode(fileName, true); |
|
|
|
|
|
|
12 |
If the node is found, |
if (node != null) |
|
a. Make sure the node is visible. |
{ |
|
// Select the node to activate it. |
|
|
b. Select the node. |
node.EnsureVisible(); |
|
|
treeViewMain.SelectedNode = node; |
|
|
} |
|
|
} |
|
|
} |
|
|
|
Our two view controls are now totally in sync with each other. The appropriate tree node is always selected, and as a result the contents of the list view are updated as required.
15.5FUN WITH TREE VIEWS
There are a few loose ends to tie up in our application. In this section we look at additional uses for a tree view class in order to complete the functionality required in the MyAlbumExplorer application. This section is to demonstrate various features and functionality, rather than explain additional Windows Forms concepts. As a result, this section will be short on discussion and simply present the code required to make the described changes.
There are three changes we will make here:
1Display the image associated with a selected photograph node.
2Permit the label text for a node to be edited.
3Display the album or photo property dialog associated with a node.
FUN WITH TREE VIEWS |
513 |
We will discuss these topics in the order they appear in this list.
15.5.1DISPLAYING THE PHOTOGRAPH
Our first topic is displaying the photograph when a photograph node is selected in the tree view. You might think that we could draw directly on the ListView control. In fact, the ListView class does not permit the Paint event to be handled by an instance of the class. So an alternate approach is required.
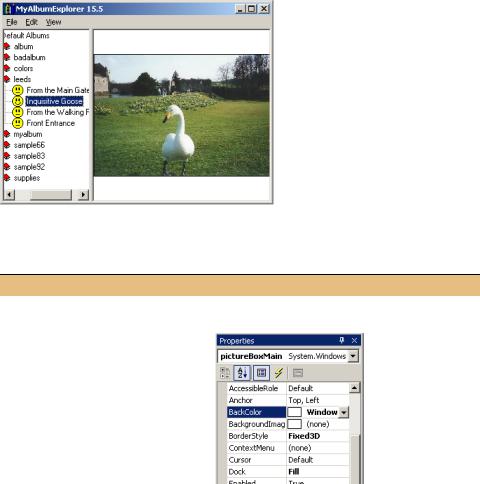
Instead, we will use a PictureBox control for this purpose. Since the PictureBox control does not support a proper aspect ratio for its contained image, we will
handle the Paint event and draw the image manually. This is shown in figure 15.9. When a list of albums or photographs is displayed, we will hide the picture box control. Conversely, when a photograph is displayed, we will hide the list view control.
Figure 15.9
Normally a PictureBox control appears with standard control colors. Since this PictureBox appears in place of a ListView control, we will use standard window colors instead.
The following table details the steps necessary to add this feature to our interface.
Set the version number of the MyAlbumExplorer application to 15.4.
DISPLAY PHOTOGRAPH IN A PICTUREBOX CONTROL
|
|
|
Action |
Result |
||
|
|
|
|
|
|
|
1 |
In the MainForm.cs [Design] |
|
||||
|
window, add a PictureBox control |
|
||||
|
to the area where the ListView |
|
||||
|
control is already located. |
|
||||
|
|
Settings |
|
|||
|
|
|
|
|
|
|
|
|
Property |
|
Value |
|
|
|
|
(Name) |
|
pictureBoxMain |
|
|
|
|
BackColor |
|
Window (under |
|
|
|
|
|
|
the System tab) |
|
|
|
|
BorderStyle |
|
Fixed3D |
|
|
|
|
Dock |
|
Fill |
|
|
|
|
Visible |
|
False |
|
|
|
|
|
|
|
|
|
514 |
CHAPTER 15 TREE VIEWS |

DISPLAY PHOTOGRAPH IN A PICTUREBOX CONTROL (continued)
|
Action |
Result |
|
|
|
2 |
In the MainForm.cs code window, |
private void DisplayPhoto(TreeNode node) |
|
add a new DisplayPhoto |
{ |
|
method. |
if (node == null) |
|
{ |
|
|
|
|
|
Note: We will use the Tag prop- |
pictureBoxMain.Visible = false; |
|
erty for the PictureBox control |
listViewMain.Visible = true; |
|
return; |
|
|
to hold the photo to display, if any. |
|
|
} |
|
|
How-to |
// Parent of photo node is album node |
|
a. If the given node is null, hide |
|
|
string file = node.Parent.Tag as string; |
|
|
the picture box and display the |
if (_album == null |
|
ListView control. |
|| (_album.FileName != file)) |
|
{ |
|
|
b. If a node was given, ensure the |
|
|
if (_album != null) |
|
|
PhotoAlbum containing the |
_album.Dispose(); |
|
photo is open. |
_album = OpenTreeAlbum(node.Parent); |
|
c. Assign the Photograph to |
|
|
} |
|
|
display to the PictureBox.Tag |
if (_album != null) |
|
property. |
|
|
{ |
|
|
d. Make the PictureBox visible. |
|
|
// Proper PhotoAlbum is now open |
|
|
|
pictureBoxMain.Tag = _album[node.Index]; |
|
|
pictureBoxMain.Invalidate(); |
|
|
pictureBoxMain.Visible = true; |
|
|
listViewMain.Visible = false; |
|
|
} |
|
|
} |
|
|
|
3 |
Create a Pen object in the |
private static Pen borderPen |
|
MainForm class for drawing a |
= new Pen(SystemColors.WindowFrame); |
|
border around a photo. |
|
|
|
|
4 |
Add a Paint event handler for the |
private void pictureBoxMain_Paint |
|
PictureBox control to draw the |
(object sender, System.Windows. |
|
assigned Photograph in the |
Forms.PaintEventArgs e) |
|
{ |
|
|
PictureBox client area with the |
|
|
Photograph photo |
|
|
proper aspect ratio. |
= pictureBoxMain.Tag as Photograph; |
|
How-to |
if (photo == null) |
|
a. Retrieve the Photograph |
{ |
|
object stored in the picture box. |
// Something is wrong, give up |
|
e.Graphics.Clear(pictureBoxMain. |
|
|
b. If a photograph is not found, |
|
|
BackColor); |
|
|
simply clear the client area. |
return; |
|
c. Otherwise, use the |
} |
|
|
|
|
ScaleToFit method to deter- |
// Paint the photograph |
|
mine the proper drawing rect- |
Rectangle rect = photo.ScaleToFit( |
|
angle. |
pictureBoxMain.ClientRectangle); |
|
e.Graphics.DrawImage(photo.Image, rect); |
|
|
d. Draw the assigned image into |
|
|
e.Graphics.DrawRectangle(borderPen, rect); |
|
|
this rectangle. |
} |
|
e. Draw a border around the |
|
|
image using the Pen object |
|
|
created in the previous step. |
|
|
|
|
FUN WITH TREE VIEWS |
515 |
DISPLAY PHOTOGRAPH IN A PICTUREBOX CONTROL (continued)
|
Action |
Result |
|
|
|
5 |
Update the AfterSelect event |
private void treeViewMain_AfterSelect(. . .) |
|
handler to use the new |
{ |
|
DisplayPhoto method to ensure |
. . . |
|
if (node.Parent == null) |
|
|
the proper control is visible. |
|
|
{ |
|
|
|
// Bad tag or top-level node. |
|
|
LoadAlbumData(fileName); |
|
|
DisplayPhoto(null); |
|
|
} |
|
|
else if (Path.GetExtension(fileName) . . .) |
|
|
{ |
|
|
// Album node selected |
|
|
PhotoAlbum album = OpenTreeAlbum(. . .); |
|
|
LoadPhotoData(album); |
|
|
DisplayPhoto(null); |
|
|
} |
|
|
else // must be a photograph |
|
|
{ |
|
|
// Clear the list and display the photo |
|
|
listViewMain.Clear(); |
|
|
DisplayPhoto(node); |
|
|
} |
|
|
} |
|
|
|
6 |
Add a Resize event handler for |
private void pictureBoxMain_Resize |
|
the PictureBox control to force |
(object sender, System.EventArgs e) |
|
the control to redraw the entire |
{ |
|
// Force the entire control to repaint |
|
|
image when it is resized. |
|
|
pictureBoxMain.Invalidate(); |
|
|
|
} |
|
|
|
As we mentioned at the start of this section, we will not spend much time discussing these changes, since they leverage concepts and features we have seen before. Let’s move on to editing a tree node’s label.
15.5.2SUPPORTING LABEL EDITS
Tree nodes can be edited in a manner similar to list items. There is a BeginEdit method in the TreeNode class to initiate a label edit programmatically, and Befor-
eLabelEdit and AfterLabelEdit events in the TreeView class that occur before and after the user edits the label. Event handlers for these events receive the belEditEventArgs class for the event parameter. This class is summarized in
.NET Table 15.5, and is manipulated in much the same way as we saw for the LabelEditEventArgs class when handling label events for the ListView class.
516 |
CHAPTER 15 TREE VIEWS |