

C#
CHANGE FORM PROPERTIES IN THE PROPERTIES WINDOW
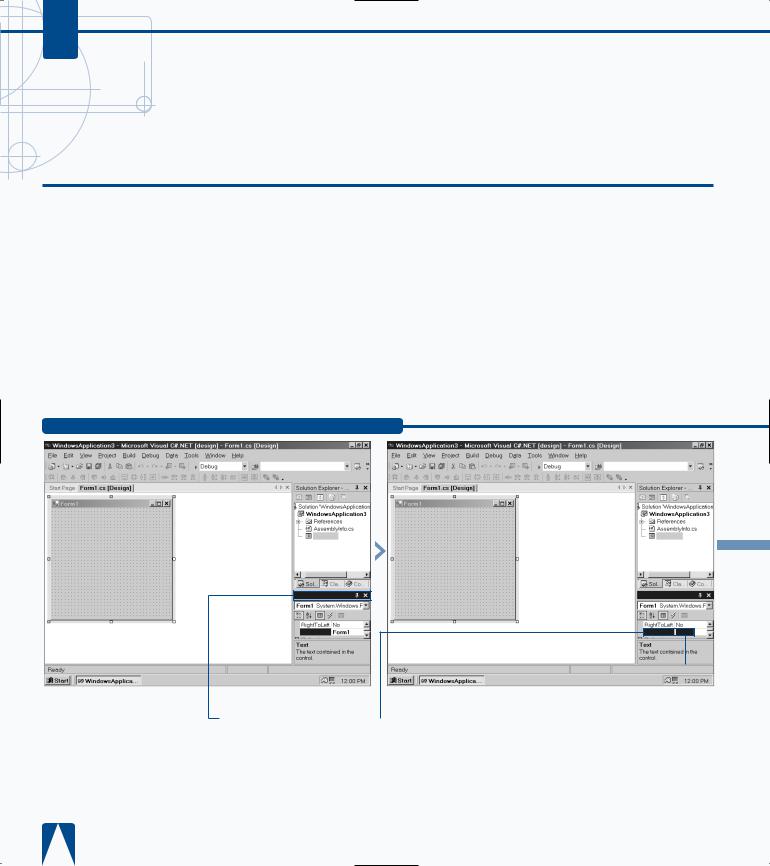
The Properties window appears in the lower-right corner of the parent window. The Properties window contains the information that pertains to a specific
object. For example, if you create a Windows application, the form appears in the parent window; a form lets a user input information so your C# program can manipulate it.
The form properties, including the form name, appear in the Properties window. When you change the form name, that name will appear on the form when you run your program.
The Properties window reflects information in the currently selected object. The Properties window contains a list of all objects in the program that you can alter in the properties window.
Many objects contain names or values that you can edit directly in the Properties window. Some object attributes have check boxes that you can click to enable or disable the object attribute. The Properties window also provides a description about a selected object attribute in case you are not familiar with what an attribute does.
Some object attributes in the Properties window contain more information than what the attribute value provides, such as font size, that you can edit in the Properties window. You can also sort the attributes in the Properties window if you want to see certain types of properties, such as events.
CHANGE FORM PROPERTIES IN THE PROPERTIES WINDOW
Form1.cs
Properties
Text 
 Form1
Form1
|
|
|
|
|
|
If the Text field does not |
|
‹ Double-click the Form1 |
|
|
|
|||
appear, scroll through the |
name. |
|||
Properties window until you |
|
|
|
|
|
the Text attribute |
|
|
|
|
the Attributes heading. |
|
|
|
EXPLORING THE C# INTERFACE 2
Form1.cs
Properties
Text
› Type in the new name for |
ˇ Press Enter. |
■ |
your form. |
|
|
C#
ADD A CUSTOM TOOLBAR
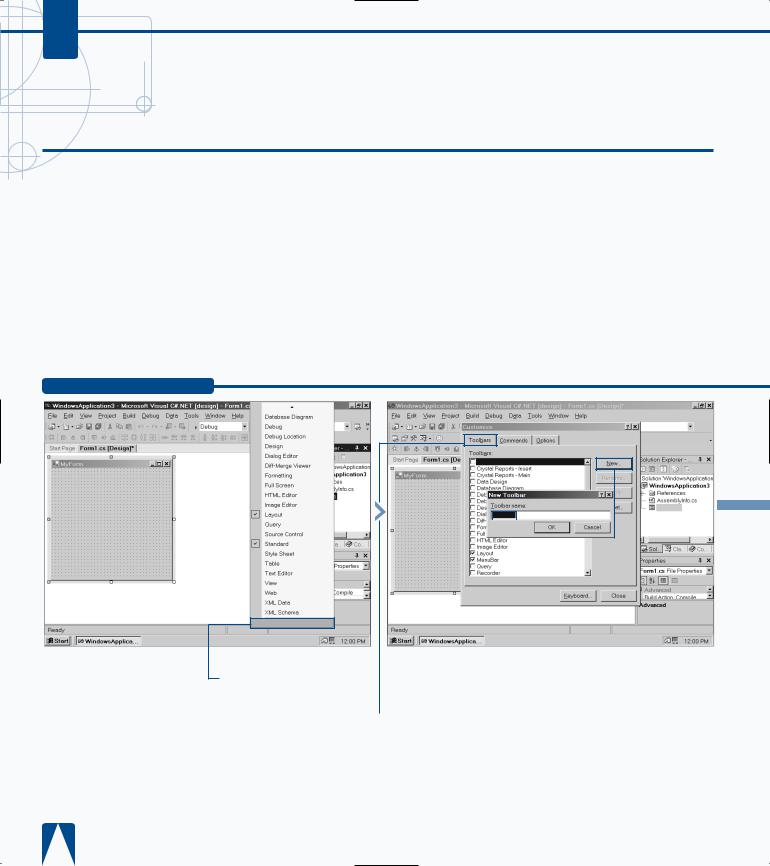
Toolbars appear near the top of the MDE window, enabling you to access commands that you use most often without having to remember where a specific
command is in a menu; instead, you can just click a button. The MDE window has 25 built-in toolbars; the Standard toolbar appears by default and others appear when you perform a particular function. For example, the Layout toolbar appears when you edit a form. You can also add your own custom toolbars to access the features you use.
Custom toolbars can reduce the number of active toolbars in the parent window. If you prefer accessing commands using the keyboard, Visual Studio .NET also lets you set keyboard combinations for different commands.
Visual Studio .NET also lets you determine how information on the toolbar appears on your screen. For example, you can determine if you want the toolbar icons to also contain their text descriptions. Doing so makes it much easier to determine what a command does, especially if you are not familiar with all of the toolbar buttons, but they do add additional space to your toolbar that will take away from other space in your window. An alternative method that saves space is to have ScreenTips on toolbars active so a button description appears when you move the mouse pointer over a toolbar button.
ADD A CUSTOM TOOLBAR
Customize
¤ Click to select Customize from the pop-up menu that appears.
Build
Form1.cs
Custom 1
|
|
|
|
|
|
|
|
|
|
|
|
|
|
|
|
|
|
|
|
|
|
■ The Customize dialog |
|
|
› Click New. |
|||||||
|
|
|||||||||
box appears. |
|
ˇ Type the new toolbar |
||||||||
|
‹ Click the Toolbars tab. |
|
||||||||
|
|
name. |
||||||||
|
||||||||||
|
|
|
|
|
|
|
|
Á Click OK. |
||
|
|
|
|
|
|
|
|
|||
EXPLORING THE C# INTERFACE 2
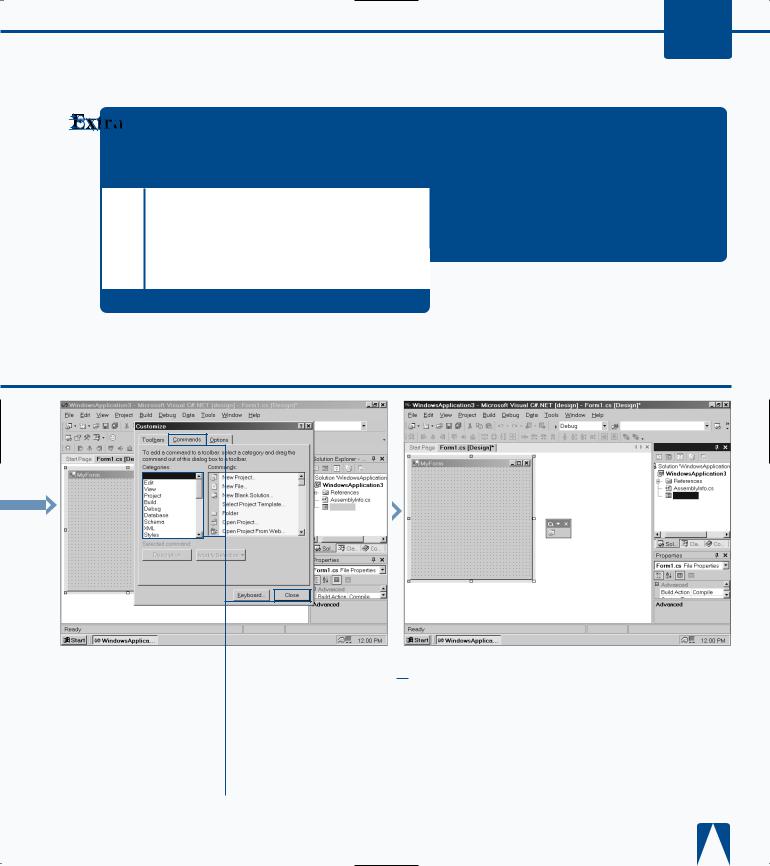
You can reset the number of toolbars to the Visual Studio .NET default — the Standard and Web toolbars — by clicking the Reset button in the Customize window’s Toolbars tab.
Visual Studio .NET has default settings for what drop-down menu options appear when you click an option on the menu. The most recent options that you used appear first, and then the rest of the options appear after the drop-down menu has been open for a short time. You can reset this information by clicking the Reset my usage data button in the Customize window’s Options tab.
If you want to know what the keyboard shortcuts are for certain tabs without having to look them up in the Customize window, you can click the Show shortcut keys in ScreenTips check box in the Customize window’s Options tab. After you check the check box, you can move the mouse pointer over a Toolbar button and the description and keyboard shortcut (if there is one) will appear in the ScreenTip next to the pointer.
File
■ The custom toolbar appears in the middle of the parent window. You can click and drag to another area.
‡ Right-click the custom toolbar.
° Click to select Customize from the pop-up menu that appears.
Form1.cs
|
· Click the Commands tab |
|
|
|
|
|
|
|
|
||
|
|
■ The command appears in |
|||
|
|
||||
in the Customize window. |
|
the custom toolbar. |
|||
|
‚ Click to select a |
|
|
|
|
|
|
|
|
||
command category. |
|
|
|
||
|
— Drag the command you |
|
|
|
|
|
|
|
|
||
want to add to the custom |
|
|
|
||
toolbar. |
|
|
|
||
|
|
± Click the Close button in |
|
|
|
|
|
|
|
|
|
the Customize window. |
|
|
|
||
Solution Explorer - . . .
Form1.cs
■ You can access the command button in the custom toolbar by clicking.
29