

C#
ENTER CLASSES
Classes provide the functionality your C# program needs to perform its tasks. Three types of members comprise a class: data members, such as user-
entered fields; function members that include methods, properties, and operators; and type members such as value types.
Visual C# lets you add classes using the Add Class Wizard. This three-page wizard asks you questions about the types of classes that you want to add, and after the wizard finishes, Visual C# enters the class types in your program automatically without making you put in the extra work of defining the classes in code.
Before you add the class in the Add Class Wizard, you have to tell Visual C# to add a class in the Class View window. When you add a class in the Class View window, the Add Class Wizard appears so you can enter the class information. After you enter the information, the class code appears in the parent window.
The Solution Explorer window in the MDE window provides the most direct way of adding a class to your project. When you add a class into the Solution Explorer tree, the class code appears in the parent window so you can edit it. The class does not, however, have as many elements defined as if you created a class using the Add Class Wizard.
ENTER CLASSES
Console
Applicatio
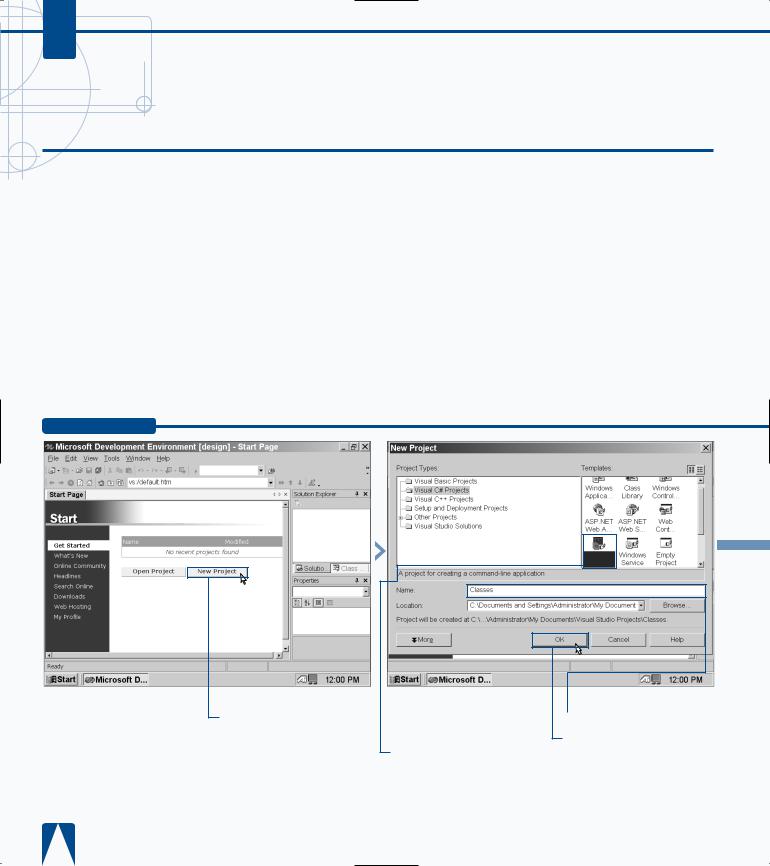
¤ Click New Project in the
.NET |
Start page. |
■ The New Project window appears.
‹ Click the Console Application icon in the Templates pane.
› Type a name for your file.
ˇ Click OK.
WORKING WITH VISUAL C# BASICS 3
The Add Class Wizard converts your summary comments into XML documentation, but you can also add summary comments directly into your program code.
TYPE THIS:
using System; |
/// <summary> |
///The summary declaration for this class.
///</summary>
class Class1
RESULT:
The summary does not display on your screen, but when you or someone else displays the code for the program, the comments appear within the code.
■ The default Class1 appears in your code in the parent window and the Solution Explorer window also highlights Class1 in the tree.
Solution Explorer... |
Solution Explorer... |
Classes
Class1.cs
|
|
|
|
|
|
|
|
|
|
|
|
|
|
|
|
|
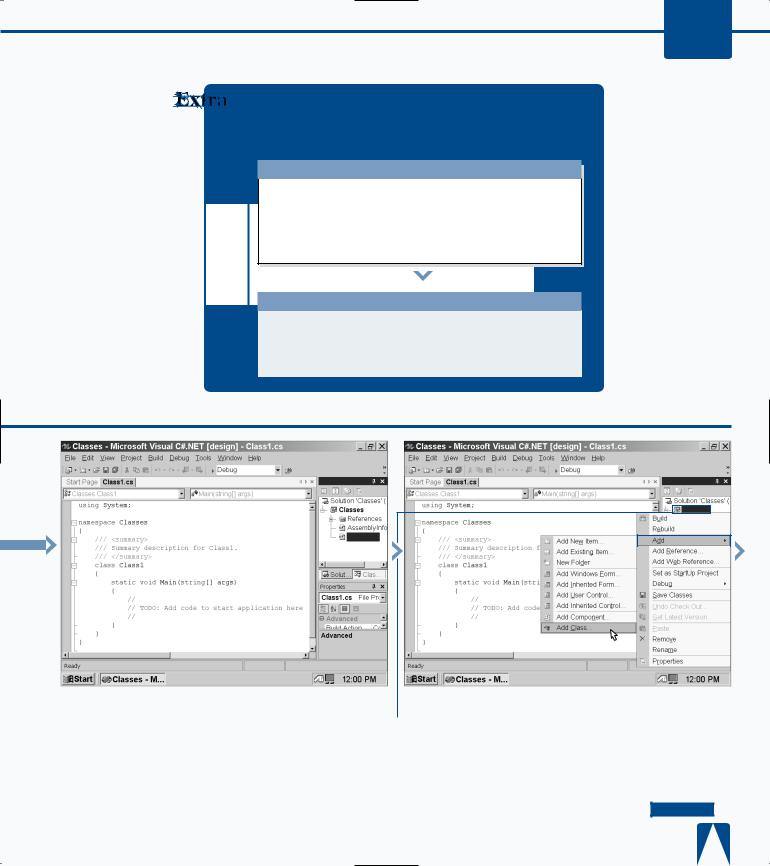
Á Right-click the Classes |
|
|
|
|
|
|
|
|
|
|
|
|
||
|
‡ Click Add. |
||||||
|
|||||||
entry in the Solution Explorer |
|
° Click Add Class. |
|||||
|
|||||||
window. |
|
|
|
|
|
||
CONTINUED 

51
C#
ENTER CLASSES
After you add your class name and its associated filename, you must create a namespace. A namespace organizes your Visual C# program so that it can
present your program elements to external programs properly. A namespace is something like a box that you use to contain your entire program elements in.
When you create a Visual C# program that is something different than an empty project (such as a Windows application), Visual C# creates the namespace for you automatically and the namespace has the name of your program. The namespace is the first thing that appears in your program.
After you enter the namespace information, you can define both the accessibility level for the class and the class modifiers. The accessibility level lets you determine whether your class can be accessed by all elements in your program, and others, or accessed by certain components. The class modifiers let you determine whether your class will be a base class or a class that cannot be inherited by another class.
After you add any comments and finish with the wizard, the class code appears in the parent window already created so you can concentrate on writing the rest of your program.
ENTER CLASSES (CONTINUED)
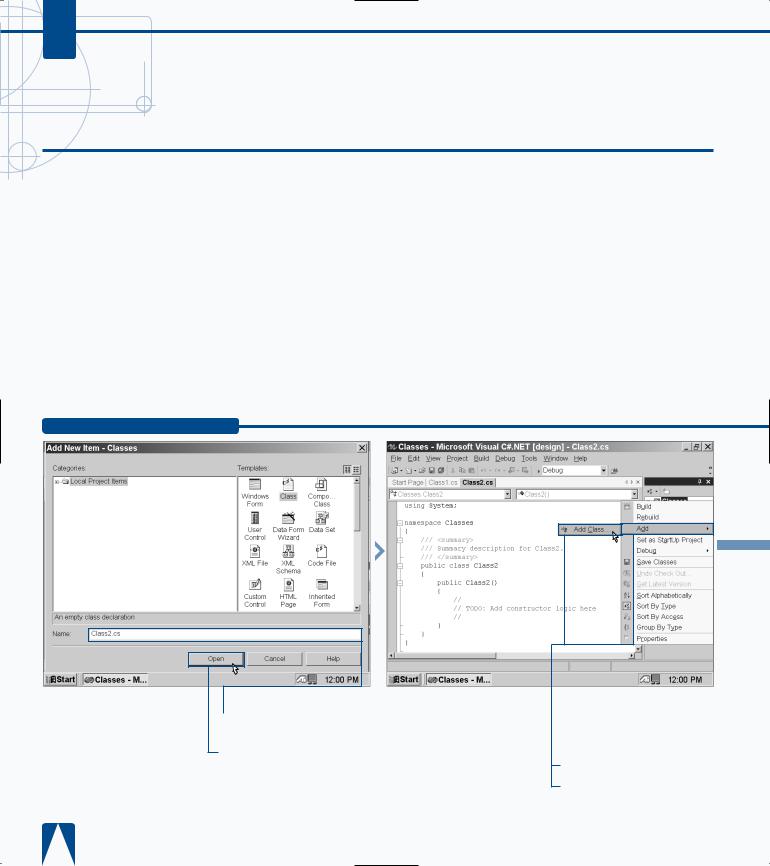
Class View - Classes
Type the name for your class in the Name field.
Click Open.
■ Your new class code appears in the parent window.
— Click the Class View tab.
± Right-click the Classes entry in the Class View window.
¡ Click Add.
™ Click Add Class.
WORKING WITH VISUAL C# BASICS 3
When you determine the class accessibility level, you can determine whether the class will have elements that can only be accessed by files in the same assembly. An assembly is like a box that holds boxes containing your program components; these components come in the form of files, such as a class being stored in a .CS file. You restrict access to the same assembly by using the internal keyword.
TYPE THIS:
internal class IntClass
{
public int x = 5;
}
RESULT:
When you tell your class that it has internal access, only the program components within the assembly box can access that class; components in other assemblies cannot.
|
|
|
|
|
|
|
|
|
|
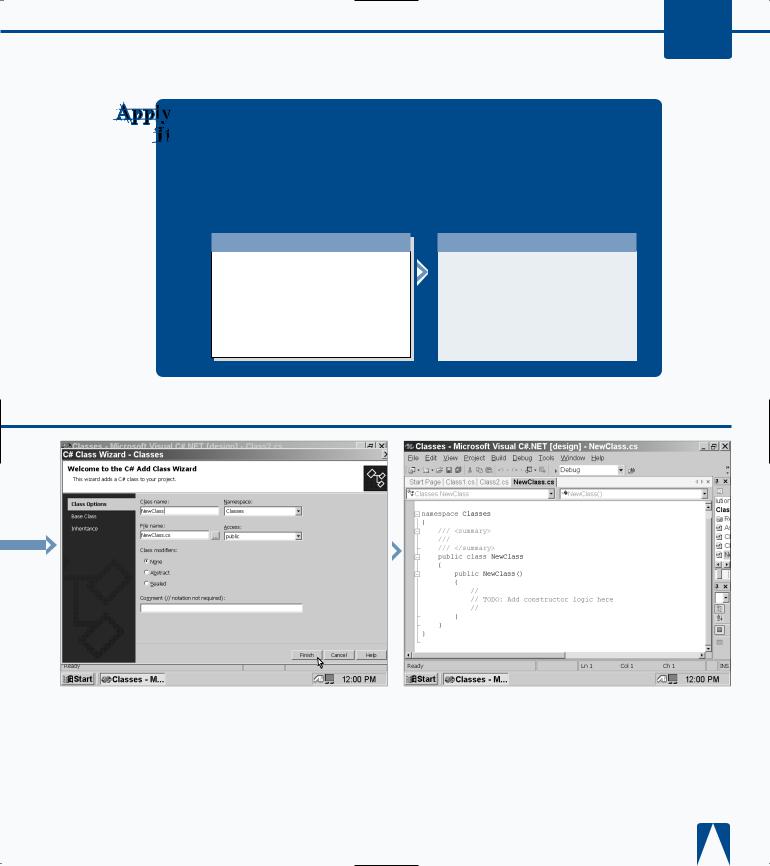
■ The C# Class Wizard |
|
|
|
|
|
|
|
||
|
|
|
|
|
|
|
|||
|
|
||||||||
£ Type a name for your |
|||||||||
window appears. |
class in the Class name field. |
||||||||
|
|
|
|
¢ Click Finish. |
|||||
|
|
|
|
||||||
■ The C# Class Wizard |
∞ Save the program as the |
window closes and your new |
filename. |
class code appears in the |
|
parent window. |
|
53