


266 Part IV: Using a Wireless Network
Other vendors are entering the marketplace, so expect your car to become a hot zone for wireless technologies soon.
Installing a wireless audio system in your car can range from the do-it-yourself job to something that a local audio installer needs to tackle. Generally, you have to install the electronics in your trunk or other tucked-away spots in your car. Some devices allow you to transmit to the car’s stereo by short-range FM transmitter. (Rockford sells one for its Omnifi that’s about $30.) So you run power (per the installation instructions) to your installed device, and the wireless connections can log onto your home network. You can then download all your music to the device by using the software provided with the device. That music is then played by tuning your car stereo into the frequency of the transmitter, like 99.1 FM. An in-car handheld control device is either connected to your main unit via a wireless or wired connection. More complex installations require you to run the audio and video cables to your stereo system, which is typically beyond the scope of the average homeowner.
Getting online with your own car PC
The previous products are great for syncing your audio at home with your car’s audio system via wireless 802.11 networks. What about video? For auto video servers, the market is still beginning to develop, but it’s more focused on putting a full PC in your car and storing and playing videos through that. Some very cool, wireless-capable auto PCs are currently on the market.
With a PC in your car (I don’t recall seeing any of those plastic traffic signs in any car windows saying “PC on Board” — do you?), you can mimic your home wireless network in your car, almost in its entirety. You can sync up with your PC for audio and video to play over your car’s radio and video display system. You can play computer games over those same systems. You can access your address books and calendars, just like at your desk. You can even use wireless keyboards.
G-NET Canada (www.gnetcanada.com) has a range of auto-enabling PCs
that add all sorts of functionality to your car. Aurora Auto PC, for instance, is a $1,500 add-on that gives you just about all you’d want from your car. It includes an MP3 audio player, a DVD player, GPS navigation support, vehicle diagnostics, and a digital dash software interface, as well as a full Windows XP-based PC that can run any application you want. The Aurora Auto PC sports a PC Card slot so that you can add the wireless card of your choice — setup is the same procedure for setting up any Windows XP 802.11 client. The trimmeddown Memphis Auto PC model, which has all the same wireless access capabilities but no onboard DVD device, enables you to store and play audio and video files downloaded from your host home PC.

Chapter 14: Other Cool Things You Can Network 267
You can get additional accessories to boost your enjoyment of your car PC. A wireless keyboard makes it simple to interface with the PC for text-oriented tasks (as is common with kid’s games) and for surfing the Internet. You can wirelessly connect to the Internet while driving by using a cellular PC Card like the Sierra Wireless AirCard 750.
So, you can now pull up to a hot spot and log on. (Check out Chapter 16 for more about hot spots.) Or, auto-sync when you enter your garage. It’s just a matter of time until you can play games car-to-car while driving down the road with another wirelessly enabled car.
Installing your car PC is both easy and hard. It’s easy in the sense that you screw the unit to your car and run power to the unit. It’s hard in the sense that other than the wireless connections, any connections to your car stereo or video system might entail running wires, just like with the audio wireless car servers that we describe previously. But after you have all this in place, using a different application is just a matter of installing new software on your car PC. It’s just like your home PC — after you install your printer, your monitors, and all the other parts of your system, the hard work is done. Just install new software to do new things.
We think that every car should have one of these wireless PCs! At least any car that has passengers in it — you don’t want to be surfing the Web while you’re driving.
Picking wireless gear for your car
The integration of external wireless connectivity options to cars is definitely in its infancy. However, some things to look for when shopping for auto-based audio/video gear include the following:
PC Card (PCMCIA) slots: You get the ultimate in flexibility with PC Card slots because you can put any card that you want into the system. You need these for connecting to the home when parked in the yard and accessing the Internet when traveling. Ideally, you’d have two PC Card slots because it’s probably going to be a while before a lot of dual-mode Wi-Fi/cellular cards are on the market.
FM modulator: Some systems have an optional FM modulator that enables you to merely tune into an unused FM band in your area and broadcast your music from the server to your stereo system. Because some audio and video systems require you to have specific receivers (that is, your actual audio component where you will listen to the music) for your car to make full use of the new functionality, it can get expensive to install a system. FM modulators make it easy to put in a system

268 Part IV: Using a Wireless Network
without changing out your stereo; you do lose some of the onscreen reporting that comes with a hard-wired installation, but you still get access to the music (which is the important part).
Upgradeable storage hard-disk space: Look for systems that allow you to add storage space when you need to. Storage is getting cheaper and coming in smaller form factors all the time. You’ll probably want to keep adding storage space as your audio and video collection increases.
Lots of interfaces: After your system is installed, you’re going to want to plug a lot of things into it. Make sure that you have a good supply of Universal Serial Bus (USB), FireWire, Ethernet, PC Card, serial, and RCA ports. You might have already installed a VHS tape deck or DVD player in your car; if you did, you might be able to easily install an audio/video server right beside it and use available In jacks on the video player to feed your existing screen and audio system.
All in all, expect a wireless LAN in your car soon — it just makes sense.
Look Ma, I’m on TV — Video Monitoring over Wireless LANs
The heightened awareness for security has given rise to a more consumerfriendly grade of video monitoring gear for your wireless network, too — this is stuff that used to be the exclusive domain of security installers. You can get network-aware 802.11b-supporting video cameras that contain their own integrated Web servers, which eliminate the need to connect a camera directly to your computer. After installation, you can use its assigned Internet Protocol (IP) address on your network to gain access to the camera, view live streaming video, and make necessary changes to camera settings.
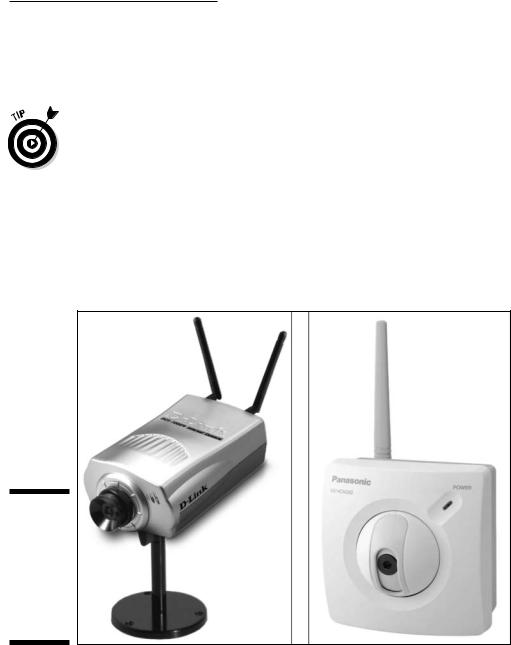
Panasonic sells its KX-HCM250 wireless network camera (www.panasonic.com; $750), complete with SSID filtering and 64/128-bit WEP encryption to help protect your wireless network from illegal intrusion. (See Figure 14-3 to see the product. We talk more about SSIDs and WEP in Chapters 6 and 10 if you need to know more.) The KX-HCM250 allows up to 30 simultaneous viewers to see up to 15 frames per second (fps) of live-motion video with resolution of up to 640 x 480. Through a Web-based interface, you can perform remote pan and tilt functions and click to eight preset angles.
D-Link is another vendor that has embraced the video aspects of wireless based video surveillance. Its D-LinkAir DCS-1000W (www.d-link.com; $329) — shown along with the Panasonic KX-HCM250 in Figure 14-3 — gives you VGAquality streaming video with built-in automatic gain and white balance controls. It comes with IPView, which is a Microsoft Windows-compatible
Chapter 14: Other Cool Things You Can Network 269
monitoring application. IPView allows you to control all your DCS-1000W cameras on your LAN from one location. IPView also lets you view as many as 16 cameras on one screen, supports manual and scheduled recording to an AVI movie file on your hard drive, and supports motion detection that triggers automatic recording.
Go to www.dlink.com/LiveDemo/ for a live demo of the D-LinkAir DCS1000W camera.
Installing a wireless network camera is incredibly simple. These are network devices and usually sport both an RJ-45 10Base-T wired network interface along with an 802.11b air interface. Installing the camera usually involves first connecting the camera to your network via the wired connection and then using the provided software to access your camera’s settings. Depending on how complicated the camera is (whether it supports the ability to pan, to e-mail pictures on a regular basis, to allow external access, and so on), you might be asked to set any number of other settings.
Figure 14-3:
The D- LinkAir DCS1000W and Panasonic KX-HCM250 wireless network cameras.
Photo courtesy of Panasonic
270 Part IV: Using a Wireless Network
You might be asked to set a fixed (static) IP address for the camera on your home wireless network. In Chapter 6, we talk about how (in most cases) your wireless clients obtain an IP address (when on your network) through the Dynamic Host Configuration Protocol (DCHP). DHCP just gives you an address based on the next one that happens to be available on your network; it can change from time to time. However, to access the camera from outside your home, say from your office, you want that IP address to be the same all the time so that you don’t have to guess what address it obtained from your DHCP host. When setting up your camera, it will probably ask you to give it a fixed address on your network. To do this, simply choose a number outside the range that’s governed by your host’s DHCP client range. If you let your router assign DHCP from within the range of numbers from 192.168.254.0 to 192.168.254.50, you can pick any number above 50 and below 254, such as 192.168.254.100. You need to make sure that you don’t pick a number being assigned by the router’s DHCP, or you might find that your number gets taken by another assignment.
The wireless communications doesn’t have to be 802.11b, although we would argue that it makes sense to use standards-based gear when you can. Danny likes his X10 FloodCam (www.x10.com; $130) that videotapes all activity around the house, night or day, and sends the images to a VCR or PC. That system uses 2.4 GHz to send the signals, but it’s not standardized wireless LAN traffic. Over time, we believe that many of these systems will move to 802.11 or Bluetooth when those chip and licensing costs continue to come down.
Controlling Your Home over
Your Wireless LAN
Another area of wireless activity is home control. If you got excited about going from the six remote controls on your TV set to one universal remote control, you ain’t seen nothin’ yet. (And if you still have those six remote controls up there, we’ve got some options for you, too.)
The problem with controlling anything remotely is having an agreed-upon protocol between the transmitting functionality and the receiving functionality. In the infrared (IR) space, strong agreement and standardization exists for remote controls among all the different manufacturers, so the concept of a universal remote control is possible for IR. (IR remotes are the standard for the majority of home audio and video equipment.) But in the radio frequency (RF) space, there has not been the same rallying around a particular format, thus making it difficult to consolidate control devices except for within the same manufacturer’s line. And then you have the issues of controlling non-entertainment devices, such as heating and air conditioning, security systems, and so on. Those have different requirements just from a user interface perspective.