

Chapter 6: Installing Wireless Access Points in Windows 111
•Service set identifier (SSID)
•Channel
•WEP keys
•Password
•MAC address
•Dynamic or static wide area network (WAN) IP address
•Local IP address
•Subnet mask
•PPPoE (Point-to-Point Protocol over Ethernet)
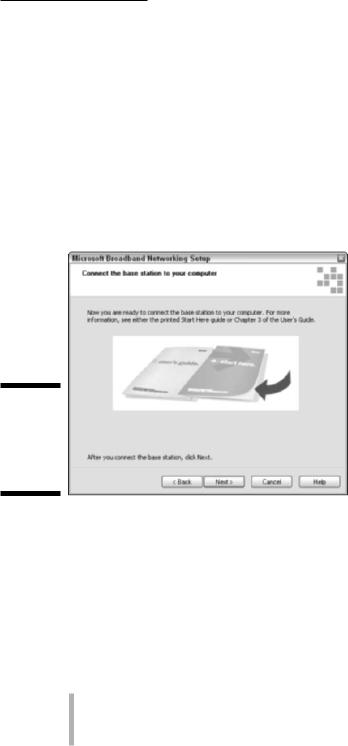
Figure 6-2:
It’s time to connect the AP or Internet gateway.
6.Complete the installation software and you’re finished.
After you complete the AP setup process, you should now have a working access point ready to communicate with another wireless device.
Configuring AP parameters
Here’s a little more meat on each of the access point parameters that you captured in Step 5 of the preceding section.
Service set identifier (SSID): The SSID (sometimes called the network name, network ID, or service area) can be any alphanumeric string, including upperand lowercase letters, up to 30 characters in length. The AP manufacturer might set a default SSID at the factory, but you

112 Part III: Installing a Wireless Network
should change this setting. Assigning a unique SSID doesn’t really add much security; nonetheless, establishing an identifier that is different than the factory-supplied SSID makes it a little more difficult for intruders to access your wireless network. And if you have a nearby neighbor with a wireless AP of the same type, you won’t get the two networks confused. When you configure wireless stations, you need to use the same SSID/network name that is assigned to the AP.
Channel: This is the radio channel over which the AP will communicate. If you plan to use more than one AP in your home, you should assign a different channel (over which the AP will communicate) for each AP to avoid signal interference. If your network uses the IEEE 802.11b or IEEE 802.11g protocols, 11 channels, which are set at 5 MHz intervals, are available in the United States. However, because the radio signals used by the IEEE 802.11b standard spread across a 22 MHz-wide spectrum, you can only use up to three channels (typically 1, 6, and 11) in a given wireless network.
If you’re setting up an 802.11a AP, you have 11 channels from which to choose. But because these channels are 20 MHz wide and do not overlap, you really have 11 channels with which to work, compared with only 3 with IEEE 802.11b or 802.11g. If you operate only one AP, all that really matters is that all wireless devices on your network must be set to the same channel. If you operate several APs, give them as much frequency separation as possible to reduce the likelihood of mutual interference.
Table 6-1 contains the channel frequencies for the different wireless standards.
Table 6-1 |
Channel Frequencies for Wireless Standards |
2.4 GHz (802.11b/g) |
5 GHz (802.11a) |
Channel 1–2.412 GHz |
Channel 36–5.180 GHz |
|
|
Channel 2–2.417 GHz |
Channel 40–5.200 GHz |
|
|
Channel 3–2.422 GHz |
Channel 44–5.220 GHz |
|
|
Channel 4–2.427 GHz |
Channel 48–5.240 GHz |
|
|
Channel 5–2.432 GHz |
Channel 52–5.260 GHz |
|
|
Channel 6–2.437 GHz |
Channel 56–5.280 GHz |
|
|
Channel 7–2.422 GHz |
Channel 60–5.300 GHz |
|
|
Channel 8–2.447 GHz |
Channel 64–5.320 GHz |
|
|
Channel 9–2.452 GHz |
|
|
|

Chapter 6: Installing Wireless Access Points in Windows 113
2.4 GHz (802.11b/g) 5 GHz (802.11a)
Channel 10–2.457 GHz
Channel 11–2.462 GHz
Channel 12–2.467 GHz
Channel 13–2.472 GHz
Channel 14–2.477 GHz (Japan only)
Notes 802.11b/g:
Channel 3 is default FCC, ETSI, Japan. Channel 12 is for ETSI countries only.
For France, Channels 10–13 are applicable only. 802.11a:
These channels are valid only in US/Canada and Japan at this time. Source: ORiNOCO
Some access points, such as some from ORiNOCO, offer an automatic channel selection feature, which is cool. For instance, the ORiNOCO AP-2000 Access Point selects its own frequency channel, based on interference situation, bandwidth usage, and adjacent channel use, using its Auto Channel Select feature. This is beneficial when first deploying your AP-2000 or adding an AP-2000 unit in an existing environment. For
instance, for the 5 GHz radio card (used for 802.11a), the default channel is 52 (5.260 GHz). When a second AP-2000 unit is turned on in the vicinity of the currently active AP-2000 device, the Auto Channel Select feature changes the frequency channel of the second unit so there is no interference between the units. Multiple AP-2000 units can be turned on simultaneously to establish proper channel selection. That’s pretty nice; you might wonder why it’s necessary to pay more for more businessclass access points — this is a good reason.
When you have multiple access points and set your 802.11a, b, or g access points all to the same channel, sometimes roaming won’t work when users move about the house, and the transmission of a single access point blocks all others that are within range. As a result, performance degrades significantly. (You notice this when your throughput, or speed of file/data transfers, decreases noticeably.) Use different, widely separated channels for b and g; you only have to use different channels for a because they are non-overlapping.
WEP keys: You should always use Wired Equivalent Privacy (WEP) encryption. Only a determined hacker with the proper equipment and software will be able to crack the key. (By the time that you’re reading this, newer encryption protocols such as Wi-Fi Protected Access [WPA] might have been implemented that are nearly impossible to break.) If you don’t use WEP or some other form of security, any nosy neighbor with a laptop, wireless PC card, and range-extender antenna might be able to see

114 Part III: Installing a Wireless Network
and access your wireless home network. Whenever you use encryption, all wireless stations in your house attached to the wireless home network must use the same key. Sometimes the AP manufacturer will assign a default WEP key. Always assign a new key to avoid a security breach.
Read Chapter 10 for great background info on WEP and WPA.
Password: Configuration software might require that you enter a password to make changes to the AP setup. The manufacturer might provide a default password (see the user documentation). Use the default password when you first open the configuration pages, and then immediately change the password to avoid a security breach. (Note: This is not the same as the WEP key, which is also called a password by some user interfaces [UIs].)
MAC address: The Media Access Control (MAC) address is the physical address of the radio in the AP. You should find this number printed on a label attached to the device. You might need to know this value for troubleshooting, so write it down. The AP’s Ethernet (RJ-45) connection to the wired network also has a MAC address that is different than the MAC address of the AP’s radio.
Dynamic or static wide area network (WAN) IP address: If your network is connected to the Internet, it must have an IP address assigned by your ISP. Most often, your ISP will dynamically assign this address. Your router or Internet gateway should be configured to accept an IP address dynamically assigned by a DHCP server. It is possible, but unlikely, that your ISP will require a set (static) IP address.
Local IP address: In addition to a physical address (the MAC address), the AP will also have its own network (IP) address. You need to know this IP address to access the configuration pages using a Web browser. Refer to the product documentation to determine this IP address. In most cases, the IP address will be 192.168.xxx.xxx where xxx is between 1 and 254. It’s also possible an AP could choose a default IP that’s in use by your cable/DSL router (or a computer that got its IP from the cable/DSL router’s DHCP server). Either way, if an IP conflict arises, you might have to keep the AP and cable/DSL routers on separate networks while configuring the AP.
Subnet mask: In most cases, this value will be set at the factory to 255. 255.255.0. If you’re using an IP addressing scheme of the type described in the preceding paragraph, 255.255.255.0 is the correct number to use. This number, together with the IP address, establishes the subnet on which this AP will reside. Network devices with addresses on the same subnet can communicate directly without the aid of a router. You really don’t need to understand how the numbering scheme works except to know that the AP and all the wireless devices that will access your wireless network must have the same subnet mask.
PPPoE: Most DSL ISPs use of Point-to-Point Protocol over Ethernet (PPPoE). The values that you need to record are the user name (or user ID) and password.