- •Using Help
- •About online Help
- •Navigating in Help
- •Using bookmarks, the table of contents, the index, and Find
- •Contents
- •Introduction
- •Welcome
- •Registration
- •Installing Adobe Photoshop and ImageReady
- •Getting started
- •If you are new to Photoshop:
- •If you are an experienced Photoshop user:
- •If you want to focus on Web features:
- •If you want to concentrate on photo editing and retouching:
- •If you want to focus on productivity features:
- •Using the printed documentation
- •Using online Help
- •Using tool tips
- •Using Web resources
- •About Adobe Online
- •Using Adobe Online
- •Accessing Adobe Online through the Help menu
- •Other learning resources
- •Customer support
- •Customer support on Adobe Online
- •Additional customer support resources
- •An Overview of Adobe Photoshop
- •Explore state-of-the-art tools
- •Edit images with ease
- •Enjoy unlimited creative options
- •Create compelling Web designs
- •Enjoy precise typographic control
- •Stay ahead of deadlines
- •Automate repetitive tasks
- •Maintain color precisely
- •What’s New in Photoshop 7.0
- •Meet every challenge
- •Stay competitive
- •Take advantage of tighter-than-ever integration
- •Looking at the Work Area
- •About the work area
- •Using the toolbox
- •Toolbox overview (1 of 3)
- •Toolbox overview (2 of 3)
- •Toolbox overview (3 of 3)
- •Using the tools
- •Using the tool pointers
- •Using the tool options bar
- •Using the palette well (Photoshop)
- •Using tool presets (Photoshop)
- •Using palettes
- •Changing the palette display
- •Docking palettes together
- •Customizing your workspace
- •Using pop-up sliders
- •Using pop-up palettes
- •Using the Info palette (Photoshop)
- •Using context menus
- •Viewing images
- •Changing the screen display mode
- •Using the document window
- •Navigating the view area
- •Magnifying and reducing the view
- •Correcting mistakes
- •Reverting to a previous version of an image
- •About the History palette
- •Using the History palette
- •Setting history options (Photoshop)
- •Making a snapshot of an image (Photoshop)
- •Painting with a state or snapshot of an image (Photoshop)
- •Duplicating images
- •Using rulers
- •Using columns (Photoshop)
- •Using the measure tool (Photoshop)
- •Using guides and the grid
- •Working with Extras
- •Displaying status information (Photoshop)
- •Annotating images (Photoshop)
- •Adding notes and audio annotations
- •Opening and editing annotations
- •Jumping between applications
- •Jumping between Photoshop and ImageReady
- •Jumping to other applications (ImageReady)
- •Previewing an image in a browser
- •Managing libraries with the Preset Manager (Photoshop)
- •Setting preferences
- •Resetting all warning dialogs
- •Monitoring operations
- •Using plug-in modules
- •Assigning scratch disks
- •Getting Images into Photoshop and ImageReady
- •About bitmap images and vector graphics
- •About image size and resolution
- •Changing image size and resolution
- •Displaying image size information
- •About resampling
- •Choosing an interpolation method
- •Changing the pixel dimensions of an image
- •Changing the print dimensions and resolution of an image (Photoshop)
- •Determining a recommended resolution for an image (Photoshop)
- •Scanning images
- •Importing scanned images
- •Importing an image using the TWAIN interface
- •Importing images using WIA (Windows Image Acquisition) Support
- •Scanning using the resolution setting (Photoshop)
- •Optimizing the dynamic range of the scan (Photoshop)
- •Eliminating unwanted color casts (Photoshop)
- •Creating new images
- •Opening and importing images
- •Opening PostScript artwork
- •Importing PICT resources (Mac OS)
- •Using the File Browser (Photoshop)
- •About workgroup management
- •Getting started with workgroup management
- •Logging on and off WebDAV servers
- •Saving changes to the server
- •Working with Color
- •About color modes and models (Photoshop)
- •HSB model
- •RGB model
- •RGB mode
- •CMYK model
- •CMYK mode
- •L*a*b model
- •Lab mode
- •Bitmap mode
- •Grayscale mode
- •Duotone mode
- •Indexed Color mode
- •Multichannel mode
- •Color gamuts (Photoshop)
- •Adjusting the monitor display
- •Specifying 8-bit color display (Photoshop)
- •Making previews display more quickly (Photoshop)
- •Adjusting color display for cross-platform variations
- •Channels and bit depth (Photoshop)
- •About color channels
- •About bit depth
- •Converting between bit depths
- •Converting between color modes (Photoshop)
- •Converting between Grayscale and Bitmap modes (Photoshop)
- •Making Grayscale and Bitmap mode conversions
- •Converting to indexed color (Photoshop)
- •Conversion options for indexed-color images (Photoshop)
- •Palette type
- •Number of colors
- •Color inclusion and transparency
- •Dithering
- •Customizing indexed color tables (Photoshop)
- •Using the color table to edit colors and assign transparency
- •Saving and loading color tables
- •Producing Consistent Color (Photoshop)
- •About color management
- •Do you need color management?
- •Creating a viewing environment for color management
- •Setting up color management
- •About working spaces
- •About color management policies
- •Working with policy warnings and messages
- •Customizing color management settings
- •Specifying working spaces
- •Specifying color management policies
- •Customizing advanced color management settings
- •Specifying a color management engine
- •Specifying a rendering intent
- •Using dither
- •Desaturating monitor colors
- •Blending RGB colors
- •Saving and loading color management settings
- •Synchronizing color management between applications
- •Calibrating versus characterizing a monitor
- •About monitor calibration settings
- •Calibrating with Adobe Gamma (Windows)
- •Entering custom CMYK settings
- •Specifying ink colors
- •Specifying dot gain
- •Adjusting the separation type and black generation
- •Printing a hard proof
- •Making Color and Tonal Adjustments
- •Basic steps for correcting images
- •1. Calibrate your monitor.
- •2. Check the scan quality and tonal range.
- •3. Adjust the tonal range.
- •4. Adjust the color balance.
- •5. Make other special color adjustments.
- •6. Sharpen the edges of the image.
- •Checking scan quality and tonal range (Photoshop)
- •Using the color adjustment tools
- •Making color adjustments
- •Seeing the color values of pixels (Photoshop)
- •Saving and reapplying settings
- •Comparing corrections in CMYK and RGB (Photoshop)
- •Identifying out-of-gamut colors (Photoshop)
- •Using the Levels dialog box
- •Using Levels to set highlights, shadows, and midtones
- •Using Levels to adjust color (Photoshop)
- •Using the Curves dialog box (Photoshop)
- •Using target values to set highlights and shadows (Photoshop)
- •Setting auto correction options (Photoshop)
- •Adjusting the gamma value of an image (ImageReady)
- •About the color wheel
- •Using the Color Balance command (Photoshop)
- •Using the Hue/Saturation command
- •Using the Replace Color command (Photoshop)
- •Using the Selective Color command (Photoshop)
- •Making quick overall adjustments to an image
- •Using the Brightness/Contrast command
- •Using the Auto Levels command
- •Using the Auto Contrast command
- •Using the Auto Color command (Photoshop)
- •Using the Variations command
- •Applying special color effects to images
- •Using the Desaturate command
- •Using the Invert command
- •Using the Equalize command (Photoshop)
- •Using the Threshold command (Photoshop)
- •Using the Posterize command (Photoshop)
- •Using the Gradient Map command (Photoshop)
- •Sharpening images
- •Selecting
- •About selections
- •Making pixel selections
- •Using the Select menu
- •Using the marquee tools
- •Using the lasso, polygonal lasso, and magnetic lasso tools
- •Setting options for the lasso, polygonal lasso, and magnetic lasso tools
- •Using the magic wand tool
- •Using the Color Range command (Photoshop)
- •Creating selections from slices (ImageReady)
- •Adjusting pixel selections
- •Moving, hiding, or inverting a selection
- •Adjusting selections manually
- •Adjusting selections numerically
- •Softening the edges of a selection
- •Moving, copying, and pasting selections and layers
- •Copying selections or layers
- •Using drag and drop to copy between applications
- •Using the Clipboard to copy between applications
- •Using the Snap command
- •Saving and loading selections
- •Deleting selections
- •Removing fringe pixels from a selection (Photoshop)
- •Extracting objects from their background (Photoshop)
- •Transforming and Retouching
- •Changing the size of the work canvas
- •Cropping images
- •Transforming perspective while cropping (Photoshop)
- •Transforming objects in two dimensions
- •Specifying what to transform
- •Setting the reference point
- •Applying transformations
- •Using the Free Transform command
- •Transforming objects in three dimensions
- •Transforming and manipulating objects
- •Modifying the preview image
- •Setting 3D rendering options
- •Cloning and repairing images
- •Using the clone stamp tool
- •Using the pattern stamp tool
- •Using the healing brush tool (Photoshop)
- •Using the patch tool (Photoshop)
- •Retouching images
- •Using the smudge tool
- •Using the focus tools
- •Using the toning tools
- •Using the sponge tool
- •Using the Liquify command
- •Using the Liquify dialog box
- •Distorting images
- •Freezing and thawing areas
- •Reconstructing distortions
- •Saving and loading distortions
- •Drawing
- •About drawing and painting
- •Drawing shapes and paths
- •About the drawing tools
- •Creating shape layers
- •Creating a work path (Photoshop)
- •Creating rasterized shapes
- •Using the shape tools
- •Setting shape tool options
- •Using preset shapes (Photoshop)
- •Controlling a shape as you draw it
- •Using the pen tools (Photoshop)
- •Drawing with the pen tool
- •Drawing curves with the pen tool
- •Drawing with the freeform pen tool
- •Editing shape layers
- •Using the Paths palette (Photoshop)
- •Editing paths (Photoshop)
- •About anchor points, direction lines, direction points, and components
- •Selecting paths (Photoshop)
- •Moving, reshaping, and deleting path segments
- •Moving, reshaping, copying, and deleting path components
- •Aligning and distributing path components
- •Adding, deleting, and converting anchor points
- •Managing paths (Photoshop)
- •Converting between paths and selection borders (Photoshop)
- •Converting paths to selection borders
- •Converting selection borders to paths
- •Adding color to paths (Photoshop)
- •Filling paths with color
- •Stroking to paint path borders
- •Painting
- •Using the painting tools (Photoshop)
- •Using the painting tools (ImageReady)
- •Erasing
- •Using the eraser tool
- •Using the magic eraser tool
- •Using the background eraser tool (Photoshop)
- •Using the Auto Erase option
- •Using the art history brush tool (Photoshop)
- •Working with brushes
- •Using the Brushes palette (Photoshop)
- •Selecting preset brushes
- •Customizing brush tips (Photoshop)
- •About brush dynamics (Photoshop)
- •Specifying brush shape dynamics (Photoshop)
- •Specifying brush scattering (Photoshop)
- •Creating textured brushes (Photoshop)
- •Creating dual brushes (Photoshop)
- •Specifying color dynamics (Photoshop)
- •Specifying paint dynamics (Photoshop)
- •Adding noise to brush strokes (Photoshop)
- •Using wet brush edges (Photoshop)
- •Creating airbrush effects (Photoshop)
- •Smoothing brush strokes (Photoshop)
- •Protecting texture in brush strokes (Photoshop)
- •Copying textures between tools (Photoshop)
- •Clearing brush options (Photoshop)
- •Creating and managing preset brushes (Photoshop)
- •Setting options for painting and editing tools
- •Selecting a blending mode
- •Using the gradient tool (Photoshop)
- •Specifying the gradient transparency
- •Managing gradients
- •Using the paint bucket tool
- •Filling and stroking selections and layers
- •Filling a selection or layer with colors or patterns
- •Stroking a selection or layer with color
- •Creating and managing patterns
- •Managing patterns (Photoshop)
- •Using the Pattern Maker
- •Generating patterns
- •Previewing patterns
- •Reviewing tiles and pattern previews
- •Specifying pattern smoothness and detail
- •Choosing foreground and background colors
- •Using color settings in the toolbox
- •Using the eyedropper tool
- •Using the Color palette
- •Using the Swatches palette
- •Using the Adobe Color Picker
- •Specifying a color using numeric values
- •Using Web-safe colors
- •Recognizing nonprintable colors (Photoshop)
- •Choosing custom colors (Photoshop)
- •Choosing a custom color system (Photoshop)
- •Using other color pickers
- •Using Channels and Masks
- •About channels
- •Using the Channels palette (Photoshop)
- •Viewing channels
- •Changing the display of the palette
- •Selecting and editing channels
- •Managing channels (Photoshop)
- •Rearranging and renaming channels
- •Duplicating channels
- •Splitting channels into separate images
- •Merging channels
- •Deleting channels
- •Mixing color channels (Photoshop)
- •Adding spot colors (Photoshop)
- •About spot colors
- •Creating spot channels
- •Modifying spot channels
- •Adjusting overlapping spot colors
- •Using channel calculations to blend layers and channels (Photoshop)
- •Using the Apply Image command
- •Using the Calculations command
- •About the Add and Subtract blending modes
- •About masks (Photoshop)
- •Creating temporary masks in Quick Mask mode (Photoshop)
- •Storing masks in alpha channels
- •About alpha channels (Photoshop)
- •Creating alpha channels (Photoshop)
- •Saving a mask selection
- •Modifying alpha channels (Photoshop)
- •Loading a selection into an image
- •Using Layers
- •About layers
- •Using the Layers palette
- •Creating layers and layer sets
- •About the background layer
- •Adding layers and layer sets
- •Working with layered images
- •Selecting layers
- •Displaying the contents of layers
- •Duplicating layers
- •Changing the stacking order of layers
- •Linking layers
- •Repositioning the contents of layers
- •Locking layers
- •Unifying layers (ImageReady)
- •Sampling from layers
- •Managing layers
- •Renaming layers
- •Color coding layers
- •Rasterizing layers
- •Deleting layers
- •Merging layers
- •Flattening all layers
- •Setting opacity and blending options
- •Setting layer opacity
- •Choosing a blending mode
- •Filling new layers with a neutral color
- •Specifying knockout options
- •Restricting blending to channels (Photoshop)
- •Grouping blend effects
- •Specifying a range for blending layers (Photoshop)
- •Using layer effects and styles
- •About layer effects and styles
- •Applying preset styles
- •Creating custom styles
- •Displaying layer styles
- •Editing styles
- •Modifying layer effects with contours (Photoshop)
- •Applying global lighting
- •Creating and managing preset styles
- •Copying and pasting styles
- •Scaling layer effects (Photoshop)
- •Removing layer effects
- •Converting layer styles to layers
- •Masking layers
- •About masking layers
- •Creating and editing layer masks
- •Creating and editing vector masks
- •Unlinking layers and masks
- •Applying and discarding layer masks
- •Selecting opaque areas on a layer
- •Creating clipping groups
- •Applying Filters for Special Effects
- •Loading images and textures
- •Using texture and glass surface controls
- •Tips for creating special effects
- •Choosing a Lighting Effects type
- •Choosing a Lighting Effects style
- •Using a Lighting Effects texture
- •Using Type
- •About type
- •Creating type
- •About using the type tools (Photoshop)
- •Entering point type
- •Entering paragraph type
- •Creating a type selection border (Photoshop)
- •Working with type layers
- •Editing text in type layers
- •Rasterizing type layers
- •Changing type layer orientation
- •Specifying anti-aliasing
- •Converting between point type and paragraph type
- •Warping type layers
- •Creating a work path from type (Photoshop)
- •Converting type to shapes (Photoshop)
- •Formatting characters
- •Selecting characters
- •Using the Character palette
- •Choosing a font
- •Choosing a type size
- •Changing the type color
- •Specifying leading
- •Specifying kerning and tracking
- •Adjusting horizontal or vertical scale
- •Specifying baseline shift
- •Changing case
- •Making characters superscript or subscript
- •Applying underline and strikethrough
- •Using ligatures and old style numerals
- •Using fractional character widths
- •Viewing text using the operating system layout
- •Rotating vertical type
- •Checking for spelling errors (Photoshop)
- •Finding and replacing text (Photoshop)
- •Formatting paragraphs
- •Selecting paragraphs and showing the Paragraph palette
- •Aligning and justifying type
- •Indenting paragraphs
- •Changing space above or below paragraphs
- •Specifying hanging punctuation
- •Adjusting hyphenation
- •Preventing unwanted word breaks
- •Adjusting spacing
- •Working with composition
- •About composition methods
- •Choosing a composition method
- •Setting options for Chinese, Japanese, and Korean type (Photoshop)
- •Displaying CJK type options
- •Adjusting tsume
- •Specifying how leading is measured
- •Using tate-chuu-yoko
- •Specifying left and right underlining
- •Working with Japanese composition
- •Using burasagari
- •Designing Web Pages
- •About designing Web pages with Photoshop and ImageReady
- •Creating and viewing slices
- •About slices
- •Types of slices
- •Creating user slices
- •Creating layer-based slices
- •Converting auto slices to user slices
- •Viewing slices
- •Selecting and modifying slices
- •Using the Slice palette (ImageReady)
- •Selecting slices
- •Moving and resizing user slices
- •Dividing user slices and auto slices
- •Duplicating slices
- •Combining slices (ImageReady)
- •Arranging user slices and layer-based slices
- •Aligning user slices (ImageReady)
- •Distributing user slices (ImageReady)
- •Deleting user slices and layer-based slices
- •Locking slices (Photoshop)
- •Specifying slice options
- •Viewing slice options
- •Choosing a content type
- •Specifying slice names
- •Specifying slice background colors
- •Assigning a URL to an Image slice
- •Resizing and moving slices using numeric coordinates
- •Specifying browser messages
- •Adding HTML text to a slice
- •Optimizing slices
- •Linking slices (ImageReady)
- •Creating and viewing image maps (ImageReady)
- •Creating image maps
- •Converting layer-based image maps to tool-based image maps
- •Viewing image maps
- •Selecting and modifying image maps (ImageReady)
- •Using the Image Map palette (ImageReady)
- •Selecting image maps
- •Duplicating image maps
- •Arranging image maps
- •Aligning tool-based image maps
- •Distributing tool-based image maps
- •Deleting image maps
- •Specifying image map options (ImageReady)
- •Selecting an image map type (ImageReady)
- •Creating Web photo galleries (Photoshop)
- •Customizing and creating Web photo gallery styles (Photoshop)
- •About Web photo gallery styles
- •Customizing Web photo gallery styles
- •Creating new Web photo gallery styles
- •Using tokens in Web photo gallery styles
- •Creating Rollovers and Animations (ImageReady)
- •About working with layers in rollovers and animations
- •Editing layers in rollover states and animation frames
- •Unifying and matching layers rollovers and animations
- •Using the Rollovers palette
- •Creating and editing rollovers
- •About rollovers
- •Creating slices for rollovers
- •Creating rollover states
- •Editing rollover states
- •Previewing rollover states
- •Adding animation to rollover states
- •Applying and creating rollover styles
- •Copying and pasting rollover states
- •Duplicating rollover states
- •Rearranging and deleting rollover states
- •Creating and editing animations
- •About animation
- •Using the Animation palette
- •Adding frames
- •Selecting frames
- •Editing frames
- •Rearranging and deleting frames
- •Copying and pasting frames
- •Tweening frames
- •Specifying looping
- •Specifying delay for frames
- •Adding layers to frames
- •Setting the frame disposal method
- •Flattening frames into layers
- •Viewing animations
- •Optimizing animations
- •Viewing animated images in Photoshop
- •Saving animations
- •Saving animations as animated GIFs
- •Saving animations as QuickTime movies
- •Opening animated GIFs
- •Opening QuickTime movies as animations
- •About optimization
- •Optimizing images
- •Using the Save for Web dialog box (Photoshop)
- •Working with slices in the Save for Web dialog box (Photoshop)
- •Using the Optimize palette (ImageReady)
- •Viewing optimized images (ImageReady)
- •Applying optimization settings
- •Optimization options for GIF and PNG-8 formats
- •Optimization options for JPEG format
- •Optimization options for PNG-24 format
- •Optimization options for WBMP format
- •Saving and resetting optimization settings
- •Resizing the image during optimization (Photoshop)
- •Controlling optimization (ImageReady)
- •Setting optimization preferences (ImageReady)
- •Using weighted optimization
- •About masks and weighted optimization
- •Using masks to modify JPEG quality
- •Using masks to modify GIF lossiness
- •Using masks to modify dithering
- •Using masks to modify color reduction
- •Optimizing colors in GIF and PNG-8 images
- •Viewing a color table
- •Generating a color table
- •Changing the display of the color table
- •Adding new colors to the color table
- •Including black and white in a color table
- •Selecting colors
- •Shifting colors
- •Shifting to Web-safe colors
- •Mapping colors to transparency
- •Locking colors in the color table
- •Deleting colors from the color table
- •Loading and saving color tables
- •Using master palettes (ImageReady)
- •Working with hexadecimal values for color
- •Viewing hexadecimal values for colors in the Info palette
- •Copying colors as hexadecimal values
- •Using a droplet to automate optimization settings (ImageReady)
- •Saving optimized images
- •Setting output options
- •Using the Output Settings dialog box
- •Setting HTML output options
- •Setting slice output options
- •Setting image map output options (ImageReady)
- •Setting background options
- •Adding title and copyright information to Web pages
- •Saving and Exporting Images
- •Saving images
- •Exporting images in ZoomView format (Photoshop)
- •Photoshop format
- •Photoshop 2.0 (Photoshop)
- •AVI (ImageReady)
- •Photoshop EPS
- •Photoshop DCS 1.0 and 2.0 (Photoshop)
- •EPS TIFF or EPS PICT Preview (Photoshop)
- •Filmstrip
- •JPEG
- •PICT File
- •PICT Resource
- •Pixar
- •QuickTime Movie (ImageReady)
- •Raw (Photoshop)
- •Scitex CT (Photoshop)
- •Targa
- •TIFF
- •Adding digital copyright information
- •Before adding a watermark
- •Embedding digital watermarks
- •Using the Watermark Durability setting
- •Using the signal strength meter
- •Creating multiple-image layouts (Photoshop)
- •Creating contact sheets
- •Creating picture packages
- •Customizing picture package layouts
- •Placing Photoshop images in other applications (Photoshop)
- •Using image clipping paths to create transparency
- •Printing image clipping paths
- •Exporting paths to Adobe Illustrator
- •Object linking and embedding (OLE) (Windows only)
- •Printing (Photoshop)
- •About printing
- •Printing images
- •Positioning and scaling images
- •Setting output options
- •Selecting halftone screen attributes
- •Printing part of an image
- •Choosing a print encoding method
- •Printing vector graphics
- •Using color management when printing
- •Creating color traps
- •Printing duotones
- •About duotones
- •Modifying the duotone curve
- •Specifying overprint colors
- •Saving and loading duotone settings
- •Viewing individual printing plates
- •Printing duotones
- •Exporting duotone images to other applications
- •Printing color separations
- •Automating Tasks
- •About actions
- •Using the Actions palette
- •Recording actions
- •Creating a new action
- •Recording paths (Photoshop)
- •Inserting stops
- •Setting modal controls
- •Excluding commands
- •Inserting nonrecordable commands (Photoshop)
- •Specifying an output folder (ImageReady)
- •Recording image size options (ImageReady)
- •Inserting optimization settings for selected slices (ImageReady)
- •Playing actions
- •Setting playback options (Photoshop)
- •Editing actions
- •Rearranging actions and commands
- •Recording additional commands
- •Rerecording and duplicating actions and commands
- •Deleting actions and commands
- •Changing action options
- •Managing actions in the Actions palette
- •Saving and loading actions (Photoshop)
- •Saving actions (ImageReady)
- •Organizing sets of actions (Photoshop)
- •Using the Batch command (Photoshop)
- •Using droplets
- •Creating a droplet from an action
- •Creating droplets for use on different operating systems
- •Editing droplets (ImageReady)
- •Using droplets to automate optimization settings (ImageReady)
- •Using the Automate commands (Photoshop)
- •External automation
- •Creating templates for data-driven graphics (ImageReady)
- •About data-driven graphics
- •Using variables
- •Using data sets
- •Previewing data-driven graphics
- •Saving templates for use with other Adobe products
- •Macintosh Shortcuts
- •Viewing
- •Selecting and moving objects
- •Painting
- •Editing
- •Path editing*
- •Slicing and Optimizing
- •Windows Shortcuts
- •Viewing
- •Selecting and moving objects
- •Painting
- •Editing
- •Path editing*
- •Slicing and Optimizing
- •Legal Notices
- •Copyright
- •Index
Adobe Photoshop Help |
|
UsingType |
|
|
|
Using Help | Contents | Index |
Back |
353 |
To change the leading: |
|
|
In the Character palette, do one of the following: |
|
|
•Choose the desired leading from the Leading menu .
•Select the existing leading value, and enter a new value.
To change the default auto leading percentage:
1Display the Paragraph palette.
2Choose Justification from the palette menu.
3For Auto Leading, specify a new default percentage.
Specifying kerning and tracking
Kerning is the process of adding or subtracting space between specific letter pairs.You can control kerning manually, or you can use automatic kerning to turn on the kerning built into the font by the font designer. Tracking is the process of creating an equal amount of spacing across a range of letters.
Positive kerning or tracking values move characters apart (adding to the default spacing); negative values move characters closer together (reducing the default spacing). Kerning and tracking values are measured in units that are 1/1000 of an em space. The width of an em space is relative to the current type size. In a 1-point font, 1 em corresponds to 1 point; in a 10-point font, 1 em corresponds to 10 points. Because kerning and tracking units are 1/1000 em, 100 units in a 10-point font are equivalent to 1 point.
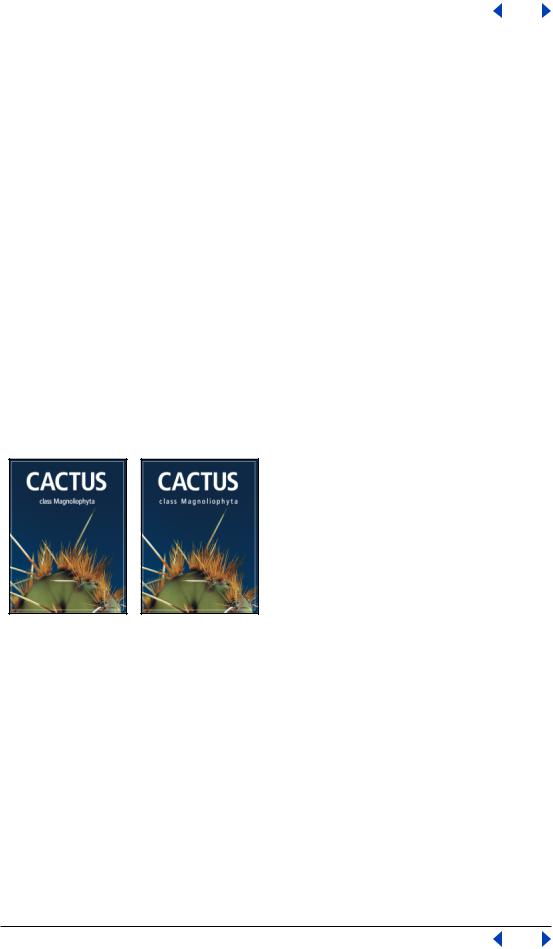
Default, and tracking set to 350
To use a font’s built-in kerning information:
In the Character palette, choose Metrics (Photoshop) or Auto (ImageReady) from the Kerning menu .
Note: The Metrics option replaces the Auto Kern option in previous versions of Photoshop.
To adjust kerning manually:
1 Click with a type tool to set an insertion point between two characters.
Note: If a range of type is selected, you can’t manually kern the characters. Instead, use tracking.
2In the Character palette, enter or select a numeric value for Kerning .
3Commit the changes to the type layer. (See “About using the type tools (Photoshop)” on page 343.)
Using Help | Contents | Index |
Back |
353 |
Adobe Photoshop Help |
|
UsingType |
|
|
|
Using Help | Contents | Index |
Back |
354 |
To specify tracking: |
|
|
In the Character palette, enter or select a numeric value for Tracking . |
|
|
Adjusting horizontal or vertical scale
Horizontal scale and vertical scale specify the proportion between the height and width of the type. Unscaled characters have a value of 100%. You can adjust scale to compress or expand selected characters in both width and height.
To adjust the horizontal or vertical scale of type:
In the Character palette, enter a new percentage for Horizontal Scale or Vertical Scale .
Specifying baseline shift
Baseline shift controls the distance that type appears from its baseline, either raising or lowering the selected type to create superscripts or subscripts.
Default, and baseline shift of 10 points
To specify baseline shift:
In the Character palette, enter a value for Baseline Shift . A positive value moves horizontal type above and vertical type to the right of the baseline; a negative value moves type below or to the left of the baseline.
To show or hide the baseline (ImageReady):
Do one of the following:
•Choose View > Show > Text Baseline.
•Choose View > Extras. This command shows or hides all selected items in the View > Show submenu. (See “Working with Extras” on page 47.)
Changing case
You can enter or format type as uppercase characters, either all caps or small caps. When you format type as small caps, Photoshop and ImageReady use the small caps designed as part of the font, if available. If the font does not include small caps, Photoshop and ImageReady generate faux small caps.
To change the case of type:
Do one of the following:
• Click the All Caps button or the Small Caps button in the Character palette.
Using Help | Contents | Index |
Back |
354 |
Adobe Photoshop Help |
|
UsingType |
|
|
|
Using Help | Contents | Index |
Back |
355 |
•Choose All Caps or Small Caps from the Character palette menu. A check mark indicates that the option is selected.
Note: Selecting Small Caps will not change characters that were originally typed in uppercase.
Making characters superscript or subscript
You can enter or format type as superscript or subscript characters. Superscript characters are reduced in size and shifted above the type baseline; subscript characters are reduced in size and shifted below the type baseline. If the font does not include superscript or subscript characters, Photoshop generates faux superscript or subscript characters.
To specify superscript or subscript characters:
Do one of the following:
•Click the Superscript button or the Subscript button in the Character palette.
•Choose Superscript or Subscript from the Character palette menu. A check mark indicates that the option is selected.
Applying underline and strikethrough
You can apply a line under horizontal type, or to the left or right of vertical type. You can also apply a line through horizontal or vertical type. The line is always the same color as the type color.
To apply an underline or strikethrough:
Choose an option:
•Click the Underline button in the Character palette to apply an underline beneath horizontal type.
•Choose Underline Left or Underline Right from the Character palette menu to apply an underline to the left or right of vertical type. You can apply an underline to the left or right, but not to both sides. A check mark indicates that an option is selected.
Note: The Underline Left and Underline Right options only appear in the Character palette menu when a type layer that contains vertical type is selected.
•Click the Strikethrough button in the Character palette to apply a horizontal line through horizontal type or a vertical line through vertical type. Alternately, choose Strikethrough from the Character palette menu.
Using ligatures and old style numerals
When working with OpenType fonts, you can use ligatures and old style typographic numerals in your type, if the font provides them. Ligatures are typographic replacements for certain pairs of characters, such as “fi” and “fl.” Old style numerals are shorter than regular numerals, and some old style numerals descend below the type baseline.
Using Help | Contents | Index |
Back |
355 |
Adobe Photoshop Help |
|
UsingType |
|
|
|
Using Help | Contents | Index |
Back |
356 |
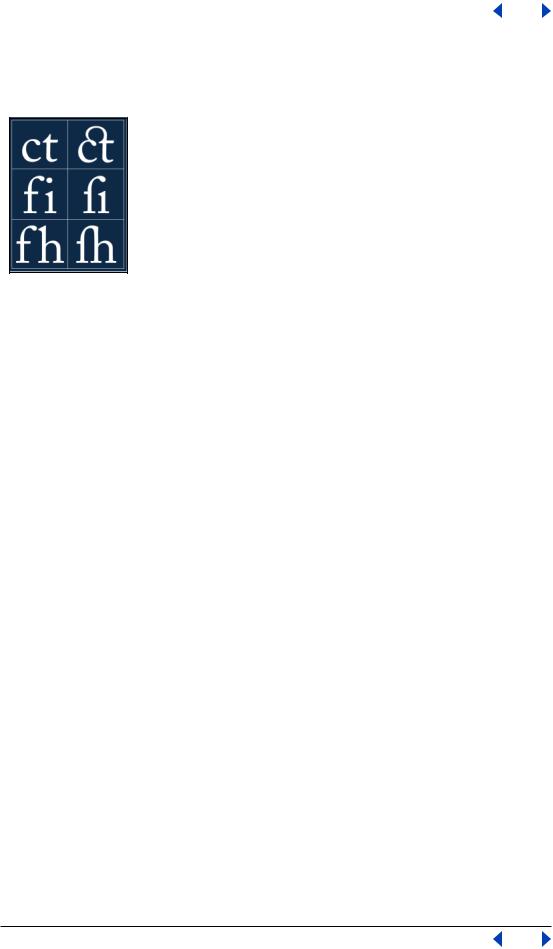
In Photoshop, you can also use alternate ligatures when working with OpenType fonts that provide them. Alternate ligatures are extra ligatures that aren't in regular use, such as “st.”
Type with Ligatures option unselected and selected
To use ligatures or old style numerals:
Choose Ligatures or Old Style from the Character palette menu. A check mark indicates that the option is selected.
To use alternate ligatures (Photoshop):
Choose Alternate Ligatures from the Character palette menu. A check mark indicates that the option is selected.
Using fractional character widths
By default, type is displayed using fractional character widths.This means that the spacing between characters varies, with fractions of whole pixels between some characters. In most situations, fractional character widths provide the best spacing for type appearance and readability. However, for type in small sizes (less than 20 points) displayed online, fractional character widths can cause type to run together or have too much extra space, making it difficult to read.
You can turn off fractional character widths to fix type spacing in whole-pixel increments and prevent small type from running together. The fractional character width setting applies to all characters on a type layer—you cannot set the option for selected characters.
To turn fractional character widths on or off:
Choose Fractional Widths from the Character palette menu. A check mark indicates that the option is selected.
Viewing text using the operating system layout
The System Layout command lets you preview text using the operating system’s default text handling. This is useful when designing user interface elements, such as dialog boxes and menus.
To turn system layout on or off:
Choose System Layout from the Character palette menu. A check mark indicates that the option is selected.
Using Help | Contents | Index |
Back |
356 |