


Adobe Photoshop Help |
|
UsingType |
|
|
|
Using Help | Contents | Index |
Back |
349 |
2Select a type tool, and click the Warp button  in the options bar; or choose Layer > Type > Warp Text.
3Choose None from the Style pop-up menu, and click OK.
Creating a work path from type (Photoshop)
Creating a work path from type lets you work with characters as vector shapes. A work path is a temporary path that appears in the Paths palette. Once you create a work path from a type layer, you can save and manipulate it like any other path. (See “Selecting paths (Photoshop)” on page 211.) You cannot edit characters in the path as text; however, the original type layer remains intact and editable.
To create a work path from type:
Select a type layer, and choose Layer > Type > Create Work Path.
Note: You cannot create work paths from fonts that don't include outline data (such as bitmap fonts).
Converting type to shapes (Photoshop)
When you convert type to shapes, the type layer is replaced by a layer with a vector mask. You can edit the vector mask and apply styles to the layer; however, you cannot edit characters in the layer as text. (See “Creating and editing vector masks” on page 317.)
To convert type to shapes:
Select a type layer, and choose Layer > Type > Convert to Shapes.
Note: You cannot create shapes from fonts that don't include outline data (such as bitmap fonts).
Formatting characters
Photoshop and ImageReady give you precise control over individual characters in type layers, including font, size, color, leading, kerning, tracking, baseline shift, and alignment. You can set type attributes before you enter characters or reset them to change the appearance of selected characters in a type layer.
Selecting characters
Before you can format individual characters, you must select them. You can select one character, a range of characters, or all characters in a type layer.
To select characters:
1 Do one of the following:
•(Photoshop) Select the horizontal type tool  or the vertical type tool
  .
.
•(ImageReady) Select the type tool  .
.
2Select the type layer in the Layers palette, or click in the text flow to automatically select a type layer.
3Position the insertion point in the text, and do one of the following:
•Drag to select one or more characters.
•Click in the text and then shift-click to select a range of characters.
Using Help | Contents | Index |
Back |
349 |

Adobe Photoshop Help |
|
UsingType |
|
|
|
Using Help | Contents | Index |
Back |
350 |
•Choose Select > All to select all the characters in the layer.
•Double-click a word to select it. Triple-click a line to select it. Quadruple-click a paragraph to select it. Quintuple-click anywhere in the text flow to select all characters in a bounding box.
•To use the arrow keys to select characters, hold down Shift and press the Right arrow or Left arrow key. To use the arrow keys to select words, hold down Shift+Ctrl (Windows) or Shift+Command (Mac OS) and press the Right arrow or Left arrow key.
4 To select all the characters in a layer without positioning the insertion point in the text flow, select the type layer in the Layers palette, and then double-click the layer’s type icon  .
.
Note: In Photoshop, selecting and formatting characters in a type layer puts the type tool into edit mode. (See “About using the type tools (Photoshop)” on page 343.)
To show or hide selection highlighting (ImageReady):
Do one of the following:
•Choose View > Show > Text Selection.
•Choose View > Extras. This command shows or hides all selected items in the View > Show submenu. (See “Working with Extras” on page 47.)
Using the Character palette
The Character palette provides options for formatting characters. Some formatting options are also provided in the options bar.
To display the Character palette:
Do one of the following:
•Choose Window > Character, or click the Character palette tab if the palette is visible but not active.
•With a type tool selected, click the palette button  in the options bar.
Choosing a font
A font is a complete set of characters—letters, numbers, and symbols—that share a common weight, width, and style. When you select a font, you can select the font family and its type style independently. The font family is a collection of fonts sharing an overall typeface design; for example,Times. A type style is a variant version of an individual font in the font family, for example, Regular, Bold, or Italic. The range of available type styles varies with each font. If a font doesn’t include the style you want, you can apply faux styles— simulated versions of bold, italic, superscript, subscript, all caps, and small caps styles.
In addition to the fonts installed on your system, Photoshop uses font files in these local folders:
Windows Program Files/Common Files/Adobe/Fonts
Mac OS 9.x System Folder/Application Support/Adobe/Fonts
Mac OS X Library/Application Support/Adobe/Fonts
If you install a Type 1, TrueType, OpenType, or CID font into the local Fonts folder, the font appears in Adobe applications only.
Using Help | Contents | Index |
Back |
350 |
Adobe Photoshop Help |
|
UsingType |
|
|
|
Using Help | Contents | Index |
Back |
351 |
To choose a font family and style:
1 Choose a font family from the Font Family pop-up menu in the Character palette or options bar. If more than one copy of a font is installed on your computer, an abbreviation follows the font name: (T1) for Type 1 fonts, (TT) for TrueType fonts, or (OT) for OpenType fonts.
In Photoshop, you can choose a font family and style by typing the desired name in  the text box. As you type, the name of the first font or style beginning with that letter appears. Continue typing until the correct font or style name appears. Be sure to deselect
the font name before entering new type in the image.
2 Do one of the following:
•Choose a font style from the Font Style pop-up menu in the Character palette or options bar.
•If the font family you chose does not include a bold or italic style, click the Faux Bold
button  or the Faux Italic button
  in the Character palette to apply a simulated style. Alternately, choose Faux Bold or Faux Italic from the Character palette menu.
Note: You cannot apply Faux Bold formatting to warped type. (See “Warping type layers” on page 348.)
Choosing a type size
The type size determines how large the type appears in the image:
•In Photoshop, the default unit of measurement for type is points. One PostScript point is equal to 1/72 of an inch in a 72-ppi image; however, you can switch between using the PostScript and traditional definitions of point size. You can change the default unit of measurement for type in the Units & Rulers section of the Preferences dialog box.
•In ImageReady, pixels are the only unit of measurement for type. This is because the ImageReady application is tailored to creating images for online media, in which pixels are the standard unit of measurement.
To choose a type size:
In the Character palette or options bar, enter or select a new value for Size  . To use an alternate unit of measurement, enter the unit (in, cm, mm, pt, px, or pica) after the value in the Size text box. The value you enter is converted to the default unit of measurement.
To specify the default unit of measurement for type (Photoshop):
1 Do one of the following:
• In Windows and Mac OS 9.x, choose Edit > Preferences > Units & Rulers.
• In Mac OS X, choose Photoshop > Preferences > Units & Rulers.
2 Select a unit of measurement for Type.
To specify the point size definition (Photoshop):
1 Do one of the following:
•In Windows and Mac OS 9.x, choose Edit > Preferences > Units & Rulers.
•In Mac OS X, choose Photoshop > Preferences > Units & Rulers.
Using Help | Contents | Index |
Back |
351 |
Adobe Photoshop Help |
|
UsingType |
|
|
|
Using Help | Contents | Index |
Back |
352 |
2 Select an option for Point/Pica Size. Traditional points are slightly smaller than PostScript points.
Changing the type color
The type you enter gets its color from the current foreground color; however, you can change the type color before or after you enter type. When editing existing type layers, you can change the color of individual, selected characters or all type in a layer.
To change the type color:
Do one of the following:
•Click the Color selection box in the options bar or Character palette, and select a color using the color picker. In ImageReady, you can also select an option from the Color selection box pop-up menu: Foreground Color, Background Color, Other (to use the color picker), or a color from the pop-up palette.
•Use fill shortcuts. To fill with the foreground color, press Alt+Backspace (Windows) or Option+Delete (Mac OS); to fill with the background color, press Ctrl+Backspace (Windows) or Command+Delete (Mac OS).
•Apply an overlay layer style to the type layer to apply a color, pattern, or gradient on top of the existing color. (See “Using layer effects and styles” on page 301.) In ImageReady, you can drag a color from the toolbox color selection box, the Color palette, the Color Table palette, or the Swatches palette, and drop it onto a type layer to automatically apply a color overlay style. Applying an overlay layer style affects all characters in the type layer; you cannot use this method to change the color of individual characters.
•Click the foreground color selection box in the toolbox, and select a color using the color picker. Or click a color in the Color palette, the Swatches palette, or the Color Table palette (ImageReady). To use this method to change the color of an existing type layer, you must first select characters on that layer.
Specifying leading
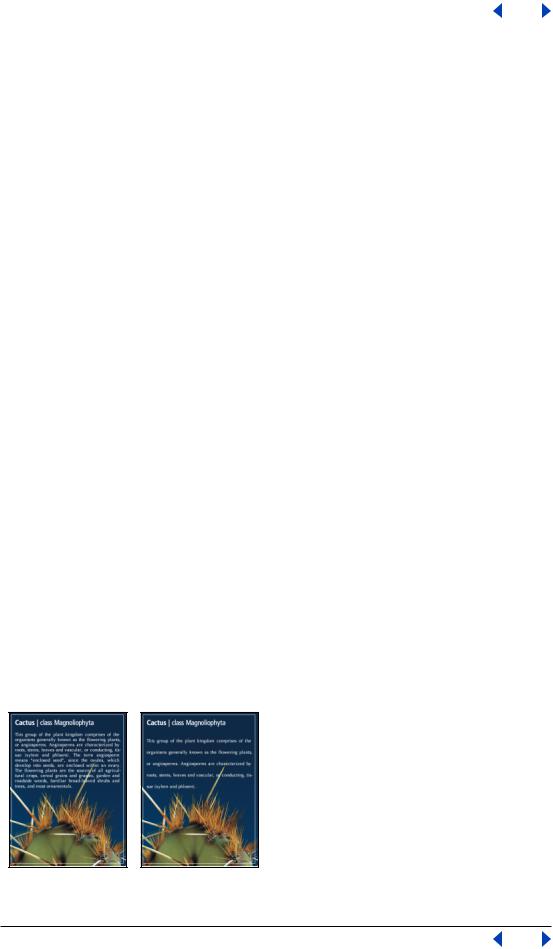
The amount of space between lines of type is called leading. For Roman type, leading is measured from the baseline of one line of type to the baseline of the next line. The baseline is the invisible line on which most type lies. You can apply more than one leading amount within the same paragraph; however, the largest leading value in a line of type determines the leading value for that line.
You can use other options to set leading for Chinese, Japanese, or Korean type. (See “Specifying how leading is measured” on page 364.)
5-point type with 6-point leading, and with 12-point leading
Using Help | Contents | Index |
Back |
352 |