

Related Topics
How to add, delete, move, and merge sections, Page 89
HANDS-ON (Multiple Section Reports)
How to prevent variable length objects from overwriting each other
When you place subreports or other variable length objects above other objects in one section of your report and you have the Can Grow option for the variable length object toggled on in the Format Editor, that object may overprint objects below it unless you have:
●expanded the section to fit the maximum size of the object, and
●spaced the objects, allowing enough space for the first object to complete printing before the second one begins. See
Types of formatting properties, Page 233.
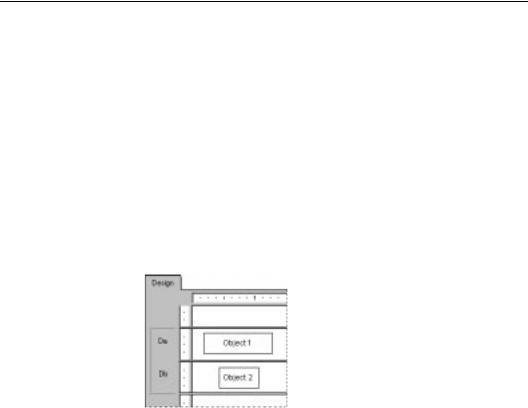
You can eliminate this overprinting problem by creating multiple sections in an area and placing objects below the variable length object in their own section(s).
Now, when the report runs, the section with the variable length object will finish printing before the section below it prints and you will get the results you want. See TWO UNRELATED REPORTS, Page 440.
Multiple Section Reports |
215 |
NOTE: Memo and BLOB fields, as well as subreports, can cause overprinting.
How to work with text objects
Move/Resize mode
Edit mode
You will use many of the capabilities of text objects as you create form letters. A brief discussion of text objects should make it easier for you to create the form letter in the next section.
●A text object can contain both text and fields; you will use both in this example.
●You can resize text objects; you will be resizing the text object so it prints as a letter.
Text objects operate in two modes:
1.the move/resize mode, and
2.the edit mode.
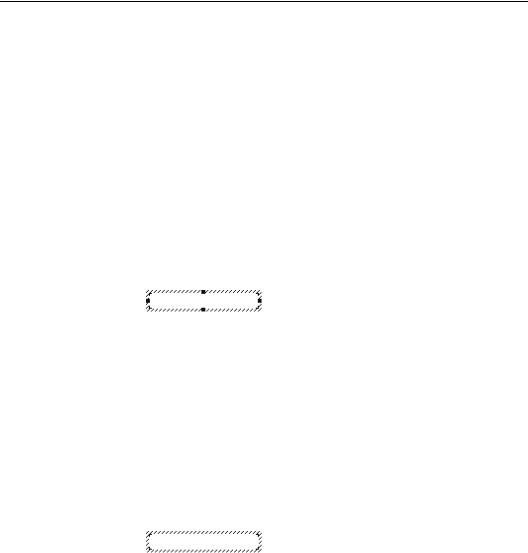
When the object is in the move/resize mode, it appears as a broken line frame with resizing handles.
In this mode, you can resize it by dragging any of the resizing handles or move it by placing the cursor inside the object and dragging it to a new location. You can also insert fields in this mode but you can not insert text. You put a text object into the move/resize mode in one of two ways:
1.by clicking the text object when it is inactive, or
2.by clicking the frame when the object is in edit mode.
When the object is in the edit mode, it appears as a broken line frame without sizing handles and with an in-place ruler at the top of the tab.
216 |
Seagate Crystal Reports User’s Guide |
When you first place a text object, the program sets it in the edit mode. You can also put a text object into the edit mode by doubleclicking it if it is inactive or in the move/resize mode.
Each text object contains word processor capabilities including the ability to change the fonts for individual characters and fields, and automatic word wrap. In the edit mode you can insert text and such non-text objects as database fields and formulas. Whenever the object is in edit mode, it contains an insertion point, a flashing vertical line that indicates the position that typed text or inserted fields will begin.
The insertion point moves as you type, automatically staying to the right of the last character. It also moves when you insert a field, automatically staying to the right of the field. It moves one character position at a time when you press the space bar. It moves down one line, to the inside left edge of the text object, when you press Enter. It moves to your cursor position when you click anywhere within the existing text.
As you work through the tutorials for multiple sections, it is always expected that you will type or place fields at the existing insertion point unless you are told otherwise.
●To select text in a text object (to delete it, to change a font, and so on), position the cursor over the text and, when the I- beam cursor appears, drag the cursor to highlight the text you want to select. See Cursors, Page 64.
●To select a field in a text object, position the cursor over the field and, when the I-beam cursor appears, right-click.
●To insert text, type in the text you want and it appears at the insertion point.
●To insert a field, you must insert it using a menu command, a button, or a dialog box. You can not simply drag a field into a text object from elsewhere in the report. When the program displays the placement frame, move the frame to the text object. The placement frame changes to a drag and drop cursor when it is in a position where the field can be inserted in the text object. See Cursors, Page 64.
Multiple Section Reports |
217 |
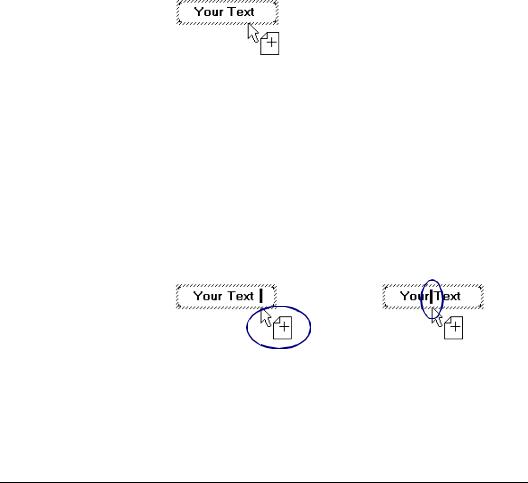
NOTE: It is critical that you see the drag and drop cursor before you place the field. If you do not see it, you might place the field so it overlays the text object instead of being inserted in it. It may appear to be inside the text object, but if you move the object the field will not move with it.
●The insertion point is tied into the drag and drop cursor. If you have existing text or fields in the text object, the insertion point moves as you move the drag and drop cursor, enabling you to pick the exact position where you want to place the field. The program always places the field at the insertion point.
As you move the drop cursor... |
the insertion point moves. |
Related Topics
How to insert text objects, Page 120
How to create a form letter using a text object
While form letters themselves are not necessarily multi-section reports, they are often used in multi-section reports to generate custom mailings. The topic, How to print conditional messages in form letters, Page 225, explains how to use multiple form letters or multiple versions of the same form letter for custom mailings. This topic shows you how to create a form letter.
You are going to use a text object to create a form letter. The form letter you create will be tied to a database table so that each letter is customized with company information from a different record.
218 |
Seagate Crystal Reports User’s Guide |
Creating the
form letter
If you have difficulty performing any of the steps in this tutorial, please see How to work with text objects, Page 216.
The letter will consist of a date, an inside address, a salutation, a one paragraph letter body, and a closing section.
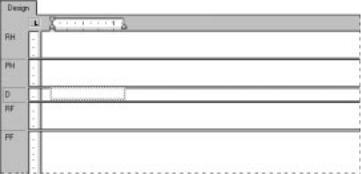
Create a report using the Customer Table of CRAZE.MDB. The Design Tab appears with the Database Tab active in the Insert Fields dialog box.
Since you do not want field titles to appear above the fields that you insert into the letter, toggle the Insert Detail Field Titles option off on the Layout Tab of the File Options dialog box.
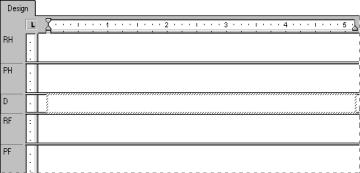
! Insert a text object in the Details section of your report.
"Click the text object frame to put the object in move/resize mode.
#Drag the resizing handle on the right side of the object to the right edge of the Design Tab. This will make the object about eight inches wide, the approximate width of a page. You may have to stop resizing, scroll the window, and resize some more to accomplish this.
Multiple Section Reports |
219 |
$Double-click inside the text object to place it in edit mode, ready for you to begin your work. When you do this, the insertion point will be positioned at the extreme left, inside the object.
DATE
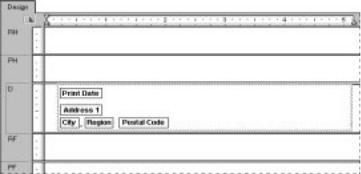
To put a date into the letter, choose the PRINT DATE FIELD command from the Insert|Special Field menu, drag the placement frame into the text object, and place it at the insertion point.
NOTE: If you want to change the way the date is formatted in the letter, click the border of the text object to put it in move/resize mode, highlight the PrintDate field, choose FORMAT [PRINTDATE]
from the shortcut menu that appears, and make your modifications on the Date Tab of the Format Editor when it appears.
Press Enter twice to put some white space between the date and the inside address and move the insertion point down within the text object.
220 |
Seagate Crystal Reports User’s Guide |
INSIDE ADDRESS
To create the inside address, drag database fields into the text object from the Customer table in the Insert Fields dialog box.
Drag in the Address 1 field, place it at the insertion point, and press Enter to place the field. The insertion point will move down to the line below.
Drag in the City field and place it at the insertion point.
! Type a comma followed by a space.
" Drag in the Region field and place it at the insertion point.
# Type in two spaces.
$Finally, drag in the Postal Code field, place it at the insertion point, and press Enter to place the field. The insertion point will move down to the line below.
%Press Enter one more time to move the insertion point down one more line to the position where you want to start the salutation. This completes the inside address.
NOTE: When you place a field into a text object, it is automatically trimmed on both the left and right sides so that it contains no extra white space.
Multiple Section Reports |
221 |
SALUTATION
Press Enter four times to move the insertion point down.
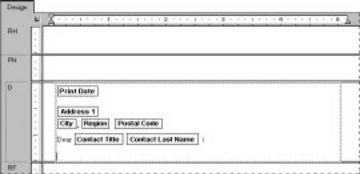
Type in the word “Dear” and a space. (Do not include the quotation marks.)
!From the Insert Fields dialog box, highlight the Contact Title field from the Customer table and drag it into the text object, placing it immediately after the space.
"Type in a space. The program positions the insertion point immediately after the space.
#Again from the Insert Fields dialog box, drag the Contact Last Name field into the text object and place it at the insertion point. The insertion point moves to the right of the field.
$Type a colon “:” at the insertion point (do not include the quotation marks) and press Enter to put in a carriage return and move the insertion point to the next line.
222 |
Seagate Crystal Reports User’s Guide |
LETTER BODY
Now type “Your company” (do not include the quotation marks) and type a comma followed by a space.
Drag the Customer Name field into the text object and place it at the insertion point, just after the space.
! Type a comma followed by a space.
"Type the following text (do not include the quotation marks): “helped make 1995 an outstanding year for CRAZE Mountain Bikes. I want to thank you and your staff for your support. I hope 1996 will be a banner year for you.”
# Press Enter twice.
$Type “Sincerely yours” (do not include the quotation marks) followed by a comma, then press Enter four times.
%Finally, to complete the form letter, type your name. The Design Tab should look similar to this:
Multiple Section Reports |
223 |