

GPS NAVIGATION
5.18 FLIGHT PLANNING (MFD)
This section describes the extensive capability of the G1000 as it pertains to flight plans and flight planning, airways, and vertical navigation.
Creating a new stored flight plan:
1)Press the FPL Key.
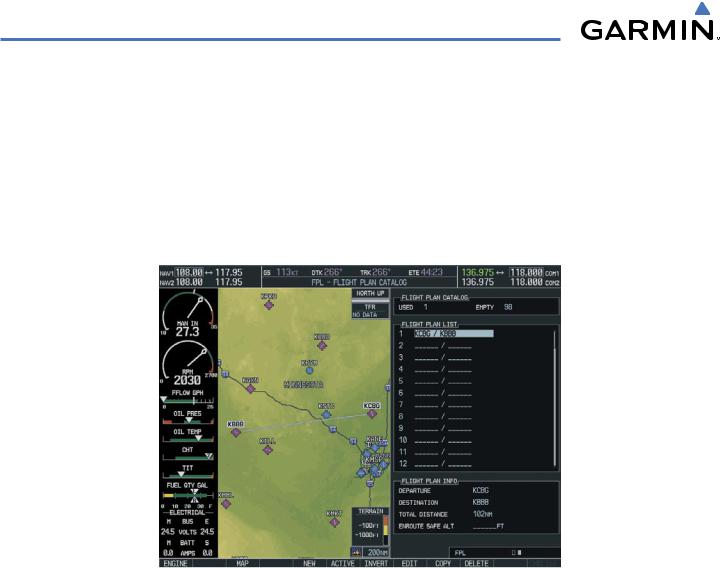
2)Turn the small FMS Knob to display the Flight Plan Catalog Page (Figure 5-58).
Figure 5-58 Flight Plan Catalog Page
3)Press the NEW Softkey. The Stored Flight Plan Page is displayed with a blank field for the first empty storage location (Figure 5-59).
5-64 |
Garmin G1000 Pilot’s Guide for Cessna Nav III |
190-00498-02 Rev.A |
GPS NAVIGATION
Figure 5-59 Stored Flight Plan Page
4)Enter the identifier, facility, or city name of the departure waypoint, or select a waypoint from the list of most recently entered waypoints.
5)Press the ENT Key.
6)Enter the identifier for each additional flight plan waypoint.
7)Once all waypoints have been entered, press the FMS Knob to store the flight plan and return to the Flight Plan Catalog Page.
OR:
1)Press the FPL Key.
2)Turn the small FMS Knob to display the Flight Plan Catalog Page.
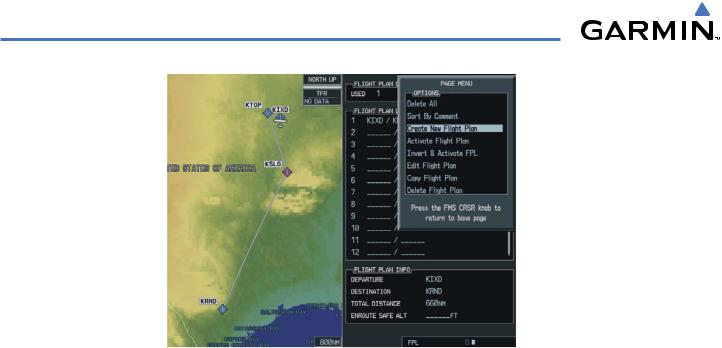
3)Press the MENU Key.
4)Highlight ‘Create New Flight Plan’.
190-00498-02 Rev.A |
Garmin G1000 Pilot’s Guide for Cessna Nav III |
5-65 |
GPS NAVIGATION
Figure 5-60 Create Flight Plan Menu Option
5)Press the ENT Key. The Stored Flight Plan Page is displayed, with a blank flight plan for the first empty storage location.
6)Enter the identifier, facility, or city name of the departure waypoint and press the ENT Key, or select a waypoint from the list of recently entered waypoints.
7)Enter the identifier for each additional flight plan waypoint.
8)Once all waypoints have been entered, press the FMS Knob to store the flight plan and return to the Flight Plan Catalog Page.
Viewing a stored flight plan:
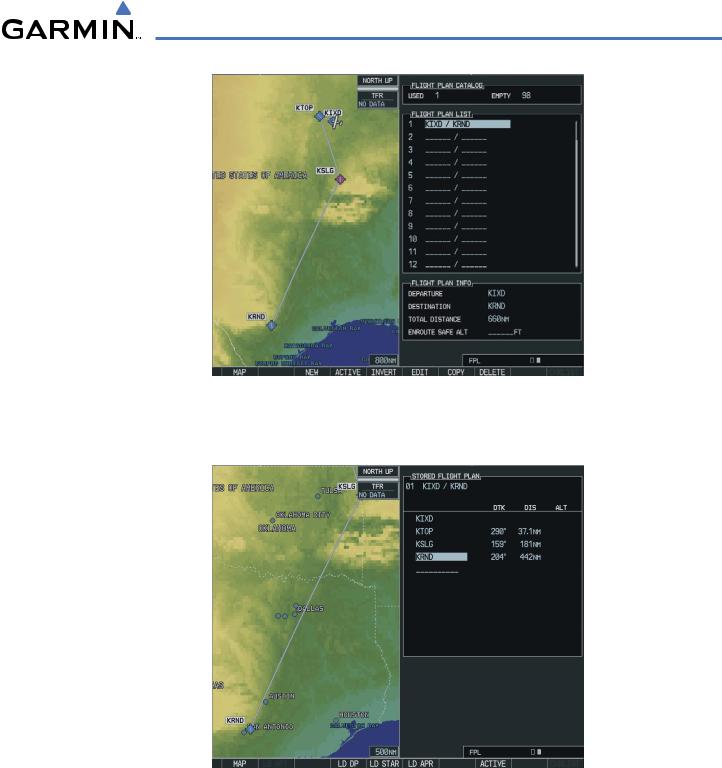
1)Select the Flight Plan Catalog Page and press the FMS Knob to activate the cursor.
2)Highlight the desired flight plan from the list.
3)The Flight Plan Information is displayed showing departure,destination,total distance,and enroute safe altitude information for the selected Flight Plan.
5-66 |
Garmin G1000 Pilot’s Guide for Cessna Nav III |
190-00498-02 Rev.A |
GPS NAVIGATION
Figure 5-61 Flight Plan Information
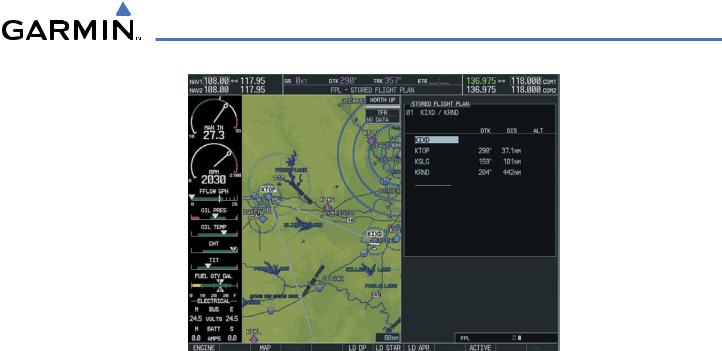
4)Press the ENT Key or the EDIT Softkey to open the Stored Flight Plan Page and view the waypoints in the flight plan (Figure 5-61).
Figure 5-62 Viewing Flight Plan Waypoints
5) Press the FMS Knob to exit the Stored Flight Plan Page.
Viewing the active flight plan:
Press the FPL Key.
190-00498-02 Rev.A |
Garmin G1000 Pilot’s Guide for Cessna Nav III |
5-67 |
GPS NAVIGATION
Adding a waypoint to a stored flight plan:
1)On the Flight Plan Catalog Page, press the FMS Knob to activate the cursor.
2)Highlight the desired flight plan.
3)Press the EDIT Softkey. The Stored Flight Plan page opens.
4)To add a waypoint to the flight plan, select the point in the plan where the new waypoint is to be added. If an existing waypoint is highlighted, the new waypoint is placed directly in front of this waypoint.
5)Enter the identifier, facility, or city of the new waypoint.
6)Press the ENT Key. The new waypoint now exists in the flight plan.
OR:
1)From the Flight Plan Catalog Page, press the FMS Knob to activate the cursor.
2)Highlight the desired flight plan.
3)Press the ENT Key. The Stored Flight Plan page opens.
4)To add a waypoint to the flight plan, select the point in the plan where the new waypoint is to be added. If an existing waypoint is highlighted, the new waypoint is placed directly in front of this waypoint.
5)Enter the identifier, facility, or city of the new waypoint.
6)Press the ENT Key. The new waypoint now exists in the flight plan.
Removing individual waypoints from the flight plan (except waypoints in the final approach segment):
1)From the Active Flight Plan Page, select the waypoint that is to be deleted.
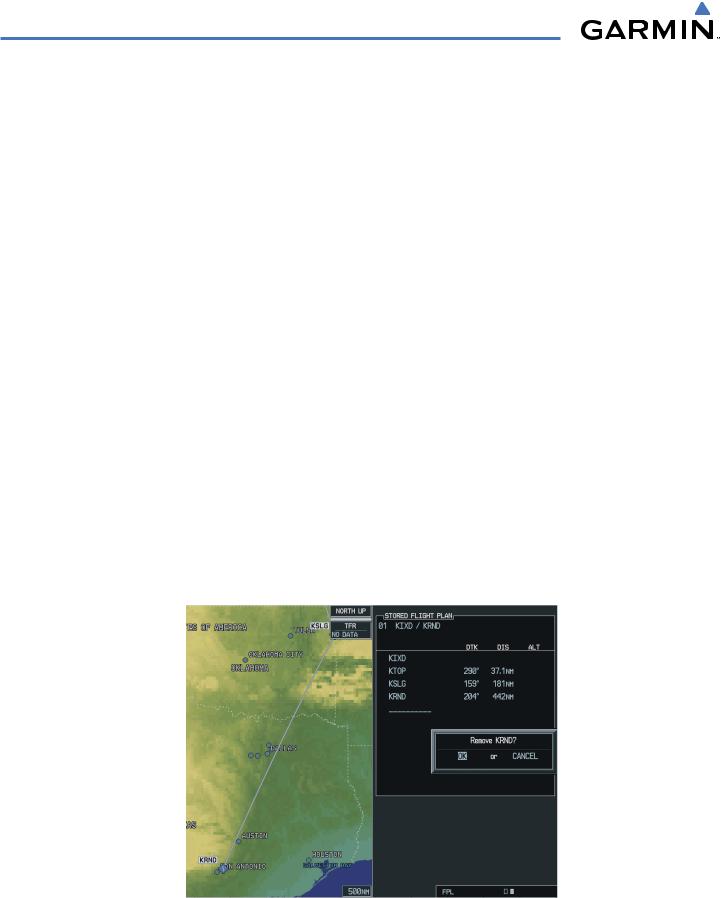
2)Press the CLR Key. A confirmation window is displayed listing the waypoint (Figure 5-63).
Figure 5-63 Confirmation Window
5-68 |
Garmin G1000 Pilot’s Guide for Cessna Nav III |
190-00498-02 Rev.A |
GPS NAVIGATION
3)With‘OK’ highlighted,press the ENT Key. To cancel the removal request,highlight‘CANCEL’ and press the ENT Key.
Switching waypoint data between leg-to-leg waypoint information and cumulative waypoint information:
1)Select the FPL Key.
2)Press the CUM Softkey to view cumulative waypoint information or press the LEG-LEG Softkey to view leg-to- leg waypoint information.
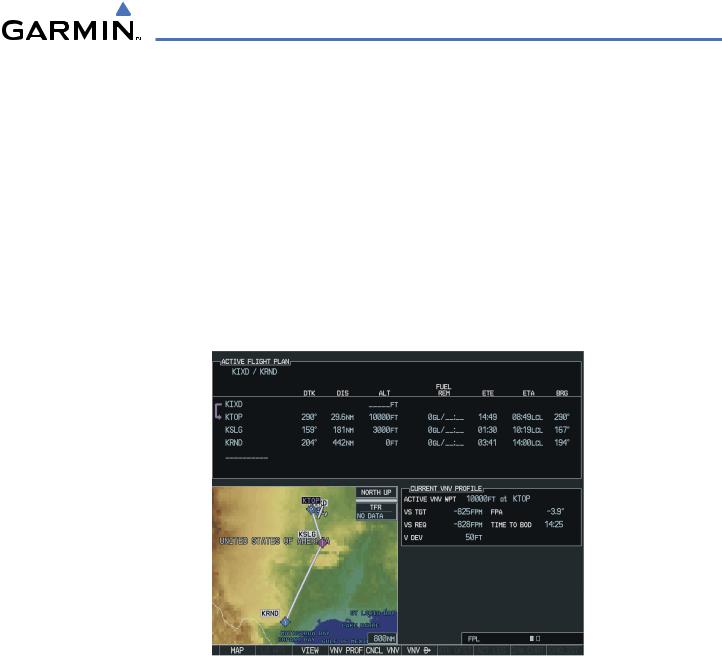
Switching views between wide and narrow to show more or less leg data:
1)Select the FPL Key.
2)Press the WIDE Softkey to view additional leg data or press the NARROW Softkey to less leg data.
Figure 5-64 Flight Plan Wide View
Changing the flight plan name, comment:
1)Press the FMS Knob from the Active Flight Plan Page.
2)Highlight the flight plan title field.
3)Use the FMS Knob to change/edit the title.
190-00498-02 Rev.A |
Garmin G1000 Pilot’s Guide for Cessna Nav III |
5-69 |
GPS NAVIGATION
Figure 5-65 Changing Flight Plan Title
4) Press the ENT Key.
‘Activate Leg’ selects the highlighted leg as the “active leg” (the flight plan leg which is currently used for navigation guidance).
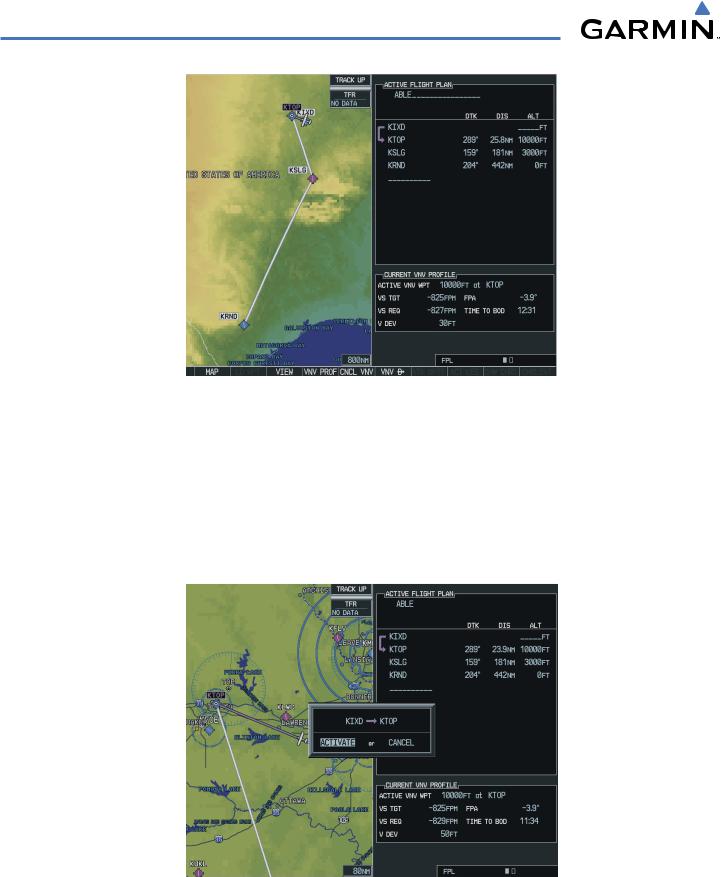
Activating a flight plan leg:
1)From the Active Flight Plan Page, highlight the desired destination waypoint.
2)Press the ACT LEG Softkey. An ‘Activate’ window is displayed (Figure 5-66).
Figure 5-66 Activate Window
5-70 |
Garmin G1000 Pilot’s Guide for Cessna Nav III |
190-00498-02 Rev.A |
GPS NAVIGATION
3)With ‘Activate’ highlighted, press the ENT Key. To cancel the operation, select ‘CANCEL’ and press the ENT Key.
OR:
1)From the Active Flight Plan Window, highlight the desired destination waypoint.
2)Press the MENU Key.
3)Select ‘Activate Leg’ (Figure 5-67).
Figure 5-67 Activate Leg Menu Option
4)Press the ENT Key. An ‘Activate’ window is displayed.
5)With ‘Activate’ highlighted, press the ENT Key.
Whenever an approach, departure, or arrival is loaded into the active flight plan, a set of approach, departure or arrival waypoints is inserted into the flight plan along with a header line describing the instrument procedure the pilot selected. The original enroute portion of the flight plan remains active (unless an instrument procedure is activated) when the procedure is loaded.
Flight plans can also be stored with an approach, departure, or arrival. The active flight plan is erased when the system is turned off and overwritten when another flight plan is activated. When storing flight plans with an approach, departure or arrival, the G1000 uses the waypoint information from the current database to define the waypoints. If the database is changed or updated, the G1000 automatically updates the information if the procedure has not been modified. If an approach, departure or arrival procedure is no longer available, the procedure is deleted from the flight plan and an alert is displayed.
190-00498-02 Rev.A |
Garmin G1000 Pilot’s Guide for Cessna Nav III |
5-71 |
GPS NAVIGATION
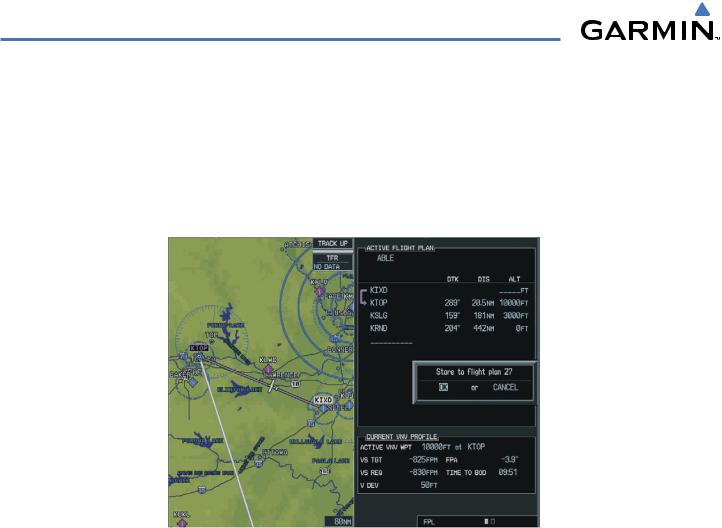
Storing an active flight plan from the Active Flight Plan Page:
1)Press the MENU Key.
2)Highlight ‘Store Flight Plan’.
3)Press the ENT Key.
4)With ‘OK’ highlighted, press the ENT Key. The flight plan is stored in the next available position in the flight plan list on the Flight Plan Catalog Page.
Figure 5-68 Storing a Flight Plan
After navigating along a flight plan, the route can be reversed for navigation guidance back to the original departure waypoint.
Inverting and activating a stored flight plan:
1)Press the FPL Key.
2)Turn the small FMS Knob to display the Flight Plan Catalog Page.
3)Highlight desired flight plan.
4)Press the INVERT Softkey from the Flight Plan Catalog Page. The ‘Invert and Activate stored flight plan?’ Window is displayed.
5-72 |
Garmin G1000 Pilot’s Guide for Cessna Nav III |
190-00498-02 Rev.A |

GPS NAVIGATION

