

Configuring Multiple Interfaces and AAA on the PIX Firewall |
335 |
toddfw(config)#static (perimeter, outside) 192.168.30.6 192.168.40.6
netmask 255.255.255.0
toddfw(config)#conduit permit host 192.168.30.5 eq smtp any
toddfw(config)#fixup protocol smtp 25
toddfw(config)#^Z
toddfw#
Configuring Multiple Interfaces and AAA on the PIX Firewall
Congratulations! You have now covered the basics of configuring the PIX Firewall and learned how to allow both inbound and outbound traffic. These functions are the “meat and potatoes” of the configuration; everything else is merely details. Unfortunately, mere details have caused many a pager to go off at 2:00 A.M.! In this section, you need to look at some of these details. This section discusses two issues: configuring multiple interfaces and how to integrate PIX into the AAA environment.
Configuring Multiple Interfaces
The first section of this appendix discussed the interfaces available on the PIX Firewall and how they must be purchased through either Cisco or a Cisco reseller. There are many ways to include the PIX Firewall in your network. Let’s take a look at two methods.
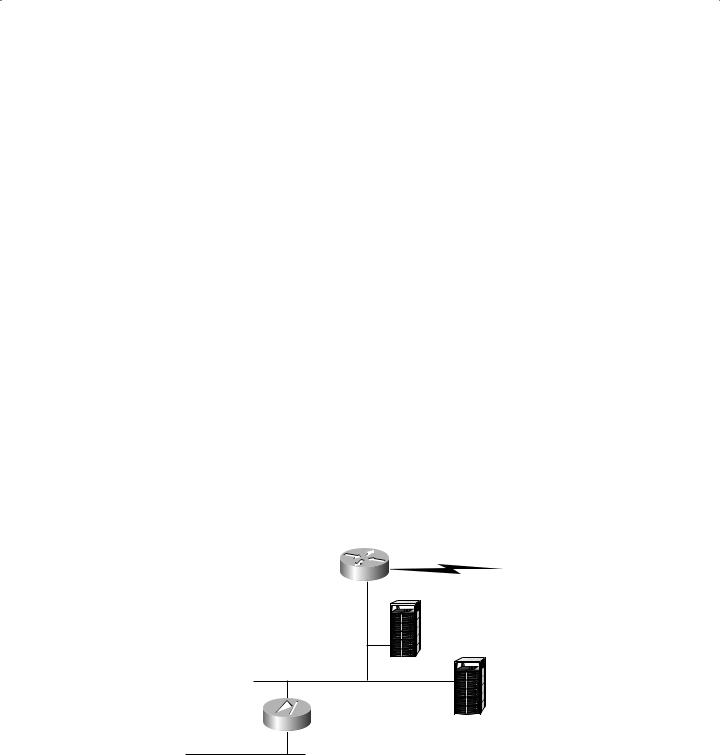
The following illustration depicts a typical three-part firewall, where there is an external router, an internal router (the PIX box), and a DMZ:
External router
|
E-mail server |
|
DMZ |
PIX Firewall |
DNS server |
|
|
Internal LAN |
|
Copyright ©2003 SYBEX Inc., 1151 Marina Village Parkway, Alameda, CA 94501. |
www.sybex.com |
336 Appendix A Introduction to the PIX Firewall
Notice that the PIX box is in an ideal position to protect the internal network from outside threats. However, what is protecting any assets placed in the DMZ? Of course, you can use ACLs on the router to offer some protection, but you may not be fully using the capabilities of your PIX Firewall.
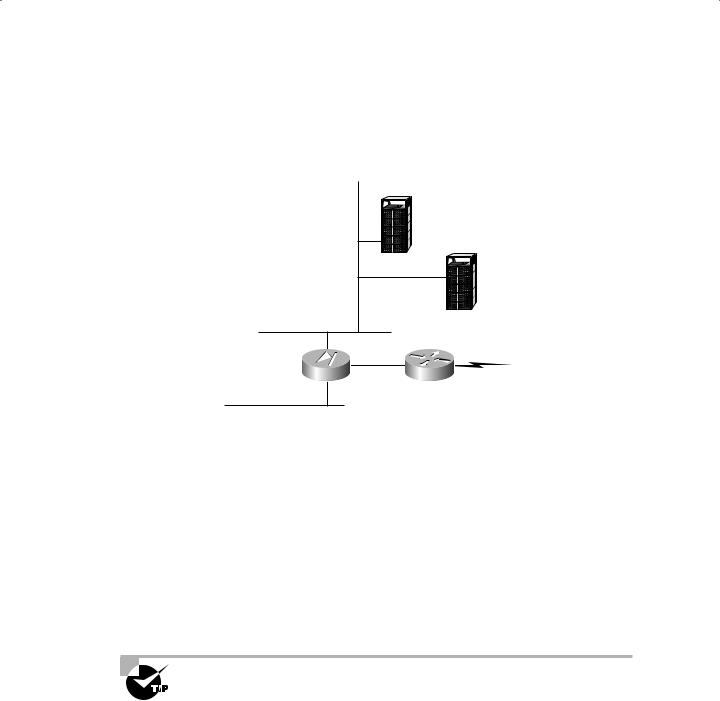
Next, consider this network diagram:
DNS server
DMZ |
E-mail server |
PIX Firewall
External router
Internal LAN
Now the PIX Firewall has been moved to act as a router between the internal network, the external network, and both DMZ networks. The PIX Firewall still has the ability to protect internal assets as in the typical three-part firewall scenario, but it now sits between the external, untrusted Internet and one DMZ. This gives the PIX Firewall the ability to offer protection to DMZ-located servers as well as internal servers. In situations such as hosting mail gateways (as discussed earlier), this setup allows the PIX Firewall to use its Mail Guard feature to protect assets otherwise left open in a DMZ.
Of course, to work between these networks, the PIX Firewall needs additional interfaces. With the addition of interfaces, the configuration becomes more complex. Basic configuration commands extend rather simply. However, the configuration of both outbound and inbound traffic becomes significantly more complex. To figure it out, draw a diagram of the PIX Firewall showing all interfaces, their names, and their security levels. Next, put this information in a table. Then you can decide where to configure inbound and outbound access.
Visit the Cisco website (www.cisco.com) to check current limitations and the availability of physical interfaces for different PIX Firewalls.
Implementing AAA on the PIX Firewall
Now that the firewall is in place, it’s time to incorporate it into the AAA environment. The first step is to do the initial AAA configuration, where you specify the location of the security servers
Copyright ©2003 SYBEX Inc., 1151 Marina Village Parkway, Alameda, CA 94501. |
www.sybex.com |

Configuring Multiple Interfaces and AAA on the PIX Firewall |
337 |
and the protocols used to communicate with them. You’ll then learn how to enable each A in
AAAseparately.
AAA can be used to authenticate in a number of different situations on the PIX Firewall:
FTP, HTTP, and Telnet traffic, either inbound or outbound
Enable mode access to the PIX Firewall
Serial console access on the PIX Firewall
Initial AAA Configuration
The first thing to do is to specify a security server to be used for authentication and the protocol to be used for this communication. Earlier in this book, we discussed in some detail the operation of CSNT as a security server, as well as the TACACS+ and RADIUS protocols. Here, you’ll begin configuring your PIX Firewall to use a security server. Suppose that you have the network configuration shown here:
|
|
|
|
PIX Firewall |
|
|
|
Inside 100 |
Outside 0 |
|
|
172.16.10.1 |
192.168.30.1 |
|
|
|
|
|
|
|
|
|
|
|
|
|
|
|
|
|
|
|
|
|
|
|
|
|
|
|
|
|
|
|
|
|
|
|
|
|
|
|
|
|
|
|
|
|
|
|
|
|
|
|
|
|
|
|
|
|
|
|
|
|
|
|
|
|
|
CSNT server 172.16.10.150
You want the PIX Firewall to use the security server at 172.16.10.150 to authenticate users. Here’s the configuration to define the protocol and the location of the security server:
toddfw#config t
toddfw(config)#aaa-server AUTH1 protocol tacacs+
toddfw(config)#aaa-server AUTH1 host 172.16.10.150 keykey timeout 5
toddfw(config)#^Z
toddfw#
In this example, you used the aaa-server command twice. The first aaa-server command specifies the group tag AUTH1 and the communications protocol TACACS+. You can configure up to 16 separate group tags. (You may use different groups of security servers for different types of authentication.)
The second aaa-server command is used to define a security server in the AUTH1 group. It specifies the group tag (AUTH1), the security server (host 172.16.10.150), the encryption key (keykey), and the timeout in seconds to be used with this security server (timeout 5). Up to 16 security servers can be configured per group tag.
Copyright ©2003 SYBEX Inc., 1151 Marina Village Parkway, Alameda, CA 94501. |
www.sybex.com |

338 Appendix A Introduction to the PIX Firewall
Implementing Authentication
Authentication can be forced on either inbound or outbound connections. The PIX Firewall can use either TACACS+ or RADIUS to communicate with the security server when using authentication. Let’s go ahead and add authentication:
toddfw#config t
toddfw(config)#aaa authentication any inbound 0 0 AUTH1
toddfw(config)#aaa authentication any outbound 0 0 AUTH1
toddfw(config)#^Z
toddfw#
This configuration requires authentication for any access, either inbound or outbound. In the aaa authentication command, the any keyword refers to the authentication service. It could be HTTP, FTP, or Telnet; the any keyword enables authentication for all TCP services.
The next parameter refers to either inbound or outbound connections. You’ve used two separate statements to require authentication for both inbound and outbound connections. The 0 0 parameter is used to specify local and foreign addresses. In this example, you use 0 to indicate any address. Finally, you specify the group tag you want that particular traffic authenticated against.
Implementing Authorization
As with authentication, authorization can be used for either inbound or outbound connections. However, authorization requires that the PIX Firewall use TACACS+ when communicating with the security server. RADIUS communication between the firewall and security server will not support authorization.
Here is the configuration to add authorization to your PIX Firewall:
toddfw#config t
toddfw(config)#aaa authorization any inbound 0 0
toddfw(config)#aaa authorization ftp outbound 0 0
toddfw(config)#^Z
toddfw#
In this example, you require authorization for any inbound traffic, but you only require authorization for outbound FTP traffic.
Implementing Accounting
Finally, let’s enable accounting to keep track of what your users are doing. Suppose that you wish to have the PIX Firewall report to the security server everything that your inbound users are doing. Here is the configuration:
toddfw#config t
toddfw(config)#aaa accounting any inbound 0 0 AUTH1
toddfw(config)#^Z
toddfw#
Copyright ©2003 SYBEX Inc., 1151 Marina Village Parkway, Alameda, CA 94501. |
www.sybex.com |