


|
|
Introduction to the Cisco VPN 3.5 Client |
305 |
T A B L E 9 . 1 Easy VPN Supported and Unsupported Options (continued) |
|
||
|
|
|
|
Options |
Supported |
Unsupported |
|
|
|
|
|
Diffie-Hellman (DH) groups |
2 |
1 |
|
|
5 |
|
|
IKE encryption algorithms |
DES |
|
|
|
3DES |
|
|
IPSec encryption algorithms |
DES |
|
|
|
3DES |
|
|
|
NULL |
|
|
IPSec protocol identifiers |
ESP |
Authentication Header (AH) |
|
|
IPCOMP-LZS |
|
|
IPSEC protocol mode |
Tunnel |
Transport |
|
|
|
|
|
And I have to note a couple more options that aren’t supported: manual keys and perfect forward security (PFS).
Let’s move on to the Cisco VPN 3.5 Client and how it is installed and configured.
Introduction to the Cisco VPN 3.5 Client
The Cisco VPN 3.5 Client can be used to establish VPN connections to any of the Easy VPN Server devices listed earlier in this chapter, including an IOS router. Cisco VPN 3.5 Client is also available via Cisco Connection Online (CCO) to customers with SMARTnet support.
The Cisco VPN 3.5 Client is available for the following operating systems:
Windows 95, 98, Me, NT 4.0, 2000, and XP
Linux (Intel)
Solaris (Ultra-Sparc 32-bit)
Mac OS X 10.1
Once installed, the VPN Client allows you to configure and select a number of possible VPN servers. When you launch the VPN Client, the window shown in Figure 9.1 appears.
Copyright ©2003 SYBEX Inc., 1151 Marina Village Parkway, Alameda, CA 94501. |
www.sybex.com |

306 Chapter 9 Cisco IOS Remote Access Using Cisco Easy VPN
F I G U R E 9 . 1 Launching VPN Client
Since no connections are configured, you need to add one by clicking the New button. When you do this, the New Connection Entry Wizard appears, illustrated in Figure 9.2. This window prompts you to give the connection a name and gives you the option of adding a description for the new connection entry.
F I G U R E 9 . 2 Creating a new connection entry
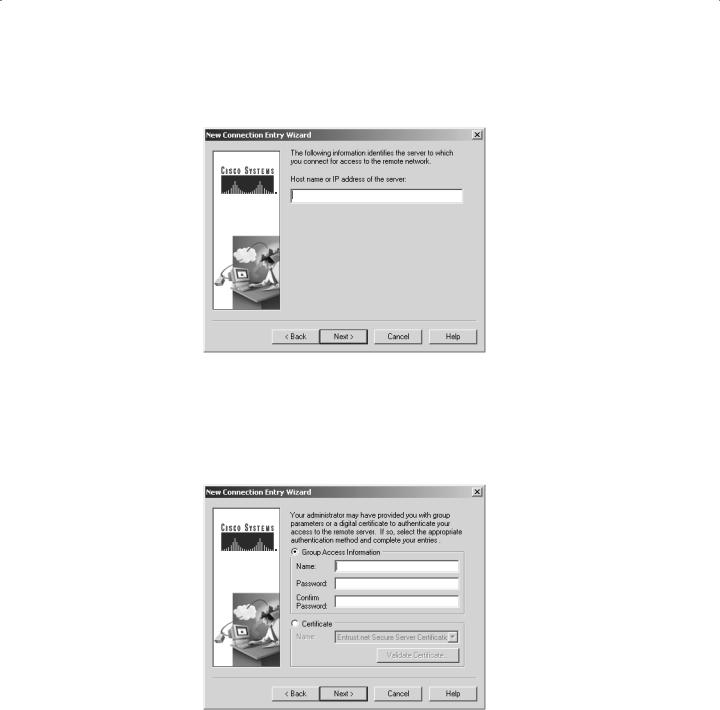
After naming the connection, you click the Next button and enter the IP address of the VPN server you’re connecting to in the window illustrated in Figure 9.3.
Copyright ©2003 SYBEX Inc., 1151 Marina Village Parkway, Alameda, CA 94501. |
www.sybex.com |
Introduction to the Cisco VPN 3.5 Client |
307 |
F I G U R E 9 . 3 Identifying the VPN server to be connected to
Next, you’re queried for group access or certificate information. This is the only remotely challenging part of the Easy VPN concept, and it isn’t even that bad. But if you’re not doing this yourself, you’ll need to provide users with the correct information so they can fill out the screen shown in Figure 9.4.
F I G U R E 9 . 4 Entering group access information
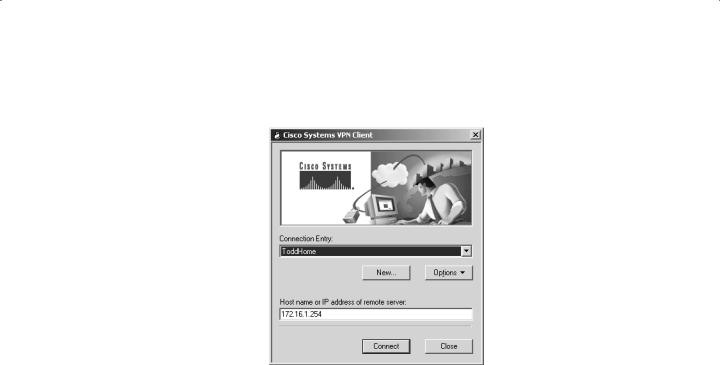
You’ll get one last chance to make any changes when you’re asked if you want to save the connection information. Once this is done, click Connect from the initial screen, as you can see in Figure 9.5.
Copyright ©2003 SYBEX Inc., 1151 Marina Village Parkway, Alameda, CA 94501. |
www.sybex.com |
308 Chapter 9 Cisco IOS Remote Access Using Cisco Easy VPN
F I G U R E 9 . 5 Connecting your VPN server
You can add as many connections as you want and then select one to use from the pull-down menu before connecting.
The VPN 3.5 Client supports many VPN features. In fact, it’s so supportive, it doesn’t have some of the limitations that the IOS Easy VPN Server does. This requires a little thought when configuring connections to avoid incompatibilities. Here’s an example—VPN Client supports Diffie-Hellman groups 1, 2, and 5, but as you know, the Easy VPN Server doesn’t support DH1.
Easy VPN Server Configuration Tasks
Easy VPN Server configuration uses skills and commands I’ve already covered in previous chapters. Basically, you need to configure AAA and then configure IPSec. There are some optional features you can configure such as DPD, but they’re not required.
Cisco has defined the following seven steps to configuring the Easy VPN Server:
1.Enable policy lookup via AAA.
2.Define group policy for mode configuration push.
3.Apply mode configuration and Xauth to crypto maps.
4.Enable Reverse Route Injection (RRI) for the VPN Client (optional).
5.Enable IKE Dead Peer Detection (optional).
6.Configure RADIUS server support (optional).
7.Verify the Easy VPN Server.
Each step itself consists of multiple steps. Step 1 involves enabling AAA. Steps 2 and 3 involve configuring IPSec. Steps 4 through 6 are specific to Easy VPN Server configuration,
Copyright ©2003 SYBEX Inc., 1151 Marina Village Parkway, Alameda, CA 94501. |
www.sybex.com |