

The Official Guide to Learning OpenGL, Version 1.1 (Redbook Second Edition)
.pdfOpenGL Programming Guide (Addison-Wesley Publishing Company)
void display(void)
{
GLdouble eqn[4] = {0.0, 1.0, 0.0, 0.0}; GLdouble eqn2[4] = {1.0, 0.0, 0.0, 0.0};
glClear(GL_COLOR_BUFFER_BIT); glColor3f (1.0, 1.0, 1.0); glPushMatrix();
glTranslatef (0.0, 0.0, -5.0);
/* |
clip lower half -- y < 0 |
*/ |
|
glClipPlane (GL_CLIP_PLANE0, eqn); |
|
|
glEnable (GL_CLIP_PLANE0); |
|
/* |
clip left half -- x < 0 |
*/ |
|
glClipPlane (GL_CLIP_PLANE1, eqn2); |
|
|
glEnable (GL_CLIP_PLANE1); |
|
|
glRotatef (90.0, 1.0, 0.0, 0.0); |
|
|
glutWireSphere(1.0, 20, 16); |
|
|
glPopMatrix(); |
|
|
glFlush (); |
|
} |
|
|
void reshape (int w, int h)
{
glViewport (0, 0, (GLsizei) w, (GLsizei) h); glMatrixMode (GL_PROJECTION); glLoadIdentity ();
gluPerspective(60.0, (GLfloat) w/(GLfloat) h, 1.0, 20.0); glMatrixMode (GL_MODELVIEW);
}
int main(int argc, char** argv)
{
glutInit(&argc, argv);
glutInitDisplayMode (GLUT_SINGLE | GLUT_RGB); glutInitWindowSize (500, 500); glutInitWindowPosition (100, 100); glutCreateWindow (argv[0]);
init (); glutDisplayFunc(display); glutReshapeFunc(reshape); glutMainLoop();
return 0;
}
http://heron.cc.ukans.edu/ebt-bin/nph-dweb/dynaw.../@Generic__BookTextView/6635;cs=fullhtml;pt=1963 (39 of 49) [4/28/2000 9:45:04 PM]

OpenGL Programming Guide (Addison-Wesley Publishing Company)
Try This
●Try changing the coefficients that describe the clipping planes in Example 3-5.
●Try calling a modeling transformation, such as glRotate*(), to affect glClipPlane(). Make the clipping plane move independently of the objects in the scene.
Examples of Composing Several Transformations
This section demonstrates how to combine several transformations to achieve a particular result. The two examples discussed are a solar system, in which objects need to rotate on their axes as well as in orbit around each other, and a robot arm, which has several joints that effectively transform coordinate systems as they move relative to each other.
Building a Solar System
The program described in this section draws a simple solar system with a planet and a sun, both using the same sphere-drawing routine. To write this program, you need to use glRotate*() for the revolution of the planet around the sun and for the rotation of the planet around its own axis. You also need glTranslate*() to move the planet out to its orbit, away from the origin of the solar system. Remember that you can specify the desired size of the two spheres by supplying the appropriate arguments for the glutWireSphere() routine.
To draw the solar system, you first want to set up a projection and a viewing transformation. For this example, gluPerspective() and gluLookAt() are used.
Drawing the sun is straightforward, since it should be located at the origin of the grand, fixed coordinate system, which is where the sphere routine places it. Thus, drawing the sun doesn't require translation; you can use glRotate*() to make the sun rotate about an arbitrary axis. To draw a planet rotating around the sun, as shown in Figure 3-24, requires several modeling transformations. The planet needs to rotate about its own axis once a day. And once a year, the planet completes one revolution around the sun.
Figure 3-24 : Planet and Sun
http://heron.cc.ukans.edu/ebt-bin/nph-dweb/dynaw.../@Generic__BookTextView/6635;cs=fullhtml;pt=1963 (40 of 49) [4/28/2000 9:45:04 PM]

OpenGL Programming Guide (Addison-Wesley Publishing Company)
To determine the order of modeling transformations, visualize what happens to the local coordinate system. An initial glRotate*() rotates the local coordinate system that initially coincides with the grand coordinate system. Next, glTranslate*() moves the local coordinate system to a position on the planet's orbit; the distance moved should equal the radius of the orbit. Thus, the initial glRotate*() actually determines where along the orbit the planet is (or what time of year it is).
A second glRotate*() rotates the local coordinate system around the local axes, thus determining the time of day for the planet. Once you've issued all these transformation commands, the planet can be drawn.
In summary, these are the OpenGL commands to draw the sun and planet; the full program is shown in Example 3-6.
glPushMatrix(); |
|
|
glutWireSphere(1.0, 20, |
16); |
/* draw sun */ |
glRotatef ((GLfloat) year, 0.0, 1.0, 0.0); |
||
glTranslatef (2.0, 0.0, |
0.0); |
|
glRotatef ((GLfloat) day, 0.0, 1.0, 0.0); |
||
glutWireSphere(0.2, 10, |
8); |
/* draw smaller planet */ |
glPopMatrix(); |
|
|
Example 3-6 : Planetary System: planet.c
#include <GL/gl.h> #include <GL/glu.h> #include <GL/glut.h>
static int year = 0, day = 0;
void init(void)
{
glClearColor (0.0, 0.0, 0.0, 0.0); glShadeModel (GL_FLAT);
}
void display(void)
{
glClear (GL_COLOR_BUFFER_BIT); glColor3f (1.0, 1.0, 1.0);
glPushMatrix(); |
|
|
glutWireSphere(1.0, 20, |
16); |
/* draw sun */ |
glRotatef ((GLfloat) year, 0.0, 1.0, 0.0); |
||
glTranslatef (2.0, 0.0, |
0.0); |
|
glRotatef ((GLfloat) day, 0.0, 1.0, 0.0); |
||
glutWireSphere(0.2, 10, |
8); |
/* draw smaller planet */ |
glPopMatrix(); |
|
|
glutSwapBuffers(); |
|
|
http://heron.cc.ukans.edu/ebt-bin/nph-dweb/dynaw.../@Generic__BookTextView/6635;cs=fullhtml;pt=1963 (41 of 49) [4/28/2000 9:45:04 PM]

OpenGL Programming Guide (Addison-Wesley Publishing Company)
}
void reshape (int w, int h)
{
glViewport (0, 0, (GLsizei) w, (GLsizei) h); glMatrixMode (GL_PROJECTION); glLoadIdentity ();
gluPerspective(60.0, (GLfloat) w/(GLfloat) h, 1.0, 20.0); glMatrixMode(GL_MODELVIEW);
glLoadIdentity();
gluLookAt (0.0, 0.0, 5.0, 0.0, 0.0, 0.0, 0.0, 1.0, 0.0);
}
void keyboard (unsigned char key, int x, int y)
{
switch (key) { case `d':
day = (day + 10) % 360; glutPostRedisplay(); break;
case `D':
day = (day - 10) % 360; glutPostRedisplay(); break;
case `y':
year = (year + 5) % 360; glutPostRedisplay(); break;
case `Y':
year = (year - 5) % 360; glutPostRedisplay(); break;
default:
break;
}
}
int main(int argc, char** argv)
{
glutInit(&argc, argv);
glutInitDisplayMode (GLUT_DOUBLE | GLUT_RGB); glutInitWindowSize (500, 500); glutInitWindowPosition (100, 100); glutCreateWindow (argv[0]);
init (); glutDisplayFunc(display);
http://heron.cc.ukans.edu/ebt-bin/nph-dweb/dynaw.../@Generic__BookTextView/6635;cs=fullhtml;pt=1963 (42 of 49) [4/28/2000 9:45:04 PM]
OpenGL Programming Guide (Addison-Wesley Publishing Company)
glutReshapeFunc(reshape);
glutKeyboardFunc(keyboard);
glutMainLoop(); return 0;
}
Try This
●Try adding a moon to the planet. Or try several moons and additional planets. Hint: Use glPushMatrix() and glPopMatrix() to save and restore the position and orientation of the coordinate system at appropriate moments. If you're going to draw several moons around a planet, you need to save the coordinate system prior to positioning each moon and restore the coordinate system after each moon is drawn.
●Try tilting the planet's axis.
Building an Articulated Robot Arm
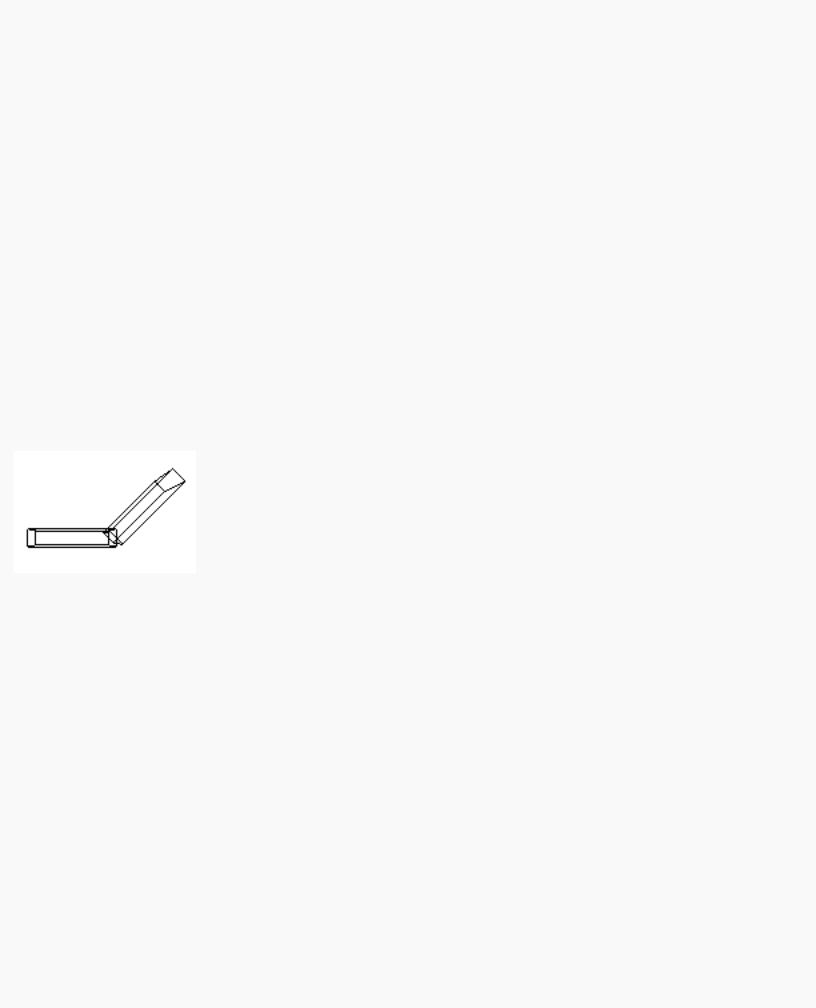
This section discusses a program that creates an articulated robot arm with two or more segments. The arm should be connected with pivot points at the shoulder, elbow, or other joints. Figure 3-25 shows a single joint of such an arm.
Figure 3-25 : Robot Arm
You can use a scaled cube as a segment of the robot arm, but first you must call the appropriate modeling transformations to orient each segment. Since the origin of the local coordinate system is initially at the center of the cube, you need to move the local coordinate system to one edge of the cube. Otherwise, the cube rotates about its center rather than the pivot point.
After you call glTranslate*() to establish the pivot point and glRotate*() to pivot the cube, translate back to the center of the cube. Then the cube is scaled (flattened and widened) before it is drawn. The glPushMatrix() and glPopMatrix() restrict the effect of glScale*(). Here's what your code might look like for this first segment of the arm (the entire program is shown in Example 3-7):
glTranslatef (-1.0, 0.0, 0.0);
glRotatef ((GLfloat) shoulder, 0.0, 0.0, 1.0); glTranslatef (1.0, 0.0, 0.0);
glPushMatrix();
glScalef (2.0, 0.4, 1.0); glutWireCube (1.0);
http://heron.cc.ukans.edu/ebt-bin/nph-dweb/dynaw.../@Generic__BookTextView/6635;cs=fullhtml;pt=1963 (43 of 49) [4/28/2000 9:45:04 PM]

OpenGL Programming Guide (Addison-Wesley Publishing Company)
glPopMatrix();
To build a second segment, you need to move the local coordinate system to the next pivot point. Since the coordinate system has previously been rotated, the x-axis is already oriented along the length of the rotated arm. Therefore, translating along the x-axis moves the local coordinate system to the next pivot point. Once it's at that pivot point, you can use the same code to draw the second segment as you used for the first one. This can be continued for an indefinite number of segments (shoulder, elbow, wrist, fingers).
glTranslatef (1.0, 0.0, 0.0);
glRotatef ((GLfloat) elbow, 0.0, 0.0, 1.0); glTranslatef (1.0, 0.0, 0.0); glPushMatrix();
glScalef (2.0, 0.4, 1.0); glutWireCube (1.0); glPopMatrix();
Example 3-7 : Robot Arm: robot.c
#include <GL/gl.h> #include <GL/glu.h> #include <GL/glut.h>
static int shoulder = 0, elbow = 0;
void init(void)
{
glClearColor (0.0, 0.0, 0.0, 0.0); glShadeModel (GL_FLAT);
}
void display(void)
{
glClear (GL_COLOR_BUFFER_BIT); glPushMatrix();
glTranslatef (-1.0, 0.0, 0.0);
glRotatef ((GLfloat) shoulder, 0.0, 0.0, 1.0); glTranslatef (1.0, 0.0, 0.0);
glPushMatrix();
glScalef (2.0, 0.4, 1.0); glutWireCube (1.0); glPopMatrix();
glTranslatef (1.0, 0.0, 0.0);
glRotatef ((GLfloat) elbow, 0.0, 0.0, 1.0); glTranslatef (1.0, 0.0, 0.0); glPushMatrix();
glScalef (2.0, 0.4, 1.0);
http://heron.cc.ukans.edu/ebt-bin/nph-dweb/dynaw.../@Generic__BookTextView/6635;cs=fullhtml;pt=1963 (44 of 49) [4/28/2000 9:45:04 PM]

OpenGL Programming Guide (Addison-Wesley Publishing Company)
glutWireCube (1.0); glPopMatrix();
glPopMatrix();
glutSwapBuffers();
}
void reshape (int w, int h)
{
glViewport (0, 0, (GLsizei) w, (GLsizei) h); glMatrixMode (GL_PROJECTION); glLoadIdentity ();
gluPerspective(65.0, (GLfloat) w/(GLfloat) h, 1.0, 20.0); glMatrixMode(GL_MODELVIEW);
glLoadIdentity();
glTranslatef (0.0, 0.0, -5.0);
}
void keyboard (unsigned char key, int x, int y)
{
switch (key) {
case `s': /* s key rotates at shoulder */ shoulder = (shoulder + 5) % 360; glutPostRedisplay();
break; case `S':
shoulder = (shoulder - 5) % 360; glutPostRedisplay();
break;
case `e': /* e key rotates at elbow */ elbow = (elbow + 5) % 360; glutPostRedisplay();
break; case `E':
elbow = (elbow - 5) % 360; glutPostRedisplay(); break;
default:
break;
}
}
int main(int argc, char** argv)
{
glutInit(&argc, argv);
glutInitDisplayMode (GLUT_DOUBLE | GLUT_RGB);
http://heron.cc.ukans.edu/ebt-bin/nph-dweb/dynaw.../@Generic__BookTextView/6635;cs=fullhtml;pt=1963 (45 of 49) [4/28/2000 9:45:04 PM]

OpenGL Programming Guide (Addison-Wesley Publishing Company)
glutInitWindowSize (500, 500); glutInitWindowPosition (100, 100); glutCreateWindow (argv[0]);
init (); glutDisplayFunc(display); glutReshapeFunc(reshape); glutKeyboardFunc(keyboard); glutMainLoop();
return 0;
}
Try This
●Modify Example 3-7 to add additional segments onto the robot arm.
●Modify Example 3-7 to add additional segments at the same position. For example, give the robot arm several "fingers" at the wrist, as shown in Figure 3-26. Hint: Use glPushMatrix() and glPopMatrix() to save and restore the position and orientation of the coordinate system at the wrist. If you're going to draw fingers at the wrist, you need to save the current matrix prior to positioning each finger and restore the current matrix after each finger is drawn.
Figure 3-26 : Robot Arm with Fingers
Reversing or Mimicking Transformations
The geometric processing pipeline is very good at using viewing and projection matrices and a viewport for clipping to transform the world (or object) coordinates of a vertex into window (or screen) coordinates. However, there are situations in which you want to reverse that process. A common situation is when an application user utilizes the mouse to choose a location in three dimensions. The mouse returns only a two-dimensional value, which is the screen location of the cursor. Therefore, the application will have to reverse the transformation process to determine from where in three-dimensional space this screen location originated.
http://heron.cc.ukans.edu/ebt-bin/nph-dweb/dynaw.../@Generic__BookTextView/6635;cs=fullhtml;pt=1963 (46 of 49) [4/28/2000 9:45:04 PM]

OpenGL Programming Guide (Addison-Wesley Publishing Company)
The Utility Library routine gluUnProject() performs this reversal of the transformations. Given the three-dimensional window coordinates for a location and all the transformations that affected them, gluUnProject() returns the world coordinates from where it originated.
int gluUnProject(GLdouble winx, GLdouble winy, GLdouble winz, const GLdouble modelMatrix[16], const GLdouble projMatrix[16], const GLint viewport[4], GLdouble *objx, GLdouble *objy, GLdouble *objz);
Map the specified window coordinates (winx, winy, winz) into object coordinates, using transformations defined by a modelview matrix (modelMatrix), projection matrix (projMatrix), and viewport (viewport). The resulting object coordinates are returned in objx, objy, and objz. The function returns GL_TRUE, indicating success, or GL_FALSE, indicating failure (such as an noninvertible matrix). This operation does not attempt to clip the coordinates to the viewport or eliminate depth values that fall outside of glDepthRange().
There are inherent difficulties in trying to reverse the transformation process. A two-dimensional screen location could have originated from anywhere on an entire line in three-dimensional space. To disambiguate the result, gluUnProject() requires that a window depth coordinate (winz) be provided and that winz be specified in terms of glDepthRange(). For the default values of glDepthRange(), winz at 0.0 will request the world coordinates of the transformed point at the near clipping plane, while winz at 1.0 will request the point at the far clipping plane.
Example 3-8 demonstrates gluUnProject() by reading the mouse position and determining the three-dimensional points at the near and far clipping planes from which it was transformed. The computed world coordinates are printed to standard output, but the rendered window itself is just black.
Example 3-8 : Reversing the Geometric Processing Pipeline: unproject.c
#include <GL/gl.h> #include <GL/glu.h> #include <GL/glut.h> #include <stdlib.h> #include <stdio.h>
void display(void)
{
glClear(GL_COLOR_BUFFER_BIT); glFlush();
}
void reshape(int w, int h)
{
glViewport (0, 0, (GLsizei) w, (GLsizei) h); glMatrixMode(GL_PROJECTION); glLoadIdentity();
gluPerspective (45.0, (GLfloat) w/(GLfloat) h, 1.0, 100.0); glMatrixMode(GL_MODELVIEW);
glLoadIdentity();
}
http://heron.cc.ukans.edu/ebt-bin/nph-dweb/dynaw.../@Generic__BookTextView/6635;cs=fullhtml;pt=1963 (47 of 49) [4/28/2000 9:45:04 PM]

OpenGL Programming Guide (Addison-Wesley Publishing Company)
void mouse(int button, int state, int x, int y)
{
GLint viewport[4];
GLdouble mvmatrix[16], projmatrix[16];
GLint realy; /* OpenGL y coordinate position */ GLdouble wx, wy, wz; /* returned world x, y, z coords */
switch (button) {
case GLUT_LEFT_BUTTON:
if (state == GLUT_DOWN) {
glGetIntegerv (GL_VIEWPORT, viewport); glGetDoublev (GL_MODELVIEW_MATRIX, mvmatrix); glGetDoublev (GL_PROJECTION_MATRIX, projmatrix);
/* note viewport[3] is height of window in pixels */ realy = viewport[3] - (GLint) y - 1;
printf ("Coordinates at cursor are (%4d, %4d)\n", x, realy);
gluUnProject ((GLdouble) x, (GLdouble) realy, 0.0, mvmatrix, projmatrix, viewport, &wx, &wy, &wz);
printf ("World coords at z=0.0 are (%f, %f, %f)\n", wx, wy, wz);
gluUnProject ((GLdouble) x, (GLdouble) realy, 1.0, mvmatrix, projmatrix, viewport, &wx, &wy, &wz);
printf ("World coords at z=1.0 are (%f, %f, %f)\n", wx, wy, wz);
}
break;
case GLUT_RIGHT_BUTTON: if (state == GLUT_DOWN)
exit(0);
break;
default:
break;
}
}
int main(int argc, char** argv)
{
glutInit(&argc, argv);
glutInitDisplayMode (GLUT_SINGLE | GLUT_RGB); glutInitWindowSize (500, 500); glutInitWindowPosition (100, 100); glutCreateWindow (argv[0]); glutDisplayFunc(display); glutReshapeFunc(reshape);
http://heron.cc.ukans.edu/ebt-bin/nph-dweb/dynaw.../@Generic__BookTextView/6635;cs=fullhtml;pt=1963 (48 of 49) [4/28/2000 9:45:04 PM]