

C# ПІДРУЧНИКИ / c# / MS Press - Msdn Training Programming Net Framework With C#
.pdfModule 3: Working with Components |
31 |
|
|
|
|
Coding the Page_Load Event Handler
Topic Objective
To explain how to code the Page_Load event handler.
Lead-in
The Page_Load event contains most of the code for the sample client program.
void Page_Load(Object sender, EventArgs EvArgs) void Page_Load(Object sender, EventArgs EvArgs)
{{ StringBuilder Out = new StringBuilder(""); StringBuilder Out = new StringBuilder(""); int Count = 0;
int Count = 0;
// Iterate over component's strings and concatenate // Iterate over component's strings and concatenate Out.Append("Strings from C# Component<br>"); Out.Append("Strings from C# Component<br>"); CompCS.StringComponent myCSStringComp = new CompCS.StringComponent myCSStringComp = new
CompCS.StringComponent();
CompCS.StringComponent();
for(int index = 0; index < myCSStringComp.Count; for(int index = 0; index < myCSStringComp.Count;
index++)
index++)
{{ Out.Append(myCSStringComp.GetString(index));
Out.Append(myCSStringComp.GetString(index));
Out.Append("<br>");
}}
Out.Append("<br>");
// … // …
Message.InnerHtml = Out.ToString();
}}
Message.InnerHtml = Out.ToString();
*****************************ILLEGAL FOR NON-TRAINER USE******************************
The Page_Load event contains most of the code for the sample client program.
The following example shows the Page_Load event-handling code:
void Page_Load(Object sender, EventArgs EvArgs)
{
StringBuilder Out = new StringBuilder(""); int Count = 0;
// Iterate over component's strings and concatenate Out.Append("Strings from C# Component<br>"); CompCS.StringComponent myCSStringComp = new
CompCS.StringComponent();
for(int index = 0; index < myCSStringComp.Count; index++)
{
Out.Append(myCSStringComp.GetString(index));
Out.Append("<br>");
}
Out.Append("<br>");
// Iterate over component's strings and concatenate Out.Append("Strings from VB Component<br>"); CompVB.StringComponent myVBStringComp = new
CompVB.StringComponent();
for(int index = 0; index < myVBStringComp.Count; index++)
{
Out.Append(myVBStringComp.GetString(index));
Out.Append("<br>");
}
Message.InnerHtml = Out.ToString();
}

32 |
Module 3: Working with Components |
Notice that the client code that calls the string component is very similar to the code for the stand-alone console and Windows Forms-based applications. After declaring the Page_Load event handler and initializing variables, you create a new instance of the StringComponent class and iterate over the string array.
Each of the strings is appended to the variable Out. You then assign Out to a property of an HTML server control, as in the following example:
Message.InnerHTML = Out.ToString();
Instead of assigning Out to a property of an HTML server control, you can use
Response.Write to write the stream directly into the HTML stream.
Note It is a recommended practice with ASP.NET forms to place the executable code in a separate file from the declarative HTML. However, for the sake of simplicity, the code for the ASP.NET page in this module has not been placed in a separate file.
Module 3: Working with Components |
33 |
|
|
|
|
Generating the HTML Response
Topic Objective
To show how to generate the HTML response by using the Message object.
Lead-in
The following example shows how to create the HTML response by using the Message object.
! Specify the Body of the HTML Response
<body>
<body>
<span id="Message" runat=server/> <span id="Message" runat=server/>
</body>
</body>
*****************************ILLEGAL FOR NON-TRAINER USE******************************
The following example shows how to create the HTML response by using the
Message object:
<body>
<span id="Message" runat=server/> </body>
This code places the string output that was generated by the Page_Load event handler in the HTTP response.
34 |
Module 3: Working with Components |
The code for the final ASP.NET page is as follows:
<%@ Page Language="C#" Description="ASP.NET Component Test" %> <%@ Import Namespace="CompCS"%>
<%@ Import Namespace="CompVB"%>
<%@ Import Namespace="System.Text"%>
<html>
<script language="C#" runat=server>
void Page_Load(Object sender, EventArgs EvArgs) { StringBuilder Out = new StringBuilder();
int Count = 0;
//Iterate over component's strings and concatenate Out.Append("Strings from C# Component<br>"); CompCS.StringComponent myCSStringComp = new CompCS.StringComponent();
for (int index = 0; index < myCSStringComp.Count; index++){ Out.Append(myCSStringComp.GetString(index)); Out.Append("<br>");
}
Out.Append("<br>");
//Iterate over component's strings and concatenate Out.Append("Strings from VB Component<br>"); CompVB.StringComponent myVBStringComp = new CompVB.StringComponent();
for (int index = 0; index < myVBStringComp.Count; index++){ Out.Append(myVBStringComp.GetString(index)); Out.Append("<br>");
}
Message.InnerHtml = Out.ToString();
}
</script>
<body>
<span id="Message" runat=server/> </body>
</html>
Module 3: Working with Components |
35 |
|
|
|
|
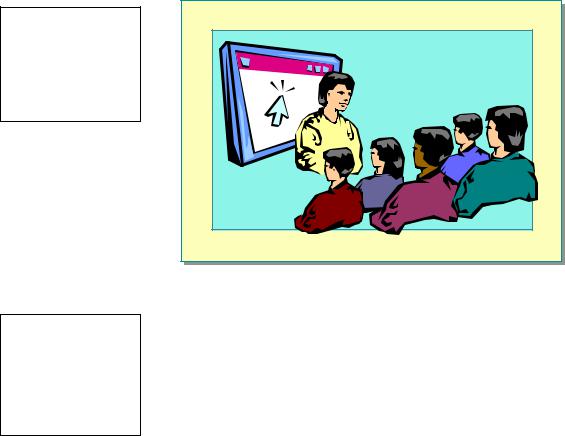
Demonstration: Testing the ASP.NET Client
Topic Objective
To demonstrate how to test the ASP.NET page.
Lead-in
In this demonstration, you will see how to test the ASP.NET page.
*****************************ILLEGAL FOR NON-TRAINER USE******************************
For Your Information
For instructions on running this demonstration, see the Instructor Notes. This exact procedure is repeated in Lab 3.3, “Calling a Component Through an ASP.NET Page.”
This demonstration shows how to test the ASP.NET page that was created in Creating an ASP.NET Client in this module. Before testing the page, you must first configure a virtual directory that points to the directory that contains the
.aspx file. You can use the New Directory Wizard in the IIS snap-in to do this.
36 |
Module 3: Working with Components |
Lab 3.3: Calling a Component Through an ASP.NET Page
Topic Objective
To introduce the lab.
Lead-in
In this lab, you will learn how to create an ASP.NET page that uses a previously developed .NET Framework component to create an ASP.NET application.
*****************************ILLEGAL FOR NON-TRAINER USE******************************
Objectives
After completing this lab, you will be able to create an ASP.NET page that uses a previously developed .NET Framework component to create an ASP.NET application.
Lab Setup
Starter and solution files are associated with this lab. The starter files are in the folder <install folder>\Labs\Lab03.3\Starter, and the solution files are in the folder <install folder>\Labs\Lab03.3\Solution.
Scenario
The labs associated with Module 3 are based on a small client/server application scenario in which a .NET Framework component may be used in several different client scenarios. The component may be written in any .NET Framework runtime-compatible language, but you will only create a C# component.
Lab 3.2, “Creating a Simple Console-Based Client,” and Lab 3.3, “Calling a Component Through an ASP.NET Page,” demonstrate how the same component code runs unchanged in different client environments.
This lab focuses on using an ASP.NET page to call the component and display the results in a Web browser.
Estimated time to complete this lab: 30 minutes
Module 3: Working with Components |
37 |
|
|
|
|
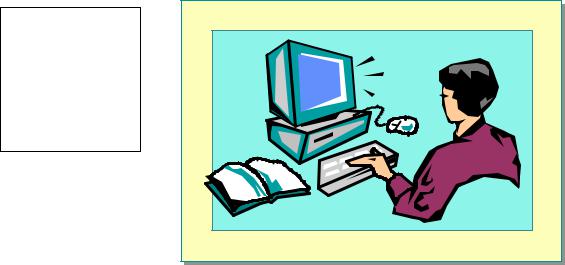
Exercise 1
Writing the ASP.NET Page
In this exercise, you will create an ASP.NET page that uses the same StringComponent component that was used in the stand-alone client application that you created in Lab 3.2, “Creating a Simple Console-Based Client.” You will build a string object that holds the results of processing the string array in the StringComponent class and generates output that can be displayed in a Web browser.
! Create an ASP.NET page
1.Open Notepad and enter an @ Page directive that specifies the following page attributes:
a.Language = C#
b.Description = “ASP.NET Component Test”
2.Import the following namespaces into the page:
a.CompCS
b.CompVB
c.System.Text
3.Create HTML script that specifies C# as the script language and uses the runat=server directive.
! Call the StringComponent class
1.Create a handler for the Page_Load event and initialize a local variable called Out of type StringBuilder to represent the string array in the
StringComponent class.
StringBuilder Out = new StringBuilder("");
2.Declare a local variable called Count of type int to obtain the number of string elements in the string array.
3.Call the Append method on the Out variable with the following string that has as it final characters an HTML line break, "<br>":
"Strings from C# Component<br> "
4.Assign to a local variable called myCSStringComp a new instance of the C# version of the StringComponent class.
5.Iterate over all the strings of the C# string component. In each iteration, append the component’s string to the string variable named Out and then append an HTML line break, "<br>".
6.Append the string "<br>Strings from the VB Component<br>" to the Out string and repeat steps 4 and 5 for the Visual Basic version of the
StringComponent class. The local variable name is myVBStringComp.
7.Assign the result of processing the string array to an HTML server control so that the output is dynamically generated on a Web page. Use the ToString method to get the output string from the Out variable.
8.Save the file as ClientASP.NET.aspx in the <install folder>\Labs\ Lab03.3\Starter\ASP.NET_Client folder.
38 |
Module 3: Working with Components |
Exercise 2
Building and Testing the ASP.NET Page
In this exercise, you will configure a virtual directory to point to a directory where the ASP.NET page is located, so that you can test the ASP.NET application that is a client of the previously created string component.
!Configure a virtual directory
1.Click Start, Control Panel, Performance and Maintenance, Administrative Tools, and then click Internet Information Services.
2.Expand the computer icon, expand the Web Sites folder, and then expand and select Default Web Site.
3.Click the Action menu, point to New, and then click Virtual Directory. The Virtual Directory Creation Wizard starts.
4.Click Next to continue.
5.In the Alias text box, type Test and click Next.
6.Browse to the <install folder>\Labs\Lab03.3\Starter\ASP.NET_Client folder that contains the file ClientASP.NET.aspx that you created in Exercise 1, click OK, and then click Next.
7.On the Access Permissions page, accept the default selections, click Next, and then click Finish.
The Test folder is added to the Default Web Site.

Module 3: Working with Components |
39 |
|
|
|
|
! Test the ASP.NET Client
1.Ensure that the compiled component DLLs, CompCS.dll and CompVB.dll, are in a \Bin subdirectory under the starting point for the application virtual directory.
2.Open Microsoft Internet Explorer, in the Address bar, type http://localhost/Test/ClientASP.NET.aspx and then press ENTER.
A dialog box that generates the correct string output should appear, as shown in the following illustration:
40 |
Module 3: Working with Components |
Review
Topic Objective
To reinforce module objectives by reviewing key points.
Lead-in
The review questions cover some of the key concepts taught in the module.
!An Introduction to Key .NET Framework Development Technologies
!Creating a Simple .NET Framework Component
!Creating a Simple Console Client
!Creating an ASP.NET Client
*****************************ILLEGAL FOR NON-TRAINER USE******************************
1.How do .NET methods indicate failure?
All .NET Framework methods indicate failure by throwing exceptions.
2.What namespace contains the classes to create a Windows Form application?
The Windows Forms library is located in the System.Windows.Forms namespace.
3.What is the default extension for ASP.NET pages?
By default, ASP.NET files have an .aspx extension or .ascx for user controls.