C# ПІДРУЧНИКИ / c# / MS Press - Msdn Training Programming Net Framework With C#
.pdf
Module 3: Working with Components |
21 |
|
|
|
|
! Compile and run the program
Important To use Microsoft Visual Studio .NET tools within a command prompt window, the command prompt window must have the proper environment settings. The Visual Studio .NET Command Prompt window provides such an environment. To run a Visual Studio .NET Command Prompt window, click Start, All Programs, Microsoft Visual Studio .NET,
Visual Studio .NET Tools, and Visual Studio .NET Command Prompt.
1.From a Visual Studio .NET command prompt window, enter the command to build the executable program ClientCS.exe from ClientCS.cs. You must reference the assemblies that contain the C# and Visual Basic StringComponent class. You should copy these assemblies into the same directory as ClientCS.cs. The Visual Basic assembly is located in
<install folder>\Labs\Lab03.2\Starter\VB\Component. The C# assembly is located in <install folder>\Labs\Lab03.1\Solution\C#\Component.
2.Run the resulting executable program.
Your C# program should generate the following output:
Strings from C# StringComponent
C# String 0
C# String 1
C# String 2
C# String 3
Strings from VB StringComponent
VB String 0
VB String 1
VB String 2
VB String 3

22 |
Module 3: Working with Components |
Demonstration: Creating a Windows Forms Client
Topic Objective
To demonstrate how to create a Windows Forms client.
Lead-in
In this demonstration, you will see how to create a Windows Forms client.
*****************************ILLEGAL FOR NON-TRAINER USE******************************
In previous sections of this course, all examples have been command-line programs that wrote to the system console. In this demonstration, you will learn how to rewrite the client application so it can use the new .NET Windows Forms library, which is available to all .NET Framework runtime-compatible languages. In this demonstration, the client displays in a list box on a form the string output that was displayed in the system console in previous examples.
Module 3: Working with Components |
23 |
|
|
|
|
using System;
using System.Drawing; using System.Collections;
using System.ComponentModel; using System.Windows.Forms; using System.Data;
using CSStringComp = CompCS.StringComponent; using VBStringComp = CompVB.StringComponent;
namespace WinForm_Client
{
public class Form1 : System.Windows.Forms.Form
{
private System.Windows.Forms.Button button1; private System.Windows.Forms.Button button2; private System.Windows.Forms.ListBox listBox1;
///<summary>
///Required designer variable.
///</summary>
private System.ComponentModel.Container components = null;
public Form1()
{
//
// Required for Windows Form Designer support
//
InitializeComponent();
}
///<summary>
///Clean up any resources being used.
///</summary>
protected override void Dispose( bool disposing )
{
if( disposing )
{
if (components != null)
{
components.Dispose();
}
}
base.Dispose( disposing );
}
(Code continued on the following page.)
24 |
Module 3: Working with Components |
#region Windows Form Designer generated code
///<summary>
///Required method for Designer support - do not modify
///the contents of this method with the code editor.
///</summary>
private void InitializeComponent()
{
this.button1 = new System.Windows.Forms.Button(); this.button2 = new System.Windows.Forms.Button(); this.listBox1 = new System.Windows.Forms.ListBox(); this.SuspendLayout();
//
//button1
this.button1.Location = new System.Drawing.Point(24, 232);
this.button1.Name = "button1";
this.button1.Size = new System.Drawing.Size(64, 24); this.button1.TabIndex = 0;
this.button1.Text = "&Execute"; this.button1.Click += new
System.EventHandler(this.button1_Click);
//button2
//
this.button2.Location = new System.Drawing.Point(192, 232);
this.button2.Name = "button2";
this.button2.Size = new System.Drawing.Size(64, 24); this.button2.TabIndex = 1;
this.button2.Text = "&Close"; this.button2.Click += new
System.EventHandler(this.button2_Click);
//
// listBox1
//
this.listBox1.Location = new System.Drawing.Point(8, 8);
this.listBox1.Name = "listBox1"; this.listBox1.Size = new System.Drawing.Size(264,
199); this.listBox1.TabIndex = 2;
//
(Code continued on the following page.)
Module 3: Working with Components |
25 |
|
|
|
|
// Form1
//
this.AutoScaleBaseSize = new System.Drawing.Size(5, 13);
this.ClientSize = new System.Drawing.Size(292, 273); this.Controls.AddRange(new
System.Windows.Forms.Control[] { this.listBox1,
this.button2,
this.button1}); this.Name = "Form1"; this.Text = "Client"; this.ResumeLayout(false);
}
#endregion
///<summary>
///The main entry point for the application.
///</summary>
[STAThread]
static void Main()
{
Application.Run(new Form1());
}
private void button1_Click(object sender, System.EventArgs e)
{
//Local Variables
CSStringComp myCompCS = new CSStringComp(); VBStringComp myCompVB = new VBStringComp(); int stringCount=0;
//Display results from C# Component for (stringCount=0;
stringCount<myCompCS.Count;stringCount++)
{
listBox1.Items.Add(
myCompCS.GetString(stringCount));
}
(Code continued on the following page.)
26 |
Module 3: Working with Components |
//Display results from Visual Basic Component for (stringCount=0;
stringCount<myCompVB.Count;stringCount++)
{
listBox1.Items.Add(
myCompVB.GetString(stringCount));
}
}
private void button2_Click(object sender, System.EventArgs e)
{
Close();
}
}
}

Module 3: Working with Components |
27 |
|
|
|
|
" Creating an ASP.NET Client
Topic Objective
To provide an overview of the section topics.
Lead-in
In this section, you will learn how to use an ASP.NET page to obtain the string data from the .NET Framework component, to format the data in HTML, and to return this HTML to a Web browser for display.
!Writing the HTML for the ASP.NET Application
!Coding the Page_Load Event Handler
!Generating the HTML Response
*****************************ILLEGAL FOR NON-TRAINER USE******************************
In this module, you have learned how to create two stand-alone versions of a client application that calls the simple string component: a console application and a form based on the Windows Forms library.
Another important feature of the .NET Framework is the capability to execute the component code that was used by such stand-alone client applications in a Microsoft Internet Information Services (IIS) ASP.NET page.
In this section, you will learn how to use an ASP.NET page to obtain the string data from the .NET Framework component, to format that data in HTML, and to return this HTML to a Web browser for display.

28 |
Module 3: Working with Components |
Multimedia: ASP.NET Execution Model
Topic Objective
To describe the ASP.NET execution model.
Lead-in
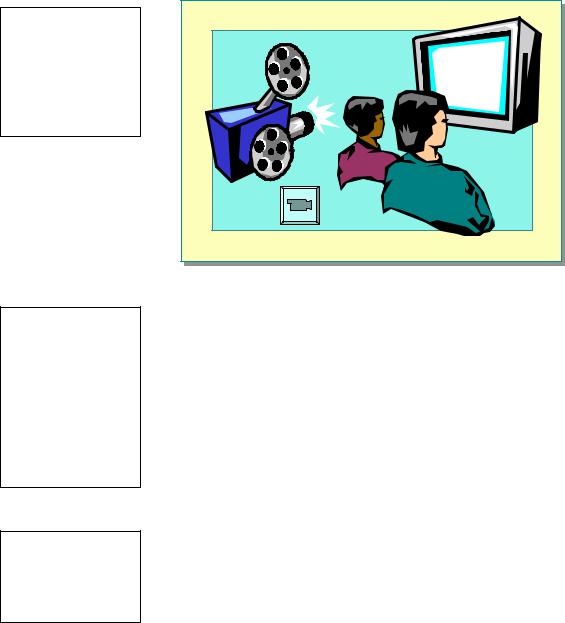
In this animation, you will see how ASP.NET pages are processed on the server.
*****************************ILLEGAL FOR NON-TRAINER USE******************************
To launch the animation, click the button in the lowerleft corner of the slide. To play the animation, click the Start button, and then click the First Request, Second Request, and Output Cache buttons at the top of the screen. There is no audio, but explanatory text appears in the Info column when you click one of the buttons.
Tell students that they can view the animation again later for themselves by opening the 2349B_mod3.htm file from the Media folder.
The .NET Framework provides the capability to execute code that was used in the preceding stand-alone client applications in an ASP.NET page. However, there are some differences in the code execution processes.
An ASP.NET page generally produces HTML in response to a HTTP request; and the page itself is compiled dynamically, unlike the stand-alone client applications. Each ASP.NET page is individually parsed, and the syntax is checked. Then, a .NET runtime class is produced, compiled, and invoked. ASP.NET caches the compiled object, so subsequent requests do not perform the parse and compile step and thus execute much faster.
In this animation, you will see how ASP.NET pages are processed on the server. To view the animation, open the 2349B_mod3.htm file from the Media folder.

Module 3: Working with Components |
29 |
|
|
|
|
Writing the HTML for the ASP.NET Application
Topic Objective
To describe how to write the HTML for an ASP.NET application.
Lead-in
An ASP.NET file is a text file that contains markup syntax for coding server-side page logic, dynamic output, and literal content.
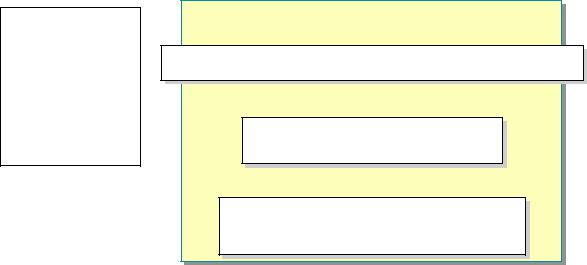
! Specify Page-Specific Attributes Within a Page Directive
<%@ Page Language="C#" Description="ASP.NET Client" %> <%@ Page Language="C#" Description="ASP.NET Client" %>
! Import the Namespace and the Physical Assembly
<%@ Import Namespace="CompCS"%> <%@ Import Namespace="CompCS"%> <%@ Import Namespace="CompVB"%> <%@ Import Namespace="CompVB"%>
! Specify Code Declaration Blocks
<script language="C#" runat=server> <script language="C#" runat=server>
...
</script>
...
</script>
*****************************ILLEGAL FOR NON-TRAINER USE******************************
An ASP.NET file is a text file that contains markup syntax for coding serverside page logic, dynamic output, and literal content. By default, ASP.NET files have an .aspx extension or .ascx for user controls. However, ASP.NET will parse and compile any file that is mapped to the aspnet_isapi.dll under IIS.
Specifying @ Page Directives
To create the ASP.NET page that calls the string component, you first specify page-specific attributes within a page directive. Page directives specify optional settings that are used by the page compiler when processing ASP.NET files, as shown in the following example:
<%@ Page Language="C#" Description="ASP.NET Client" %>
The following table describes the two @ Page directive attributes that are used in the sample client ASP.NET page.
Attribute |
Description |
Language |
Language that is used when compiling all <% %> and <%= %> blocks |
|
within a page. Can be Visual Basic, C#, or Microsoft JScript® .NET. |
Description |
Provides a text description of the page. Supports any string description. |
30 |
Module 3: Working with Components |
Specifying @ Import Directives
After specifying an @ Page directive, you include an @ Import directive, which explicitly imports a namespace into a page, as in the following example:
<%@ Import Namespace="CompCS"%> <%@ Import Namespace="CompVB"%>
When you use an @ Import directive to import a namespace into a page, all classes and interfaces of the imported namespace are made available to the page. The imported namespace can be part of the .NET Framework class library or a user-defined namespace. In addition, the @ Import directive specifies the name of the assembly that will be used. The assembly must be located in the \Bin subdirectory of the application’s starting point.
Specifying Code Declaration Blocks
After specifying @ Page directives and importing the required namespaces, you add code declaration blocks in which you place the code that calls the string component in the ASP.NET page.
You define code declaration blocks by using <script> tags that contain a runat attribute, which tells the server to execute the code on the server, instead of sending the code text back to the client as part of the HTML stream. The script element may optionally use a language attribute to specify the language of its inner code, as in the following example:
<html>
...
<script language="C#" runat=server>
...
</script>
...
</html>
If you do not specify a language, ASP.NET defaults to the language that was configured for the base page, which is determined by the @ Page directive.
For more information about directives in ASP.NET, see “Directive Syntax” in the .NET Framework SDK documentation.
