

СУБД Oracle / Литература / PowerDesigner 9 / GeneralFeatures
.pdf&KDSWHU 8VLQJ WKH 3RZHU'HVLJQHU ,QWHUIDFH
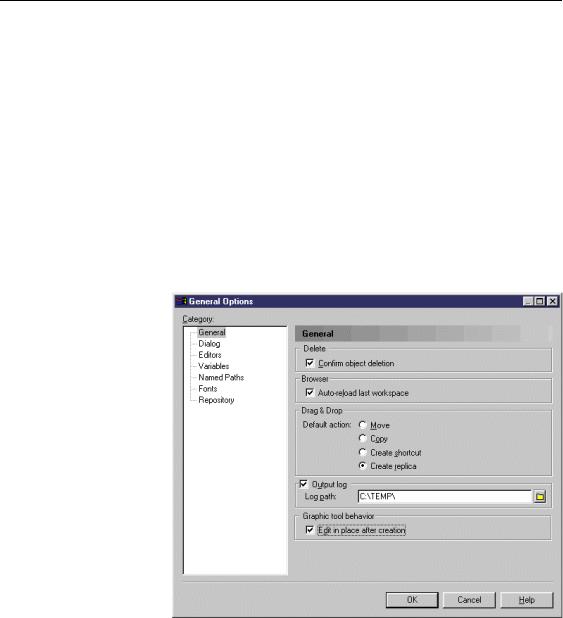
'HILQLQJ WKH 2XWSXW ZLQGRZ ORJ ILOH ORFDWLRQ
By default, PowerDesigner creates a log file for the contents of each tab of the Output window. This log file is saved in the Windows temporary folder. You can define another location.
ϖ7R GHILQH WKH 2XWSXW ZLQGRZ ORJ ILOH ORFDWLRQ
1Select Tools→General Options.
The General Options dialog box appears with the General category selected by default.
2Type a directory path in the Output Log groupbox. Select the Output log
check box if necessary.
RU
Click the Browse button beside the Log Path box and browse to select a directory path.
3 Click OK.
'HILQLQJ WKH JUDSKLF WRRO EHKDYLRU
By default when you want to modify an object property, you must open the object property sheet.
General Features Guide |
|
'HILQLQJ JOREDO RSWLRQV
PowerDesigner allows you to directly modify the name of an object from the object symbol in the diagram without opening its property sheet whenever you create an object with the tool palette. This parameter is defined in the General Options dialog box.
For more information on the different ways to directly modify an object property from its symbol in the diagram, see section Modifying the object properties from its symbol in the diagram in chapter Managing Objects.
ϖ7R GHILQH WKH JUDSKLF WRRO EHKDYLRU
1Select Tools→General Options.
The General Options dialog box appears with the General category selected by default.
2Select the Edit in Place after Creation check box in the Graphic Tool Behavior groupbox.
3 Click OK.
|
PowerDesigner |

&KDSWHU 8VLQJ WKH 3RZHU'HVLJQHU ,QWHUIDFH
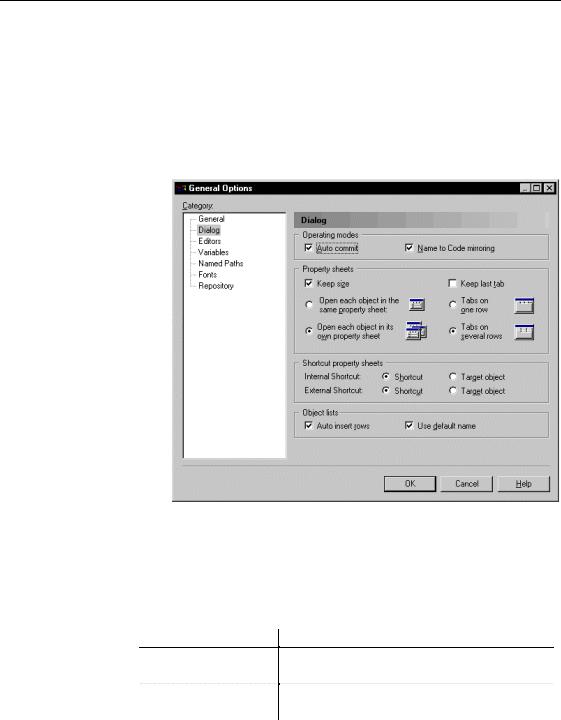
'HILQLQJ GLDORJ ER[ EHKDYLRU
You can define the following behavior options for the PowerDesigner dialog boxes:
♦Operating modes
♦Open property sheet mode
♦Property sheets tab presentation
♦Open shortcut property sheet mode
♦Object lists
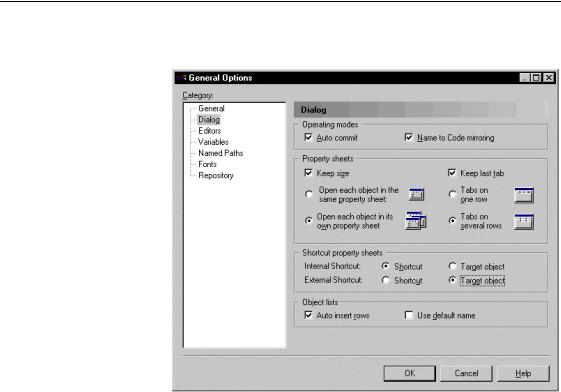
'HILQLQJ GLDORJ ER[ RSHUDWLQJ PRGHV
Auto commit mode PowerDesigner offers two modes for validating the changes in a dialog box:
|
9DOLGDWLRQ |
|
|
%XWWRQV LQ WKH |
|
RSWLRQ |
&KHFNHG |
'HVFULSWLRQ |
GLDORJ ER[ |
|
Auto Commit |
|
Any change performed in a |
Close |
|
|
|
property sheet field or list cell is |
|
|
|
|
automatically committed in the |
|
|
|
|
object definition. You cancel a |
|
|
|
|
change by using the Undo |
|
|
|
|
feature. |
|
|
Auto Commit |
— |
Any change performed in a |
OK |
|
||||
|
|
|
property sheet field or list cell is |
Apply |
|
|
|
committed by clicking Apply |
Cancel |
|
|
|
and saved by clicking OK. You |
|
|
|
|
use the Cancel button to cancel |
|
|
|
|
the changes. This is the default |
|
|
|
|
validation mode |
|
|
|
|
|
|
|
By default, the auto commit mode is not selected, and the dialog boxes |
|||
|
display the OK, Apply and Cancel buttons. |
|
||
Name to Code |
When you create an object in PowerDesigner, you may have to type a name |
|||
mirroring mode |
and a code because the name to code mirroring mode may not be selected in |
|||
|
the General Options dialog box. |
|
||
You can choose to automatically set the code equals to the name by selecting this operating mode.
ϖ7R GHILQH RSHUDWLQJ PRGHV IRU GLDORJ ER[HV
1 Select Tools→General Options.
General Features Guide |
|
'HILQLQJ JOREDO RSWLRQV
The General Options dialog box appears with the General category selected by default.
2Select Dialog in the Category tree view. The Dialog options appear in the right pane.
3Select or clear the Auto Commit check box in the Operating Modes groupbox.
4Select or clear the Name to Code mirroring check box.
5 Click OK.
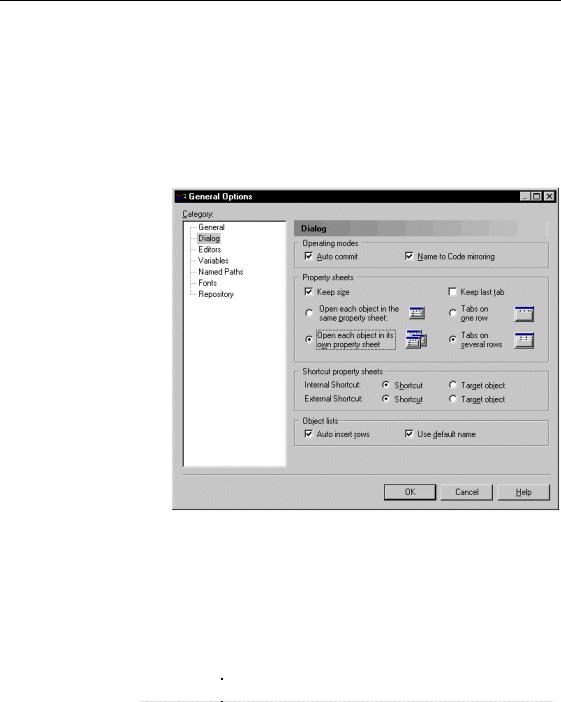
'HILQLQJ SURSHUW\ VKHHW RSHQ PRGH
You can customize the display of property sheets in PowerDesigner in the following way:
2SHQ PRGH
Open each object in the same property sheet
Open each object in its own property sheet
'HVFULSWLRQ
Uses a single property sheet to display the properties of objects of the same type
Allows to open several property sheets for objects of the same type
|
PowerDesigner |
&KDSWHU 8VLQJ WKH 3RZHU'HVLJQHU ,QWHUIDFH
ϖ7R GHILQH DQ RSHQ PRGH IRU SURSHUW\ VKHHWV
1Select Tools→General Options.
The General Options dialog box appears with the General category selected by default.
2Select the Dialog category in the Category tree view. The Dialog options appear in the right pane.
3Select an open radio button in the Property Sheets groupbox.
4 Click OK.
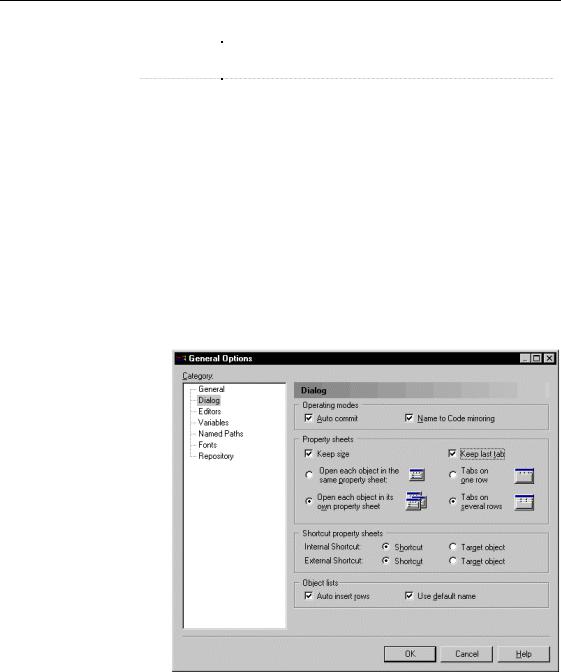
'HILQLQJ SURSHUW\ VKHHWV OD\RXW
In PowerDesigner, property sheets appear by default with a certain size and a series of tabs in the upper part of the dialog box.
You can modify the property sheets layout using the following options:
|
7DE RSWLRQ |
|
'LVSOD\V |
|
|
Keep size |
|
Preserves the customized size you have defined |
|
|
Keep last tab |
|
Opens the property sheet to the last selected tab |
|
|
|
|||
General Features Guide |
|
|
||
|
||||
'HILQLQJ JOREDO RSWLRQV
7DE RSWLRQ |
'LVSOD\V |
|
Tabs on one |
Aligns all tabs on a single line with arrow buttons < and > for |
|
row |
browsing the tab titles |
|
Tabs on |
Displays tabs on two lines, their size corresponding to the length |
|
several rows |
of their title. This is the default display mode |
|
|
|
ϖ7R GHILQH WKH OD\RXW RI D SURSHUW\ VKHHW
1Select Tools→General Options.
The General Options dialog box appears with the General category selected by default.
2Select the Dialog category in the Category tree view. The Dialog options appear in the right pane.
3Select or clear the Keep size and Keep Last Tab check box in the Property Sheets groupbox.
4Select a tab presentation radio button.
5 Click OK.
|
PowerDesigner |

&KDSWHU 8VLQJ WKH 3RZHU'HVLJQHU ,QWHUIDFH
'HILQLQJ VKRUWFXW SURSHUW\ VKHHW RSHQ PRGH
From internal and external shortcuts you can choose to open:
♦The shortcut property sheet
♦The target object property sheet
You can switch from one mode to the other by pressing the SHIFT key while opening the property sheet:
2SWLRQ |
2SHQ SURSHUW\ VKHHW |
2SHQ SURSHUW\ VKHHW 6KLIW |
|
Shortcut |
Shortcut |
Target object |
|
Target object |
Target object |
Shortcut |
|
|
|
|
If the target object cannot be found (target model is closed for example), the shortcut property sheet automatically opens.
For more information on shortcuts, see chapter Managing Shortcuts.
ϖ7R GHILQH VKRUWFXW SURSHUW\ VKHHW RSHQ PRGH
1Select Tools→General Options.
The General Options dialog box appears with the General category selected by default.
2Select the Dialog category in the Category tree view. The Dialog options appear in the right pane.
3Select an open mode radio button for internal shortcuts in the Shortcuts property sheet groupbox.
General Features Guide |
|
'HILQLQJ JOREDO RSWLRQV
4Select an open mode radio button for external shortcuts in the Shortcuts property sheet groupbox.
5 Click OK.
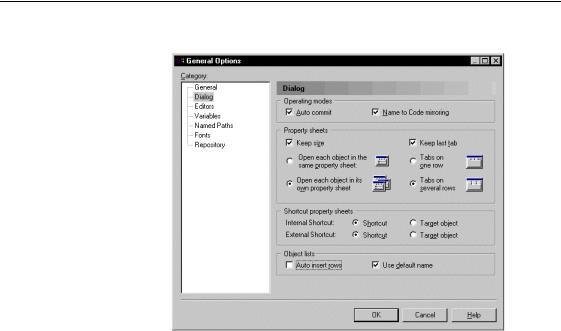
'LVDEOLQJ DXWRPDWLF URZ LQVHUWLRQ LQ D OLVW
In PowerDesigner, when you click an empty row or press the DOWN ARROW key, you automatically insert a row in the list.
When you deselect this default general option, you can insert a row in a list by clicking the Add a Row tool or using the key combination CTRL+N.
ϖ7R GLVDEOH DXWRPDWLF URZ LQVHUWLRQ LQ D OLVW
1Select Tools→General Options.
The General Options dialog box appears with the General category selected by default.
2Select the Dialog category in the Category tree view. The Dialog options appear in the right pane.
|
PowerDesigner |
&KDSWHU 8VLQJ WKH 3RZHU'HVLJQHU ,QWHUIDFH
3 Deselect the Auto Insert Rows check box in the Object Lists groupbox.
4 Click OK.
'LVDEOLQJ DXWRPDWLF GHIDXOW QDPH LQVHUWLRQ LQ D OLVW
In PowerDesigner, when you click an empty row or press the DOWN ARROW key, you automatically insert a row in the list with a default name, which allows you to create as many rows as you need at once.
When you deselect this default general option, the row you insert has no default name, however you must type a name before creating another row.
ϖ7R GLVDEOH DXWRPDWLF GHIDXOW QDPH LQVHUWLRQ LQ D OLVW
1Select Tools→General Options.
The General Options dialog box appears with the General category selected by default.
2Select the Dialog category in the Category tree view. The Dialog options appear in the right pane.
General Features Guide |
|

'HILQLQJ JOREDO RSWLRQV
3 Deselect the Use Default Name check box in the Object Lists groupbox.
4 Click OK.
'HILQLQJ D WH[W HGLWRU
When you are using PowerDesigner, you need a text editor for:
♦Editing descriptions and annotations for object
♦Editing generated scripts like SQL in the PDM or Java in the OOM
♦Editing code like class operation implementation or trigger SQL code
♦Editing file objects
PowerDesigner allows you to define text editors in the General Options dialog box.
You can define as many text editors as you want for your file extensions. The same file extension can have several text editors. The first editor you defined for your file extension becomes the default editor since the list of editors is not sorted.
The list of editors also contains the editors you define to edit codes or notes or to open file objects using the feature.
|
PowerDesigner |