

СУБД Oracle / Литература / PowerDesigner 9 / GeneralFeatures
.pdf&KDSWHU 0DQDJLQJ 0RGHOV
Multi-Model Report A multi-model report is the association of several models to several report (MMR) structures and several selections of objects. It is the graphical representation
of the structure of several models.
You generate a multi-model report when you want to have a clear overview of several models in the same report. You can see for example to which table (physical data) corresponds an entity (conceptual data).
&UHDWLQJ D PRGHO IURP WKH %URZVHU WUHH YLHZ
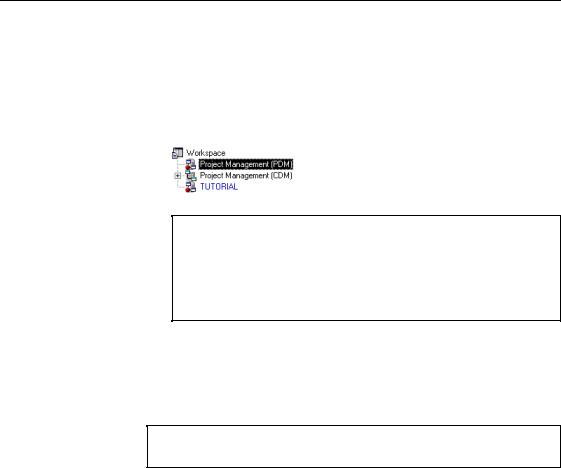
You can create a model using the workspace or folder contextual menus in the Browser tree view.
ϖ7R FUHDWH D PRGHO IURP WKH %URZVHU WUHH YLHZ
1Right-click the workspace node.
RU
Right-click a folder node.
2Select New→0RGHO W\SH from the contextual menu.
The model node appears in the Browser tree view and the default model diagram appears.
0RGHO GHIDXOW QDPH
When you create a new model, the following symbol * (star) appears beside the model default name in the Browser, for example BusinessProcessModel_1 *. This symbol designates the state of a model to be saved. The first time you save your model, the symbol is no longer displayed.
2SHQLQJ DQ H[LVWLQJ PRGHO
When you open a model, the standard file selection dialog box displays all file extensions available for PowerDesigner:
♦.PDM (Physical Data Model)
♦.CDM (Conceptual Data Model)
♦.OOM (Object-Oriented Model)
♦.BPM (Business Process Model)
♦.FEM (Free Model)
General Features Guide |
|
'HILQLQJ D PRGHO
ϖ7R RSHQ DQ H[LVWLQJ PRGHO
1Select File→Open from the PowerDesigner menu bar.
2Select a model type in the standard Windows file selection dialog box, and click OK.
The model node is expanded in the Browser tree view.
2SHQLQJ WKH PRGHO GLDJUDP
Opening a model does not automatically display the model diagram, to open the model diagram you have to double-click the diagram node in the Browser tree view.
2SHQLQJ D PRGHO SUHYLRXVO\ FORVHG LQ WKH ZRUNVSDFH
By default, when you open a workspace, the models linked to workspace are closed. When a model is closed, the connection and memory linked with the model file are not loaded.
You can restore at any time the connection with the file of a closed model.
ϖ7R RSHQ D PRGHO SUHYLRXVO\ FORVHG LQ WKH ZRUNVSDFH
♦Right-click the model node and select Open from the model contextual menu.
This action establishes the connection with the model file and displays a diagram window.
$GGLQJ PRGHOV WR WKH ZRUNVSDFH
Within the same workspace, your current models can coexist with nonmigrated V6 models like Process Analyst Models (PAM) or Warehouse Architect Models (WAM) and also external models like ERwin or Rational Rose.
This feature allows you to keep on working with the non-migrated or external model application together with PowerDesigner within the same workspace.
You can add a model to the workspace by using:
♦The Add command from the Workspace node contextual menu
♦The drag and drop feature from the Windows Explorer to the Browser
|
PowerDesigner |

&KDSWHU 0DQDJLQJ 0RGHOV
Opening nonmigrated V6 models or external models
♦The Repository extraction (with the Add to workspace option selected and the Open document option deselected)
Each time you add a model to the workspace, PowerDesigner lets you choose for each one of them whether you want to:
♦Add non-migrated V6 models and external models to the workspace and keep their original format
♦Open non-migrated V6 models and external models as a CDM, a BPM or a PDM
When you choose to add a model to the workspace and keep its original format, the model opens in its associated application every time you want to open it.
When you open a non-migrated V6 model or an external model in PowerDesigner, it is automatically imported as a CDM, a PDM or a BPM.
For more information on opening a PAM into a CDM, see chapter Working with Conceptual Data Models in the &'0 8VHU V *XLGH.
For more information on opening a PAM into a BPM, see chapter Working with Business Process Models in the %30 8VHU V *XLGH.
For more information on importing a WAM into a PDM see chapter Working with Physical Data Model in the 3'0 8VHU V *XLGH.
5HQDPLQJ D PRGHO LQ WKH %URZVHU WUHH YLHZ
You can rename a model from the Browser tree view.
ϖ7R UHQDPH D PRGHO LQ WKH %URZVHU WUHH YLHZ
1 Select the model node.
2Click in the selection in order to make the name editable.
RU
Press F2.
RU
Right-click the node and select Rename from the contextual menu.
3Type a new name for the model.
4Press ENTER.
General Features Guide |
|
'HILQLQJ D PRGHO
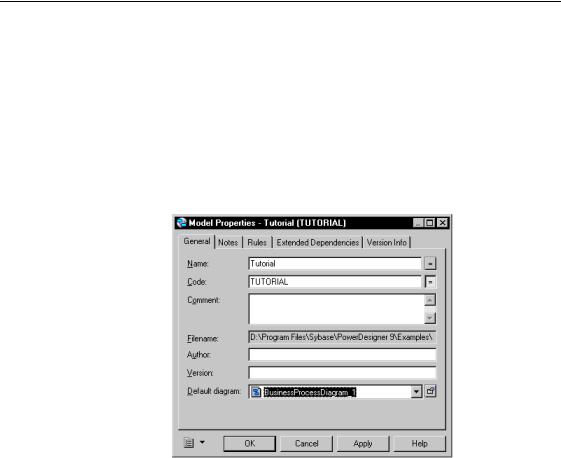
0RGLI\LQJ PRGHO SURSHUWLHV
You can modify the properties of a model from its property sheet.
ϖ7R PRGLI\ WKH PRGHO SURSHUWLHV
1Double-click the model node in the Browser tree view.
RU
Right-click the model node or the model diagram background and select Properties from the contextual menu.
The model property sheet appears.
2Modify the model properties.
3Click OK.
6DYLQJ D PRGHO
Each PowerDesigner model is saved in a separate file, with a module related file extension:
♦.CDM for Conceptual Data Model
♦.PDM for Physical Data Model
♦.OOM for Object-Oriented Model
♦.BPM for Business Process Model
♦.FEM for Free Model
|
PowerDesigner |
&KDSWHU 0DQDJLQJ 0RGHOV
When you save a model or a multi-model report, PowerDesigner automatically creates a backup copy of your file with identical identifying number and the following extension:
♦.CDB for Conceptual Data Model
♦.PDB for Physical Data Model
♦.OOB for Object-Oriented Model
♦.BPB for Business Process Model
♦.BMR for Multi-model report
♦.FEB for Free Model
When you save a model, PowerDesigner automatically assigns to the file a unique identifying number called GUID (Global Unique ID).
The GUID is used:
♦In the Repository. Documents are identified and can be updated
♦During models generation
The following formats are available when you save a model:
)RUPDW |
'HVFULSWLRQ |
XML |
Saving and loading time longer than binary (1.5 times) |
|
File size bigger than binary (2.5 times) |
|
File modification. You can open and modify the contents of an |
|
XML file |
|
Recommended for small models |
Binary |
Saving and loading time shorter than XML |
|
File size smaller than XML |
|
Recommended for big models |
Save As command The Save As command allows you to create a backup version of a model. This backup version has an identical GUID number with its original. Therefore the Save As command does not allow you to begin to work with a new model.
If you want to use the same objects in another model, you should copy the objects you want and paste them in a new model.
3RZHU'HVLJQHU YHUVLRQ
PowerDesigner version 7.0.3 cannot read models created or consolidated in version 9.
General Features Guide |
|
'HILQLQJ D PRGHO
ϖ7R VDYH D PRGHO
♦Select File→Save.
RU
Click the Save tool in the PowerDesigner toolbar.
RU
Right-click the model node in the Browser tree view and select Save from the contextual menu.
If you did not define a file name when you created the new model, the Save As dialog box asks you to indicate a name and a path for the file of the new model.
0RGHO GHIDXOW QDPH
When you create a new model, the following symbol (*) appears beside the model default name in the Browser and in the title bar, for example BusinessProcessModel_1 (*). This symbol designates the state of a model to be saved. The first time you save your model, the symbol is no longer displayed.
6DYLQJ DOO PRGHOV
You can save all the models existing in the current workspace and the workspace using the Save All feature.
ϖ7R VDYH DOO PRGHOV
♦Select File→Save All.
RU
Click the Save All tool in the PowerDesigner toolbar.
*HQHUDWLQJ D PRGHO
When you generate a PowerDesigner model, you can define generation targets, options, and tasks.
'HILQLQJ D JHQHUDWLRQ WDUJHW
The Targets page displays a list of target extended model definitions that can be selected for generation.
|
PowerDesigner |

&KDSWHU 0DQDJLQJ 0RGHOV
If you use an extended model definition to extend an object language, you must use an extended model definition designed for generation. To do this, you must verify that the Complement Language Generation check box is selected in the Extended Model Definition Editor.
For more information on extended model definitions used with object languages, see chapter Generating for a language in the 220 8VHU V *XLGH.
If you use an extended model definition for extended generation, you must use an extended model definition designed for generation that does not complement the main generation. To do this, you must verify that the Complement Language Generation check box is deselected in the Extended Model Definition Editor.
For more information on the generation targets, see section Generation
category, in chapter Extended Model Definition Reference Guide in the $GYDQFHG 8VHU 'RFXPHQWDWLRQ.
The Targets page contains check boxes and radio buttons. The check boxes allow you to select a category that may contain multiple extended model definitions, whereas the radio buttons allow you to select extended model definitions. The radio buttons are mutually exclusive, as it is only possible to select one extended model definition at a time.
For more information on how to create or import an extended model
definition, see section Working with extended model definitions in chapter Extended Model Definition Reference Guide in the $GYDQFHG 8VHU 'RFXPHQWDWLRQ.
For more information on OOM generation targets, see section Defining
generation targets (XEM) in chapter Generating for a language in the 220 8VHU V *XLGH.
'HILQLQJ JHQHUDWLRQ RSWLRQV
You can check your model before generation by using the Check Model check box. This check box is always available. The generation stops if an error is found. You must correct this error before starting the generation again.
For more information on the Check Model feature, see sections on checking a model in the different user’s guides.
You can add any options you may need during generation in the Generation\Options sub-category of the object language or extended model definition file. For example, you may want to sort the order in which the operations are displayed according to their visibility.
General Features Guide |
|

'HILQLQJ D PRGHO
For more information on how to add options for generation, see section
Generation category in chapters Object Languages Reference Guide and Extended Model Definition Reference Guide in the $GYDQFHG 8VHU 'RFXPHQWDWLRQ.
The Options page of the Generation dialog box may be empty, this means that no option has been defined in the corresponding target file (object language or extended model definition). If you use Java for example, you can use standard generation options available by default in this object language.
'HILQLQJ JHQHUDWLRQ WDVNV
The Tasks page contains standard commands defined in the object language and/or the extended model definition(s) attached to the model. You can select any tasks to execute at generation time.
You can add any tasks you may need during generation in the Generation\Tasks sub-category of the object language or extended model definition file. For example, you may add tasks in your current language in order to automatically compile files, or run a Java application during generation.
For more information on using these tasks in object languages, see
section Tasks category in chapter Object Languages Reference Guide in the $GYDQFHG 8VHU 'RFXPHQWDWLRQ.
For more information on using these tasks in extended model
definitions, see section Commands and tasks in chapter Extended Model Definition Reference Guide in the $GYDQFHG 8VHU 'RFXPHQWDWLRQ.
You may use a language or an extended model definition that displays the Tasks page of the Generation dialog box empty by default. This means that no task has been defined in the corresponding object language or extended model definition.
&ORVLQJ D PRGHO
When you close a model you:
♦Close the file linked with the model and consequently release the connection and memory linked with the model file
♦Keep the model definition in the workspace and the model node in the Browser tree view
You can close models if you want to free memory in your environment when you are working with large models.
|
PowerDesigner |
&KDSWHU 0DQDJLQJ 0RGHOV
ϖ7R FORVH D PRGHO
1 Right-click the model.
2 Select Close in the contextual menu.
If the model needs to be saved, a Save dialog box appears. The node in the Browser tree view is tagged with a red dot.
0RGLI\LQJ WKH ILOHQDPH RI FORVHG PRGHOV LQ WKH ZRUNVSDFH
You can easily modify the filename of closed models in the workspace, by right-clicking the closed model in the Browser tree view and selecting Properties from the contextual menu. You can directly modify the filename of the model in the Document Properties dialog box that appears.
'HOHWLQJ D PRGHO
When you delete a model, you detach it from the current workspace.
0RGHO GHOHWLRQ
Deleting a model does not delete the corresponding file from your disk.
ϖ7R GHOHWH D PRGHO
♦Right-click the model node in the Browser tree view and select Detach
From Workspace from the contextual menu.
RU
Select the model node in the Browser tree view and press DEL.
RU
Select the model node in the Browser tree view and click the Delete tool in the toolbar.
The model node and all its related items disappear from the current workspace.
General Features Guide |
|

'HILQLQJ D PRGHO
6HQGLQJ D PRGHO YLD D PHVVDJLQJ DSSOLFDWLRQ
PowerDesigner uses the messaging application programming interface (MAPI) to send model files by electronic mail.
This interface lets you use your internal messaging system to send model files directly to other team members.
ϖ7R VHQG D PRGHO XVLQJ D PHVVDJLQJ V\VWHP
1Select File→Send.
A profile selection dialog box appears.
2Select a profile.
3Click OK.
The file transfers to your internal messaging system, which may ask you for additional information, such as a destination.
|
PowerDesigner |