

Chapter 8 Microsoft Azure
a unique url that we can find on the portal. We did have to enter an application name when creating the static web app resource, but that is purely an administrative name used for our purposes. Of course, we can still buy a custom domain and hook that up.
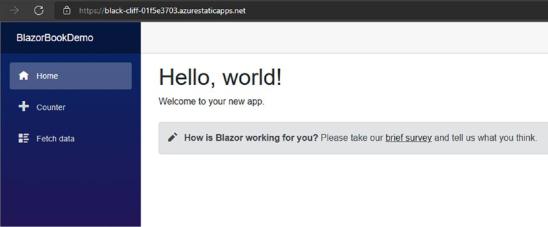
Once everything is finished, we can go to the generated domain name.
Figure 8-14. Blazor app running on Azure static web apps
We have successfully configured a Blazor app on static web apps. There is nothing happening server-side besides serving of files, client download everything and executes everything locally. The Blazor app shown here as a demo is compiled by GitHub
using .NET 6 on an Ubuntu build host. Other supported frameworks include Angular, Vue, React, or static site generators like Gatsby. For a full up-to-date list of supported frameworks, see https://docs.microsoft.com/en-us/azure/static-web-apps/front- end-frameworks.
Web App for Containers
Web apps support a second hosting model as we have seen in the deployment wizard. Besides just deploying code, we can deploy our application as a Docker container. The ins-and-outs of Docker are way beyond the scope of this book, but just to get everyone on the same page, here is a quick primer of what Docker is.
237
Chapter 8 Microsoft Azure
Docker
Docker is a set of tools build upon the containerd runtime to create containerized applications. Containers are basically an evolution of virtual machines. Virtual machines emulate full hardware devices where containers are on the operating system level.
A container bundles software, libraries, and configuration for running on a specific operating system. This means that a container is a fully isolated, self-configured unit of work that runs on top of the underlying operating system of the Docker host. This means that containers have less overhead than virtual machines, allowing more containers to run on one physical device than virtual machines.
Using containerized applications simplifies a lot of things. Moving from one cloud host to another, let’s say from Amazon AWS to Microsoft Azure, can be very easy since no configuration changes to the application are needed. Updating an application is as simple as restarting the container and so on. The majority of the work is in setting up an application for containerization. To get an application in a Docker container up and running, we need:
•\ |
A Docker file describing entry points, ports, and configuration. |
•\ |
Docker image, a containerized application, ready to startup and |
|
being used. |
•\ |
A Docker registry, this is like a package repository (NuGet, NPM, |
|
etc.) but for containers. It contains the container images we want |
|
to deploy. |
•\ |
A Docker runtime. |
•\ |
Docker runner, a system that pulls an image from a Docker registry |
|
and deploys it to a Docker runtime. |
The Docker registry is needed as this is where Docker runners pull their images from. Let’s try to dockerize our MVC demo application.
First thing we need is to install Docker Desktop on our system. The installer can be downloaded from their website https://hub.docker.com/editions/community/ docker-ce-desktop-windows. The installer will guide you through the process of
installing WSL2 and making sure the right updates are installed, after which Docker and Docker Desktop will be installed. Docker Desktop is the Windows version of Docker. It provides a UI to configure Docker and a CLI. Most importantly, it connects the Docker engine to Visual Studio for debugging.
238

Chapter 8 Microsoft Azure
After Docker Desktop is installed, we can open our solution, right-click the project we want to containerize, and select Add > Docker Support. Note that you can already generate the file without installing Docker first, but you won’t be able to run your containerized application.
Figure 8-15. Adding Docker support to an application
Selecting this will ask if we want a Linuxor Windows-based container. Select Linux and continue. Visual Studio will generate a Docker file. This file contains all the instructions needed to build and run our .NET 6-based application in a container.
After adding the Docker file, Visual Studio will show Docker as a new debug target. If Docker is selected as debug target, Visual Studio will take the Dockerfile into account and follow its instructions to build the application whenever we launch the Build command. When we launch the app in debug, a container will spin up in Docker
Desktop and a debugger will attach to that container. The first time you do this you might see some command line windows pop up. These are the Docker tooling downloading the correct images for this type of project.
Figure 8-16. Downloading Docker images for ASP.NET
239
Chapter 8 Microsoft Azure
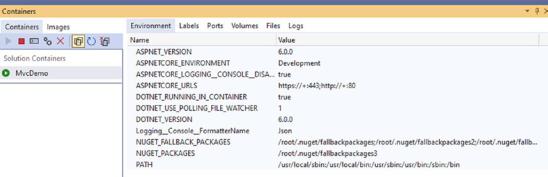
Visual Studio provides us with a container pane showing us all running containers and their environment configuration.
Figure 8-17. Running containers in Visual Studio
To be able to use this container for deployment, we first need to upload it to a container repository. Docker has a public repository where we can upload containers called Docker Hub, but Azure also has a service that allows us to create private container registries. This service is called the Azure Container Registry, or ACR.
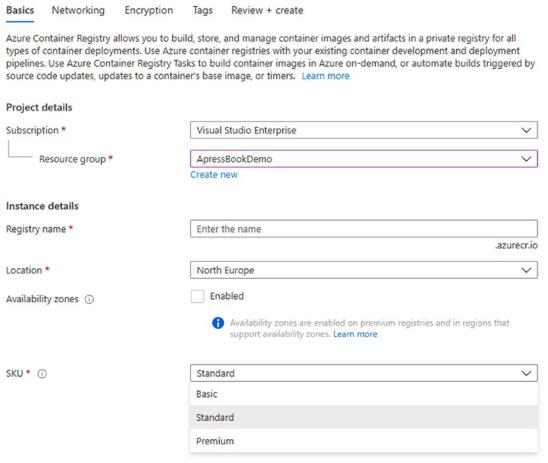
An ACR instance can be created through the portal, similar to web apps.
240
Chapter 8 Microsoft Azure
Figure 8-18. Creating an ACR instance
Creating an ACR instance is quite easy; the most important thing is the name. We need the <hostname>.azurecr.io domain in our commands to upload our containers to the correct registry.
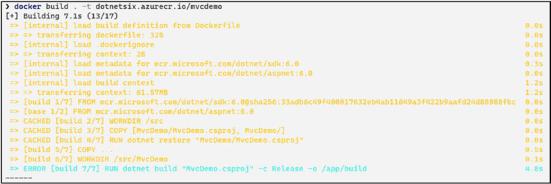
The next step would be to use the Docker CLI to buildour container; unfortunately, if we try to do this with the Dockerfile that was generated by Visual Studio, we get an error.
241
Chapter 8 Microsoft Azure
Figure 8-19. Error on Docker build
The reason is that this Dockerfile is used by the Visual Studio tooling to enable debugging and integrations. The Docker tooling internally uses different relative paths, assuming that the Docker file is on solution level, but Visual Studio places it on project level. The fastest solution is to copy the Docker file and duplicate it on solution level. In this way, both the Visual Studio tooling and Docker CLI tooling will work.
Once that is done, we are ready to build our container. Make sure your command line is in the solution directory, not the project directory.
Listing 8-3. Docker build command
docker build . -t dotnetsix.azurecr.io/mvcdemo
The Docker build command takes a path, which we define relatively by “. ”; it will look for a Docker file and build according to the info in that file. The tag, or t, command is what you want to tag the container image as. A tag is in the form of repositoryname:tag.
242
Chapter 8 Microsoft Azure
Figure 8-20. Building the container
We now have successfully created our container image; it is fully ready to be uploaded to our Azure Container Registry. However, since the ACR instance is private, we need to authenticate to Azure and ACR first. Make sure to have the Azure CLI installed for authenticating with the cloud platform. The CLI can be found at https:// docs.microsoft.com/en-us/cli/azure/install-azure-cli.
Once the Azure CLI is installed, we can authenticate against Azure with a simple command.
Listing 8-4. Authenticating with Azure
az login
This command will open a browser window to authenticate you with the correct Azure account. Once authenticated, a token will be set that can be accessed by the CLI. The next step is authenticating against the ACR instance.
Listing 8-5. Authenticating against ACR
az acr login --name dotnetsix.azurecr.io
If everything is set up correctly, we will get a Login Succeeded message. With this, authentication is set and we can push our container image to the registry.
Listing 8-6. Pushing container images to the ACR
docker push dotnetsix.azurecr.io/mvcdemo
243
Chapter 8 Microsoft Azure
We are not explicitly setting a tag so our image will automatically be tagged with
:latest.
After upload we can inspect our image on the Azure portal in the ACR instance by going to Repositories, selecting the repository and the correcting tag.
Figure 8-21. Container image on ACR
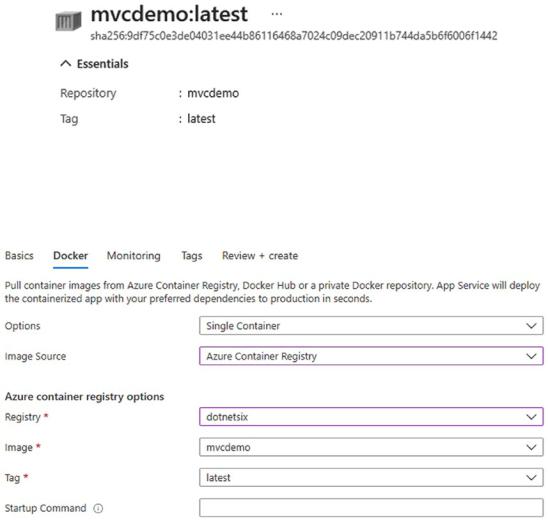
The final step is creating a new Azure Web Apps instance and selecting Docker instead of code. The second step of the wizard will be the Docker setup.
Figure 8-22. Setting up an Azure Web App using ACR
The wizard can connect to our ACR instance and read the list of images and tags. Azure will create a new instance, pull in the image from ACR, and create a container. Note that browsing to a Docker-based web app might take time; the container needs to be generated and spun up on first browse.
244