

Chapter 4 Desktop Development
DPI mode in a WinForms application can be set in the app.config file, through an API call or via a static method that needs to be called at startup. The default template in
.NET 6 includes setting the DPI mode to System Aware through the static method, which is now the recommended way of setting the DPI mode. Depending on what version of Windows your application is running on, you can have three or four modes.
•\ |
Unaware |
•\ |
Unaware GDI Scaled |
•\ |
System Aware |
•\ |
Per Monitor |
•\ |
Per Monitor v2 |
Most of these match perfectly on the list of modes supported in the GDI+ API, but what about Per Monitor v2? This is a mode that only works on Windows 10 version 1607 and later. Per Monitor v2 extends the Per Monitor option into the non-client areas,
meaning that title bars and scroll bars, for example, will keep DPI scaling in mind as well. It also extends scaling events to child windows while Per Monitor limits this for parent windows only.
Responding to Scale Events
WinForms provides some events, helper methods, and properties to allow us to react to DPI changes and update the UI where needed.
•\ |
DpiChanged – an event that fires when the DPI is changed for the |
|
monitor the form is currently on. |
•\ |
DpiChangedAfterParent – an event that fires when the parent control |
|
or form changed DPI from code after receiving a DpiChanged event. |
•\ |
DpiChangedBeforeParent – an event that fires when the parent |
|
control or form changed DPI from code before receiving a |
|
DpiChanged event. |
•\ |
LogicalToDeviceUnits – a helper method that converts a logical |
|
size to device units, keeping the current DPI in mind, and returns a |
|
System.Drawing.Size object. |
76
|
Chapter 4 Desktop Development |
•\ |
ScaleBitmapLogicalToDevice – a helper method that scales a System. |
|
Drawing.Bitmap to device units after a DPI change. |
•\ |
DeviceDpi – a property that gets the current DPI value for the |
|
monitor the form is currently displayed on. This property comes in as |
|
a parameter on a DpiChanged event. |
Listing 4-4 shows an example of a form that uses some of these events and properties to show a form that displays DPI information. If you still have the designer window open from the first part of this chapter, you can press F7 to switch to the code behind. From there we can add an eventhandler to the DpiChanged event, shown here in the constructor. From that eventhandler, we update the text on a label that we dropped on the form using the designer.
Listing 4-4. Reacting to DPI changes
public partial class DpiForm : Form
{
public DpiForm()
{
InitializeComponent();
DpiLabel.Text = $"Current DPI: {DeviceDpi}";
DpiChanged += OnDpiChanged;
}
private void OnDpiChanged(object sender, DpiChangedEventArgs e)
{
DpiLabel.Text = $"DPI changed from {e.DeviceDpiOld} to {e.DeviceDpiNew}";
}
}
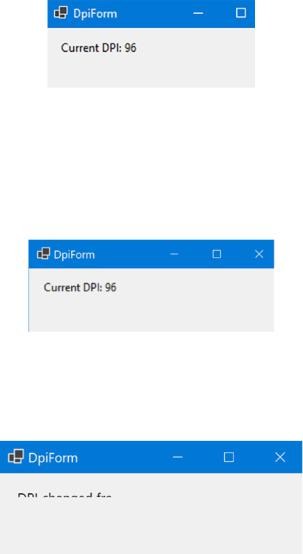
Figure 4-7 shows the result of the form when it starts up.
77
Chapter 4 Desktop Development
Figure 4-7. Form displaying the current DPI
If we set High DPI mode to DpiUnaware and change the scaling of the monitor, you’ll notice that the form seems to zoom in; it will get blurry but the text in the label will remain the same. This means that the system still calculates the size according to 96 DPI, instead of the new value. Figure 4-8 shows this result.
Figure 4-8. Result when scaling set to 175%
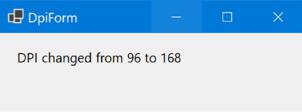
After setting High DPI mode to PerMonitorV2, we expect the DPI to change when we adjust scaling, and it does exactly that, but we get a new problem as shown in Figure 4-9.
Figure 4-9. Result after changing scaling
You’ll notice that the text we do see is rendered sharp; however, the label didn’t resize, so our text is being cut off. This is because the WinForms designer, by default, sets autoscale mode to Font. However, our font size is not changing; our scale factor is. We can solve this by changing the autoscale mode as shown in Listing 4-5; Figure 4-10 shows the result.
78
Chapter 4 Desktop Development
Listing 4-5. Setting autoscale mode to DPI instead of font
public DpiForm()
{
InitializeComponent();
DpiLabel.Text = $"Current DPI: {DeviceDpi}"; AutoScaleMode = AutoScaleMode.Dpi; DpiChanged += OnDpiChanged;
}
private void OnDpiChanged(object sender, DpiChangedEventArgs e)
{
DpiLabel.Text = $"DPI changed from {e.DeviceDpiOld} to {e.DeviceDpiNew}";
}
Figure 4-10. Result after changing autoscale mode
Visual Styles
Let’s continue with the startup calls; the next step is Application.EnableVisualStyles. EnableVisualStyles simply prepares all the colors, fonts, and other visual elements in the theme of the current operating system. Let’s take a form with a label, datepicker, and
a button as shown in Figure 4-11.
79

Chapter 4 Desktop Development
Figure 4-11. Form with default controls
The elements on this form automatically take the styling of Windows 10, the operating system the application was running on when taking this screenshot. We can disable loading the visual styles by replacing the call to Initialize with Listing 4-3 and commenting out Application.EnableVisualStyles method we get the result from Figure 4-12.
80