


!
:AAA/ACCT: user James, acct type 0 (2103966373):\ Method=tacacs+ (tacacs+)
:TAC+: (2103966373): received acct response status = SUCCESS
:AAA/MEMORY: free_user (0x62527B28) user='James' ruser='' − port='tty2' rem_addr='192.168.11.45'
authen_type=ASCII service=ENABLE priv=15
!
:AAA/ACCT/CMD: User James, Port tty2, Priv 15:''show run−config''
:AAA/ACCT/CMD: Found list ''default''
:AAA/ACCT: user James, acct type 3 (3950182121): Method=tacacs+
:TAC+: (3950182121): received acct response status = SUCCESS
:AAA/ACCT/ACCT_DISC: Found list ''default''
:tty2 AAA/DISC: 1/''User Request''
:AAA/ACCT/EXEC/STOP User James, Port tty2:task_id=276 − start_time=1004308382 timezone=CST service=shell − disc−cause=1 disc−cause−ext=1020 elapsed_time=29
!
:AAA/ACCT: user James, acct type 0 (1600314757): − Method=tacacs+ (tacacs+)
:TAC+: (1600314757): received acct response status = SUCCESS
:AAA/MEMORY: free_user (0x625249DC) user='James' ruser='' − port='tty2' rem_addr='192.168.11.45' authen_type=ASCII − service=LOGIN priv=1
:AAA/ACCT/CMD: User James, Port tty1, Priv 15: ''sh ip route''
:AAA/ACCT/CMD: Found list ''default''
:AAA/ACCT: user James, acct type 3 (668218192): Method=tacacs+
:TAC+: (668218192): received acct response status = SUCCESS
Notice that the access server first determines that method list "default" is configured to provide accounting services for user James. The access server then determines that in order to account for the users' actions, it should use the tacacs+ method. You should notice the following key aspects of the accounting feature:
:AAA/ACCT/CMD: User James, Port tty2, Priv 15:''show run−config''
:AAA/ACCT/CMD: User James, Port tty1, Priv 15: ''sh ip route''
The access server will account for every command that is entered during the session in which James is connected. This feature provides the nonrepudiation aspect of the AAA architecture.
Installing and Configuring Cisco Secure NT
It's somewhat easy to install and configure the Cisco Secure ACS server. This section presents a brief overview of the installation steps.
For the AAA security architecture to function as designed, there are a few requirements that must be met prior to configuring the Cisco Secure ACS software on the server. First, the administrator must ensure that the following items are configured:
∙Make sure your network access server is running IOS 11.2 or higher or you are using a third−party device that can be configured with TACACS+ and/or RADIUS.
∙Make sure remote clients can successfully connect to your network access server.
∙Use the ping command to ensure that the network access server can successfully establish logical communication to the server that the Cisco Secure ACS software will be installed on.
78
∙Ensure that the server has a compatible Internet Web browser installed and that Java and JavaScript are enabled.
∙Identify the security that will be used, identify the network access server's name and IP address, and validate the encryption and authentication key.
Cisco Secure ACS server installs from a CD−ROM, and the process is similar to any other Windows−based application. Although the installation steps are somewhat detailed, the installation process is quite easy. You should be aware that there are some major decisions that should be made during the installation process, and they will be mentioned.
During the installation process, the first major decision is to determine if Cisco Secure ACS software is already installed on the system. If it is, you are asked if you would like to remove the previous version and save the existing database information. If you want to keep the existing data, select the Yes, Keep Existing Database checkbox. If you want to create a new database, click to clear the checkbox and click the Next button. You're then asked to choose a destination location folder in which to install the software. If you choose to install the software into the default location, click the Next button to proceed to the next section. To use a different directory, click the Browse button and enter the name of the directory to use. If the directory does not exist, Setup asks if you want to create it. Click the Yes button to proceed. At this point, the Authentication Database Configuration window opens.
In the Authentication Database Configuration window, you will choose the database that is to be used to verify all authentication requests. The choices are as follows:
∙Cisco Secure ACS Database—Choosing this option configures the Cisco Secure ACS to use only the locally populated Cisco Secure ACS database for authentication. Using the Cisco Secure ACS database is the default method.
∙Windows NT User Database—Choosing this option configures the Cisco Secure ACS to authenticate clients using the Windows NT/2000 user database.
This step requires some planning ahead because, in order for the Cisco Secure ACS server to use the local database on the server, the database must first be populated. To populate the database, you must manually enter the information for each and every client. The advantage of using the Cisco Secure ACS database is speed of response time to the network access server. Also, note that if the administrator chooses to use the Windows NT/2000 database option, the Cisco Secure ACS server will still attempt to authenticate the client using the local Cisco Secure ACS database. However, most enterprises do not configure the local database if they elect to use the external Windows NT/2000 database. When you've chosen the database, click the Next button.
The next few abbreviated configuration windows are very critical for ensuring communication between the Cisco Secure ACS server and the network access server:
∙Authenticate Users—This window determines the security protocol to be used for communication between the Cisco Secure ACS server and the access server. The TACACS+ protocol is the default choice.
∙Access Server Name—This window allows the administrator to configure the name of the network access server that will use the services of the Cisco Secure ACS server.
∙Access Server IP Address—This window allows the administrator to configure the IP address of the network access server that was defined in the preceding step.
∙Windows NT Server IP Address—This window defines the IP address of this Windows NT/2000 server.
∙TACACS+ or RADIUS Key—This is one of the most important configuration windows in the
79
configuration process. It allows the administrator to configure the shared secret encryption key exchanged between the network access server and the Cisco Secure ACS. These passwords must be identical to ensure proper function and communication between the NAS and Cisco Secure ACS. Shared secrets are case sensitive.
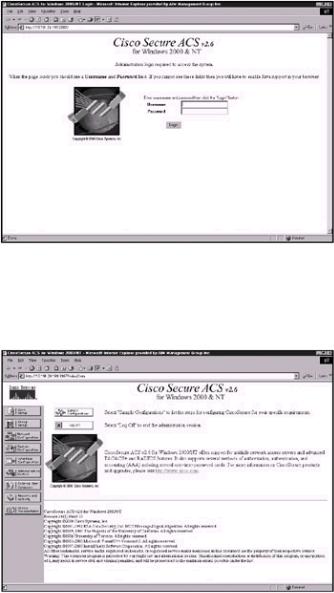
After you successfully install the Cisco Secure ACS software and reload the server, an icon will be displayed on the desktop of the server. You can double−click this icon to continue configuring the Cisco Secure ACS server. Because the Cisco Secure ACS server is an HTML−only software package, you will need a Web browser to continue. Double−clicking the icon will open the default Web browser, and the screen in Figure 2.11 will appear. The Cisco Secure ACS server is also accessible from any workstation with a functioning Web browser and logical connectivity to the server by entering the following URL: http:// <ip address of the server>:2002 or http://<hostname of the server>:2002. Figure 2.11 is the interface that is displayed after the server is accessed.
Figure 2.11: Cisco Secure ACS server interface
Upon initially accessing the Cisco Secure ACS server, the administrator will be prompted to enter a username and password. By default, the username and password are set to admin and admin. After the correct username and password pair is entered, the server logs the user into the console and the interface displays the output screen shown in Figure 2.12.
Figure 2.12: Console of the Cisco Secure ACS server
Notice the navigation bar (the column of buttons) on the left side of the screen in Figure 2.12. Each button represents a particular area that you can configure. Depending on your requirements, you might not need to configure all areas. Click one of the buttons on the navigation bar to begin configuring the ACS server:
80
∙User Setup—View a list of all users contained within the Cisco Secure ACS database, find or add a user, assign a user to a group, edit a user's account, and disable or delete a user account.
∙Group Setup—Create, rename, edit, and assign users to a group.
∙Network Configuration—Edit network access server parameters. You can also add or delete network access servers from the Cisco Secure ACS server.
∙System Configuration—Configure service control parameters that stop or restart the Cisco Secure ACS services, configure logging, set password validation, and control database replication.
∙Interface Configuration—Configure TACACS+ and RADIUS options and control what options are displayed in the user interface.
∙Administration Control—Configure the parameters that pertain to the administration of the Cisco Secure ACS server.
∙External User Databases—Configure the unknown user policy, database group mappings, and the external user database, such as Windows NT/2000 Server database.
∙Reports and Activities—View or export the reports that the ACS server generates.
The Cisco Secure ACS server comes with a Command−line Database Utility that lets administrators use the CSUtil.exe utility to import or export usernames, passwords, and group information all at once from a standard text file, allowing for backup and maintenance of the database. The utility can be run while the server is online or offline; the only disadvantage to running the utility while the server is online is a degradation of performance. To import the text file database into the Cisco Secure ACS server user database, add new users into the database, or modify users' authentication information, you must first open a DOS window and change the directory as follows:
C:\Program Files\CiscoSecure ACS v2.6\Utils
This is the location of the utility directory if you elected to install the Cisco Secure ACS software to the default location. The CSUtil.exe uses text files to perform the import and export functions. To configure the text file to add, update, or delete users, enter the following information of each field listed below on a single line and separate the fields with a colon:
Username field:
∙add—Add user information to the Cisco Secure user database. If the username already exists, no information is changed.
∙update—Update the information associated with the existing username in the Cisco Secure user database.
∙delete—Remove the user information from the Cisco Secure user database.
Authentication field:
∙csdb—Authenticate the username against the Cisco Secure user database.
∙ext_ldap—Authenticate the username against a generic LDAP database.
∙ext_nt—Authenticate the username against a Windows NT/2000 database.
∙ext_nds—Authenticate the username against a Novell NDS database.
∙ext_sdi—Authenticate the username against an SDI database.
∙ext_anpi—Authenticate the username against an AXENT database.
∙ext_eniga—Authenticate the username against a SafeWord database.
∙chap—Use a CHAP password for authentication.
81

User Group:
∙ profile—Group number between 0 and 99 that the user is assigned.
The following is a sample import text file:
ADD:James:CSDB:letmein:PROFILE:1
ADD:admin:CSDB:admin:PROFILE:1
ADD:John:CSDB:cto:PROFILE:
ADD:joe:EXT_NT:CHAP:dialuppassword
ADD:jeff:CSDB:iloveunix
ADD:steve:EXT_NT:unixpassword
The CSUtil.exe utility supports the following arguments for importing and exporting the database files. Use the following arguments to import and/or export the database information:
CSUtil <−q> <−c> <−d> <−g> <−i filename> −
<−e errornumber> <−b filename> <−r filename> <−f> <−n> − <−s> <−y> <−u> <−x>
Each argument has the following meaning:
∙q—Runs the import or export in quiet mode and does not prompt for other options.
∙b—Runs a complete system backup.
∙c—Recalculates the database CRC values.
∙d—Exports the complete database to a dump.txt file.
∙e—Decodes error numbers to an ASCII message.
∙f—Fixes group assignments.
∙g—Exports all group information to the group.txt file.
∙i—Imports or merges a named user file.
∙n—Creates a new database.
∙r—Restores a database from a named file.
∙s—Removes deleted users from the database.
∙x—Displays the help options.
∙y—Dumps the server Registry information to a named file.
∙u—Creates a file of all users within each group.
To create the backup of user information for each group, you will need to run a command like the following example from the DOS prompt of the Cisco Secure ACS server:
C:\Program Files\CiscoSecure ACS v2.6\Utils>CSUtil −u users.txt
This command creates a text file with the names of the group's members displayed under the group name. The output of this file is shown in Listing 2.12.
Listing 2.12: Output of the Users.txt file.
#Users listed on TACACS−SERVER01 at 08:50 November 01 2001
82

#SW version 2.6(1.10)
Group 'Network Engineers' (20 users): nsa
nsanat cw2000 TAC <clipped>
Group 'Cable Engineers' (3 users): testuser
CableGuy
FlukeMan
The file first lists the name of the Cisco Secure ACS server and the date on which the file was generated. The second line displays the current software version of the Cisco Secure ACS server. The lines following the first two display all the users in the Cisco Secure ACS server database and each group's members. This command is a useful backup command you can run quite often to maintain a current list of all users contained within the database. The preceding file only exported the users and the groups the users that are associated with. In many instances, the information contained in the file is not sufficient. Using the CSUtil command with the –d option, you can create a complete database backup that is exported to a file named dump.txt. The abridged output the dump.txt file creates is displayed in Listing 2.13.
Listing 2.13: Output of the dump.txt file.
#DB dumped on |
TACACS−SERVER01 at 08:51 November 01 2001 |
|||||||||||
#DB version 8.0 |
|
|
|
|
|
|
|
|
|
|||
#SW version 2.6(1.10) |
|
|
|
|
|
|
|
|
||||
#−−−−−−−−−−−−−−−−−−−−−−−−−−−− |
|
|
|
|
|
|
||||||
Name |
|
|
:nsa |
|
|
|
|
|
|
|
|
|
Password |
|
|
: |
0x0020 ca 64 ad 2c c0 13 8d 21 85 7f 0b − |
||||||||
a5 75 |
63 |
11 |
9e 1f a5 |
f6 |
15 |
e3 |
96 |
2c |
d8 |
39 |
86 9c 4a 5f 53 e0 6c |
|
Chap password |
: |
0x0020 23 a6 08 39 d4 88 db 10 8e f7 ba − |
||||||||||
5d cf 5f 8d |
21 ff c4 e4 63 86 c3 d6 27 c4 be 24 4a b1 ae 9a fe |
|||||||||||
State |
|
|
: |
0 |
|
|
|
|
|
|
|
|
S_flags |
|
|
: |
1 |
|
|
|
|
|
|
|
|
Aging policy |
: |
group0 |
|
|
|
|
|
|
|
|||
Good count |
|
: |
0 |
|
|
|
|
|
|
|
|
|
Warning count |
: |
0 |
|
|
|
|
|
|
|
|
||
Change count |
: |
0 |
|
|
|
|
|
|
|
|
||
Last change Lo: |
334080752 |
|
|
|
|
|
|
|||||
Last change Hi: |
29445163 |
|
|
|
|
|
|
|||||
Last auth Lo |
: |
0 |
|
|
|
|
|
|
|
|
||
Last auth Hi |
: |
0 |
|
|
|
|
|
|
|
|
||
Rights |
|
|
: |
1 |
|
|
|
|
|
|
|
|
Type |
|
|
: |
4 |
|
|
|
|
|
|
|
|
EnableType |
|
: |
4 |
|
|
|
|
|
|
|
|
|
Status |
|
|
: |
1 |
|
|
|
|
|
|
|
|
Reset |
|
|
: |
1 |
|
|
|
|
|
|
|
|
Expiry |
|
|
: |
209 |
|
100 |
|
4294937589 |
638 0 5 |
|||
MaxSession |
|
: |
0 |
|
|
|
|
|
|
|
|
|
MaxSess2 |
|
|
: |
0 |
|
|
|
|
|
|
|
|
Profile |
|
|
: |
0 |
|
|
|
|
|
|
|
|
LogonHrs |
|
|
: |
0x0016 00 ff ff ff ff ff ff ff ff ff ff ff ff ff ff ff ff ff ff ff ff |
||||||||
Alias |
|
|
: |
0 |
|
|
|
|
|
|
|
|
Value Flags |
|
: |
524324 |
|
|
|
|
|
|
|
||
CounterVals_00: |
161 |
|
161 |
|
689 |
|
1888 |
|||||
CounterRst_00 |
: |
2667b8401c16164 |
|
|
|
|||||||
CounterVals_01: |
1 |
|
3 |
|
|
60 |
|
137 |
|
|||
CounterRst_01 |
: |
49391a60 |
|
1c161f7 |
|
|
||||||
83

##− User End |
|
|
|
|
App00 EXTRN_PASSWD ESTRING |
0x0020 |
ca 64 2c c0 13 8d 21 58 73 |
||
f3 9c |
c0 5c bf 8d 12 d9 9a d8 |
b5 2e 61 |
3f b1 d8 91 f3 df d7 18 |
|
App00 USER_DEFINED_FIELD_0 |
STRING |
|
Cisco NSA |
|
App00 USER_DEFINED_FIELD_1 |
STRING |
|
National Service |
|
App00 IP_ACS_POOLS_LENGTH |
INTEGER |
|
2 |
|
App00 IP_ACS_POOLS |
STRING |
|
|
|
App00 IP_ALLOCATION_METHOD |
INTEGER |
|
5 |
|
App00 IP_STATIC_ADDR_LENGTH |
INTEGER |
|
1 |
|
App00 IP_STATIC_ADDR |
STRING |
|
|
|
App00 IP_NAS_POOL_LENGTH |
INTEGER |
|
1 |
|
App00 IP_NAS_POOL |
STRING |
|
|
|
App00 user_callback_type |
INTEGER |
|
0 |
|
App00 |
user_callback |
STRING |
|
|
App00 |
disp_callback |
STRING |
|
|
App01 |
Filters\NAS\records |
MSTRING |
|
|
App01 |
Filters\NAS\enabled |
STRING |
|
0 |
App01 |
Filters\NAS\option |
STRING |
|
PERMIT |
App01 |
Filters\Dialup\records |
MSTRING |
|
|
App01 |
Filters\Dialup\enabled |
STRING |
|
0 |
App01 |
Filters\Dialup\option |
STRING |
|
PERMIT |
App01 |
max_priv |
STRING |
|
15,1 |
App01 max_priv_LENGTH |
INTEGER |
|
4 |
|
App01 |
enable_passwd ESTRING |
0x0020 ca 64 ad 2c 13 8d 21 0c − |
||
13 ab e0 2d e1 60 ab 1f c1 c5 c7 33 07 ce ee c2 13 b2 22 a9 3a
ba
−−−−−−−−−−−−−−−−−−−−−−−−−−−
#End Of Dump
The most useful function of the CSUtil.exe utility is that it gives you the ability to back up the entire system, export it to secure location, and restore the server from the backup in the event of a catastrophic failure. To create the backup of the Cisco Secure ACS server, perform the following step:
1. From the command prompt of the Utility directory, use the csutil –b filename command. This command will create four compressed files in the Utils\SysBackup\directory\: folder:
∙Registry.dat
∙User.dat
∙User.idx
∙Varsdb.mdb
A fifth file is also created and stored in the Utils\dbcheckpoint directory. This file is stored in yyyymmddhhmm.zip format.
Each time a backup is initiated, separate files are created, mean ing the server does not overwrite the existing files in the direc tory. Performing the backup procedure on a regular basis is al ways recommended.
84