

OS Integration
How it works...
The Tunnelblick GUI is a wrapper program around the command-line openvpn program. It monitors the startup and the shutdown of OpenVPN and it supplies the right input, such as the private key password, if required.
Other than that the Mac OS X version of OpenVPN, it behaves very similar to the Linux and UNIX versions of OpenVPN. Therefore, nearly all scripts that work for Linux and UNIX can be made to work easily for Mac OS X as well.
There's more...
There are a few subtle differences between the UNIX version of OpenVPN and the Mac OS X version. The two major differences are outlined here.
Name resolution
If the checkbox Set nameserver is enabled, then Tunnelblick will run an up script that interacts with the Mac OS X network layer to use the DNS information pushed out by the OpenVPN server. It will also update the /etc/resolv.conf file with this DNS information.
Scripting
Note that Tunnelblick does not allow scripting on the client side, as it replaces the up and down scripts with scripts of its own.
Windows Vista/7: elevated privileges
With the introduction of Windows Vista, Microsoft introduced User Access Control (UAC). UAC is meant to safeguard users from running programs that can modify the operating system itself. Before such a program is run, privilege elevation is required, even if the user has full Administrator rights. A dialog box appears that the user must click on before the execution begins. In order to run OpenVPN, elevated privileges are needed, as OpenVPN wants to open a system device and start a VPN connection. Especially, if the routes need to be added to the system, elevated privileges are essential.
This recipe shows how OpenVPN can be set up on Windows Vista/7 with elevated privileges, including how to run up and down scripts.
 266
266

Chapter 10
Getting ready
Set up the client and server certificates using the first recipe from Chapter 2, Client-server IP-only Networks. For this recipe, the server computer was running CentOS 5 Linux and OpenVPN 2.1.1. The client computer was running Windows Vista SP1 and OpenVPN 2.1.3.
Keep the configuration file, basic-udp-server.conf, from the Chapter 2 recipe Server-side routing at hand. For the client, keep the configuration file, example6-1.ovpn, from the Chapter 6 recipe Using a client-side up/down script at hand.
How to do it...
1.First, start the server:
[root@server]# openvpn --config basic-udp-server.conf
2.Next, we modify the client configuration file, example6-1.ovpn, by changing the lines:
script-security 2
up "c:\\program\files\\openvpn\\scripts\\updown.bat" down "c:\\program\files\\openvpn\\scripts\\updown.bat"
to:
script-security 2 system
cd "c:\\program\files\\openvpn\\scripts"
up "%windir%\\system32\\cmd.exe /c updown.bat" down "%windir%\\system32\\cmd.exe /c updown.bat"
This is required for batch files to work when they are called by the OpenVPN executables on Windows Vista/7. Save this configuration file as example10-4.ovpn.
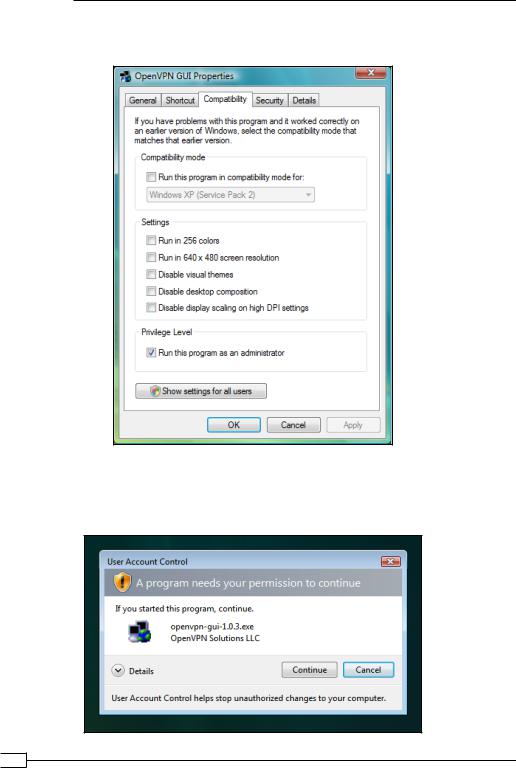
3.Before starting the OpenVPN GUI, right-click on the OpenVPN GUI icon that was placed on your desktop after installing the OpenVPN 2.1.3 installer for Windows.
267
OS Integration
4.In the Properties screen that comes up, click on the tab Compatibility and enable
Run this program as an administrator:
Click on OK.
5.The next time you start the OpenVPN GUI using this icon, it will prompt for permissions:
 268
268

Chapter 10
6.Click on Continue to start the OpenVPN GUI as usual. At this point, the OpenVPN GUI is running with elevated privileges, which means it has full control over the system.
7.Start the OpenVPN client by launching the example10-4 configuration file. Verify that the VPN connection is established and that the log file c:\temp\openvpn.log has been created.
How it works...
When the OpenVPN GUI application is launched, the user must confirm that it can run with elevated privileges. After that the OpenVPN GUI can launch other executables that will also inherit these privileges. When the GUI launches the openvpn.exe process, it can open the VPN adapter, alter the routing tables, and run up and down programs. One thing it cannot do is directly run batch files, as these are considered too dangerous. By explicitly launching the Windows command shell with the name of the batch file, the OpenVPN process is capable of running an up or down script.
There's more...
A new OpenVPN GUI application is currently under development, which is capable of running without elevated privileges. It uses a different method for communicating to the openvpn.exe process, which still requires such privileges.
Windows: using the CryptoAPI store
OpenVPN has the capability of using the Windows CryptoAPI store to retrieve the public and private key needed for setting up a connection. This improves security somewhat, as the CryptoAPI store is more secure than the plaintext .crt and .key files that are normally used to set up an OpenVPN connection. In this recipe, we will configure an OpenVPN client to retrieve the required information from the CryptoAPI store when connecting to the server. This recipe was tested on Windows XP and Windows Vista but it will also work on other versions of Windows.
Getting ready
Set up the client and server certificates using the first recipe from Chapter 2, Client-server IP-only Networks. For this recipe, the server computer was running CentOS 5 Linux and OpenVPN 2.1.1. The client computer was running Windows XP SP3 and OpenVPN 2.1.1. Keep the configuration file basic-udp-server.conf from the Chapter 2 recipe Server-side routing at hand.
269

OS Integration
How to do it...
1.First, we need to import the client certificate into the CryptoAPI store. In order to do that we must convert the existing client2.crt and client2.key files to PKCS12 format. Open a Windows command shell and change directory to the location where these files are located:
[winclient]C:> cd C:\Program Files\OpenVPN\config [winclient]C:\Program Files\OpenVPN\config>..\bin\openssl pkcs12
-export |
-in client2.crt |
-inkey |
client2.key -out client2.p12 |
Loading 'screen' into random state |
- done |
||
Enter pass phrase for client2.key: |
[existing password] |
||
Enter Export Password: [new |
export |
password] |
|
Verifying - |
Enter Export Password: |
[repeat export password] |
|
2.Next, import the PKCS12 file into the Windows CryptoAPI store:
[winclient]C:\Program Files\OpenVPN\config>start client2.p12
The certificate import wizard will start.
3.Click Next on the first screen, and again Next on the second screen. Then, you must supply the Export password from the previous step:
If you enable Enable strong private key protection, the certificate and private key are even better protected, but you will be required to retype the password every time OpenVPN starts.
 270
270
Chapter 10
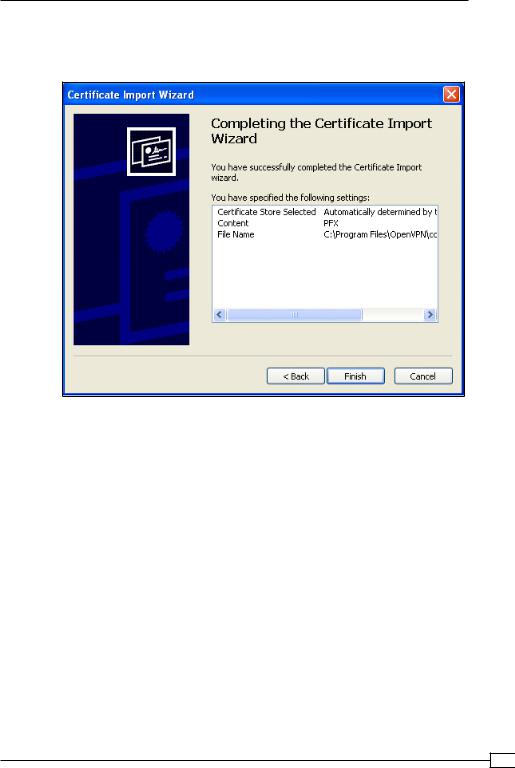
4.Click Next. In the next screen, select the default option Automatically select the certificate store and click on Next once more. By clicking on Finish in the next screen, the certificate import is completed:
5.Create the client configuration file:
client proto udp
remote openvpnserver.example.com port 1194
dev tun nobind
ca "c:/program files/openvpn/config/ca.crt" tls-auth "c:/program files/openvpn/config/ta.key" 1 cryptoapicert "SUBJ:OpenVPNClient2"
ns-cert-type server
Save the configuration file as example10-5.ovpn. 6. Start the server:
[root@server]# openvpn --config basic-udp-server.conf
7.Start the VPN connection.
271

OS Integration
The VPN connection should be established without asking for a private key password. If the CryptoAPI option Enable strong private key protection was enabled, a separate dialog will pop up to ask for the CryptoAPI password.
How it works...
The Windows OpenVPN client software is capable of extracting a certificate and public key from the Windows CryptoAPI store if either the certificate subject name is specified using the keyword SUBJ: or if the certificate thumbprint or fingerprint is specified using the keyword THUMB:. After retrieving the certificate and private key from the CryptoAPI store, the VPN connection is established in exactly the same manner as if plaintext certificate and private key files had been used.
There's more...
There are several small yet important details when using the Windows CryptoAPI store:
The CA certificate file
Note that it is still required to specify the CA certificate using the following line:
ca c:/program files/openvpn/config/ca.crt
In theory, it would be possible to also retrieve the CA certificate from the CryptoAPI store but this is currently not implemented in OpenVPN.
Certificate fingerprint
Instead of supplying:
cryptoapicert SUBJ:<subject name>
It is also possible to specify:
cryptoapicert THUMB:<fingerprint>
The fingerprint or thumbprint of an X509 certificate can be both be retrieved by either looking up the Thumb property for the imported certificate in the Windows Certificate store or by typing the OpenSSL command:
C:\Program Files\OpenVPN\config>..\bin\openssl x509 \ -fingerprint -noout -in client2.crt
SHA1 Fingerprint=D7:15:21:1F:11:15:33:58:81:DA:DE:2C:17:1E:36:43:58:4 0:87:07
 272
272