

Beginning Visual Basic 2005 Express Edition - From Novice To Professional (2006)
.pdf20 |
C H A P T E R 1 ■ W E L C O M E T O V I S U A L B A S I C E X P R E S S |
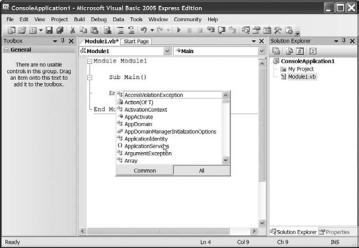
Figure 1-20. The IDE after starting up a new console application
Because a console application has no real graphical user interface in the traditional Windows application sense, the IDE automatically drops you into the code editor. If you have never written any Visual Basic applications before, don’t worry if the text on the screen looks worryingly cryptic. You’ll work through just how a Visual Basic program looks and what it all means, in detail, in the next chapter.
When you write a program in Visual Basic, you actually spend most of your time either creating or using objects and classes (think of a class as a blueprint for an object). Visual Basic also provides you with something called modules. These are just containers for short snippets of code. Take a look at the code on-screen and you’ll see that we’re already working with a module:
Module Module1
Sub Main()
End Sub
End Module
As you can see, your program consists of a single module called Module1. Inside that module is an empty subroutine called Main. This is the subroutine that will run when you hit F5 to start the program. It all looks pretty simple, doesn’t it. The complexity comes in when you consider what it means to work with the .NET Framework.
C H A P T E R 1 ■ W E L C O M E T O V I S U A L B A S I C E X P R E S S |
21 |
The .NET Framework consists of hundreds of classes that each contain a bunch of subroutines that you can call. That all adds up to a lot of things to remember, which is exactly what IntelliSense is designed to help you with.
Position your cursor on the blank line between Sub Main() and End Sub and then hit Ctrl+spacebar. The IntelliSense window appears just beneath the cursor, as shown in Figure 1-21.
Figure 1-21. The IntelliSense window appears when you press Ctrl+spacebar.
Here you’ll find all the classes that are available for you to use, as well as namespaces. Because there are so many classes in the framework, .NET uses namespaces to group them. For example, if you were about to write code to talk to the Internet, you’d need the classes in the System.Net namespace. We’ll look more at IntelliSense and namespaces in the next chapter.
If you were to run the program at this point, all you’d see is a text window (called the console window—this is a console application after all) appear briefly and disappear. Because this is a console application, running it causes the console to appear, and because you don’t have any code in your application, the console window immediately disappears. There’s a way to stop that from happening.
The System namespace contains a class called Console. This has lumps of code in it (methods) to do various tasks, such as display text in the console window and other such console-related goodies. There’s also a method in there called ReadLine() that waits for the user to enter some text and press Enter before continuing. Let’s use IntelliSense to add a line of code into your Main () subroutine to do just that.
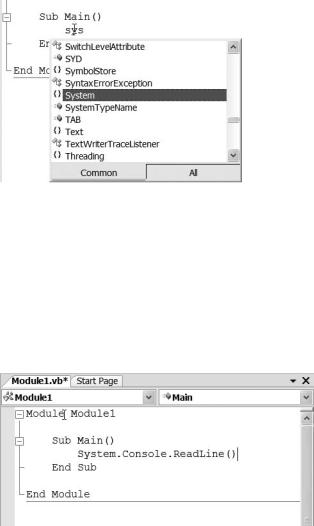
If the IntelliSense window is not currently displayed, press Ctrl+spacebar once again to show it, and then type the letters Sys. The IntelliSense window automatically jumps to the first entry it can find that begins with those letters—the System namespace (as shown in Figure 1-22).
22 |
C H A P T E R 1 ■ W E L C O M E T O V I S U A L B A S I C E X P R E S S |
Figure 1-22. Typing while the IntelliSense window is open causes it to automatically jump to the first match closest to whatever you typed.
You can select the entry shown in the list by clicking it with the mouse, pressing Enter, typing ., or (, or by pressing Tab. Why so many choices? Well, to use a method in the System namespace’s Console class, you’ll need to list the namespace followed by a period, followed by the name of the class, followed by a period, followed by the method name. So, try it out. Erase the text you just typed and press Ctrl+spacebar once again. This time, type exactly this: Sys.Cons.ReadL. Your editor will look like the one in Figure 1-23.
Figure 1-23. Notice how IntelliSense automatically fills in the rest of the text for you.
As you can see, IntelliSense can save you an awful lot of typing. More to the point though, it can save you an awful lot of grief by avoiding spelling mistakes. Notice also that IntelliSense changes when you start to call a method on a class by showing you a description of that method.
C H A P T E R 1 ■ W E L C O M E T O V I S U A L B A S I C E X P R E S S |
23 |
Finish the line of code, and your program should look like this:
Module Module1
Sub Main()
System.Console.ReadLine()
End Sub
End Module
If you run the program now (F5), you’ll see the console window appear, and it will stay visible until you click in it and press Enter. System.Console.ReadLine() is waiting for you to do just that, and until you do, the program won’t end. When it does end, the console is closed down and you are returned to the normal IDE view.
IntelliSense does far more than this, though, and can actually help you add structure to your program. For example, let’s get this program to count from 1 to 10 and display those numbers in the console.
Now, just to play dumb here, say I know that the Visual Basic command I need to use to count is the For command, but I can’t remember how to use it. I do know that IntelliSense can help me.
Place the cursor on the S of System on the line of code you just typed in, and press Enter to insert a blank line.
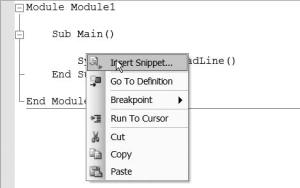
Click in that blank line and right click with the mouse. A menu appears, as in Figure 1-24.
Figure 1-24. The context menu in the code editor
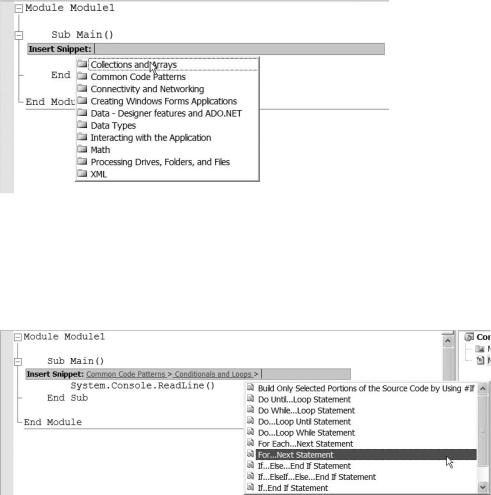
Now go ahead and select Insert Snippet. Another list appears, showing you a list of expansions. These are actually code snippets, lumps of code written by Microsoft (you can add your own to the list as well) that you can insert into your own projects as you need them. You can see the snippets list in Figure 1-25.
24 |
C H A P T E R 1 ■ W E L C O M E T O V I S U A L B A S I C E X P R E S S |
Figure 1-25. The list of code snippets
Click on the code snippet group called Common Code Patterns. The list will change to show you more snippet categories. Click Conditionals and Loops, and the list will change once again, this time showing you actual code snippets, as in Figure 1-26.
Figure 1-26. You need to click through numerous code snippet groups to get at the actual code snippets themselves.
Select the snippet called For...Next Statement and you’ll see the code window suddenly change, as in Figure 1-27.

C H A P T E R 1 ■ W E L C O M E T O V I S U A L B A S I C E X P R E S S |
25 |
Figure 1-27. The selected code snippet is inserted into your own code.
Notice that there are two elements in the new code highlighted in green. These are called replacements and are meant for you to, umm, replace. For now, ignore the highlighted “index” thing—it’s called a variable, and if you’ve never come across them before, then you’ll be introduced to them in the next chapter.
You want your loop to count from 1 to 10, and that’s exactly what this snippet does. If you wanted to count from 10 to 100, you would just change the numbers on that first line of code accordingly.
All that remains is to put some code in to display the numbers. You can use IntelliSense for this as well. Click so that your cursor is on the blank line inside the new code snippet block. Press Ctrl+spacebar to bring up the IntelliSense window and type Sys.Cons.WriteL(. Your code window will look like Figure 1-28.
Figure 1-28. Use IntelliSense to make your code window look like this.
26 |
C H A P T E R 1 ■ W E L C O M E T O V I S U A L B A S I C E X P R E S S |
System.Console.WriteLine displays text in the console window when the program is running. You simply put the item that you want displayed inside the parentheses at the end of the command. Now, your code snippet uses something called Index to count from 1 to 10. Inside your loop then (The For...Next thing is called a loop), you’ll just have WriteLine display Index. Change the code so that it looks like this:
Module Module1
Sub Main()
For index As Integer = 1 To 10
System.Console.WriteLine(index)
Next
System.Console.ReadLine()
End Sub
End Module
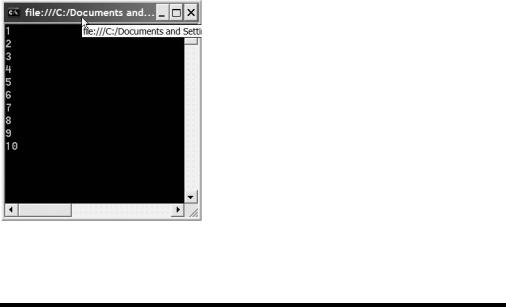
Run the application now, and your console window will display the numbers 1 to 10 and wait for you to press Enter before closing down. You can see this in Figure 1-29.
Figure 1-29. When you run the program, it will visibly count from 1 to 10 and then wait for you to press Enter on your keyboard before shutting down.
C H A P T E R 1 ■ W E L C O M E T O V I S U A L B A S I C E X P R E S S |
27 |
Writing Your Own Web Browser
I’m going to close out this chapter with a nice big “Try It Out” that not only shows you even more about the IDE and what it can do, but also focuses on what Visual Basic is best at: writing great applications.
In this example you’re going to produce a really simple but functional web browser, something that took Microsoft many years to produce. You’re going to do it in about 15 minutes.
Try It Out: Writing a Web Browser
Start a new Windows application project in the usual way (click File New Project and then choose Windows Application from the Project Type dialog box when it appears).
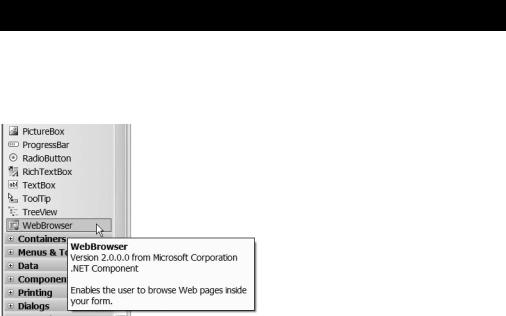
After the form appears in the editing area, take a look at the Toolbox, shown in Figure 1-30.
Figure 1-30. The Toolbox contains a ready-made WebBrowser control.
Scroll down the Toolbox. Near the bottom you’ll see a WebBrowser control. Double-click it to add it to the form.
The form will appear to change color, but other than that, there’s no obvious sign that the form is now a web browser. By default, when you drop the WebBrowser control onto a form, it just shows a blank white page and docks itself to the entire form area. Let’s fix that.

28 |
C H A P T E R 1 ■ W E L C O M E T O V I S U A L B A S I C E X P R E S S |
Many of the controls in VB Express support something called smart tags, a technology originally developed to make people’s lives in the Office applications more productive. The WebBrowser control has a smart tag attached, and you can access it by clicking its icon (a small left-pointing arrow at the top right of the browser). Figure 1-31 shows this.
Figure 1-31. Clicking the smart tag icon on a control pops up an additional menu.
Select Undock in Parent Container (the only menu item that appears), and the web browser will undock itself to take up a lot less of the form, as shown in Figure 1-32.
Figure 1-32. Undocking the web browser makes it take up less room and allows you to move
and resize it.
C H A P T E R 1 ■ W E L C O M E T O V I S U A L B A S I C E X P R E S S |
29 |
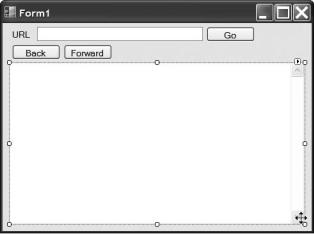
Go ahead now and drop some labels, a text box, and a few buttons onto the form so that it looks like mine in Figure 1-33. If you can’t remember how to do this or to set properties on a control, refer to the first “Try It Out” in this chapter.
Figure 1-33. Your web browser form should look like this.
The next thing that you need to do is to set up anchor points for the various controls. If you were to resize the form right now (please don’t), you would find that the form would grow or shrink in size but the controls would remain exactly where they are. What you really want to happen is that when the user resizes the form, the controls move to match the new form size. This is achieved by setting up the Anchor property of a control.
In the case of our web browser form, set the Anchor property for the text box holding the URL to Top, Left, and Right. This will make the URL stay in the same place on the form, but grow in width as the form is resized. Set the Anchor property for the Go button to Top Right, which means it will always appear at its current location, in relation to the top-right corner of the form.
Finally, set the Anchor property for the browser control to Top, Left, Right, and Bottom. This means that the web browser will never move, but as the form changes in width, so too will the browser. Similarly, as the form changes in height, so too will the browser.
Try resizing the form now and you should see the effects of the Anchor property changes, like mine in Figure 1-34.