

Beginning Visual Basic 2005 Express Edition - From Novice To Professional (2006)
.pdf190 |
C H A P T E R 8 ■ B U I L D I N G W I N D O W S A P P L I C A T I O N S |
The first parameter passed to any event handler is called sender and it’s typed as
an object. This is actually the control that fired the event. By casting it to the appropriate object type, you can interact with it just as you would any other control. Notice also how Button1_Click actually specifies at the end of the subroutine definition Handles Button1.Click. This is the connection among a control and an event and your code. If you used the event browser to link one event handler to more than one control, that Handles statement would be expanded to a list of controls, like this:
Private Sub Button1_Click(ByVal sender As System.Object, _
ByVal e As System.EventArgs) Handles Button1.Click, _
Button2.Click, Button4.Click, Button3.Click
End Sub
Common Properties and Events
Every single control that you drop onto a form to build your application’s user interface is a subclass of System.Windows.Forms.Control. What this means to you, of course, is that every visual control you’ll ever use will inherit a common set of functions, properties, and events from that base System.Windows.Forms.Control. If you take a look at the online help for System.Windows.Forms.Control, you’ll see that the list is in fact huge, but the good news is that you don’t need to memorize everything there.
On the properties side, the most common properties that you’ll want to work with are listed in Table 8-1.
Table 8-1. The Most Common Properties You’ll Ever Work With
Property |
Description |
Name |
This is the name of your control. When you name a control, an |
|
instance variable is created in your form’s class with the same |
|
name. |
BackColor |
The background color of the control. Its actual effect varies from |
|
control to control, but it’s usually pretty obvious. Clicking the |
|
ellipsis (…) button in the Properties window brings up a color |
|
browser that you can use to choose a color. |
ForeColor |
The color of the text or foreground within the control. Like the |
|
BackColor control, clicking the ellipsis (…) button in the Properties |
|
window brings up a color browser that you can use to choose a |
|
color. |

C H A P T E R 8 ■ B U I L D I N G W I N D O W S A P P L I C A T I O N S |
191 |
Property |
Description |
Text |
For most controls, this property is the text that the user sees inside |
|
the control. On a button, for example, it’s the text that appears |
|
within the button itself. For a TextBox control, it’s the text that the |
|
user enters. |
Size.Width, Size.Height |
Width and height belong to the size structure embedded in every |
|
control. Usually you don’t have to do anything with these properties |
|
at all, because you typically set them by dragging the resize handles |
|
in the visual designer to make the control the size you want. |
Location.X, Location.Y |
Just like Size.Width and Size.Height, these properties are typically |
|
set as a result of you moving the control around on the form with |
|
the mouse at design time. The X value specifies how far from the left |
|
edge of the form the control should appear, and the Y value specifies |
|
how far down from the top edge of the form it should appear. |
Font |
This is an object embedded inside every control. It exposes |
|
properties such as Font.Name, Font.Size, Font.Bold, and so on. |
|
Normally this is best set by clicking the ellipsis (…) button next to |
|
the Font property in the Properties window. |
Anchor |
This is also a complex property. It’s best set by clicking the drop- |
|
down arrow next to the property value in the Properties window, |
|
where you can choose which sides of a control to anchor. Anchoring |
|
a control makes it respond to changes in the form’s size, so if you |
|
anchor all four sides of a control, it will grow and shrink as the form |
|
itself does at runtime. |
GenerateMember |
This is a Boolean (True/False) value. Every time you drop a control |
|
onto a form, you get a new variable in your class with the same |
|
name as the Name property of the control. However, you won’t |
|
always want this to happen. For example, you’ll rarely need access |
|
to a Label control from within code. Just set this to False for those |
|
controls that you don’t actually need to work with inside your |
|
program code. |
|
|
Of course, there are other common properties, but these are by far the most useful and frequently used.
Similarly, there is a huge list of events that every control can generate. For example, all visual controls in .NET can fire off a Click event in response to the user clicking them with the mouse, and also Validating and Validated events to let you check the contents of the control after the user has finished messing with them. Rather than listing them all here, I’ll have you look at the events as you explore each of the controls throughout the rest of this chapter and the rest of the book.
192 |
C H A P T E R 8 ■ B U I L D I N G W I N D O W S A P P L I C A T I O N S |
Buttons in All Their Glory
I’d like to introduce you to perhaps the simplest, and most common, of all the controls in the Toolbox—the humble Button control. The button, while sporting a wealth of properties that let you change its general appearance, is really designed to do just one thing: click. In fact, it does a little more than that. It can be depressed, and it can pop up after being depressed—if only life were as simple. If you really wanted to take the button to the very bleeding edge, you could even get it to do things when the mouse travels over it, when it’s dragged, or when things are dropped on it. See, not so simple a control after all, is it.
Let’s take a look.
Try It Out: Working with Buttons
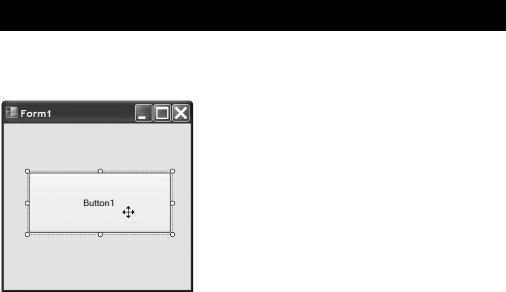
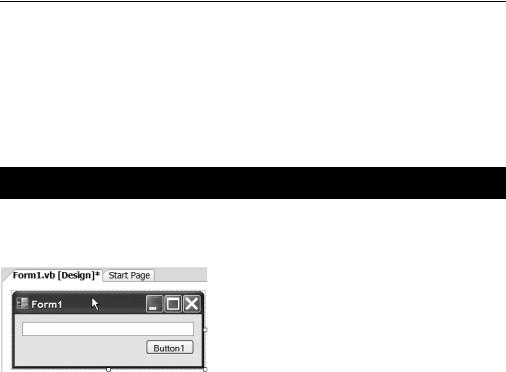
Start up a new Windows project. When the form editor appears, drop a button onto the form’s surface, as in Figure 8-2.
Figure 8-2. Drop a button onto the form, like this.
Select the button by clicking it just once, and if the Properties window is not currently visible, press F4 on the keyboard (or select Properties Window from the View menu) to bring it into view.
C H A P T E R 8 ■ B U I L D I N G W I N D O W S A P P L I C A T I O N S |
193 |
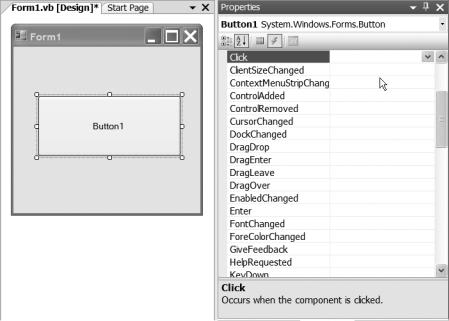
Notice at the top of the Properties window there is a button that looks quite like a lightning bolt. Click this, and the Properties window will change to show you a list of all the events that the button can respond to. You can see this in Figure 8-3.
Figure 8-3. The Properties window also shows you the list of all the events that a control supports.
Events, as I explained earlier, are raised by controls, more often than not as a result of the user doing something. There are a few events in the list, though, that have very little to do with the user. The Paint event is a good example. This event fires whenever the button needs to redraw itself—for example, when it reappears after being covered by another window.
Let’s take a look at some of the events in action. Scroll down the list of events and find the MouseEnter event.
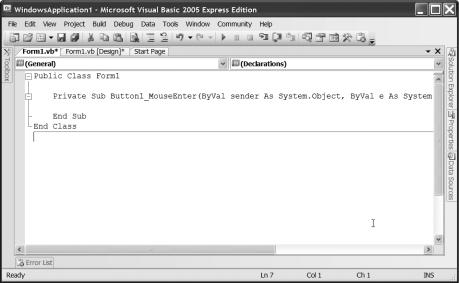
Double-click in the entry area to the right of the event name (MouseEnter), and your code window will appear, looking like mine in Figure 8-4.
194 |
C H A P T E R 8 ■ B U I L D I N G W I N D O W S A P P L I C A T I O N S |
Figure 8-4. Double-clicking the event in the event list drops you into the code editor for that event.
Add some code to the event so that it reads like this:
Private Sub Button1_MouseEnter(ByVal sender As System.Object, _
ByVal e As System.EventArgs) Handles Button1.MouseEnter
Button1.Text = "The mouse is over me"
End Sub
What you’re saying here is that when the mouse enters the control, you’ll change the Text in the control.
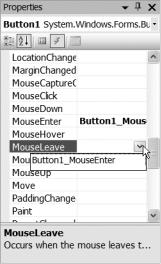
Go back to the form editor by clicking its tab at the top of the code window, and reselect the button. This time find the MouseLeave event in the event list and click it once. Notice the drop-down button in the entry area next to the event name (see Figure 8-5).
C H A P T E R 8 ■ B U I L D I N G W I N D O W S A P P L I C A T I O N S |
195 |
Figure 8-5. The event drop-down lets you set up one method to work with many different events.
Clicking the drop-down button shows you a list of event handlers you’ve already written that could be used for this event as well. These aren’t necessarily event handlers for just the currently selected control; if you had a few buttons on the form, you could have them all use the same event handler.
For now, though, just double-click in the entry area beside the event name (MouseLeave) to go into the editor for that event. Change the code so that it looks like mine here:
Private Sub Button1_MouseLeave(ByVal sender As System.Object, _
ByVal e As System.EventArgs) Handles Button1.MouseLeave
Button1.Text = "The mouse is not over me"
End Sub
Run the application and wave the mouse over the button—the caption will change as the button’s events fire.
196 |
C H A P T E R 8 ■ B U I L D I N G W I N D O W S A P P L I C A T I O N S |
Stop the program that is running by closing down the window in the usual way when you are finished exploring.
Every control has a default event that logically fits the control. With a button, for example, the default event is Click. Double-click the button on the form editor and you’ll see the code window open up, ready for you to fill in the button’s Click event.
I mentioned earlier that an event could be called by many controls. But the problem is that so far the code you’ve written pretty much assumes which control triggered it (you explicitly set Button1’s Text property). This is exactly where the two parameters passed to the event come into play:
Private Sub Button1_Click(ByVal sender As System.Object, _
ByVal e As System.EventArgs) Handles Button1.Click
End Sub
The first parameter, sender, can be used to figure out which control sent the event through. Let’s add some code to the click event handler to demonstrate this:
Private Sub Button1_Click(ByVal sender As System.Object, _
ByVal e As System.EventArgs) Handles Button1.Click
Dim clickedButton As Button = TryCast(sender, Button) If Not clickedButton Is Nothing Then
clickedButton.Text = "I was clicked" End If
End Sub
I’ll walk through the code just in case some of it doesn’t make sense. First, a new object variable is created to hold a button. On the same line of code, a new Visual Basic command called TryCast is used. Before Visual Basic 2005, if you wanted to convert an object (such as sender) into another type of object (such as Button), you’d use a command called CType. The problem is, if sender is not actually a Button, you end getting a runtime exception, meaning that you’d have to write exception handlers into the code. In addition, dealing with exceptions takes quite some time at runtime, and we want our application to remain quite “snappy.” TryCast solves this problem. It attempts to convert one object into another type. If the conversion is successful, the result is the converted object. On the other hand, if the conversion can’t be performed, the result is a special Visual Basic data type called Nothing.
The very next line of code checks to see whether your object is Nothing. Assuming it’s not, clickedButton’s Text property is set to I was clicked. In English, if the sender of the event is a button, you set its Text property. Go ahead and run the application to try this out (see Figure 8-6). Notice of course that adding a click handler doesn’t in any way affect the MouseEnter and MouseLeave events you already coded.

C H A P T E R 8 ■ B U I L D I N G W I N D O W S A P P L I C A T I O N S |
197 |
Figure 8-6. Clicking the button now changes its caption, even though you didn’t refer to the button by name in code.
Stop the program that is running again and add a second button to the form. Bring up its events list and use the drop-down next to the Click event to give it the same event handler as the one you just coded.
If you run the application now, you’ll find that you can click each button, and in each case the appropriate button’s caption gets set.
So what about that second parameter to the event, the EventArgs parameter? This is an object that provides some useful information about the event that just fired. On a command button it’s actually not that much use, but you will see it used quite extensively when you get into some of the more-complex controls later in the book (the grid controls, for example). On those controls, the parameter is used to pass specific information back to your code—for example, which item in a list was clicked.
Entering Text
Although command buttons may be one of the most common types of control that you’ll drop on a form, perhaps one of the most common things you’ll want to let users do with your forms is enter information. Visual Basic 2005 Express provides a bunch of controls to enable this, covering everything from entering small amounts of text to making choices by using radio buttons and check boxes.
Text Boxes
You’ve seen text boxes already in some of the example programs that you’ve developed so far. They are typically used to grab a small piece of information from a user (such as the user’s name, or a brief description of a product in a stock management program). Like the

198 |
C H A P T E R 8 ■ B U I L D I N G W I N D O W S A P P L I C A T I O N S |
button, text boxes provide a great deal of functionality beneath the surface, and a mass of events they can respond to. The most interesting of these are listed in Table 8-2.
Table 8-2. The Most Useful Events of a Text Box
Event |
Description |
Enter |
Occurs when the user clicks on, or tabs into, a text control and is ready to start |
|
entering information. |
Leave |
Occurs when the user clicks on another control or tabs out of a control, and |
|
finishes entering information. |
Validated |
Happens when validation of the control has finished. |
Validating |
Happens when the control wants to validate its contents—you write code to do |
|
the validation. |
TextChanged |
Occurs when the text inside the control changes, usually as a result of the user |
|
doing something. |
|
|
In terms of functionality, the humble text box packs a whole lot in. You can type on the keyboard to enter text, and the control automatically supports backspacing, deleting, and navigating around the text with the keyboard cursor keys. You can cut and paste by using the Windows Clipboard without having to write any special code. You can also select part or all of the text and have the text box automatically highlight the selected text. In fact, out of the box without any effort on your part, the text box works just the way users would expect a text box in any other Windows application to work. Aren’t user interface standards great!
All this functionality brings with it some interesting properties that you haven’t really seen yet. Table 8-3 lists some of the most important.
Table 8-3. Some of the More Interesting Properties Attached to a Text Box
Property |
Description |
CausesValidation |
A True/False property that tells the text box whether it should raise |
|
validating events. |
Lines |
A text box can hold multiple lines of text, and this property, a string array, |
|
provides access to the lines in the control. |
PasswordChar |
Setting a character in here, such as *, lets you hide the text in the control |
|
from the user—great for handling password entry. |
Multiline |
A True/False property that indicates whether the control can hold more |
|
than one line of text. |
Wordwrap |
If you have a lot of text in the control spread over multiple lines, setting this |
|
to True ensures that a word doesn’t get split over two lines in the control. |
Text |
You know this one—the text inside the control. |
C H A P T E R 8 ■ B U I L D I N G W I N D O W S A P P L I C A T I O N S |
199 |
Property |
Description |
SelectedText |
The text that the user has selected inside the control. |
SelectionStart |
The beginning of the selection, indicated by the number of characters into |
|
the text in the text box. |
SelectionLength |
The number of characters inside the text box that the user selected. |
|
|
Let’s take a look at some of these in action.
Try It Out: Handling Selections in Text Boxes
Start up a new Windows project and drop a text box and button onto the form so that it looks like mine in Figure 8-7.
Figure 8-7. Arrange a text box and button onto your form so that it looks like this.
To start getting into some good habits, you’ll set some names on the important controls. Set the name of the TextBox control to inputBox, and the name of the Button control to showButton.
What you’re going to do in this application is pop up a message box when the button is clicked that shows you exactly what’s in the text box, what’s selected inside the text box, and information about the selection. First, though, you need to make sure that the user actually selected something inside the text box.
Double-click the Show button to open the code window so you can start working on the button’s Click event. Change the code to read like this:
Private Sub showButton_Click(ByVal sender As System.Object, _
ByVal e As System.EventArgs) Handles showButton.Click
If inputBox.SelectionLength = 0 Then
MessageBox.Show("Select some text in the textbox")
End If
End Sub