

Microsoft Windows XP Networking Inside Out
.pdf13 Chapter
Part 4: Network Resources
purpose of this feature is to allow related data to be managed as a single unit. As an example, a thumbnail image for a graphic file can be stored in the same file as the graphic image using this multiple stream capability. However, if such a file is moved to a FAT volume, the additional data streams will be lost, leaving only the main, unnamed stream.
note Although Windows XP Home Edition supports NTFS volumes, it does not support all its features. For example, file encryption is not available in Windows XP Home Edition, and there is no interface for setting permissions on individual files and folders. Windows XP Home Edition uses Simple File Sharing, which only lets you make your user profiles private, which include data in users’ My Documents and Desktop folders. Dynamic volumes are only available for NTFS volumes in Windows XP Professional.
Selecting a File System
Now that you’ve read about the features of FAT32 and NTFS, which file system should you use?
By default, NTFS is the preferred file system for fixed storage in Windows XP. Windows XP formats floppy disks using FAT12 (an older version of FAT, even older than the FAT16 used by MS-DOS 4.0) and formats DVD-RAM disks using FAT32, but you can override this behavior and use NTFS on removable devices if you prefer.
Windows XP supports CD and DVD media with the Compact Disc File System (CDFS) and Universal Disk Format (UDF).
For fixed storage, on the surface, the many additional features of NTFS make it the clear winner. Its built-in enhancements over FAT make it far more flexible, powerful, reliable, and secure.
However, because of its lower overhead, FAT32 does provide better raw performance on individual disks than does NTFS. On volumes that require the highest possible performance, it might be a good idea to format them using FAT32. Additionally, very few operating systems other than Windows XP can access NTFS volumes. If you need to dual-boot your computer using Windows XP and another version of Windows or maintain volumes that are accessible via Windows or Linux boot disks, FAT32 is your best option.
Keep in mind that Microsoft now recommends that NTFS be used on any volume that can be accessed over a network as well as all volumes on a computer that is connected in any way to a network. The security and auditing features of NTFS become crucial in these situations because they add a layer of defense against hackers.
The basics of configuring NTFS permissions are covered in “Configuring NTFS Permissions,” page 433; NTFS auditing is covered in “Auditing File System Access,” page 594.
388
4: Network Resources
Chapter 13: Selecting a File System
Configuring NTFS Features
Now that the main features of NTFS have been covered along with how to choose a file system, this section addresses using NTFS file system features in Windows XP. If Windows XP was installed on a clean system rather than as an upgrade or if your
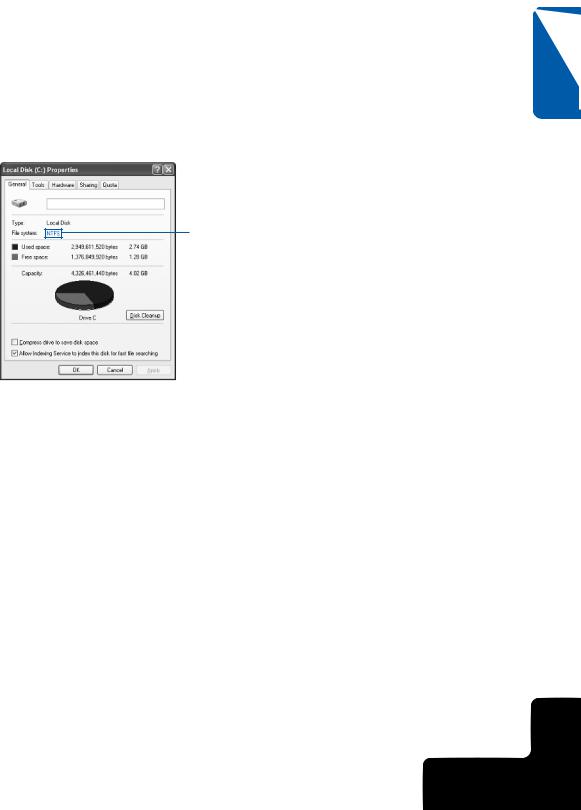
computer came to you from the computer manufacturer configured with Windows XP, the file system in use is probably NTFS. You can quickly determine the file system in use by opening My Computer. Right-click a volume and choose Properties. On the General tab, shown in Figure 13-2, you can see the file system in use.
File system
Chapter 13
Figure 13-2. The File System field on the General tab of a disk’s properties dialog box indicates the disk’s file system.
Converting a Disk to NTFS
What do you do if you access the General tab on the disk’s properties dialog box and find that the disk is formatted with FAT, and you’ve decided you want to use NTFS? Windows XP includes an easy conversion utility that converts the disk to NTFS without having to back up, reformat, and restore the disk’s contents. It is a simple and safe command, but bear in mind that the process is one way. Once you convert to NTFS, you cannot convert back to FAT without reformatting the entire disk (after backing up your data of course). It is also very important to back up any irreplaceable data from your system to avoid catastrophe should the system fail (due to a power failure, for instance) during the conversion. To convert a drive to NTFS, follow these steps:
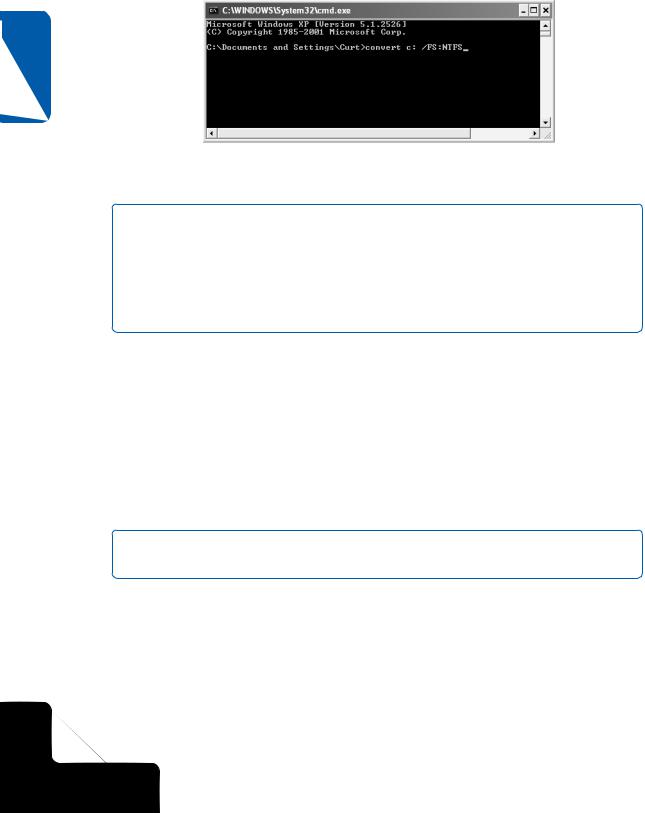
1Choose Start, Run. Type cmd and click OK.
2At the command prompt, type the command convert d: /FS:NTFS where d is the letter of your drive. For example, in the following figure, drive C is being converted to NTFS.
389
4: Network Resources
Part 4: Network Resources
13 Chapter
3Press Enter to execute the command. Conversion will take several minutes, depending on the size of the drive.
note You won’t be able to convert a volume that has any of its files open. Nor can you convert the boot volume of your computer (the one on which Windows XP is installed). In the first case, you’re given an opportunity to force a dismount of the volume, but this can cause data loss. Answer no to this prompt, and you’ll see the same message that appears when you attempt to convert the boot volume. The message gives you the option of automatically converting the volume the next time you start Windows XP. Accept this option and restart your computer.
Enabling Disk Compression
You can quickly and easily enable or disable disk compression at any time. You can compress an entire volume or just particular folders or files. To compress an entire drive, follow these steps:
1Double-click My Computer.
2Right-click the volume that you want to compress and choose Properties.
3On the General tab, select Compress Drive To Save Disk Space and click OK.
note If you later want to decompress the drive that you’ve compressed, return to this dialog box, and clear the Compress Drive To Save Disk Space check box.
4The Confirm Attribute Changes dialog box appears and asks whether you want to compress only the volume’s root folder or the drives subfolder and files as well. In most cases, you’ll want to choose the second option. Click OK.
Depending on how many folders and files your volume contains, the compression process might take several minutes to complete.
If you want to compress certain folders, but not the entire drive, or if you want to compress one or more files in a folder, but not an entire folder, follow these steps:
390
4: Network Resources
Chapter 13: Selecting a File System
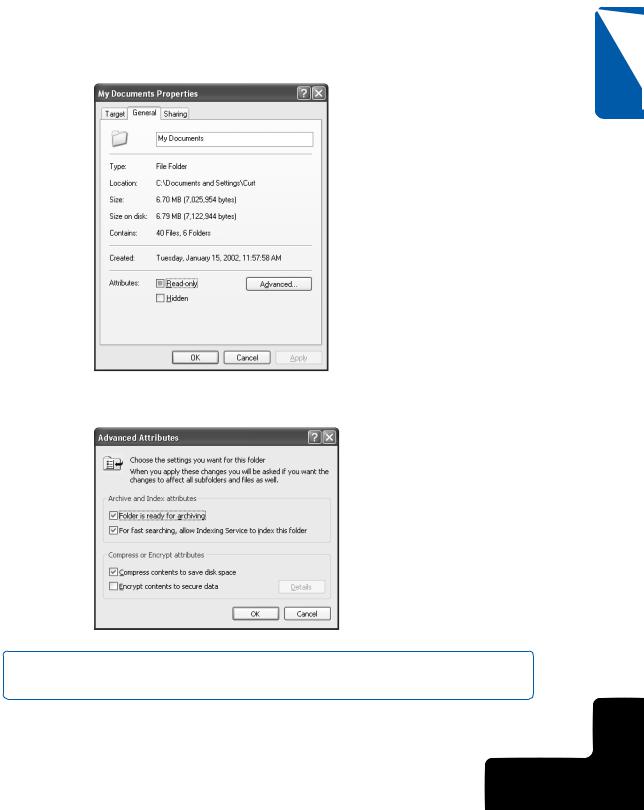
1Locate the file or folder that you want to modify, right-click the file or folder, and choose Properties.
2On the General tab of the properties dialog box that appears here, click the Advanced button.
3In the Advanced Attributes dialog box, shown in the following figure, select Compress Contents To Save Disk Space and click OK.
note If you want to remove compression from a file or folder in the future, return to this dialog box, and clear the Compress Contents To Save Disk Space check box.
Chapter 13
391
4: Network Resources
13 Chapter
Part 4: Network Resources
Enabling Encryption
If you are using Windows XP Professional, you can encrypt any of your files or folders using EFS. You’ll still be able to use that file or folder as you normally would, but no one else will be able to access the file or folder unless you choose to share the encryption with other users. Even if your machine was stolen and the hard disk files could be opened, the encrypted files would appear to be composed of meaningless characters.
To encrypt a file or folder, follow these steps:
1On a Windows XP Professional computer, right-click the file or folder that you want to encrypt and choose Properties.
2On the General tab, click the Advanced button.
3In the Advanced Attributes dialog box, select Encrypt Contents To Secure Data and click OK.
note If you are using Windows XP Home Edition, the encryption option appears dimmed. Encryption is not available in Windows XP Home Edition.
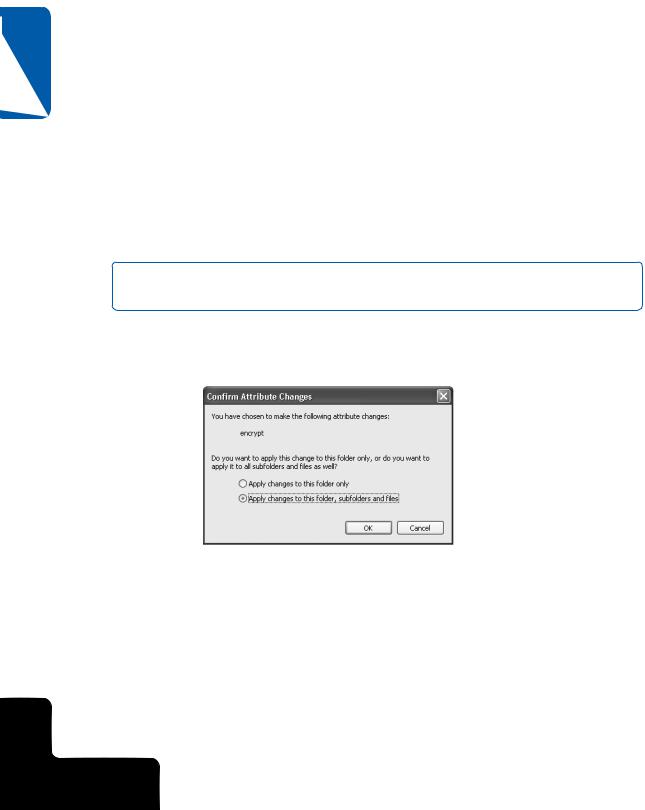
4If you are encrypting a folder, the Confirm Attribute Changes dialog box appears, as shown here. You can choose to encrypt only the selected folder or its subfolders as well. Make a selection and click OK.
new feature!
The EFS service in Windows XP Professional includes a new feature that allows you to share an encrypted file or folder so that others you specify can access it. This feature lets you encrypt the file or folder as well as make exceptions if other users on your computer need to access the file and you want to allow them to do so. To enable others to use the encrypted file, follow these steps:
1Right-click the encrypted file and choose Properties.
2On the General tab, click the Advanced button, and then click the Details button in the Advanced Attributes dialog box.
392
4: Network Resources
Chapter 13: Selecting a File System
tip If the Details button appears dimmed, click OK, and allow the file to encrypt. When you return to the Advanced Attributes dialog box, the Details button will be available. Also note that the Details button is available at the file level only—not on encrypted folders.
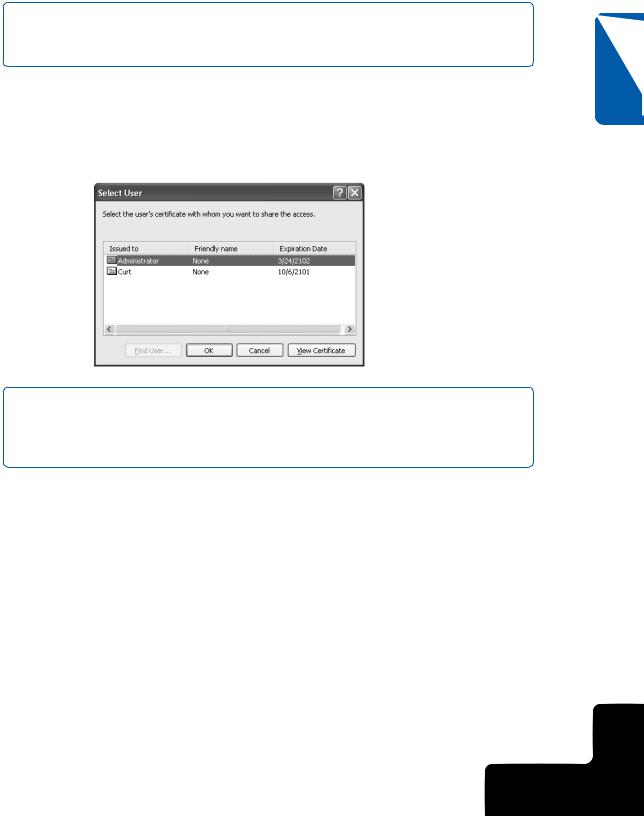
3In the Encryption Details dialog box that appears, you see the user account that is allowed to access the file. To allow others to access the file, click the Add button.
4In the Select User dialog box shown here, select the additional users you want to access the file, and then click OK.
tip Using EFS can be perilous. If the user profile that encrypts a file is damaged or destroyed and no system recovery agent was designated when the encryption took place, the file cannot be decrypted. For more information on designating recovery agents as well as learning the safest ways to use EFS, see “Managing EFS,” page 595.
Enabling Disk Quotas
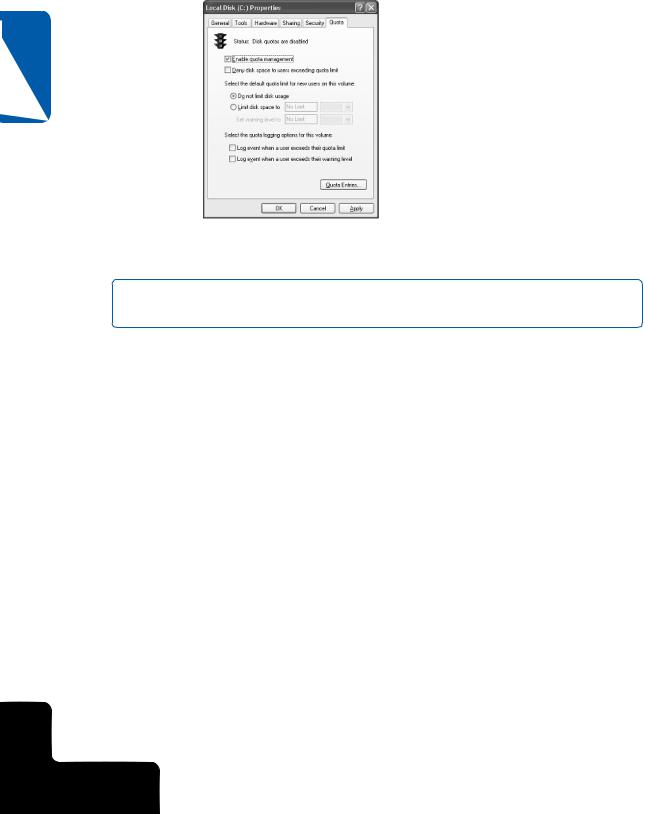
Disk quotas can be enabled on a per-volume basis. The volume to be enabled must be an NTFS volume, and you must have administrative privileges to even see the Quota tab in a volume’s properties dialog box. Follow these steps to enable disk quotas:
1Double-click My Computer.
2Right-click the volume that needs to have a quota established or adjusted and choose Properties.
3Select the Quota tab, shown on the next page. Select Enable Quota Management to turn on quota management.
Chapter 13
393
4: Network Resources
Part 4: Network Resources
13 Chapter
4Select the desired quota limits and logging options available on the tab. Note that you can prevent users from storing data once they exceed their quota.
note After you’ve established quota limits, you can check a user’s quota status by clicking the Quota Entries button.
5 Click OK when you are done.
Mounting a Volume
To mount a volume as a folder, log on to the computer as a user with administrative rights, and then follow these steps.
1Choose Start, Run.
2Type diskmgmt.msc, and click OK to open the Disk Management snap-in. (You can also find the Disk Management snap-in in the Computer Management console in the Administrative Tools folder.)
3Right-click the volume you want to mount (attach to another volume), and choose Change Drive Letter And Paths from the shortcut menu.
4In the dialog box that appears, click the Add button.
5Select Mount In The Following Empty NTFS Folder, and click the Browse button.
6Browse to an empty folder or select a location, and click the New Folder button to create and name an empty folder. (Volumes can only be mounted on an empty folder.) Click OK to close each dialog box.
394
4: Network Resources

Chapter 13: Selecting a File System
Use Windows Explorer or My Computer to access the mounted volume. You should now see a volume within a volume, which provides more flexible and expanded storage under one drive letter. This volume can be managed separately from the volume in which it is mounted using such tools as Disk Defragmenter and Chkdsk; to do so, simply refer to it by its root path name. For example, if you’ve mounted a second volume in the folder C:\Dev, you should refer to it as C:\Dev in any application that manages volumes.
Chapter 13
395
4: Network Resources
This page intentionally left blank

Chapter 14
Understanding |
|
Network |
398 |
Resource Access |
|
Sharing Resources |
400 |
Sharing Printers |
400 |
Sharing Files |
419 |
Configuring |
433 |
NTFS Permissions |
Understanding
Resource Sharing
and NTFS Security
Why bother using networks at all? This is a fundamental question to ask before embarking on any network design. The usual answer is that a network is desired for the sharing of information. Without a network, your only option to move files from computer to computer is with a removable disk, and you can’t share other hardware resources such as printers.
Although this observation might appear to be obvious, sharing resources continues to be the primary reason for creating home and small office networks. In addition, the need to share an Internet connection is often reason enough to create a network. In Microsoft Windows domain-based networks, centralized control, management, and security also continue to be major reasons for networking. But to users working on small or large networks, access to resources is the most important aspect of the network.
The term network share refers to a resource on the network that is designated to be shared among some or all the network’s users. The most common shared network object is usually a folder or hard disk, but network shares can be many types of resources, such as disks, folders, removable storage devices, and printers. This chapter examines the process of sharing network resources, which consists of creating network shares, assigning share permissions, assigning file system permissions (if the NTFS file system is used), and managing shared resources. Common sharing problems and their solutions are also discussed in this chapter.
397
4: Network Resources