

USING ADOBE PREMIERE PRO |
356 |
Effects and transitions
Equalize effect
The Equalize effect alters an image’s pixel values to produce a more consistent brightness or color component distribution. The effect works similarly to the Equalize command in Adobe Photoshop. Pixels with 0 alpha (transparent) values aren’t considered.
Richard Harrington provides a video tutorial on the Creative COW website that shows how to use the Equalize effect to correct color and exposure.
Equalize RGB equalizes the image based on red, green, and blue components. Brightness equalizes the image based on the brightness of each pixel. Photoshop Style equalizes by redistributing the brightness values of the pixels in an image so that they more evenly represent the entire range of brightness levels.
Amount To Equalize How much to redistribute the brightness values. At 100%, the pixel values are spread as evenly as possible; lower percentages redistribute fewer pixel values.
Fast Color Corrector effect
The Fast Color Corrector effect adjusts a clip’s color using hue and saturation controls. This effect also has levels controls for adjusting intensity levels of image shadows, midtones, and highlights. This effect is recommended for making simple color corrections that preview quickly in the Program monitor.
Here are links to some additional resources describing the Fast Color Corrector effect:
•Using the Fast Color Corrector Effect by Karl Soule
•Basics of Color Correction podcast with Aanarav Sareen
•Color Correction Made Simple by Charlie White
In this tutorial Andrew Devis from Creative Cow demonstrates how to use the Fast Color Corrector for primary color correction.
Jeff Sengstack explains how to work with the Fast Color Corrector in his article, "Streamlining Color Correction in Premiere Pro" on the Pro Video Coalition website.
Output Lets you view adjustments in the Program monitor as the final results (Composite), tonal value adjustments (Luma), or display of the alpha matte (Mask).
Show Split View Displays the left or upper part of the image as the corrected view and the right or lower part of the image as the uncorrected view.
Layout Determines whether the Split View images are side by side (Horizontal) or above and below (Vertical).
Split View Percent Adjusts the size of the corrected view. The default is 50%.
White Balance Assigns a white balance to an image using the Eyedropper tool to sample a target color in the image or anywhere on your monitor’s desktop. You can also click the color swatch to open the Adobe Color Picker and select a color to define the white balance.
Hue Balance And Angle Controls hue balance and hue angle using a color wheel. The small circle moves about the center of the wheel and controls the hue (UV) translation. This changes the balance magnitude and balance angle. The small perpendicular line sets the relative coarseness/fineness of the control, which controls the balance gain.
 Adjustments to the Hue Balance And Angle can be viewed in the vectorscope.
Hue Angle Controls the hue rotation. The default value is 0. Negative values rotate the color wheel to the left and positive values rotate the color wheel to the right.
Balance Magnitude Controls the amount of color balance correction as determined by the Balance Angle.
Last updated 1/16/2012

USING ADOBE PREMIERE PRO |
357 |
Effects and transitions
Balance Gain Adjusts brightness values by multiplication so that lighter pixels are affected more than darker pixels.
Balance Angle Controls the selection of desired hue value.
Saturation Adjusts the image’s color saturation. The default value is 100, which doesn’t affect the colors. Values less than 100 decrease saturation, with 0 completely removing any color. Values greater than 100 produce more saturated colors.
Auto Black Level Raises the black levels in a clip so the darkest levels are above 7.5 IRE (NTSC) or 0.3v (PAL). A portion of the shadows is clipped and the intermediate pixel values are redistributed proportionately. As a result, using Auto Black Level lightens the shadows in an image.
Auto Contrast Applies both the Auto Black Level and Auto White Level simultaneously. Auto Contrast makes the highlights appear darker and shadows appear lighter.
Auto White Level Lowers the white levels in a clip so the lightest levels do not exceed 100 IRE (NTSC) or 1.0v (PAL). A portion of the highlights is clipped and the intermediate pixel values are redistributed proportionately. As a result, using Auto White Level darkens the highlights in an image.
Black Level, Gray Level, White Level Sets the levels for darkest shadow, midtone gray, and lightest highlight using the different Eyedropper tools to sample a target color in the image or anywhere on your monitor’s desktop. You can also click the color swatch to open the Adobe Color Picker and select a color to define the black, midtone gray, and white.
Input Levels The outer two Input Levels sliders map the black point and white point to the settings of the Output sliders. The middle Input slider adjusts the gamma in the image. It moves the midtone and changes the intensity values of the middle range of gray tones without dramatically altering the highlights and shadows.
Output Levels Map the black point and white point input level sliders to specified values. By default, the Output sliders are at level 0, where the shadows are completely black, and level 255, where the highlights are completely white. So, in the default position for the Output sliders, moving the black input slider maps the shadow value to level 0, and moving the white point slider maps the highlight value to level 255. The remaining levels are redistributed between levels 0 and 255. This redistribution decreases the tonal range of the image, in effect reducing the overall contrast of the image.
Input Black Level, Input Gray Level, Input White Level Adjust the black point, midtone, and white point input levels for the highlights, midtones, or shadows.
Output Black Level, Output White Level Adjust the mapped output levels for the input black and input white levels for the highlights, midtones, or shadows.
More Help topics
“Apply the Color Correction effects” on page 313
“Color balance, angle, and saturation controls” on page 316
“Adjust color and luminance using curves” on page 318
Leave Color effect
The Leave Color effect removes all colors from a clip except those similar to the Color To Leave. For example, a shot of a basketball game could be decolored except for the orange of the ball itself.
How to leave two colours in a clip in the video tutorial by Ann Bens.
Richard Harrington provides a video tutorial on the Creative COW website that demonstrates the Leave Color effect in Adobe Premiere Pro.
For more information about the Leave Color effect in Premiere Pro, see this video by Learn by Video and Video2Brain by Jan Ozer.
Last updated 1/16/2012
USING ADOBE PREMIERE PRO |
358 |
Effects and transitions
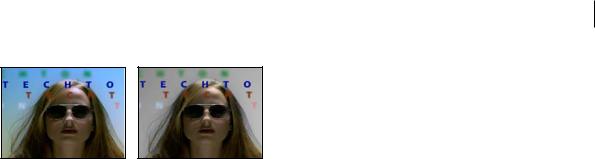
Original image (left), and with effect applied (right)
Amount To Decolor How much color to remove. 100% causes areas of the image dissimilar to the selected color to appear as shades of gray.
Color To Leave Use the eyedropper or Color Picker to determine which color to leave.
Tolerance The flexibility of the color-matching operation. 0% decolors all pixels except those that exactly match Color To Leave. 100% causes no color change.
Edge Softness The softness of the color boundaries. High values smooth the transition from color to gray.
Match Colors Determines whether colors’ RGB values or hue values are compared. Choose Using RGB to perform more strict matching that usually decolors more of the image. For example, to leave dark blue, light blue, and medium blue, choose Using Hue and choose any shade of blue as Color To Leave.
Luma Corrector effect
The Luma Corrector effect lets you adjust the brightness and contrast in the highlights, midtones, and shadows of a clip. You can also specify the color range to be corrected by using the Secondary Color Correction controls.
Output Lets you view adjustments in the Program monitor as the final results (Composite) or tonal value adjustments (Luma), display of the alpha matte (Mask) or a tritone representation of where the shadows, midtones, and highlights fall (Tonal Range).
Show Split View Displays the left or upper part of the image as the corrected view and the right or lower part of the image as the uncorrected view.
Layout Determines whether the Split View images are side by side (Horizontal) or above and below (Vertical).
Split View Percent Adjusts the size of the corrected view. The default is 50%.
Tonal Range Definition Defines the tonal range of the shadows and highlights using threshold and threshold with falloff (softness) controls. Click the triangle to display the Tonal Range Definition controls. Drag a square slider to adjust the threshold values. Drag a triangle slider to adjust the softness (feathering) value.
Note: Choose Tonal Range from the Output menu to view the different tonal ranges as you adjust the Tonal Range Definition sliders.
Tonal Range Specifies whether the luminance adjustments are applied to the entire image (Master), the highlights only, midtones only, or shadows only.
Brightness Adjusts the black level in a clip. Use this control so that the black picture content in your clip appears as black.
Contrast Affects the image’s contrast by adjusting the gain from the clip’s original contrast value.
Contrast Level Sets the clip’s original contrast value.
Gamma Adjusts the image’s midtone values without affecting black and white levels. This control causes changes in contrast, much like changing the shape of the curve in the Luma Curve effect. Use this control to adjust images that are too dark or too light, without distorting shadows and highlights.
Last updated 1/16/2012

USING ADOBE PREMIERE PRO |
359 |
Effects and transitions
Pedestal Adjusts an image by adding a fixed offset to the image’s pixel values. Use this control with the Gain control to increase an image’s overall brightness.
Gain Affects the overall contrast ratio of an image by adjusting brightness values by multiplication. The lighter pixels are affected more than darker pixels.
Secondary Color Correction Specifies the color range to be corrected by the effect. You can define the color by hue, saturation, and luminance. Click the triangle to access the controls.
Note: Choose Mask from the Output menu to view the areas of the image that are selected as you define the color range.
Center Defines the central color in the range that you’re specifying. Select the Eyedropper tool and click anywhere on your screen to specify a color, which is displayed in the color swatch. Use the + Eyedropper tool to extend the color range, and use the – Eyedropper tool to subtract from the color range. You can also click the swatch to open the Adobe Color Picker and select the center color.
Hue, Saturation, and Luma Specify the color range to be corrected by hue, saturation, or luminance. Click the triangle next to the option name to access the threshold and softness (feathering) controls to define the hue, saturation, or luminance range.
Soften Makes boundaries of the specified area more diffuse, blending the correction more with the original image. A higher value increases the softness.
Edge Thinning Makes the specified area more sharply defined. The correction becomes more pronounced. A higher value increases the edge definition of the specified area.
Invert Limit Color Corrects all colors except for the color range that you specified with the Secondary Color Correction settings.
More Help topics
“Adjust color and luminance using curves” on page 318
Luma Curve effect
The Luma Curve effect adjusts the brightness and contrast of a clip using a curve adjustment. You can also specify the color range to be corrected by using the Secondary Color Correction controls.
Output Lets you view adjustments in the Program monitor as the final results (Composite) or tonal value adjustments (Luma), or display of the alpha matte (Mask).
Show Split View Displays the left or upper part of the image as the corrected view and the right or lower part of the image as the uncorrected view.
Layout Determines whether the Split View images are side by side (Horizontal) or above and below (Vertical).
Split View Percent Adjusts the size of the corrected view. The default is 50%.
Luma Waveform Alters the brightness and contrast of the clip when you change the shape of the curve. Bowing the curve upward lightens the clip and bowing the curve downward darkens the clip. The steeper sections of the curve represent portions of the image with greater contrast. Click to add a point to the curve and drag to manipulate the shape. You can adjust up to a maximum of 16 points on the curve. To delete a point, drag it off the graph.
Secondary Color Correction Specifies the color range to be corrected by the effect. You can define the color by hue, saturation, and luminance. Click the triangle to access the controls.
Note: Choose Mask from the Output menu to view the areas of the image that are selected as you define the color range.
Center Defines the central color in the range that you’re specifying. Select the Eyedropper tool and click anywhere on your screen to specify a color, which is displayed in the color swatch. Use the + Eyedropper tool to extend the color
Last updated 1/16/2012