

Running Stitch
This is the simplest form of hand stitch. It can be used for gathering, quilting, mending, tucking and seams that do not require much strain. For easing and gathering, take stitches 1/16 to 1/4 inch length, pass the needle through the fabric several times and then pull the needle through. Continue across the work, gently easing the fullness. For a permanently stitched seam, use tiny stitches 1/16 to 1/8 inch in length. Do not draw the thread up; keep it flat and smooth in the work. On sheer fabrics use the tiny 1/16-inch stitch; on heavier woolens a 1/8-inch stitch may be the smallest you can make (Fig.7).
Basting Stitch
A basting stitch is used to hold two or more pieces of fabric together temporarily, to transfer construction symbols from wrong to right side of fabric and to indicate guide lines. Use a contrasting thread so the basting stitch can be easily identified when permanent stitching is made and the basting is removed. The stitch is a larger version of the running stitch, about 1/4 to 1/2 inch in length, depending on the weight of the fabric and how securely the pieces of fabric should be held together (Fig.8).

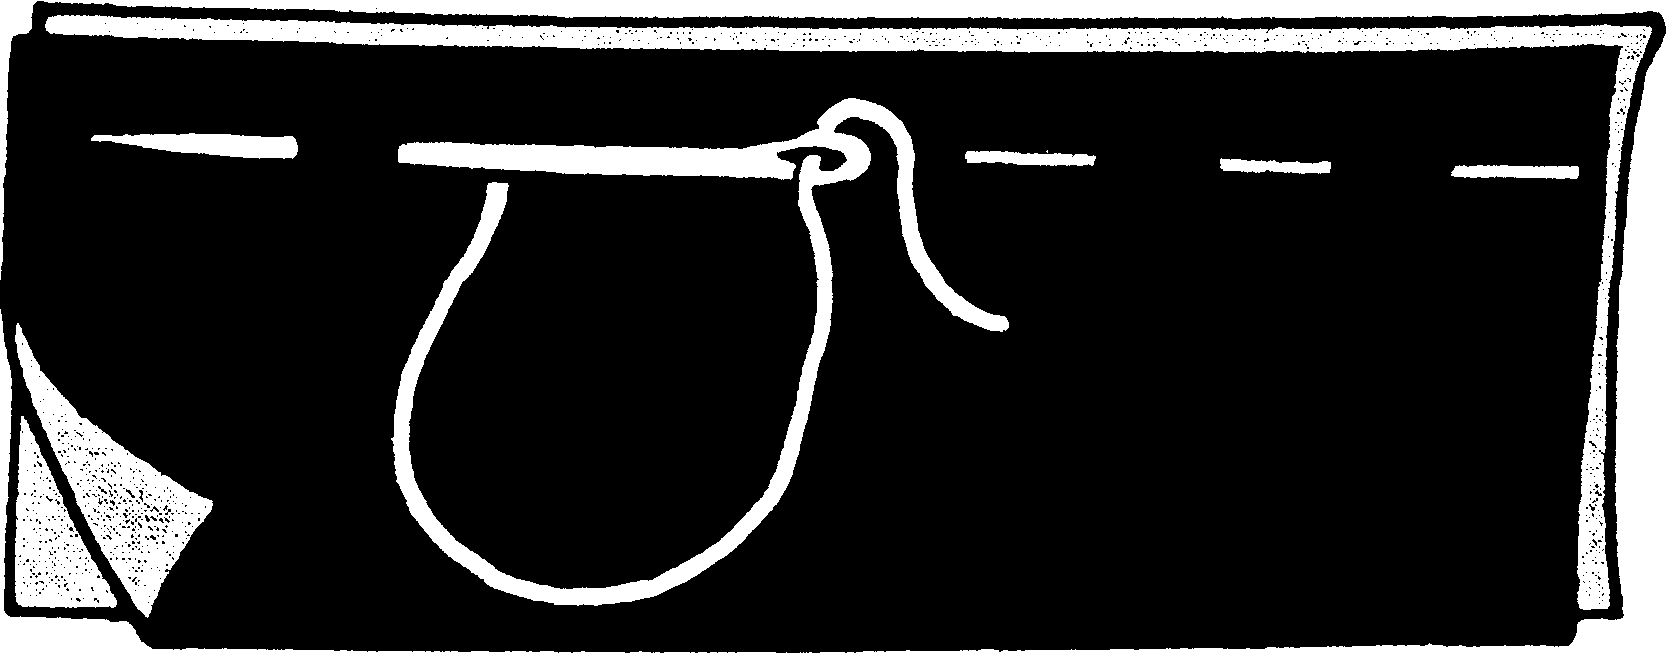
Fig.8Fig.9
Even Basting. Used when there will be some strain on the seam. Make stitches about 14 inch long, even on both sides of fabric (Fig.9).
Uneven Basting. Used in seams where there is little or no strain or as a guide line for stitching. Take long stitches on one side of fabric and short stitches on other side (Fig.10).
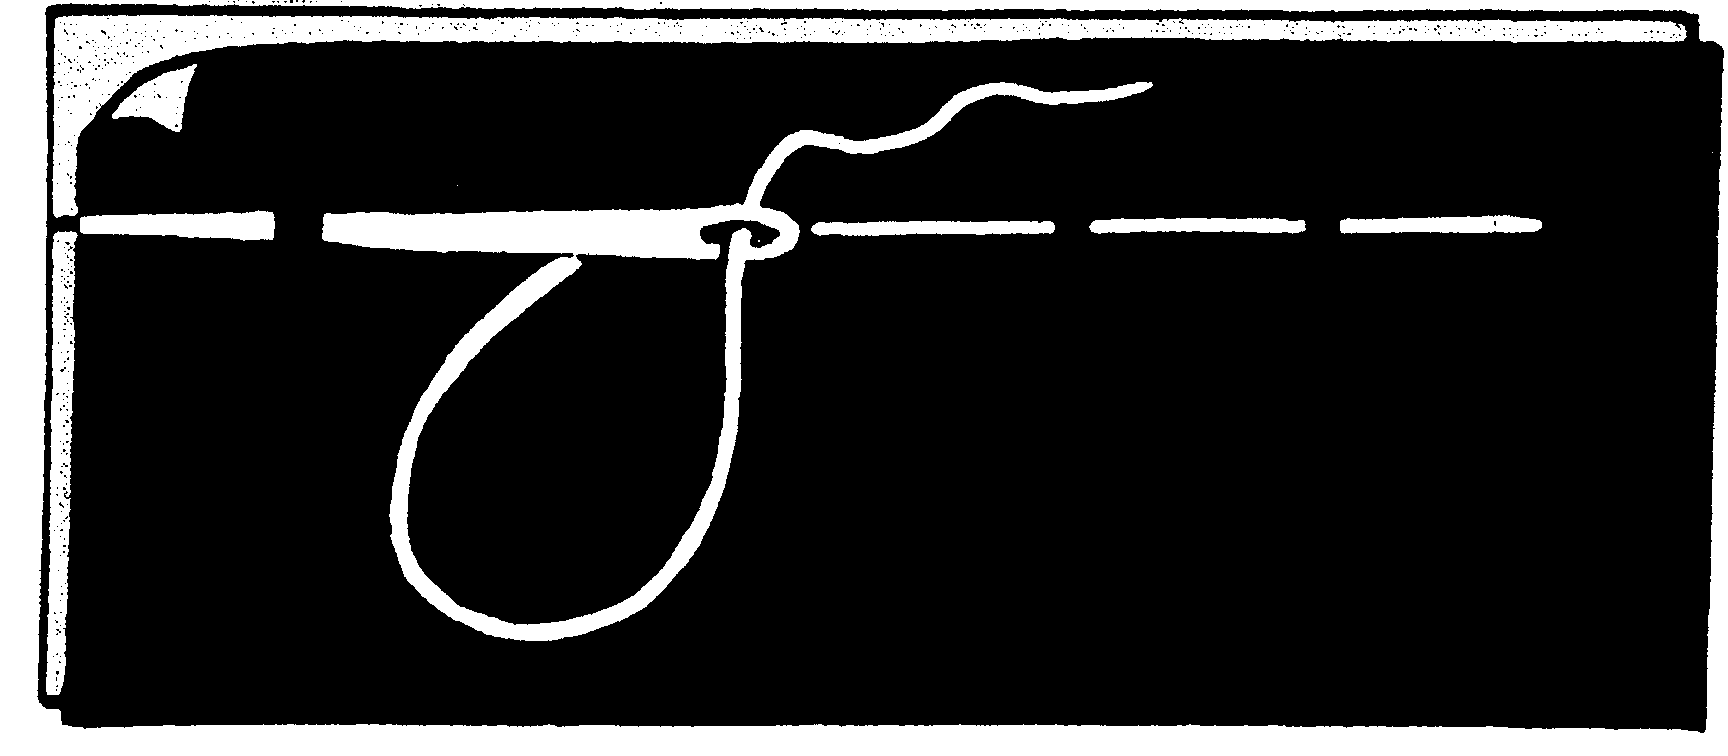
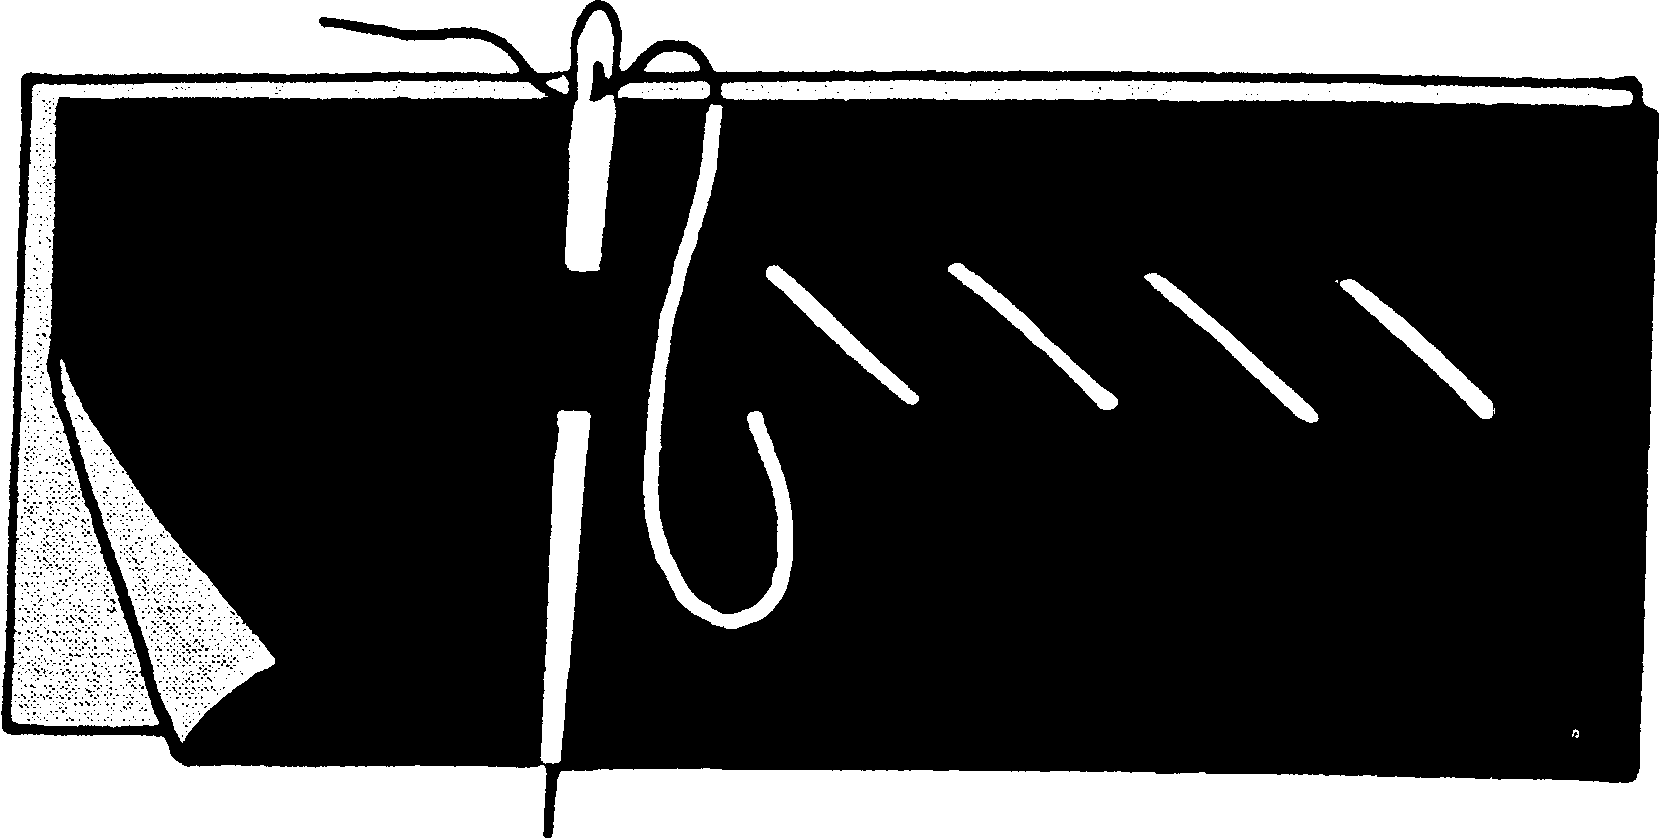
Fig.10 Fig.11
Diagonal Basting. Used to hold several layers of fabric securely together. Stitch through the fabric at right angles to the fabric edge. This gives a diagonal stitch on the upper side and a short horizontal stitch on the underside. It is used to hold interfacings, linings and facings in place during fittings (Fig.11).
Slip-Basting. Most often used when matching seams in plaids or stripes or to baste alterations made on the right side. Fold under the seam allowance on one side of the seam and press flat. Then place this over the other section of the seam, right sides up, matching accurately at the seam line and pin. Place the needle through the seam line on the underside and back through the seam line. Take stitches about 1/4 inch in length. Place the needle through the seam line fold and out on the fold line. Continue in the same manner. No stitches will show on the right side, while on the wrong side, there is a regular basting stitch (Fig.12).
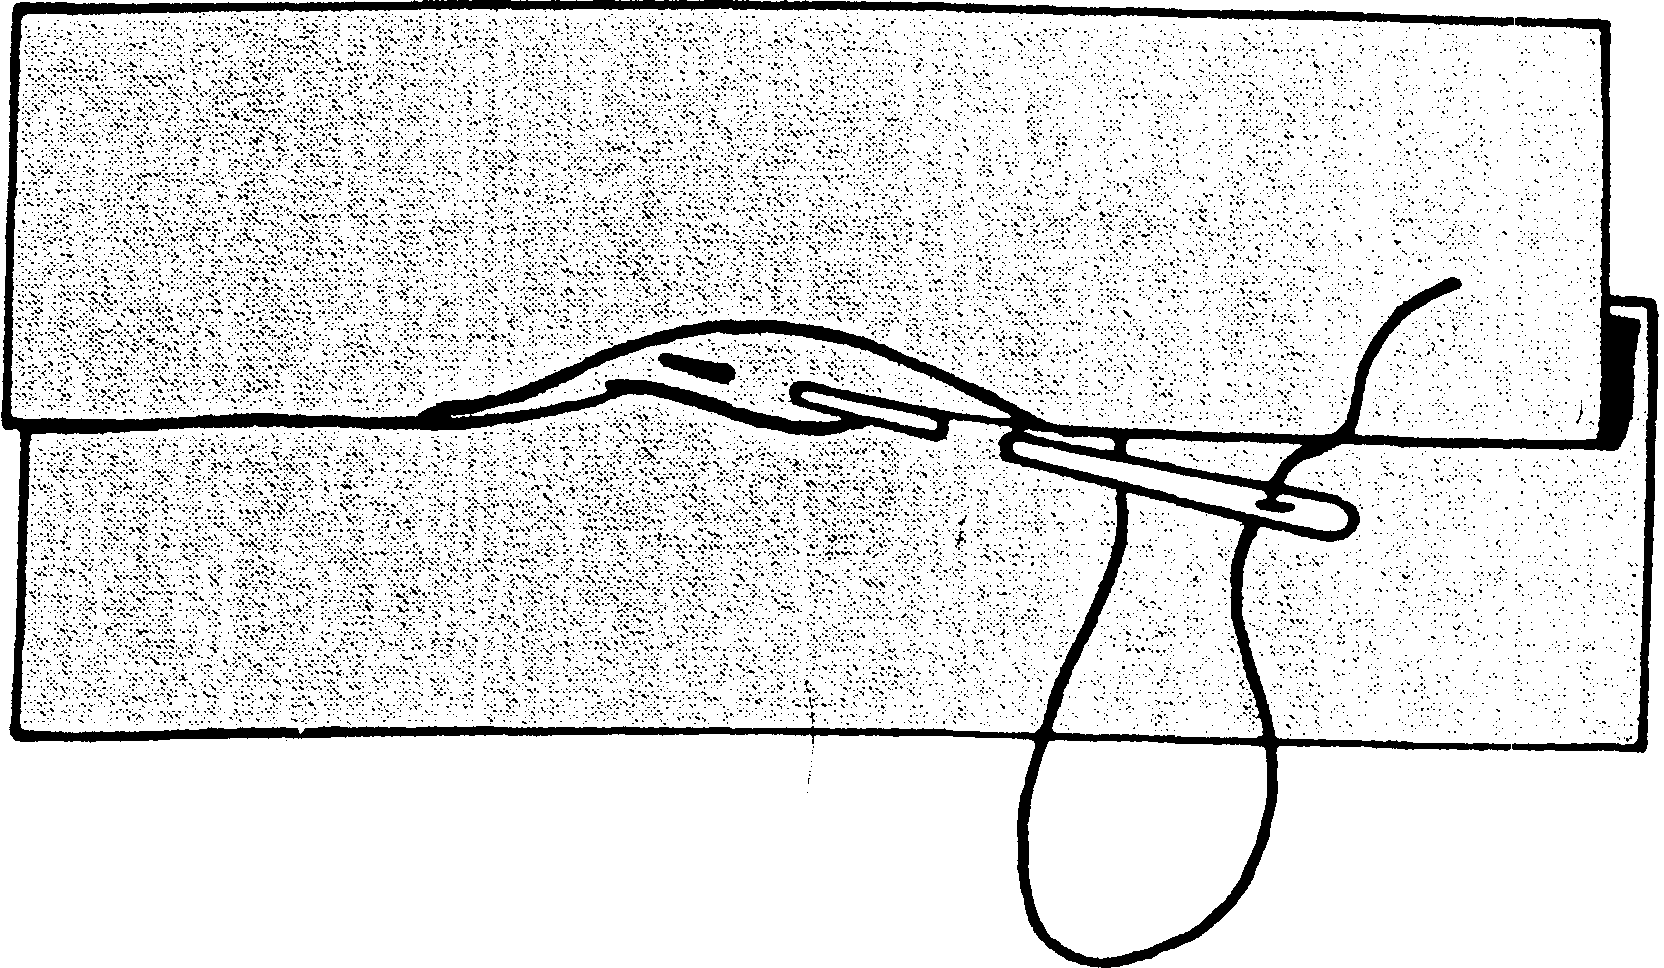
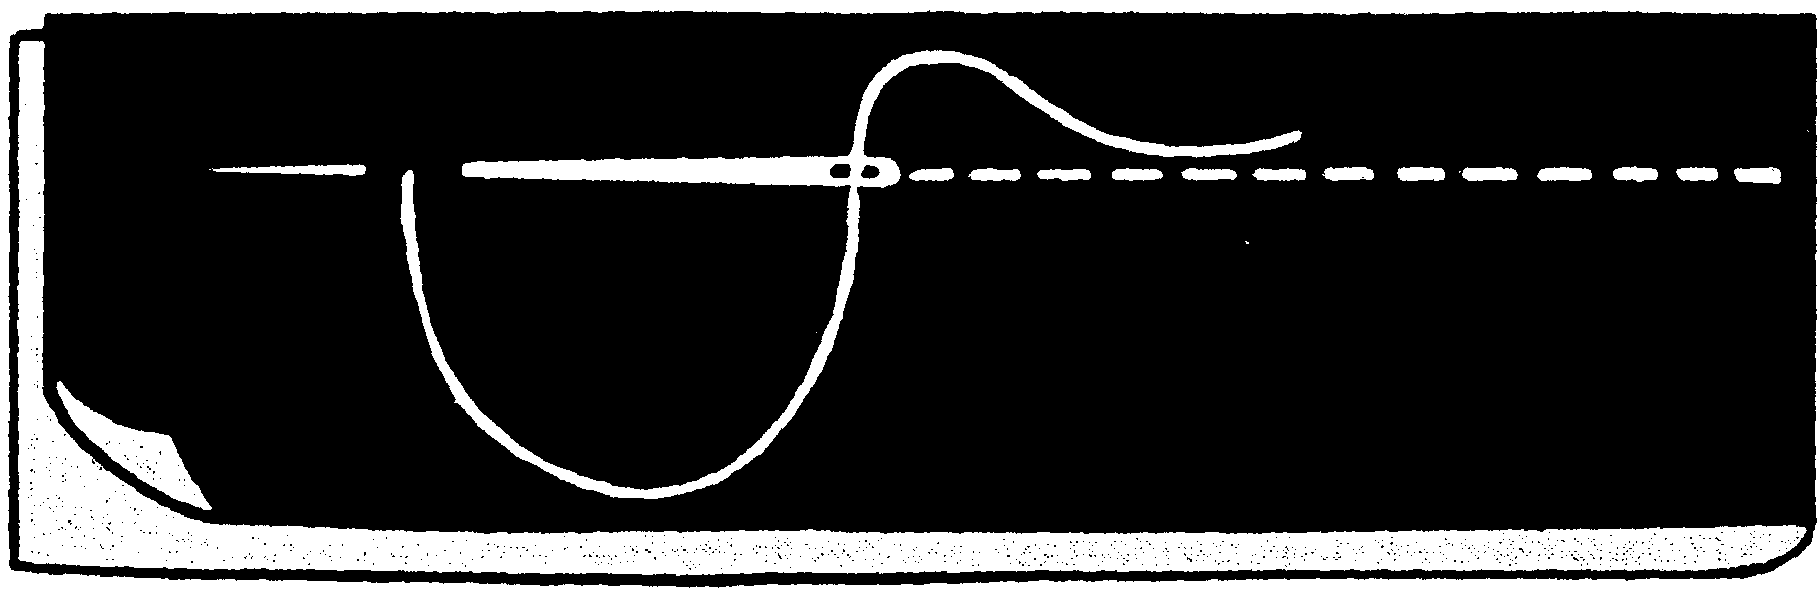
Fig.12 Fig.13
Back-Stitch
Back-stitching is used to stitch a seam securely or permanently. It looks like machine-stitching on the right side, but stitches overlap on the wrong side. Take a small running stitch (1/8 inch long) through the fabric on the underside. Take a stitch back, placing the needle in the fabric at the beginning of the first stitch and bringing it out a stitch ahead. Continue in this manner working across the fabric (Fig.13).
Slip-Stitch
The slip-stitch is used when stitching should not show, but it isn't very strong. It differs from the slip-basting stitch in the length of the stitches. Place a stitch through the fold of the fabric about 1/8 to 1/4 inch in length. Pick up only one or two threads of the under fabric. Continue in this manner taking a stitch through the fold and then in the under fabric (Fig.14).
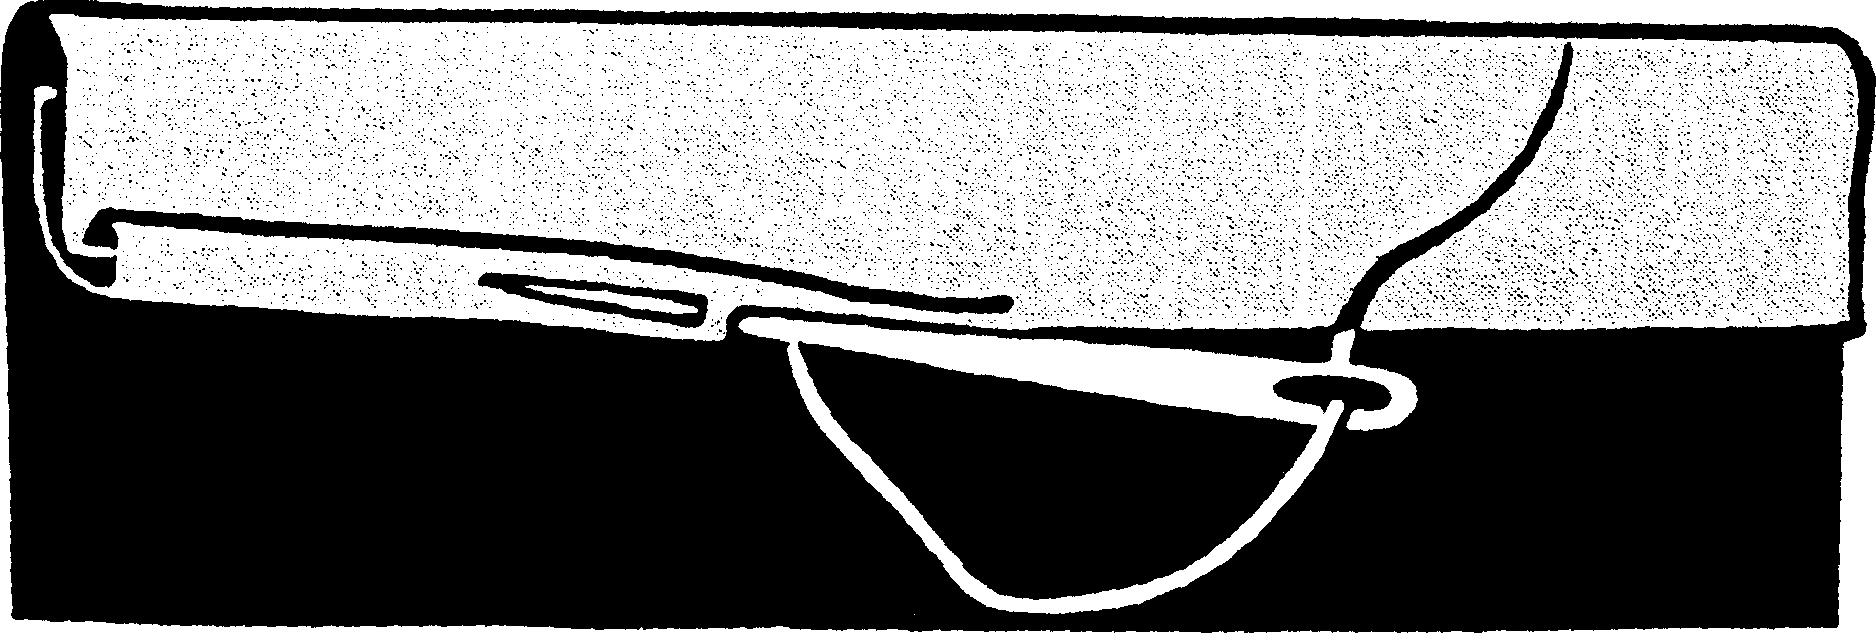
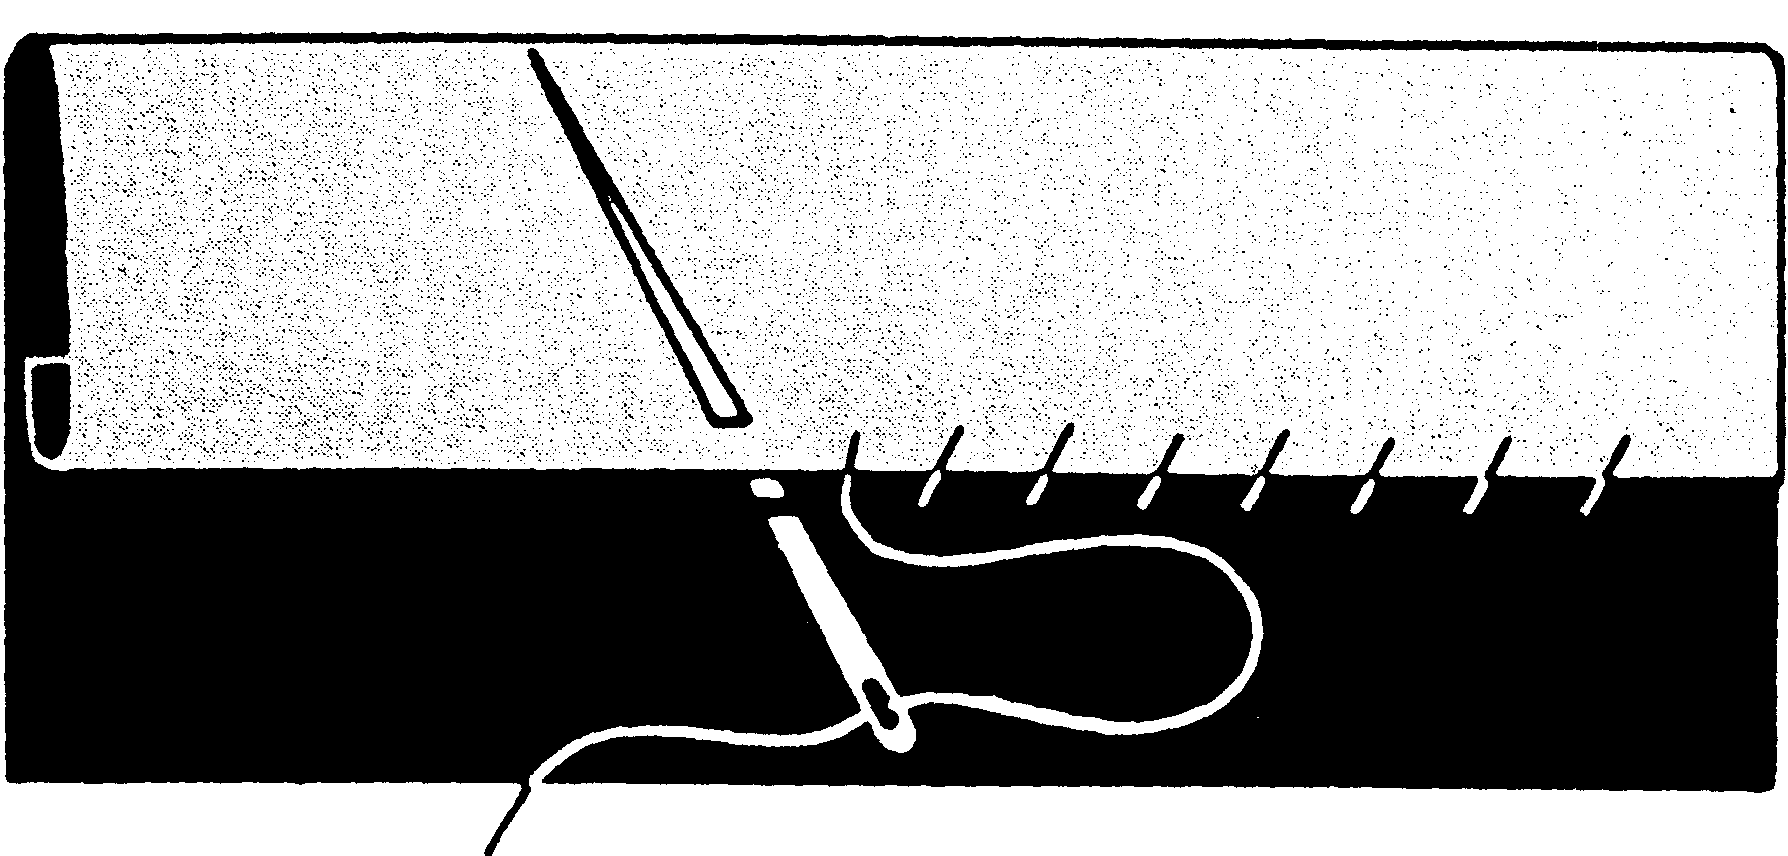
Fig.14 Fig.15
Hemming Stitch
A slanting stitch which shows on the wrong side and is stronger than the slip-stitch. Used for all types of hemming. Take up one thread of the garment fabric and then bring the needle through the fold of the hem edge. Stitches should not show on the right side (Fig.15).
Catch-Stitch
This is a fairly loose but secure stitch used to hold raw edges of facings and interfacings. Working from left to right, take a small stitch through the upper fabric from right to left, then pick up one or two threads in the under fabric from right to left. Do not pull the stitches tight. The threads will cross each other between stitches (Fig.16).
Invisible Stitch
Sometimes called the French hemming stitch. This stitch is used for hems and for attaching facings and interfacings in tailoring. Fold hem or facing back on garment. Working from right to left, pick up a thread of the garment, then pick up a thread of the hem or facing diagonally above. Do not pull the stitches tight (Fig.17).
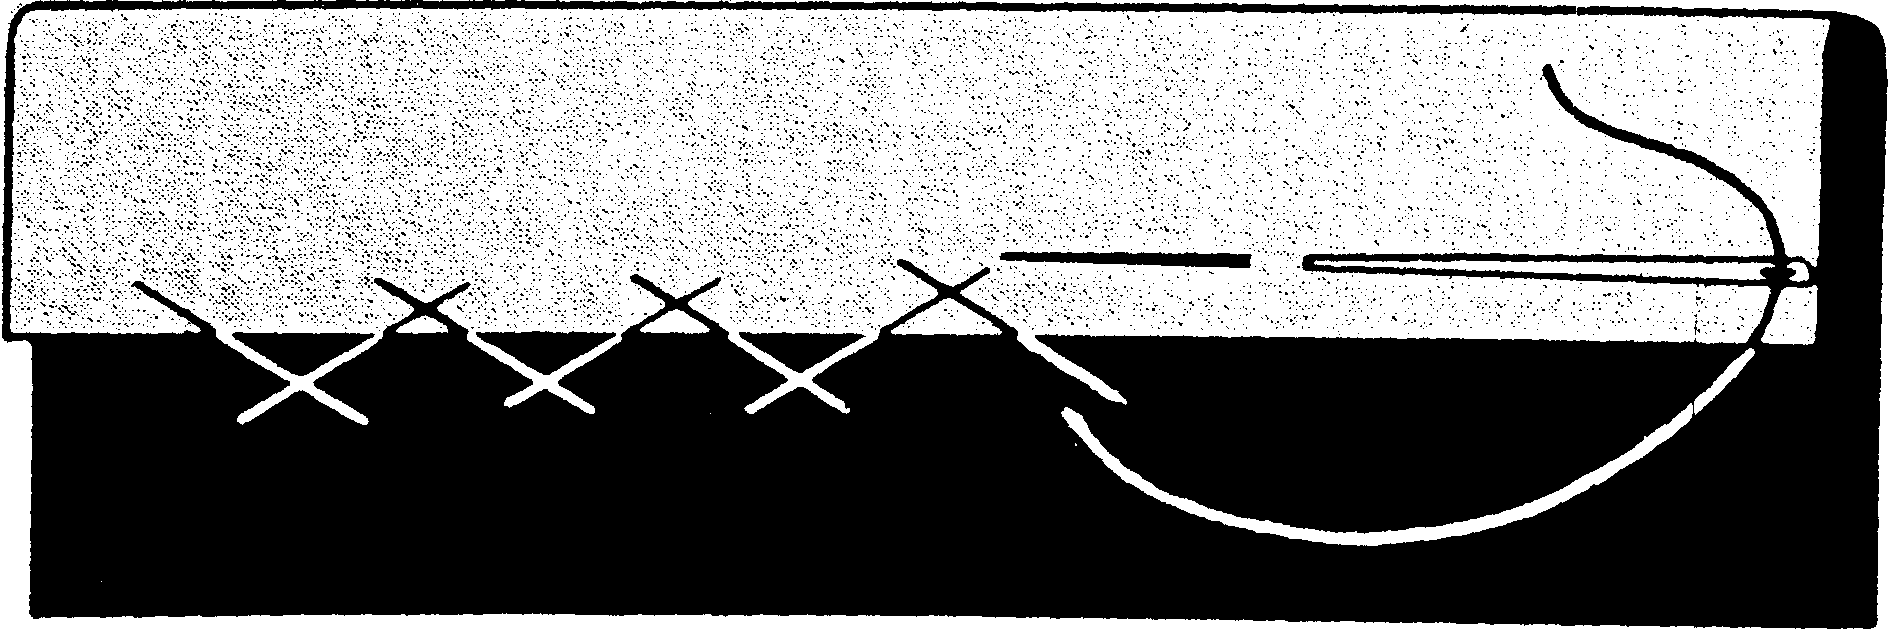

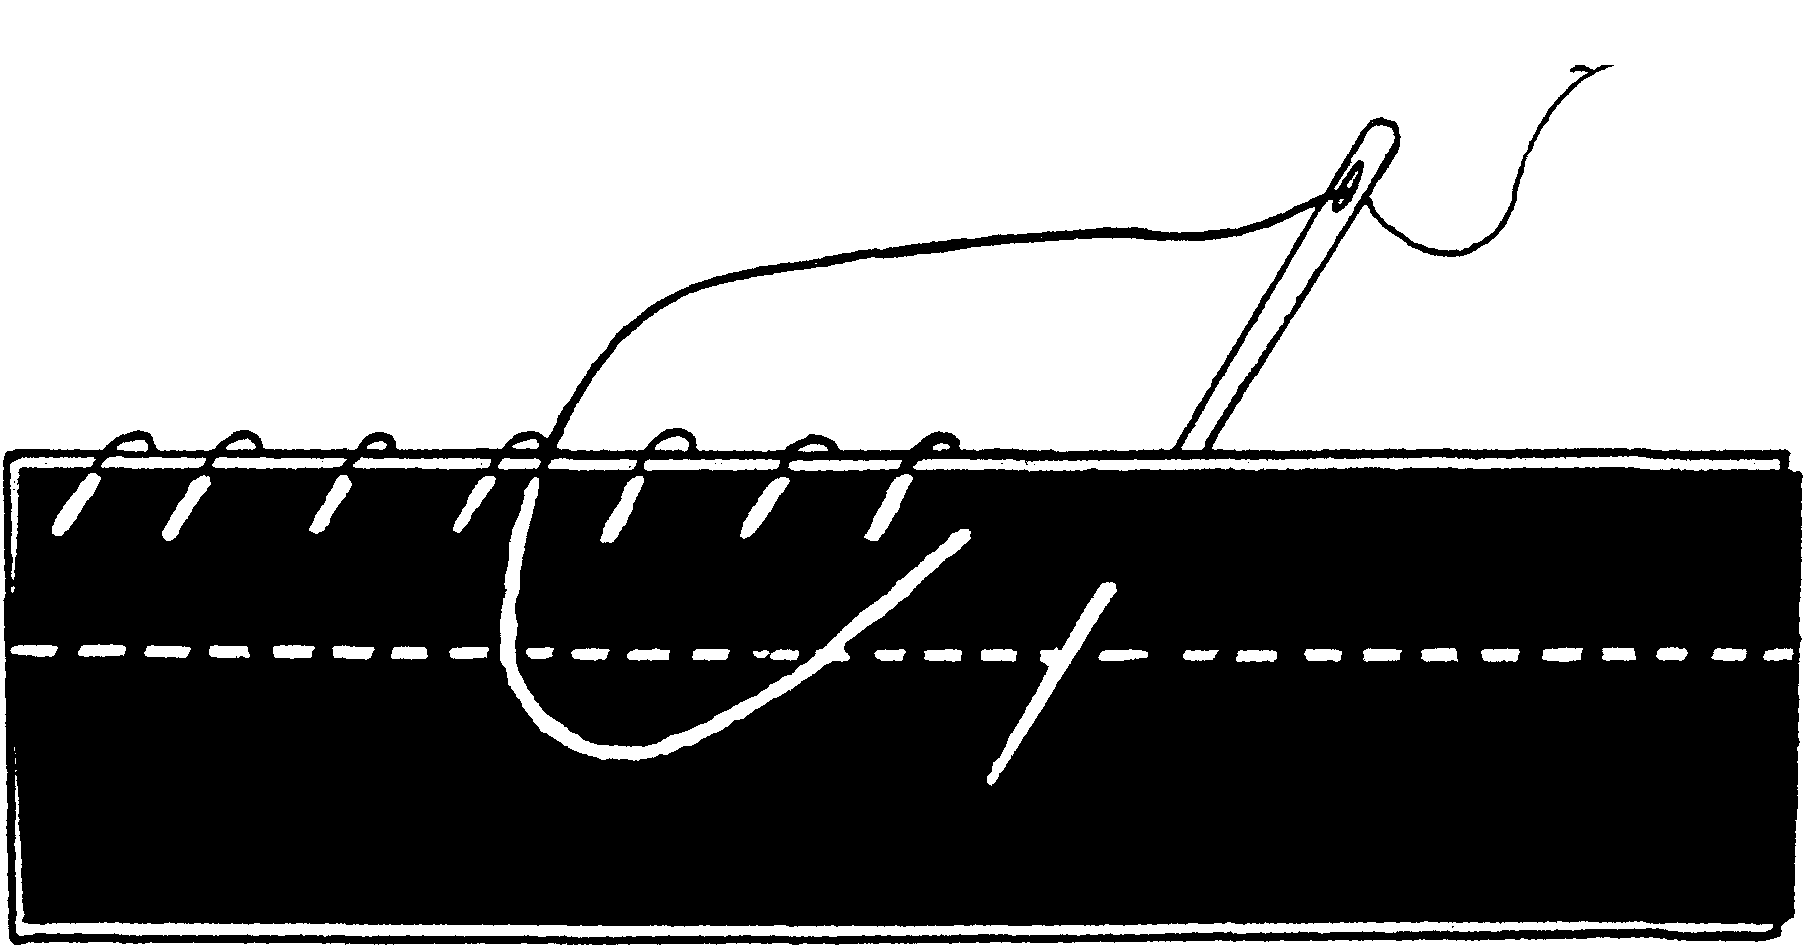
Fig.16 Fig.17 Fig.18
Overcasting
This stitch may be used on raw edges, either single or double, to prevent their raveling. Take stitches over the edge with the needle held in a slanting position. Stitches should be close together and an even distance apart. Keep the depth of the stitches uniform (Fig.18).
Exercise 1. Answer the following questions:
1. How should you begin and end any permanent hand stitches?
2. Where can you use a running stitch?
3. When is a basting stitch used?
4. What kind of basting stitches are there?
5. How does a back-stitch look like?
6. How does a slip-stitch differ from a slip-basting stitch?
7. What stitch is used to prevent the raveling of the edge?
Exercise 2. Find the English equivalents of such words from the text:
Ремонт, повнота (ширина), рівномірний наметувальний стібок, шар, підкладка, потайний наметувальний стібок, переробка (зміна), зігнути (скласти), підрубка, невидимий стібок.
Exercise 3. Match each word in the left-hand column with the best meaning in the right-hand column.
1) Running stitches a) look like machine-stitching on the
right
side, but stitches overlap on the wrong
side.
2) Back-stitches b) may be used on raw edges, either
single or double, to prevent their
raveling.
3) Catch-stitches c) can be used for gathering, quilting,
mending, tucking and seams that do not
require much strain.
4) Overcasting d) used to hold raw edges of facings and
interfacings.
Exercise 4. Make up a list of key words to describe basting stitches.
Exercise 5. Translate into English:
Використовуй контрастну нитку для наметувальних стібків, щоб їх можна було легко побачити.
Так утворюється косий стібок на верхній стороні і короткий горизонтальний – на нижній.
Ні один стібок не з’явиться на лицевій стороні, в той час як на зворотній буде наметувальний стібок.
Підрублювальний стібок не повинен з’явитись на лицевій
стороні.
Обметувальні стібки можуть використовуватись як для одного, так і для двох шарів тканини, щоб запобігти її обсипанню.
Text C: Seams
Key Words and Phrases:
Evenly – рівно, plain seam – зшивний шов, shifting – зміщення, notches – помітки, rate – розмір, grading – висікання припусків швів, reduce – зменшувати, clipping – надсікання, apart – на відстані.