

Real - World ASP .NET—Building a Content Management System - StephenR. G. Fraser
.pdfFigure 9-17: Successful completion of the setup procedure
Click Login to CMS.NET Administration, and I will meet you in the next section.
A Brief Tutorial
Before I get to coding CMS.NET, let's take a quick trip through the features of the CMS.NET administration system. If you are like me, seeing things in action before getting into the details provides a frame of reference and makes it easier to understand. This book will not provide a tutorial of the Internet Web site because that should be selfexplanatory or the site is not going to be successful.
Logging In
Obviously, the first thing you are going to do before you enter the administration Web site is enter your username and password (see Figure 9-18). If you are the primary administrator, you need to enter the username and password you created during the setup procedure. If you don't want to have to re-enter your password every time you enter the system, you can click the Remember Login check box.
Figure 9-18: The CMS.NET administration login Web page
Adding Users
Most likely, you will be developing the Web site with the help of others, and each of these people will have a different role to play. CMS.NET provides a role-based approach
to developing content. Chapter 3 covers some of the roles that might make up CMS administration, and Chapter 14 goes over the roles used by CMS.NET. So, for now, let's just create a user that does everything on the system. By the way, you already have someone who has that capability. He is called the administrator, but let's create another one. As time progresses, your user will start to have smaller or more specific roles, but for now let him have the world.
1.Select Account Maint from the NavBar.
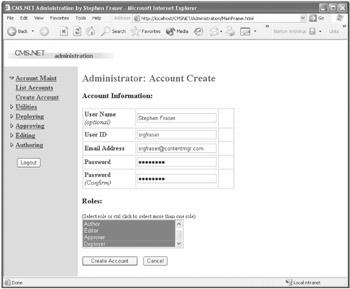
2.Select Create Account. This will display a Web form to create a new user (see Figure 9-19).
Figure 9-19: Creating a power user
3.Enter the data that is requested in the top half of the form.
4.In the bottom half, Ctrl-click all the roles.
5.Click the Create Account button.
You now have a user that can do anything on the system—a very dangerous person, indeed. Log out and then log back in as this new power user.
Creating a Story
Without content, there is no purpose for the CMS, so let's create our first story and walk it through to deployment. The process of entering the story is very simple.
1.Select Authoring from the NavBar.
2.Select the Create Content menu item. This will display a Web form to create a story (see Figure 9-20).

Figure 9-20: Creating content
3.Enter the data that is requested.
4.Click the Create Content button.
You now have your first story in CMS.NET. I'm sure you want to see if you typed in all that HTML right.
Viewing a Story
Let's take a look at what you entered. When you finished creating your story, you then jumped to the Content List Web page. This Web page gives an author a snapshot of everything she is currently working on. From here, the author can view, update, submit, and delete the content, and create a note (see Figure 9-21).
Figure 9-21: Listing the author's content
Okay, let's view the story you entered. Click the button that looks like a diamond under the View heading for the story you want to view. You will be presented with an author's view of the story. This is nothing like the view that will be presented to the Internet users. It shows all the content components as separate entities on the Internet site; these components will be merged seamlessly.
Figure 9-22 shows what you wrote. Not what you were expecting! This shows the danger of giving an author the capability to enter HTML code; if HTML is used incorrectly, complete garbage can be the result, as you can see.
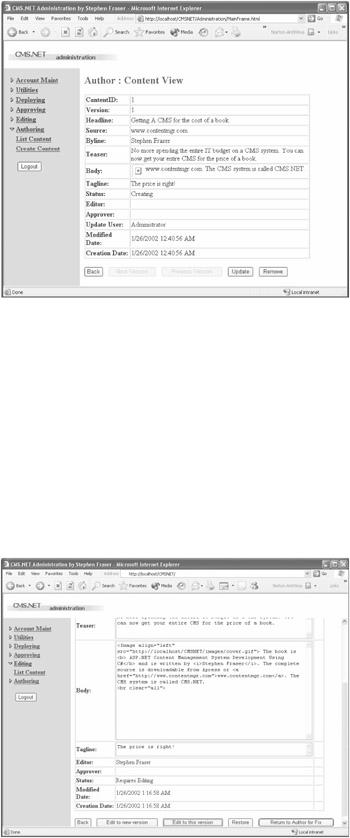
Figure 9-22: Viewing a content mistake
Updating a Story
The Web page for updating is very similar to the Web page for creating. The big difference is that it shows more information about the content, such as who was the original author and when she wrote this story.
To update content, simply click the diamond button under the Update column for the story you want to update. This will open the Update content Web form.
The problem with the page is actually a simple and very common mistake in HTML. I forgot a quote after the address of the image. After fixing this, all is well with the story. Take a look at the options at the bottom of the Update Web page (see Figure 9-23). CMS.NET provides simple content versioning. It is possible to create a new version of the content with each update or to fix the current version. It is up to the author whether she wants to use versioning or not. Let's make the change and create a new version.
Figure 9-23: CMS.NET's version control
When you view the content now, you notice that it says it is version 2, just as expected (see Figure 9-24). You might also notice that at the bottom of the View Web page, you can view previous versions of the content.

Figure 9-24: Viewing the corrected content
Creating a Note
Even though the note facility is very simple in CMS.NET, it provides a lot of functionality if used correctly. It can be used as a means of passing information between roles as the content progresses through its life cycle. It also can be a simple notepad to jot down ideas about a story. Because it is a free format of almost unlimited size, you can put nearly anything you want in it.
Creating a note is simple. Click the diamond Note button, click the Create A Note button, and then type to your heart's content. Finally, just click the Create Note button (see Figure 9-25) to save the note and have it associated with a specific piece of content.
Figure 9-25: The Note Web page
Submitting Content to Editors
You've finished your masterpiece, and you're ready for the editors to rip it to shreds. It's time to submit the content back into the workflow. The process barely needs explanation. Just click the diamond Submit button and then click the Submit Content button (see Figure 9-26). At this point, the story is no longer under your control. In fact, you now only have read access to the story. You still have the ability to create notes for the story, and using this method, you can request it back for any changes you think you need to make.

Figure 9-26: Submitting content
That's it from the author's point of view. There are a few other features, and I recommend that you play around with the content development Web pages. But it's now time to move on to the editor's role.
Editing Content
The editing process is very similar to the authoring process. The big difference is that a piece of content does not originate with an editor. Thus, there is no menu item to create content. An editor has the ability to create notes and view, edit, withdraw, submit, and return content back to the author (see Figure 9-27). I have already covered viewing content, creating notes, and submitting content during the discussion of the author's functionality.
Figure 9-27: Listing the editor's content
In fact, I have already covered editing as well because it is nearly identical to the author's updating process. The only difference is that when an editor first selects a piece of content to edit, it gets assigned to him and no one else can edit it. Before this time, the content was available to all editors for editing.

Withdrawing
Because the editor has exclusive rights to the content, CMS.NET needed to add a way for the editor to give up his lock on the content so that another editor could work on it. Why do you need to be able to do this? Editors get sick and go on vacations, so if the content is important enough, withdrawing and allowing another editor to finish the work might enable the content to get through the system faster.
The withdrawing process is nearly the same as the submitting process. Click the diamond Withdraw button and then click the Withdraw As Editor button (see Figure 9- 28). By the way, there is nothing stopping an editor from reselecting a piece of content at a later date.
Figure 9-28: Withdrawing as the editor
Returning Content to the Author
If the editor feels that the author needs to do more work on the content, he can return it. When the author finishes with her updates to the story and resubmits it, this time the story is routed directly to the editor who returned it to the author. This author-to-editor cycle can be repeated as many times as necessary to complete an acceptable story for the Web site.
The returning process is the same as all role-transition processes. Click the diamond Return button and then click the Return Content button (see Figure 9-29).

Figure 9-29: Returning content to the author
That's it for the new functionality provided to the editor. Now let's move on to the approver, who has the ultimate say on whether the story is acceptable for the Web site.
Approving Content
CMS.NET requires only one person with approval status to approve content. After an approver approves content, it will be eligible to be placed on the Web site. Approvers cannot change the content they are approving in any way. If changes need to be made, the content must be returned to the editor, usually accompanied by a note discussing what needs to be fixed.
The role of the approver is very simple. She can view, create notes, approve, return, or cancel content (see Figure 9-30). I have covered almost every one of these functions in the previous roles. The only one that needs some clarification is canceling content.
Figure 9-30: Listing the approver's content
Canceling Content
The workflow of CMS.NET is modeled after the simple workflow presented in Chapter 3, and as was pointed out there, the approver has the ability to stop midstream the development of a piece of content. This obviously means that if the approval staff is not
kept in the loop as to what is in the content pipeline, it is possible that time could be wasted by authoring and editing an unwanted piece of content.
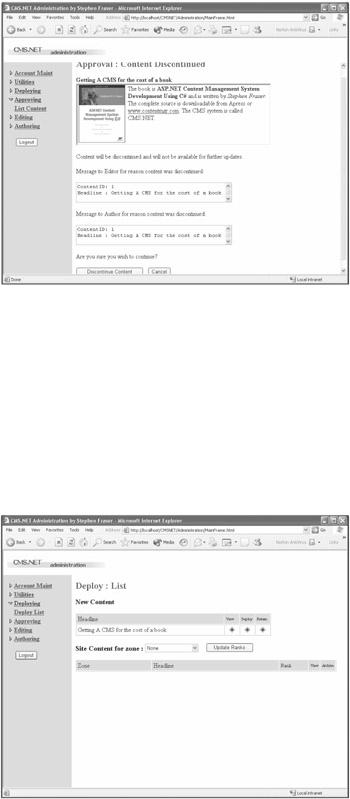
The process of canceling is very similar to any of the other role-transition processes. The big difference is that the author and editor of the content are e-mailed and told the reason why the content was canceled (see Figure 9-31).
Figure 9-31: Canceling content
All that is left after approval is deploying the content to the Web site. Once deployed, it will be visible to the Internet world (if, of course, the Web site is visible to the Web).
Deploying Content
The role of a deployer is very simple and is broken into two parts: routing and prioritizing. Routing is the process of placing the content into the appropriate zone or zones. Prioritizing is the process of ranking content to determine in what order the content is displayed.
The deployment process starts by receiving content in the Deploy List (see Figure 9-32). All content that is approved is routed to this list. From here, the deployer views the content and determines which zone to place it in. If notes have been used, the job of the deployer may be simplified because the author, editor, and approver might also provide suggestions as to where to deploy the content.
Figure 9-32: The deployer's content list
After the deployer decides where the content is to be placed, he then clicks the diamond Deploy button. This will bring up the Content Deployment Web page (see Figure 9-33).

This page simply displays the content and asks the deployer to Ctrl-click any zones in which the content should be deployed. After all the zones have been selected, click the Deploy Content button.
Figure 9-33: Deploying the content
Prioritizing Content
The fi nal step before the content is displayed is prioritizing the content. Each piece of content can have a different priority in each zone in which it appears. There are four priorities in CMS.NET:
§Low: This content will be displayed last, sorted by date last modified.
§Average: This content will be displayed before the Low setting but after the High setting. It is also sorted by date last modified.
§High: This content will be displayed first, sorted by date last modified. The exception is if there is a lead.
§Lead: This is the top story, and there is only one per zone. It will always be displayed first.
All content is deployed with a default value of Average. To change the default, select the zone in which the content resides from the Site Content For Zone drop-down box. Then, after all the content is displayed for that zone (see Figure 9-34), update the ranking in the drop-down box for the content. Finally, click the Update Ranks button. (If you forget to do this, no ranking changes will be saved.)
Figure 9-34: Updating priorities