

Real - World ASP .NET—Building a Content Management System - StephenR. G. Fraser
.pdfConfiguring IIS
When you have the CMS.NET code where you want it, the next step is to let IIS know where it is. To do this, use the Internet Information Services program found in the Administrative Tools folder.
1.Start up the Internet Information Services program.
2.Navigate to and then right-click the Default Web Site folder.
3.Select Virtual Directory from New menu item (see Figure 9-1).
Figure 9-1: The Internet Information Services program
4.Click the Next button on the Virtual Directory Creation Wizard welcome screen (see Figure 9-2).
Figure 9-2: The Virtual Directory Creation Wizard
5.Enter CMSNET in the Alias edit field.
6.Click the Next button (see Figure 9-3).

Figure 9-3: Setting the virtual directory alias
7.Use the Browse button and navigate to the location where you copied the CMSNET directory earlier. Or, if you used the defaults during IIS installation, enter C:\Inetpub\wwwroot\CMSNET in the Directory field.
8.Click the Next button (see Figure 9-4).
Figure 9-4: Setting the virtual directory
9.Use the default check boxes.
10.Click the Next button (see Figure 9-5).
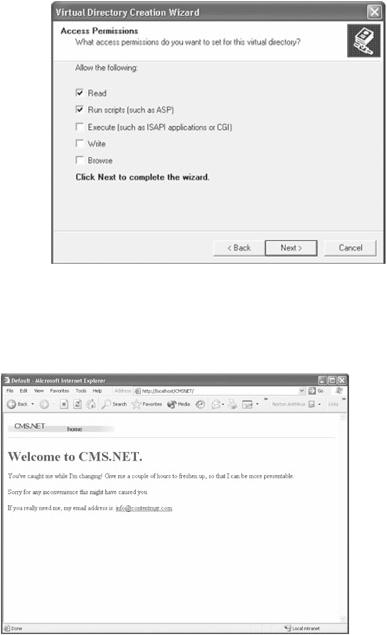
Figure 9-5: Setting the virtual directory access permissions
11.Click the Finish button.
12.Exit the IIS program.
CMS.NET is now ready to run (without a database, of course). If you want, you can type http://localhost/CMSNET in your browser's Address field and get your first CMS.NET Web page (see Figure 9-6). In fact, it's the "I'm changing" Web page that will be covered in Chapter 13.
Figure 9-6: The "I'm changing" Web page
Creating and Loading the CMSNET Database
You can create and load the CMSNET database in numerous ways. You can, of course, do it the long way and enter everything by hand. But because I've already done that, let's do it three easier ways.
Using Visual Studio .NET
I am aware that not everyone has Microsoft SQL Server 2000 available, so first I will show you how to install CMSNET into the Microsoft SQL Server Desktop Engine (MSDE), which comes free with Visual Studio .NET. I happened upon this method by luck. There probably is a correct way of doing it, but the following method works and it is very easy:
1. Copy only the CMSNET.mdf file from the Final\MS SQL Database directory on the Apress Web site to the C:\Program Files\Microsoft

SQL Server\MSSQL\Data directory. This file makes up an empty copy of the CMS.NET database.
2.Load Visual Studio .NET.
3.Using the Server Explorer, right -click the Data Connections folder.
4.Select the Add Connection menu item (see Figure 9-7).
Figure 9-7: Using the Server Explorer to add a database connection
5.In the Data Link Properties dialog box, select the Connection tab.
6.Enter your server name or enter local into the Select or Enter a
Server Name field.
7.Select the Use a Specific User Name and Password radio button.
8.Enter sa into the User Name field.
9.Select the Blank Password check box.
10.Select the Attach a Database File as a Database Name radio button.
11.Enter CMSNET in the field below the radio button.
12.Using the button with the ellipses, navigate to where you placed the CMSNET.mdf file.
13.Click the Open button.
14.Click the OK button (see Figure 9-8).

Figure 9-8: The Data Link Properties dialog box
Now, believe it or not, delete the newly created data connection. Yes, you read that right! You do this because you now have two copies of the connection: the one you just deleted and the one in the SQL Servers section, where it is supposed to be (see Figure 9-9).

Figure 9-9: Duplicate connections
Exit Visual Studio .NET. Now you are all set to play with CMS.NET.
Using Microsoft SQL Server Enterprise Manager
For those of you who are lucky enough to have Microsoft SQL Server available to you, I will now show you how to do virtually the same thing you did with Visual Studio .NET but this time with Enterprise Manager.
1.Copy the CMSNET.mdf and CMSNET_Log.ldf files from the Final\MS SQL Database directory on the Apress Web site to the C:\Program Files\Microsoft SQL Server\MSSQL\Data directory.
2.Load Enterprise Manager.
3.Navigate down to your Server Group and right -click the Databases folder.
4.Select the Attach Database submenu item from the All Tasks menu
item (see Figure 9-10).

Figure 9-10: Using Enterprise Manager to attach a database
5.Using the button with the ellipses, navigate to where you placed the CMSNET.mdf file.
6.Click the OK button to close the Navigation dialog box.
7.Enter CMSNET in the Attach As field.
8.Enter sa in the Specific Database Owner field.
9.Click the OK button (see Figure 9-11).
Figure 9-11: The Attach Database dialog box
Exit Enterprise Manager. Now you are all set to play with CMS.NET.
Using Microsoft Query Analyzer
Just for grins and giggles, I will show you a third way to create and load the CMSNET database. This time, you will execute a SQL script that defines the database. You will find the SQL script, CMSNET.sql, in the same directory on the Apress Web site as the
.mdf and .ldf database files: Final\MS SQL Database.
This procedure is a lot easier to execute than the previous two. (It was also a lot harder to build the SQL script, but that is a story for another time.) First, make sure you connect to the SQL Server using SQL Server Authentication and use the login name sa without a password. Then, simply load the Query Analyzer, open the CMSNET.sql file in the script editor, and execute the script. It couldn't be any easier (see Figure 9-12).
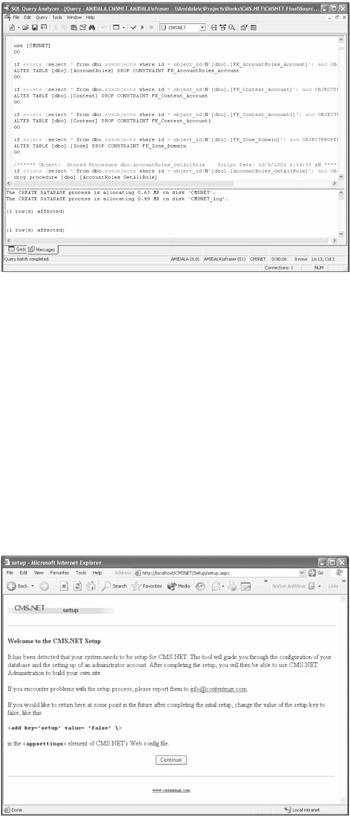
Figure 9-12: Running CMSNET.sql in the Query Analyzer
Exit the Query Analyzer. Now you are all set to play with CMS.NET.
Running CMS.NET Setup
The first thing you need to do to get CMS.NET up and running is to let CMS.NET know where its database is. After that is established, CMS.NET needs to know who its administrator is. Chapter 10 covers the actual coding of the setup procedure, so for now, let's pretend you are just an administrator.
You don't have to do anything special to run the setup procedure—just access CMS.NET's administration Web site. You can do this in one of two ways. If CMS.NET is on your own machine, enter http://localhost/CMSNET/admin.aspx in your browser's Address field. If, on the other hand, you are accessing CMS.NET remotely, enter the host address instead of "localhost." In my case, I entered www.contentmgr.com/CMSNET/admin.aspx.
The first time the administration Web site is run, CMS.NET intercepts the request and runs the setup routine. The first Web page you will see is the "Welcome to the CMS.NET Setup" Web page (see Figure 9-13). Read it and then click the Continue button.
Figure 9-13: The "Welcome to the CMS.NET Setup" Web page
The next setup Web page requests where to find its database (see Figure 9-14). On this Web form, you will enter the following:

Figure 9-14: The configure database Web page
§Database: The name you gave the database. It defaults to CMSNET.
§Data Source: The server where the database is housed. If it is on your local machine, enter localhost. On the other hand, if it is remote, enter the server name or the IP address of the database server.
§User ID: The user ID needed to connect to the database. I used the default sa, but your database administrator could use just about anything.
§Password: The password needed to connect to the database. I left this blank, but again, you might want to consult with your database administrator because she might have assigned a password.
§Connection Timeout: The length of time in seconds that the system will wait before timing out due to connection problems.
§SMTP Server: The name of the SMTP server to be used to send e-mail alerts. If this field is left blank, no e-mail alerts will be sent.
After you have entered the appropriate data, click the Make Connection button. If CMS.NET can connect to the database you provided, you will be presented with the next Web page. If not, you will be presented with an error message that should point you in the right direction to fix the problem.
If you get this error:
Access to the path "C:\Inetpub\wwwroot\CMSNET\web.config.001" is denied. you have to provide write privileges to the CMSNET directory for the user group {Machine}\ASPNET. To do this, perform the following steps:
1.Using Windows Explorer, right-click the C:\Inetpub\wwwroot\CMSNET directory.
2.Select Properties. This will bring up the dialog box shown in Figure 9- 15.

Figure 9-15: The CMSNET Properties dialog box
3.Select the Security tab.
4.Click the Add button.
5.Enter {Machine}\ASPNET in the presented dialog box. For my computer I entered AMIDALA\ASPNET.
6.Click the OK button.
7.Click the Modify or Write check box.
8.Click the OK button.
With the database connection out of the way, the setup process next needs to find out who is the primary administrator (see Figure 9-16). There is really nothing difficult about this Web page; just enter the appropriate information. You have probably entered this same information a hundred times or more elsewhere.
Figure 9-16: Setting up the administrator account
That's all there is to setting up CMS.NET. Your CMS might need more configuration, but this is all that CMS.NET needs to work. The setup procedure presents one more Web page that tells you of your success (see Figure 9-17), and then it offers you a button to start administrating the Web site.