

Real - World ASP .NET—Building a Content Management System - StephenR. G. Fraser
.pdfDisplayXMLTree (nav);
nav.MoveToParent();
lbXPath.Items.Add(" </" + nav.Name + ">");
}
while (nav.MoveToNext())
{
FormatXML (nav); DisplayXMLTree (nav);
}
}
private void FormatXML (XPathNavigator nav)
{
if (!nav.HasChildren)
{
lbXPath.Items.Add("->" + nav.Value);
}
else
{
lbXPath.Items.Add("<" + nav.Name + ">");
}
}
private void Page_Load(object sender, System.EventArgs e)
{
if (!IsPostBack)
{
XmlTextWriter writer = new XmlTextWriter( Server.MapPath("XMLFiles/MyContent.xml"), null);
//set up indenting format writer.Formatting = Formatting.Indented; writer.Indentation = 2;
//start XML document writer.WriteStartDocument();
//Write XML document writer.WriteStartElement("", "Content", "");
writer.WriteStartElement("", "ContentForAuthor", "");
writer.WriteStartElement("", "Author", ""); writer.WriteStartElement("", "FirstName", ""); writer.WriteString("John"); writer.WriteEndElement(); writer.WriteStartElement("", "LastName", ""); writer.WriteString("Doe"); writer.WriteEndElement(); writer.WriteEndElement(); writer.WriteStartElement("", "Articles", ""); writer.WriteStartElement("", "Headline", ""); writer.WriteString("This is the Headline"); writer.WriteEndElement(); writer.WriteStartElement("", "Story", ""); writer.WriteString("The story is entered here.");
//not needed as XmlTextWrite closes all open elements
//with WriteEndDocument

//writer.WriteEndElement();
//writer.WriteEndElement();
//writer.WriteEndElement();
//writer.WriteEndElement();
//End XML document writer.WriteEndDocument();
//Close document so that it can be opened again
//from the XPathNavigator process of document writer.Close();
//Read created file using XPathNavigator XPathDocument doc = new XPathDocument(
new XmlTextReader( "http://localhost/Ch08Examples/XMLFiles/MyContent.xml"));
XPathNavigator nav = doc.CreateNavigator();
nav.MoveToRoot();
// Recursive navigation of the DOM tree DisplayXMLTree(nav);
}
}
#region Web Form Designer generated code override protected void OnInit(EventArgs e)
{
InitializeComponent();
base.OnInit(e);
}
private void InitializeComponent()
{
this.Load += new System.EventHandler (this.Page_Load);
}
#endregion
}
}
After you have entered, compiled, and run this example, you will probably get an error. Normally, you don't want just anyone writing to your hard drive. But, in this case, you want ASP.NET to be able to write the XML file. To allow this, you need to change the security setting of the directory where the file is going to be written to, as follows:
1.Open Windows Explorer and navigate to directory where file is to be written to—in this case, C:\Inetpub\wwwroot\Ch08Examples.
2.Right -click the directory folder XMLFiles.
3.Select the Properties menu item.
4.Click the Security tab.
5.Click the Add button. This will display the dialog box shown in Figure 8-4.
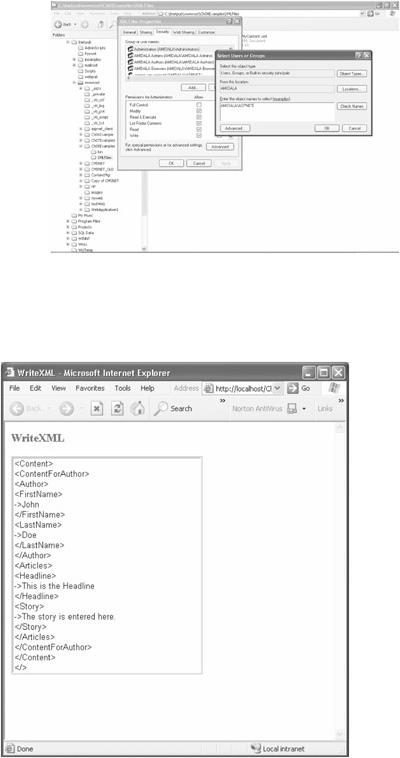
Figure 8-4: The Select User or Groups dialog box
6.Enter {Machine Name}\ASPNET into the text box. For me this is
AMIDALA\ASPNET.
7.Click the OK button.
8.Click the OK button.
When you run this example, you should get a Web page that looks like the one shown in Figure 8-5. Exciting, don't you think?
Figure 8-5: The WriteXML Web page
Inserting and Updating an XML File
You can now read and write an XML document, so let's take the final plunge and go ahead and complete the ways of working with XML documents. All that's left to cover is inserting and updating.
Just to simplify things, you will work with the minimal XML file shown in Listing 8-4. Basically, I removed the Articles elements from the original Content.xml. You should put the XML document in the XMLFiles directory that you created earlier in the Solution Explorer.

Listing 8-4: Authors.xml
<?xml version="1.0" encoding=" utf-8"?>
<Authors>
<Author>
<FirstName>Bill</FirstName>
<LastName>Doors</LastName>
</Author>
<Author>
<FirstName>Larry </FirstName>
<LastName>Ellidaughter</LastName>
</Author>
<Author>
<FirstName>Stephen</FirstName>
<LastName>Fraser</LastName>
</Author>
</Authors>
The goal of this example is to insert a new author after Ellidaughter. You will follow that with updating my last name. For more grins and giggles, I will show a third way of reading an XML file.
First, you will add a new Web form to your project. Name the Web form UpdateXML.aspx. Then design a Web page consisting of titles and two list boxes, changing the (ID) of these list boxes to lbBefore and lbAfter. Finally, bring up the code for UpdateXML in the main edit window.
As always, the first thing you need to do is add namespaces. In this example, you will need two. You are obviously going to need the XML namespace, but to implement the third method of how to read an XML document, you need the IO namespace as well. The code, as you can see, is nothing you shouldn't already know.
using System.Web.UI.HtmlControls;
using System.IO;
using System.Xml;
...
With the namespaces squared away, let's open up the authors.xml file and assign an XmlTextReader to it. Next, create a new XmlDocument and load it with XmlTextReader. Finally, close the authors.xml file so that it can be opened later with the inserted and updated authors.xml file.
if (!IsPostBack)
{
XmlReader reader = new XmlTextReader(
File.OpenRead(Server.MapPath("XMLFiles\\Authors.xml")));
XmlDocument doc = new XmlDocument();
doc.Load(reader);

reader.Close();
...
Before I get to inserting and updating, you are going to look at a third way of reading an XML file. This method only needs the functionality provided by the XmlDocument and
XmlNodeList classes.
This method provides the capability to do simple searches in tag names and then load an array with the retrieved values. In this example, I note that there is a first name for every last name, so you can do a search on both and then concatenate the retrieved values into the list box, displaying the author's full name.
XmlNodeList fnames = doc.GetElementsByTagName("FirstName");
XmlNodeList lnames = doc.GetElementsByTagName("LastName");
for (int i = 0; i < lnames.Count; i++)
{
lbBefore.Items.Add(fnames[i].InnerText + ""+ lnames[i].InnerText);
}
You will use this same code after you do your inserts and updates. The only difference will be the name of the list box you will populate.
fnames = doc.GetElementsByTagName("FirstName");
lnames = doc.GetElementsByTagName("LastName");
for (int i = 0; i < lnames.Count; i++)
{
lbAfter.Items.Add(fnames[i].InnerText + ""+ lnames[i].InnerText);
}
The steps for inserting a piece of XML into another piece of XML are hardly difficult. The following method of inserting XML after a sibling is one way, but there are many others. Some of the other, more common methods of inserting XML are before another sibling, after all children, and before all children.
The first thing you need to do is create the XML you want to insert. The easiest way to do so is simply to create the entire piece as a string and insert it into an XmlDocumentFragment, as you see in this piece of code:
XmlDocumentFragment newAuthor = doc.CreateDocumentFragment();
newAuthor.InnerXml=("\n <Author>\n" +
"<FirstName>John</FirstName>\n" +
"<LastName>Doe</LastName>\n" +
"</Author>\n");
You might notice that you can embed new line characters using the escape code "/n". If you don't add new line characters of your own, the fragment inserted will end up as one long line of XML. This is not a problem for a computer, but humans like nice formatting. Go figure.
Admittedly, the following code is a bit of a hack, but it does show the basics of how to insert XML. First, you locate the sibling node after which you want to insert. Then you use the InsertAfter() method to squeeze it in. In the example, you are placing the new XML fragment after the second Author element.
XmlElement root = doc.DocumentElement;

XmlNodeList nodes = root.GetElementsByTagName("Author");
root.InsertAfter(newAuthor,nodes.Item(1));
To insert the fragment before the second Author, you would simply change the last line as follows:
root.InsertBefore(newAuthor,nodes.Item(1));
The process to update an XML file is only slightly trickier. You must navigate to the node you want to change and then replace the old values in the node with the new. In the example, I get an array of all Authors, and then I navigate through all of them, getting all of the LastName elements. There is only one, but this shows how you can find a node if there were more. Finally, I check if the LastName contains my last name: Fraser. If it does, I replace it with TheAuthor. As you can see, the code is quite easy:
nodes = root.GetElementsByTagName("Author");
for (int i = 0; i < nodes.Count; i++)
{
XmlNodeList authornodes =
((XmlElement)(nodes.Item(i))).GetElementsByTagName("LastName");
for (int j = 0; j < authornodes.Count; j++)
{
if (authornodes[j].InnerText.Equals("Fraser"))
{
authornodes[j].InnerText = "TheAuthor";
}
}
}
The last thing you need to do is save the XML document to disk. If you don't, all the changes you made will disappear when you exit the program. I do this purposely in this example, as you may note in the final version. This code is commented out in the final version.
StreamWriter writer = new StreamWriter(
File.OpenWrite(Server.MapPath("XMLFiles\\Authors.xml")));
doc.Save(writer);
writer.Close();
Listing 8-5 shows the entire UpdateXML.cs so that you can make sure you entered it correctly.
Listing 8-5: The UpdateXML Codebehind
using System;
using System.Collections;
using System.ComponentModel;
using System.Data;
using System.Drawing;

using System.IO;
using System.Web;
using System.Web.SessionState;
using System.Web.UI;
using System.Web.UI.WebControls;
using System.Web.UI.HtmlControls;
using System.Xml;
namespace Ch08Examples
{
public class UpdateXML : System.Web.UI.Page
{
protected System.Web.UI.WebControls.ListBox lbAfter;
protected System.Web.UI.WebControls.ListBox lbBefore;
private void Page_Load(object sender, System.EventArgs e)
{
if (!IsPostBack)
{
XmlReader reader = new XmlTextReader(
File.OpenRead(Server.MapPath("XMLFiles\\Authors.xml")));
XmlDocument doc = new XmlDocument();
doc.Load(reader);
reader.Close();
// Displaying XML Document before insert & update
XmlNodeList fnames = doc.GetElementsByTagName("FirstName"); XmlNodeList lnames = doc.GetElementsByTagName("LastName");
for (int i = 0; i < lnames.Count; i++)
{
lbBefore.Items.Add(fnames[i].InnerText + ""+ lnames[i].InnerText);
}

// Inserting
XmlDocumentFragment newAuthor = doc.CreateDocumentFragment();
newAuthor.InnerXml=("\n <Author>\n" +
"<FirstName>John</FirstName>\n" +
"<LastName>Doe</LastName>\n" +
"</Author>\n");
//insert the new author after 2nd author XmlElement root = doc.DocumentElement;
XmlNodeList nodes = root.GetElementsByTagName("Author"); root.InsertAfter(newAuthor,nodes.Item(1));
//Updating
//Get New node list with inserted author
nodes = root.GetElementsByTagName("Author");
for (int i=0; i < nodes.Count; i++)
{
XmlNodeList authornodes = ((XmlElement)(nodes.Item(i))). GetElementsByTagName("LastName");
for (int j=0; j < authornodes.Count; j++)
{
if (authornodes[j].InnerText.Equals("Fraser"))
{
authornodes[j].InnerText = "TheAuthor";
}
}
}
//Normally you would save the document but we want to
//be able to re-run this
//StreamWriter writer = new StreamWriter(
//File.OpenWrite(Server.MapPath("XMLFiles\\Authors.xml")));
//doc.Save(writer);
//writer.Close();
//Reading XML Document after insert & update
fnames = doc.GetElementsByTagName("FirstName"); lnames = doc.GetElementsByTagName("LastName");
for (int i = 0; i < lnames.Count; i++)
{
lbAfter.Items.Add(fnames[i].InnerText + ""+ lnames[i].InnerText);
}
}
}
#region Web Form Designer generated code override protected void OnInit(EventArgs e)
{
InitializeComponent();

base.OnInit(e);
}
private void InitializeComponent()
{
this.Load += new System.EventHandler (this.Page_Load);
}
#endregion
}
}
After you enter, compile, and run this program, you should get a Web page that looks similar to the one shown in Figure 8-6.
Figure 8-6: The UpdateXML Web page
Creating a NavBar Using XML
Let's finish off all the background material needed to build a CMS with an example you can actually use. Almost all Web sites have a NavBar, and implementing one (using XML to store the navigation structure) is really quite easy.
Actually, the hard part of implementing an XML NavBar is not the XML code at all. It is the intrinsic Table control code that complicates things. It would be a simple thing to write
the <table> HTML in the CodeBehind C# file, but then you would not be separating the code and HTML as I promised in the beginning of the book.
Before you get to the coding of the NavBar, let's take a quick look at the XML file that stores the Web site navigation. As you can see in Listing 8-6, the structure is very simple.
Listing 8-6: The XML Menu Structure

Menu 1
Menu Name
Menu Item 1
Name
Link
Menu Item 2
...
Menu Item n
...
Menu 2
...
Menu n
...
The structure is a list of menus. Each menu has a menu name followed by a list of menu items. Each menu item has a name and a link. Listing 8-7 shows the navigation structure of the example. Note that the first two menus contain nonexistent Web pages, and the final menu has menu items pointing to the Web pages developed in this chapter. As with all the other examples, you should place this XML file in the XMLFiles directory in the Solution Explorer.
Listing 8-7: MainMenu.xml
<?xml version="1.0" encoding=" utf-8" ?>
<MainMenu>
<Menu>
<MenuName>Users</MenuName>
<MenuItem>
<Name>User Summary </Name>
<Link>Users.aspx</Link>
</MenuItem>
<MenuItem>
<Name>Create User</Name>
<Link>CreateUser.aspx </Link>
</MenuItem>
<MenuItem>
<Name>Edit User</Name>