

Using a framebu er
Selecting a framebu er as render target is very easy, in fact it can be done with a single call.
glBindFramebuffer(GL_FRAMEBUFFER, frameBuffer);
After this call, all rendering operations will store their result in the attachments of the newly created framebu er. To switch back to the default framebu er visible on your screen, simply pass 0.
glBindFramebuffer(GL_FRAMEBUFFER, 0);
Note that although only the default framebu er will be visible on your screen, you can read any framebu er that is currently bound with a call to glReadPixels as long as it’s not only bound to GL_DRAW_FRAMEBUFFER.
Post-processing
In games nowadays post-processing e ects seem almost just as important as the actual scenes being rendered on screen, and indeed some spectacular results can be accomplished with di erent techniques. Post-processing e ects in real-time graphics are commonly implemented in fragment shaders with the rendered scene as input in the form of a texture. Framebu er objects allow us to use a texture to contain the color bu er, so we can use them to prepare input for a post-processing e ect.
To use shaders to create a post-processing e ect for a scene previously rendered to a texture, it is commonly rendered as a screen filling 2D rectangle. That way the original scene with the e ect applied fills the screen at its original size as if it was rendered to the default framebu er in the first place.
Of course you can get creative with framebu ers and use them to do anything from portals to cameras in the game world by rendering a scene multiple times from di erent angles and display that on monitors or other objects in the final image. These uses are more specific, so I’ll leave them as an exercise to you.
Changing the code
Unfortunately it’s a bit more di cult to cover the changes to the code step-by- step here, especially if you’ve strayed from the sample code here. Now that you know how a framebu er is created and bound however and with some care put into it, you should be able to do it. Let’s globally walk through the steps here.
•First try creating the framebu er and checking if it is complete. Try binding it as render target and you’ll see that your screen turns black because the scene is no longer rendered to the default framebu er. Try changing the
74
clear color of the scene and reading it back using glReadPixels to check if the scene renders properly to the new framebu er.
•Next, try creating a new shader program, vertex array object and vertex bu er object to render things in 2D as opposed to 3D. It is useful to switch back to the default framebu er for this to easily see your results. Your 2D shader shouldn’t need transformation matrices. Try rendering a rectangle in front of the 3D spinning cube scene this way.
•Finally, try rendering the 3D scene to the framebu er created by you and the rectangle to the default framebu er. Now try using the texture of the framebu er in the rectangle to render the scene.
I’ve chosen to have only 2 position coordinates and 2 texture coordinates for my 2D rendering. My 2D shaders look like this:
#version 150
in vec2 position; in vec2 texcoord; out vec2 Texcoord; void main()
{
Texcoord = texcoord;
gl_Position = vec4(position, 0.0, 1.0);
}
#version 150
in vec2 Texcoord; out vec4 outColor;
uniform sampler2D texFramebuffer; void main()
{
outColor = texture(texFramebuffer, Texcoord);
}
With this shader, the output of your program should be the same as before you even knew about framebu ers. Rendering a frame roughly looks like this:
// Bind our framebuffer and draw 3D scene (spinning cube) glBindFramebuffer(GL_FRAMEBUFFER, frameBuffer); glBindVertexArray(vaoCube);
glEnable(GL_DEPTH_TEST); glUseProgram(sceneShaderProgram);
glActiveTexture(GL_TEXTURE0); glBindTexture(GL_TEXTURE_2D, texKitten); glActiveTexture(GL_TEXTURE1); glBindTexture(GL_TEXTURE_2D, texPuppy);
// Draw cube scene here
75
// Bind default framebuffer and draw contents of our framebuffer glBindFramebuffer(GL_FRAMEBUFFER, 0); glBindVertexArray(vaoQuad);
glDisable(GL_DEPTH_TEST); glUseProgram(screenShaderProgram);
glActiveTexture(GL_TEXTURE0); glBindTexture(GL_TEXTURE_2D, texColorBuffer);
glDrawArrays(GL_TRIANGLES, 0, 6);
The 3D and 2D drawing operations both have their own vertex array (cube versus quad), shader program (3D vs 2D post-processing) and textures. You can see that binding the color bu er texture is just as easy as binding regular textures. Do mind that calls like glBindTexture which change the OpenGL state are relatively expensive, so try keeping them to a minimum.
I think that no matter how well I explain the general structure of the program here, some of you just like to look at some new sample code and perhaps run a diff on it and the code from the previous chapter.
Post-processing e ects
I will now discuss various interesting post-processing e ects, how they work and what they look like.
Color manipulation
Inverting the colors is an option usually found in image manipulation programs, but you can also do it yourself using shaders!
As color values are floating point values ranging from 0.0 to 1.0, inverting a channel is as simple as calculating 1.0 - channel. If you do this for each channel (red, green, blue) you’ll get an inverted color. In the fragment shader, that can be done like this.
outColor = vec4(1.0, 1.0, 1.0, 1.0) - texture(texFramebuffer, Texcoord);
This will also a ect the alpha channel, but that doesn’t matter because alpha blending is disabled by default.
76
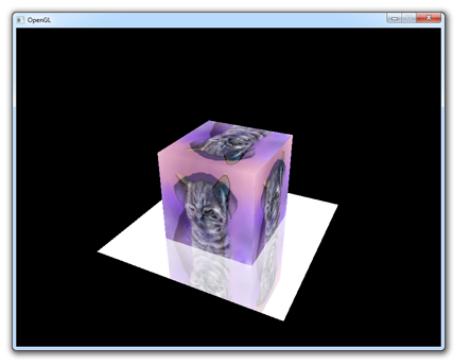
Figure 42:
77

78