

Camera and Gimbal
Camera Profile
The on-board camera uses the 1/2.3 inch CMOS sensor to capture video (up to 4096x2160p at 24fps or 4K at up to 30fps with the Phantom 3 Professional) and 12 megapixel stills. You may choose to record the video in either MOV or MP4 format. Available picture shooting modes include burst, continuous, and time-lapse mode. A live preview of what the camera sees can be monitored on the connected mobile device via the DJI GO app.
Camera Micro-SD Card Slot
To store your photos and videos, insert the Micro-SD card into the slot, as shown below, before turning on the Phantom 3 Professional. The Phantom 3 Professional comes with a 16 GB Micro-SD card and supports Micro-SD cards up to 64 GB. A UHS-1 Micro-SD card is recommended due to their fast read and write speeds allowing you to save high-resolution video data.
Do not remove the Micro-SD card from the Phantom 3 Professional when it is turned on.
Camera Data Port
Turn on the Phantom 3 Professional and connect a USB cable to the Camera Data Port to download photos and videos to your computer.
The aircraft must be turned on before attempting to access the files on the Micro-SD card.
Camera Gimbal
© 2015 DJI. All Rights Reserved. 31
Camera Gimbal
Phantom 3 Professional User Manual
Camera Operation
Use the Shutter and Video Recording buttons on the remote controller to shoot the images or videos through the DJI GO app. For more information about how to use these buttons, refer to “Controlling the Camera Page 24”.
Camera LED Indicator
Camera LED Indicator lights up after the flight battery is powered on. It provides information on the working status of the camera.
Camera LED Indicator |
Camera status |
Green Fast Blink (0.2s off, 0.1s on ) |
System is warming up. |
Green Blink Once (0.5s off, 0.4s on ) |
Taking a single picture. |
Green Blink 3 Times (0.3s off, 0.1s on ) |
Taking 3 or 5 photos per shot. |
Slow Red Blink (1.6s on, 0.8s off ) |
Recording. |
Fast Red Blink (0.5s off, 0.2s on ) |
SD card error. |
Double Red Blink (0.1s on, 0.1s off, 0.1s on, 0.1s off) |
Overheated Camera |
Solid Red |
System error. |
Green and Red Blink (0.8s green on, 0.8s red on) |
Firmware Upgrading |
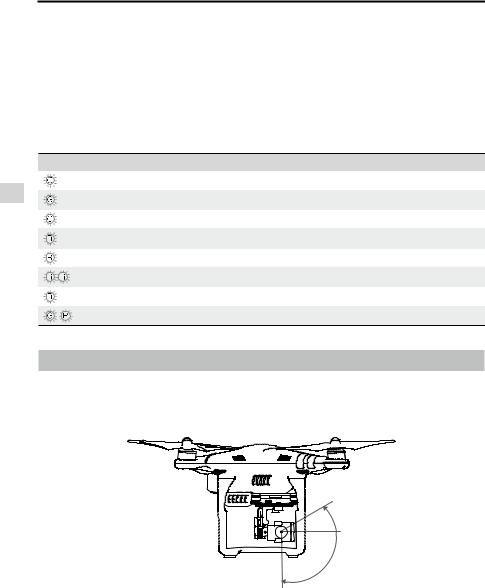
Gimbal
Gimbal Profile
The 3-axis gimbal provides a steady platform for the attached camera, allowing you to capture clear, stable images and video. The gimbal can tilt the camera within a 120˚ range.
30°
0°
-90°
Use the gimbal dial on the remote controller to control the tilt movement of the camera.
32 © 2015 DJI. All Rights Reserved.
Phantom 3 Professional User Manual
Gimbal Operation Modes
Two gimbal operation modes are available. Switch between the different operation modes on the camera settings page of the DJI GO app. Note that your mobile device must be connected to the remote controller for changes to take effect. Refer to the table below for details:
Follow Mode |
The angle between gimbal’s orientation and aircraft’s nose remains |
|
constant at all times. |
||
|
||
FPV Mode |
The gimbal will synchronize with the movement of the aircraft to provide a |
|
first-person perspective flying experience. |
||
|
 A gimbal motor error may occur in these situations: (1) the aircraft is placed on uneven ground or the gimbal’s motion is obstructed (2) the gimbal has been subjected to an excessive external force, such as a collision. Please take off from flat, open ground and protect the gimbal at all times.
 Flying in heavy fog or clouds may make the gimbal wet, leading to temporary failure. The gimbal will recover full functionality after it dries.
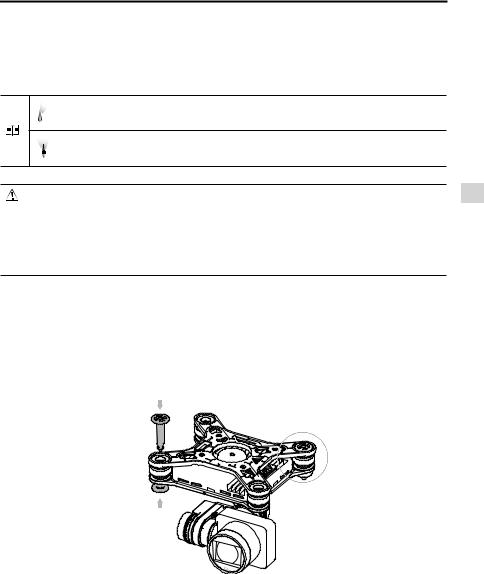
Anti-Drop Kit
The anti-drop kit helps keep the gimbal and camera connected to the aircraft. Two pins have been mounted prior to shipping. If new or additional pins are required, see the diagram below. Press Partthrough the hole of the vibration absorber and into the center hole of Part , then lock them together as shown . Mounting the anti-drop kit pins diagonally from each other is recommended.
Camera Gimbal
© 2015 DJI. All Rights Reserved. 33

DJI GO app
This section introduces the four main functions of the DJI GO app.
34 © 2015 DJI. All Rights Reserved.