


Chapter 2
Hardening the
Operating System
Solutions in this chapter:
■Updating the Operating System
■Handling Maintenance Issues
■Manually Disabling Unnecessary Services and Ports
■Locking Down Ports
■Hardening the System with Bastille
■Controlling and Auditing Root Access with Sudo
■Managing Your Log Files
■Using Logging Enhancers
;Summary
;Solutions Fast Track
;Frequently Asked Questions
41

42 Chapter 2 • Hardening the Operating System
Introduction
Linux is capable of high-end security; however, the out-of-the-box configurations must be altered to meet the security needs of most businesses with an Internet presence.This chapter shows you the steps for securing a Linux system—called hardening the server—using both manual methods and open source security solutions.The hardening process focuses on the operating system, and is important regardless of the services offered by the server.The steps will vary slightly between services, such as e-mail and Hypertext Transfer Protocol (HTTP), but are essential for protecting any server that is connected to a network, especially the Internet. Hardening the operating system allows the server to operate efficiently and securely.
This chapter includes the essential steps an administrator must follow to harden a Unix system; specifically, a Red Hat Linux system.These steps include updating the system, disabling unnecessary services, locking down ports, logging, and maintenance. Open source programs allow administrators to automate these processes using Bastille, sudo, logging enhancers such as SWATCH, and antivirus software. Before you implement these programs, you should first understand how to harden a system manually.
Updating the Operating System
An operating system may contain many security vulnerabilities and software bugs when it is first released.Vendors, such as Red Hat, provide updates to the operating system to fix these vulnerabilities and bugs. In fact, many consulting firms recommend that companies do not purchase and implement new operating systems until the first update is available. In most cases, the first update will fix many of the problems encountered with the first release of the operating system. In this section, you will learn where to find the most current Red Hat Linux errata and updates.
Red Hat Linux Errata and
Update Service Packages
The first step in hardening a Linux server is to apply the most current errata and Update Service Package to the operating system.The Update Service Package provides the latest fixes and additions to the operating system. It is a collection of fixes, corrections, and updates to the Red Hat products, such as bug fixes, security
www.syngress.com
Hardening the Operating System • Chapter 2 |
43 |
advisories, package enhancements, and add-on software. Updates can be downloaded individually as errata, but it is a good idea to start with the latest Update Service Package, and then install errata as necessary. However, you must pay to receive the Update Service Packages, and the errata are free. Many errata and Update Service Packages are not required upgrades.You need to read the documentation to determine if you need to install it.
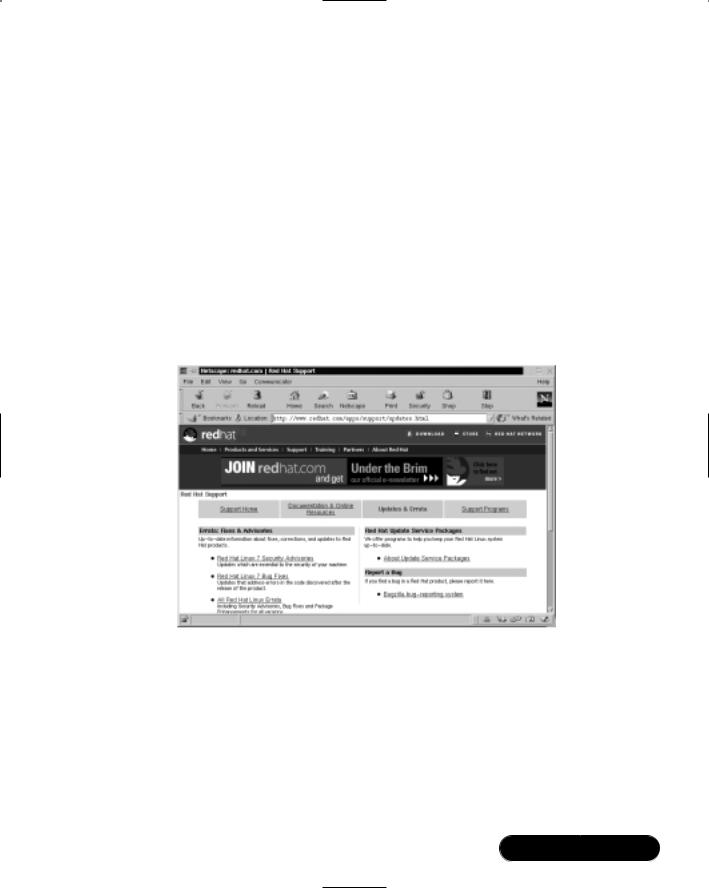
The Update Service Packages include all of the errata in one package to keep your system up to date. After you pay for the service, you can order Update Service Packages on CD, or download them directly from the Red Hat Web site. To find out more about the Update Service Packages, visit www.redhat.com/ support/services/update.html (Figure 2.1).You will learn more about errata in the maintenance section of this chapter.
Figure 2.1 Red Hat Errata and Updates
Handling Maintenance Issues
You should apply the latest service pack and updates before the server goes live, and constantly maintain the server after it is deployed to make sure the most current required patches are installed.The more time an operating system is available to the public, the more time malicious hackers have to exploit discovered vulnerabilities.Vendors offer patches to fix these vulnerabilities as quickly as possible; in some cases, the fixes are available at the vendor’s site the same day.
www.syngress.com

44 Chapter 2 • Hardening the Operating System
Administrators must also regularly test their systems using security analyzer software. Security analyzer software scans systems to uncover security vulnerabilities, and recommends fixes to close the security hole. (These tools are discussed in detail in Chapter 3.)
This section discusses the maintenance required to ensure that your systems are safe from the daily threats of the Internet.
Red Hat Linux Errata: Fixes and Advisories
Once your Red Hat system is live, you must make sure that the most current required Red Hat errata are installed.These errata include bug fixes, corrections, and updates to Red Hat products.You should always check the Red Hat site at www.redhat.com/apps/support/updates.html for the latest errata news.The following list defines the different types of errata found at the Red Hat Updates and Errata site.
■Bug fixes Address coding errors discovered after the release of the product, and may be critical to program functionality.These Red Hat Package Manager tools (RPMs) can be downloaded for free. Bug fixes provide a fix to specific issues, such as a certain error message that may occur when completing an operating system task. Bug fixes should only be installed if your system experiences a specific problem. Another helpful resource is Bugzilla, the Red Hat bug-tracking system at http://bugzilla.redhat.com/bugzilla.
■Security advisories Provide updates that eliminate security vulnerabilities on the system. Red Hat recommends that all administrators download and install the security upgrades to avoid denial-of-service (DoS)
and intrusion attacks that can result from these weaknesses. For example, a security update can be downloaded for a vulnerability that caused a memory overflow due to improper input verification in Netscape’s Joint Photographic Experts Group (JPEG) code.
■Package enhancements Provide updates to the functions and features of the operating system or specific applications. Package enhancements are usually not critical to the system’s integrity; they often fix functionality programs, such as an RPM that provides new features.
Here are the steps for accessing Linux bug fixes, security advisories, and package enhancements:
www.syngress.com
Hardening the Operating System • Chapter 2 |
45 |
1.To download bug fixes, point your browser to www.redhat.com/ apps/support/updates.html. Under the “Errata: Fixes and Advisories” section, click the Red Hat Linux Bug Fixes link.The latest bug fixes are available for download on this page. Click each bug to learn more, and determine whether it affects your system. Some fixes do not include software downloads, such as RPMs; instead, they explain how to configure your system to fix the problem.
2.To download security advisories, point your browser to www.redhat
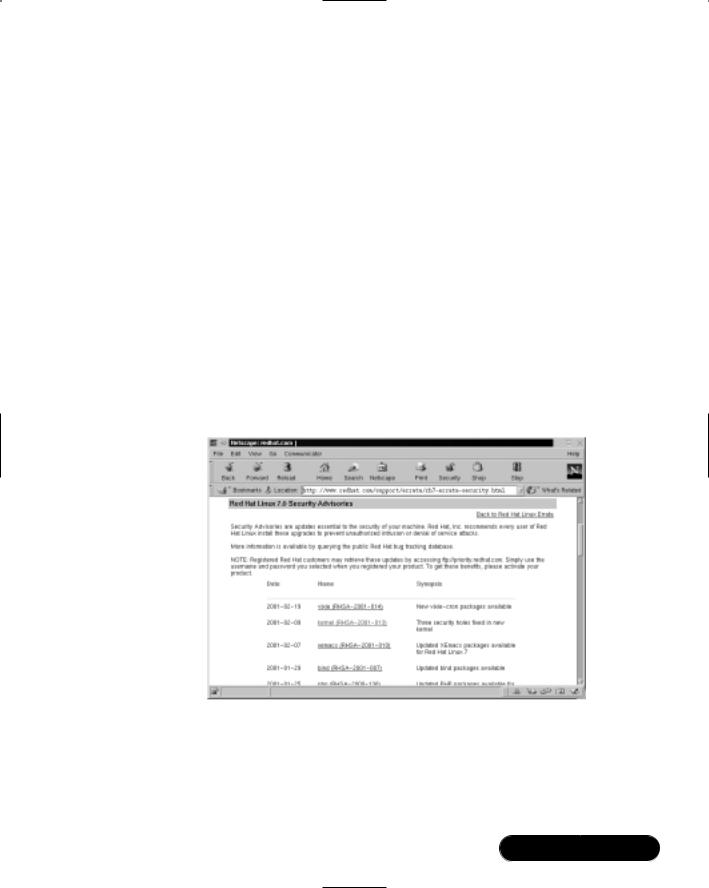
.com/apps/support/updates.html. Under the “Errata: Fixes and Advisories” section, click the Red Hat Linux Security Advisories link.The available security fixes are listed as shown in Figure 2.2. For example, one download contains three security hole fixes, as well as additional support for Pentium 4 processors.This affects Red Hat 6.x and 7.0 users. It is imperative for Linux administrators to check this Web site on a regular basis, determine if the changes are necessary, and implement the vulnerability fix.
Figure 2.2 Available Security Fixes for Red Hat Linux
3.To download package enhancements, point your browser to www.redhat.com/apps/support/updates.html. Under the “Errata: Fixes and Advisories” section, click the All Red Hat Linux Errata link, and then the Package Enhancements link. A Red Hat Linux
www.syngress.com

46 Chapter 2 • Hardening the Operating System
Package Enhancements link may also exist on the main Errata page.The available package enhancements are listed. Check the list to see if any enhancements affect your operating system or applications. If an enhancement exists, and installing it would benefit your system, download and install the corresponding package.
Bug Fix Case Study
In a production environment, a problem may exist if a system has an i810 chipset and is running Red Hat Linux 6.2.The correct amount of system RAM may not be available to the system. Consequently, the system cannot maximize RAM usage, and may not run certain programs because it thinks it does not have enough RAM. A fix for this problem is available at the Red Hat Updates and Errata Web site.
According to the bug fix, an administrator needs to manually enter the amount of RAM for the system.To check if the problem exists on a system, the administrator must log on as root and enter:
cat /proc/meminfo
If the memTotal value is not within a few MB of the actual system RAM, the administrator needs to manually enter the correct amount of system RAM.To accomplish this task, the administrator must have root access and edit the /etc/lilo.conf file by entering:
vi /etc/lilo.conf
The administrator must locate the current kernel image and add a new line by pressing i (to enter vi’s insert mode) and entering the following:
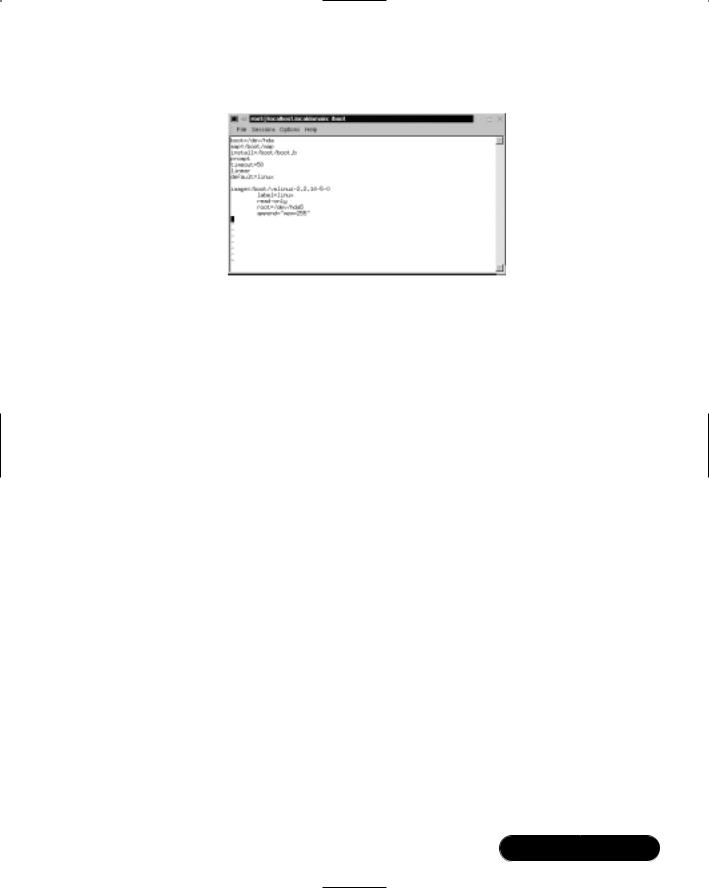
append="mem=[total amount of ram (in MB)]"
Figure 2.3 displays an edited lilo.conf file for a system that has 256MB of RAM. One MB should be subtracted from the total because the final megabyte is not available on all systems.
The administrator must write and quit the lilo.conf file by pressing ESC (to exit vi’s insert mode) and entering:
:wq
Then he or she must load the updated lilo.conf file into memory by entering:
/sbin/lilo
www.syngress.com
Hardening the Operating System • Chapter 2 |
47 |
Figure 2.3 Editing the Lilo.conf File to Fix a Bug
The administrator must reboot the machine. Afterward, he or she must check the RAM allocation by entering:
cat /proc/meminfo
If it is within a few MB of the actual RAM, the bug has been fixed. If not, the administrator must repeat the case study steps to ensure that the correct amount of RAM is allocated to the OS.
Manually Disabling Unnecessary
Services and Ports
To harden a server, you must first disable any unnecessary services and ports.This process involves removing any unnecessary services, such as the Linux rlogin service, and locking down unnecessary Transmission Control Protocol/User Datagram Protocol (TCP/UDP) ports. Once these services and ports are secure, you must then regularly maintain the system.
This section shows you how to manually disable several vulnerable services. Later in this lesson, you learn how to disable unnecessary services and ports using the open source program Bastille.
Services to Disable
Linux, by nature, is more secure than most operating systems. Regardless, there are still uncertainties to every new Linux kernel that is released, and many security vulnerabilities that have not been discovered. Most Linux services are not vulnerable to these exploits. However, an administrator can reduce the amount of risk by removing unnecessary services. Red Hat Linux includes many services, so
www.syngress.com

48 Chapter 2 • Hardening the Operating System
it makes sense that an administrator customize the system to suit the company needs. Remember, you are removing risk when you remove unnecessary services.
The xinetd.conf File
The /etc/xinetd.conf file (previously the inetd.conf file) controls many Unix services, including File Transfer Protocol (FTP) and Telnet. It determines what services are available to the system.The xinetd (like inetd) service is a “super server” listening for incoming network activity for a range of services. It determines the actual nature of the service being requested and launches the appropriate server. The primary reason for the design is to avoid having to start and run a large number of low-volume servers. Additionally, xinetd’s ability to launch services on demand means that only the needed number of servers is run.
The etc/xinted.conf file directs requests for xinetd services to the /etc/xinetd.d directory. Each xinetd service has a configuration file in the xinetd.d directory. If a service is commented out in its specified configuration file, the service is unavailable. Because xinetd is so powerful, only the root should be able to configure its services.
The /etc/xinetd.d directory makes it simple to disable services that your system is not using. For example, you can disable the FTP and Telnet services by commenting out the FTP and Telnet entries in the respective file and restarting the service. If the service is commented out, it will not restart.The next section demonstrates how to disable the Telnet, FTP, and rlogin services.
Telnet and FTP
Most administrators find it convenient to log in to their Unix machines over a network for administration purposes.This allows the administrator to work remotely while maintaining network services. However, in a high-security environment, only physical access may be permitted for administering a server. In this case, you should disable the Telnet interactive login utility. Once disabled, no one can access the machine via Telnet.
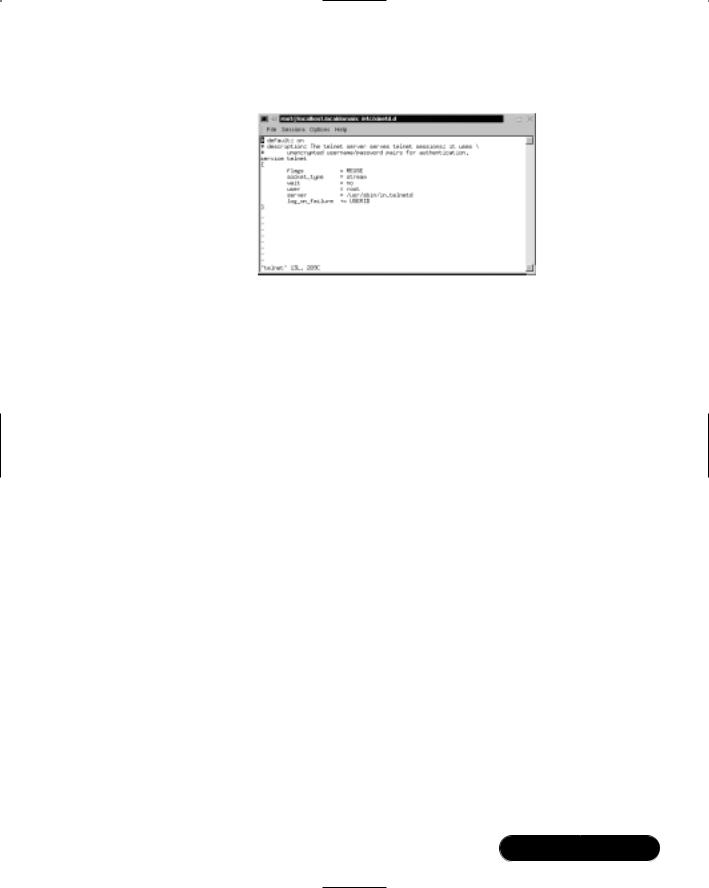
1.To disable Telnet, you must edit the /etc/xinetd.d/telnet file. Open the Telnet file, as shown in Figure 2.4, using vi or an editor of your choice.
2.Comment out the service telnet line by adding a number sign (#) before service telnet:
#service telnet
3. Write and quit the file.
www.syngress.com
Hardening the Operating System • Chapter 2 |
49 |
Figure 2.4 Disabling Telnet Using the /xinetd.d/telnet File
4. Next, you must restart xinetd by entering:
/etc/rc.d/init.d/xinetd |
restart |
|
Stopping |
xinetd: |
[OK} |
Starting |
xinetd: |
[OK} |
5.Attempt to log on to the system using Telnet.You should fail.
6.Note that commenting out the service line in the respective xinetd.d directory can disable many services.
7.Disable the FTP service using the same method (e.g., edit the /xinetd.d/wu-ftpd file by commenting out the service ftp line and restarting xinetd).
8.Attempt to access the system via FTP.You should be unable to log in to the server.
The Rlogin Service
The remote login (rlogin) service is enabled by default in the /etc/xinetd.d/ rlogin file. Rlogin has security vulnerabilities because it can bypass the password prompt to access a system remotely.There are two services associated with rlogin: login and RSH (remote shell).To disable these services, open the /xinetd.d/ rlogin file and comment out the service login line.Then, open the /etc/ xinetd.d/rsh file and comment out the service shell line. Restart xinetd to ensure that your system is no longer offering these services.
www.syngress.com
50 Chapter 2 • Hardening the Operating System
Locking Down Ports
TCP/IP networks assign a port to each service, such as HTTP, Simple Mail Transfer Protocol (SMTP), and Post Office Protocol version 3 (POP3).This port is given a number, called a port number, used to link incoming data to the correct service. For example, if a client browser is requesting to view a server’s Web page, the request will be directed to port 80 on the server.The Web service receives the request and sends the Web page to the client. Each service is assigned a port number, and each port number has a TCP and UDP port. For example, port 53 is used for the Domain Name System (DNS) and has a TCP port and a UDP port. TCP port 53 is used for zone transfers between DNS servers; UDP port 53 is used for common DNS queries—resolving domain names to IP addresses.
Well-Known and Registered Ports
There are two ranges of ports used for TCP/IP networks: well-known ports and registered ports.The well-known ports are the network services that have been assigned a specific port number (as defined by /etc/services). For example, SMTP is assigned port 25, and HTTP is assigned port 80. Servers listen on the network for requests at the well-known ports. Registered ports are temporary ports, usually used by clients, and will vary each time a service is used. Registered ports are also called ephemeral ports, because they last for only a brief time.The port is then abandoned and can be used by other services.
The port number ranges are classified, as shown in Table 2.1, according to Request for Comments (RFC) 1700.To access RFC 1700, go to ftp://ftp.isi.edu/ in-notes/rfc1700.txt.
Table 2.1 Port Number Ranges for Various Types
Type |
Port Number Range |
Well-known |
1 to 1023 |
Registered |
1024 to 65535 |
NOTE
Connections to ports number 1023 and below are assumed to run with root-level privileges. This means that untrusted services should never be configured with a port number below 1024.
www.syngress.com

Hardening the Operating System • Chapter 2 |
51 |
You will see how well-known ports work with registered ports shortly. Table 2.2 is a list of well-known TCP/UDP port numbers.
Table 2.2 Commonly Used Well-Known TCP/UDP Port Numbers
Protocol |
Port Number |
|
|
FTP (Default data) |
20 |
FTP (Connection dialog, control) |
21 |
Telnet |
23 |
SMTP |
25 |
DNS |
53 |
DHCP BOOTP Server |
67 |
DHCP BOOTP Client |
68 |
TFTP |
69 |
Gopher |
70 |
HTTP |
80 |
POP3 |
110 |
NNTP |
119 |
NetBIOS Session Service |
139 |
Internet Message Access Protocol (IMAP), version 2 |
143 |
To explain how well-known ports work with registered ports, let’s look at a typical Web site connection from a Web browser to a Web server.The client sends the HTTP request from a registered TCP port, such as port 1025.The request is routed across the network to the well-known TCP port 80 of a Web server. Once a session is established, the server continues to use port 80, and the client uses various registered ports, such as TCP port 1025 and 1026, to transfer the HTTP data.
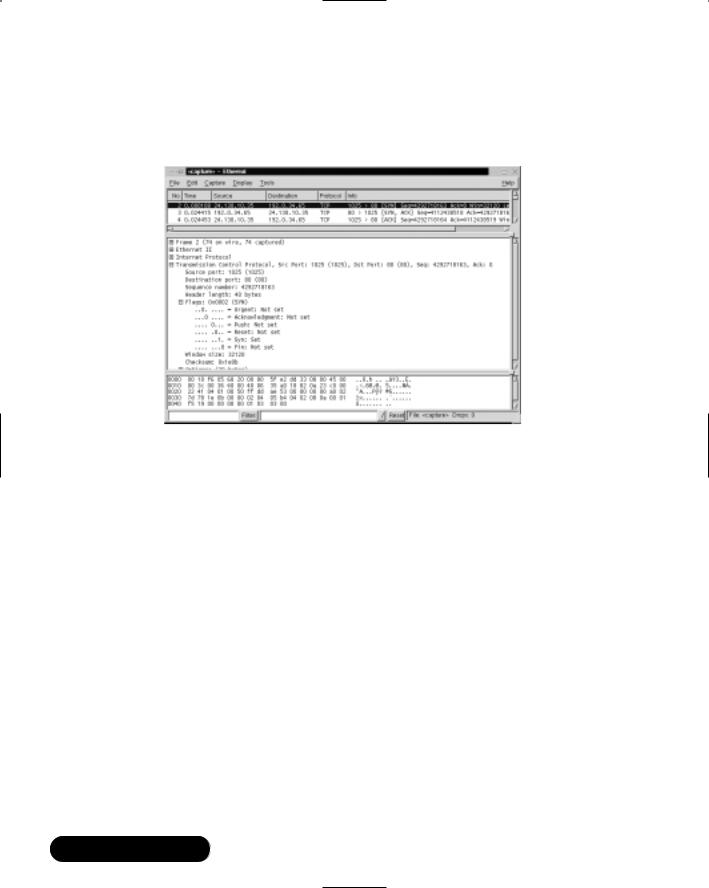
Figure 2.5 is a packet capture that displays the establishment of a TCP session between a client and server, and the transmission of HTTP data between them.
In frame 2 of the packet capture, the source address (24.130.10.35) is the client computer requesting the Web page.The destination address (192.0.34.65) is the Web server, which hosts the Internet Corporation of Assigned Names and Numbers (ICANN) Web site. In the Info field, the 1025 > 80 indicates that the source TCP port is 1025.The 80 indicates that the destination TCP port is 80. The first three frames display the TCP handshake, which establishes a TCP connection between the client and server. In the frames that follow, the client requests HTTP data from the server.The request determines the HTTP version
www.syngress.com
52 Chapter 2 • Hardening the Operating System
that the client and server will use.The client then requests and downloads the contents of the Web page.
Figure 2.5 Port Usage in a Client/Server HTTP Session
Determining Ports to Block
When determining which ports to block on your server, you must first determine which services you require. In most cases, block all ports that are not exclusively required by these services.This is tricky, because you can easily block yourself from services you need, especially services that use ephemeral ports, as explained earlier.
If your server is an exclusive e-mail server running SMTP and IMAP, you can block all TCP ports except ports 25 and 143, respectively. If your server is an exclusive HTTP server, you can block all ports except TCP port 80. In both cases, you can block all UDP ports since SMTP and IMAP all use TCP services exclusively. However, if you want to use your server as an HTTP client (i.e., for accessing operating system updates) or as an e-mail client to a remote mail server, you will restrict the system. Clients require registered UDP ports for DNS, as well as registered TCP ports for establishing connections with Web servers.
If you open only the corresponding UDP ports 25, 80, and 143, DNS requests are blocked because DNS queries use UDP port 53, and DNS answers use a UDP registered port (e.g., the response stating that www.syngress.com= 205.181.158.215). Even if you open port 53, a different registered port may be
www.syngress.com

Hardening the Operating System • Chapter 2 |
53 |
assigned each time for the answer. Attempting to allow access to a randomly assigned registered port is almost impossible and a waste of time.The same problem applies with TCP connections that require ephemeral ports.
Therefore, you should either open all TCP/UDP registered ports (so you can use your server as a client), or block them (except for the services you require) and access resources, such as operating system updates, another way. Many administrators order the Red Hat Linux Update CDs, which are re-mastered every eight weeks, that contain all current updates (www.redhat.com/products/software/linux/updatecd/).You can also simply download the updates from another computer.
Blocking Ports
To block TCP/UDP services in Linux, you must disable the service that uses the specific port.The following section discusses disabling ports using xinetd, and disabling ports assigned to stand-alone services.
Xinetd Services
Many services are disabled by their respective files in the /etc/xinetd.d directory by commenting out the service that uses the port.You learned how to comment out xinetd services earlier in this chapter. For example, to disable port 79 (used for finger services, which gives out user data that can be used by malicious hackers), you would comment out the service finger entry in /etc/xinetd.d/ finger file. Refer to Table 2.2 to view other ports you may wish to block. It lists common ports blocked by firewalls. However, these ports can also be blocked at the server itself. Follow these steps to disable port 79:
1.To disable port 79, you must edit the /etc/xinetd.d/finger file. Open the finger file and locate the service finger line.
2.Comment out the finger service line, and then write and quit the file.
3.Next, you must restart xinetd by entering:
/etc/rc.d/init.d/xinetd restart
4.If you have a finger program installed on your system, or access to a finger gateway, attempt a finger request to your system.You should fail. Note that you can use xinetd to disable many other ports.
www.syngress.com

54 Chapter 2 • Hardening the Operating System
Stand-Alone Services
To disable ports whose corresponding services are not included in the /etc/xinetd.d directory, you must kill the service’s process and make sure that service does not automatically restart upon reboot.These services are called standalone services. For example, port 111 is assigned a stand-alone portmapper service not required for most e-mail servers.The portmapper service, which is technically part of the Sun Remote Procedure Call (RPC) service, runs on server machines and assigns port numbers to RPC packets, such as NIS and NFS packets. Because these RPC services are not used by most e-mail services, port 111 is not necessary.To disable port 111, you must disable the portmapper service as follows:
1.To disable the portmapper service, identify the process identifier (PID) for portmap by entering:
ps aux | grep portmap
2.The second column lists the PID number.The last column lists the process using that PID.To stop the portmapper service, identify the PID number and enter:
kill –9 [PID NUMBER]
3. To make sure the service does not restart during reboot, enter:
ntsysv
4.Scroll down to the portmap service and uncheck the check box next to the service. Click OK.The portmap service will no longer restart at bootup.
NOTE
Some ports, such as port 80, are not activated unless the service is installed. For example, if you have not installed Apache server, then port 80 is not used. There is no need to block the port because it is already disabled.
www.syngress.com

Hardening the Operating System • Chapter 2 |
55 |
Hardening the System with Bastille
Bastille is an open source program that facilitates the hardening of a Linux system. It performs many of the tasks discussed in this chapter, including downloading operating system updates and disabling services and ports that are not required for the system’s job functions.The program also offers a wider range of additional services, from installing a firewall (ipchains) to implementing secure shell (SSH).
Bastille is powerful and can save administrators time from configuring each individual file and program throughout the operating system. Instead, the administrator answers a series of “Yes” and “No” questions through an interactive textbased interface.The program automatically implements the administrator’s preferences based on the answers to the questions.
Bastille is written specifically to Red Hat Linux and Mandrake Linux, but can be easily modified to run on most Unix flavors.The specific Red Hat/Mandrake content has been generalized, and now the hard-code filenames are represented as variables.These variables are set automatically at runtime.
Bastille Functions
The following list highlights the security features offered by Bastille to secure your system.You will choose which feature you want to implement on your system during the question-and-answer period. For example, many servers do not need to provide firewall or Network Address Translation (NAT), so you may not need to configure ipchains.This list may vary as new versions of Bastille are released and the program becomes more powerful. More information about each of these features is explained in the program.
■Run the ipchains script You can configure your system as a packet filter.This allows your system to perform NAT, serve as a small firewall, and deny certain connection types to your server.
■Download and install RPM updates The most recent versions of the RPMs used on your system are downloaded and installed.These RPM downloads are obtained from the Red Hat Errata page (www.redhat.com/support/errata).
■Apply restrictive permissions on administrator utilities Allows only the root to read and execute common Administrator utilities such as ifconfig, linuxconf, ping, traceroute, and runlevel). It disables the SUID root status for these programs, so nonroot users cannot use them.
www.syngress.com

56Chapter 2 • Hardening the Operating System
■Create a second root account A second UID 0 (root) account allows administrators to track the original root account.This is helpful for tracking hackers because Bastille notifies the second account to original account logins. If you always use the second account, then you know when a security breach may have occurred.
■Disable r-protocols The r-protocols allow users to log on to remote systems using IP-based authentication. IP-based authentication permits only specific IP addresses to remotely log on to a system. Because this authentication is based on the IP address, a hacker who has discovered an authorized IP address can create spoofed packets that appear to be from the authorized system.
■Implement password aging Default Red Hat Linux systems allow passwords to expire after 99,999 days. Because this is too long in a secure environment, Bastille offers to change the password expiration time to 180 days.These configurations are written to the /etc/login.defs file, as shown in Figure 2.6.
Figure 2.6 The /etc/login.defs File Configured for 180-Day Password Expiration
■Password protect the LILO prompt Allows users with the correct password to add arguments to the LILO prompt. Otherwise, only the default value (usually linux) is allowed. Be careful to implement this
www.syngress.com

Hardening the Operating System • Chapter 2 |
57 |
change if you have a dual-boot system, because the name of the operating system, such as dos, is often typed at the LILO prompt to access other operating systems.
■Disable CTRL-ALT-DELETE rebooting This disallows rebooting the machine by this method.
■Password protect single-user mode If a user gains access to your physical system, he or she can enter single-user mode by typing init 1. Once in single-user mode, that user has root access, and no one else can access the machine. By placing a password on single-user mode, runlevel 1 is protected (the password is the root password).
■Optimize TCP Wrappers This choice modifies the inetd.conf (preRed Hat Linux 7 versions only) and /etc/hosts.allow files so that inetd must contact TCP Wrappers whenever it gets a request, instead of automatically running the requested service.TCP Wrappers will determine if the requesting IP address is allowed to run the particular service. If the request is not allowed, the request is denied and the attempt is logged. Although IP-based authentication can be vulnerable, this optimization adds a layer of security to the process.
■Add Authorized Use banners These banners automatically appear whenever anyone logs on to the system. Authorized Use banners are helpful in prosecuting malicious hackers, and should be added to every system on your network that allows access to the network. An information bulletin from the U.S. Department of Energy’s Computer Incident Advisory Capability can be found at http://ciac.llnl.gov/ciac/bulletins/ j-043.shtml.
The bulletin is titled “Creating Login Banners” and explains what is required within login banners for government computers. It also includes how to create banners and provides the text from the approved
banner for Federal Government computer systems. Bastille uses a modified version of this login banner. If you choose to create a login banner, it will resemble Figure 2.7.You can modify the banner text to suit your security needs in the etc/motd file.
■Disable the compiler Most hackers access systems through regular user accounts. Once they have access to the system, they compile malicious programs to attack the system and other systems. Disabling the compiler denies users from compiling programs, which reduces the
www.syngress.com
58 Chapter 2 • Hardening the Operating System
security risk.This step is recommended for dedicated servers and firewalls, but may be too strict for workstations used by employees who require use of the compiler for their job tasks.
Figure 2.7 The etc/motd File Displaying Banner Text
■Limit system resource usage If you limit system resource usage, you can reduce the chances of server failure from a DoS attack. If you choose to limit system resource usage in Bastille, the following changes will occur:
■Individual file size is limited to 40MB.
■Each individual user is limited to 150 processes.
■The allowable core files number is configured to zero. Core files are used for system troubleshooting.They are large and exploitable if a hacker gains control of them: they can grow and consume your file system.
These limits are written to the /etc/security/limits.conf file, as shown in Figures 2.8 and 2.9.
■Restrict console access Anyone with access to the console has special rights, such as CD-ROM mounting. Bastille can specify which user accounts are allowed to log on via the console.
www.syngress.com

Hardening the Operating System • Chapter 2 |
59 |
Figure 2.8 The /etc/security/limits.conf File
Figure 2.9 The /etc/security/limits.conf File Configured to Limit the Allowable Core Files, User File Sizes, and User Processes
■Additional and remote logging Two additional logs can be added to /var/log/:
■/var/log/kernel (kernel messages)
■/var/log/syslog (error and warning severity messages) You can also log to a remote logging host if one exists.
■Process accounting setup Allows you to log the commands of all users. It also records when the commands were executed.This log file is helpful in retracing a hacker’s steps into your system, but the file can become large quickly. If the hacker has root access, the hacker can remove this accounting log.
www.syngress.com
60Chapter 2 • Hardening the Operating System
■Disable unnecessary daemons As discussed earlier in this chapter, only the required services should run on a system. All other services should be removed. Bastille allows you to disable daemons that are often unnecessary and pose potential security risks. If you performed a custom Red Hat installation with “everything,” you will be asked if you want to disable the services shown in Table 2.3.
Table 2.3 Disabling Unnecessary Daemons
|
|
|
Reason for |
|
|
Service |
Description |
Disabling |
|
|
|
|
|
|
|
Ampd |
Monitors battery power on |
Often unnecessary |
|
|
|
laptop computers |
|
|
|
Network File System |
Unix network file systems |
Potential security risk |
|
|
(NFS) and Samba |
used for sharing files |
|
|
|
Atd |
At daemon used for |
Potential security risk |
|
|
|
scheduling commands |
|
|
|
PCMCIA services |
Used for laptop computers |
Often unnecessary |
|
|
Dynamic Host |
Used by DHCP servers |
Often unnecessary |
|
|
Configuration Protocol |
|
|
|
|
(DHCP) daemon |
|
|
|
|
News server daemon |
Used by news servers |
Often unnecessary |
|
|
Routing daemon |
Used by routers |
Often unnecessary |
|
|
Network Information |
Unix network naming and |
Potential security risk |
|
|
System (NIS) server and |
administration system |
and often unnecessary |
|
|
client programs |
|
|
|
|
Simple Network |
Used to manage network |
Potential security risk |
|
|
Management Protocol |
devices |
and often unnecessary |
|
|
(SNMP) daemon |
|
|
|
|
Sendmail daemon mode |
Used by sendmail servers |
Often unnecessary |
|
|
|
|
|
|
■Download and install Secure Shell (SSH) A standard for securely logging on to remote systems. SSH encrypts usernames, passwords, and all information between hosts as they communicate across the network. Standard telnet connections send the information in clear text.Therefore, you should always use SSH to ensure secure remote connections.
■Deactivate and chroot named Similar to other services, named should be deactivated if the service is not required (e.g., if the server will
www.syngress.com

Hardening the Operating System • Chapter 2 |
61 |
not answer DNS queries). Bastille also offers to change the root directory of named to a child node on the directory tree, which is /home/dns.This new directory is considered a “chroot’ed prison” because the daemon is limited to only part of the file system and can only access the required files needed to function.These prisons are not entirely secure, but they do offer another layer of security to fend off a would-be hacker.This change is transparent, except that all configuration files and editing must occur in /home/dns. In addition, if you control named with ndc, you must enter: ndc -c /home/dns/var/run/ndc.
NOTE
The chroot() system call makes the current working directory act as if it were /. Consequently, a process that has used the chroot() system call cannot cd to higher-level directories. This prevents anyone exploiting the service from general access to the system.
■Harden Apache Web server httpd should be deactivated if the service is not required. If you decide to use Apache, you can perform the steps shown in the “Hardening the Apache Web Server” sidebar in Bastille to run the service.
Damage & Defense…
Hardening the Apache Web Server
Bastille has a reputation for being unable to secure the Apache Web server. If you implement the following steps for hardening Apache, be aware that security issues may still arise.
1.Run Apache as localhost only This action is especially helpful for Web designers and programmers because it allows them to work on their code and view their progress without opening the Web server to others network users. They access their local Web server by entering http://localhost.
Continued
www.syngress.com

62Chapter 2 • Hardening the Operating System
2.Bind the Web server to a specific interface Allows you to bind the Web server’s IP address to an interface, such as an Ethernet network interface card (NIC). The option overrides the previous localhost-only action.
3.Disable symbolic links Symbolic links are “pointers” to other files in a file system. They are capable of allowing Web site visitors to access files outside of the Web server directories. If you disable symbolic links, you limit the files accessible to visitors on the Web server.
4.Deactivate server-side includes Server-side includes (SSIs) are interpreters or programs on a Web server that are activated by a client. SSIs can create HTML on the fly, which reduces bandwidth usage. SSIs are HTML directives to run programs on the server and add the programs’ output to the page being returned to the client. The problem is that crackers could cause the program to run in an insecure way, and in some cases could even cause other programs to run. Consequently, SSIs are considered insecure and have fallen out of favor. If you do not use SSIs on your Apache Web server, you should deactivate them.
5.Disable CGI scripts Common Gateway Interface (CGI) scripts allow a Web server to communicate with an application, such as a database, and then return that data to a client. CGI scripts should be limited to certain users, depending on the CGI scripts. For example, many scripts are used to process Web page forms, which are available to the public. Some scripts may be used to access private databases, which require limited access. If you do not use CGI scripts on your Apache Web server, you should deactivate them.
6.Disable indexes A world-readable file or directory allows Web site visitors access to files or directories. An automatically generated index file will list the contents of these files and directories. Listing them is usually a bad idea unless you want the files to be listed for HTTP downloads (Web-based file archives) or similar uses.
■Disable printing Printing should only be enabled if your system needs to print. If printing is not required, Bastille removes SUID root on lpr, and disables lpr and lpd. As stated in the configuration script, if you
www.syngress.com

Hardening the Operating System • Chapter 2 |
63 |
disable SUID root on lpr and need to print, you must undo the setting by entering the following:
/bin/chmod 06555 /usr/bin/lpr /usr/bin/lprm
/sbin/chkconfig lpd on
■Disable FTP daemon user privileges By default (in the wu-ftpd configuration file), FTP clients cannot connect anonymously and upload files via FTP. Users with accounts on the system can still access the FTP server.This is dangerous if they access the server over a public network because the FTP passwords are sent as clear text, which can be captured by anyone with a packet sniffer. Anyone who has upload privileges can compromise the FTP daemon, because uploading files cause most attacks that allow root access.
■Disable anonymous download Allows anyone to download files from your FTP server without a unique username and password. Instead, it is recommended that you use an Apache Web-based file archive to allow the public to download files.
Bastille Versions
Bastille 1.1.0 and later incorporates several important changes that make the program even more powerful and easy to use.The examples in this book use Bastille 1.1.1. It is recommended that you implement at least version 1.1.0 because of the following enhancements:
■Nonvirgin system install Bastille runs on systems that are already in production. Previous versions only allowed Bastille to run on systems with a new install only.
■Multiple runnings Bastille can be run many times on the same system. Therefore, administrators can change settings as needed.
■Log-only feature Administrators can run Bastille without actually implementing the changes. Instead, the changes are written to a log file. This is helpful because it allows an administrator to decide what will work best for his or her system without being forced to commit to the changes. One wrong choice in Bastille can restrict the system’s functionality, and not allow the server to perform its job (hence, the all-important
www.syngress.com

64 Chapter 2 • Hardening the Operating System
Undo feature).To run the program in log-only mode, enter the following at the prompt when using interactive mode:
./InteractiveBastille.pl -v
■Distribution support Bastille is written specifically to Red Hat Linux and Mandrake Linux.The specific Red Hat/Mandrake content has been generalized, and hard-code filenames are now represented as variables.
These variables are set automatically at runtime.
■Undo feature Administrators can undo settings through various methods that are listed at the end of this section.
Implementing Bastille
Bastille is available for free download at www.bastille-linux.org.This tarball is also on the CD accompanying this book (Bastille-1.1.1.tar.gz).The program is offered in tarball format and must be installed by a root user in his or her root directory (a tarball is a collection of archived files that have been archived using the Unix tar program and have the .tar extension). Because Bastille is actually a collection of Perl scripts, you must also ensure that Perl 5.0 or later is installed on your system.
The program automatically implements the administrator’s preferences based on the answers to the questions, and saves them in the /root/Bastille/config file, as shown in Figure 2.10.
Figure 2.10 Bastille Configuration File
www.syngress.com

Hardening the Operating System • Chapter 2 |
65 |
Bastille allows the same configuration to be implemented on other systems. To do this, administrators need to install Bastille on that machine, copy the config file and the BackEnd.pl file to the new system’s ~/Bastille directory, and then run the command:
./BackEnd.pl
Damage & Defense…
Logging Your Configurations in Bastille
As with many security programs, Bastille is relatively simple to implement, but it’s easy to lose track of the changes you implemented. This can be a problem if you are unable to perform a typical operation on the system, or are denied access to a command or service. Many times, it is because you locked down part of the system by mistake, or misjudged the impact of a particular Bastille choice.
It is always a good idea to create a hard-copy log of the options you select in Bastille, or any security configurations you implement on your system. When you configure Bastille on your systems, use the Bastille log included in Appendix A of this book. It includes each configuration question and an area for your manual input. Make copies of the Appendix A, fill out the table during configuration, and keep the hard copies in a safe place.
If your system goes down, you can access the hard copies and recreate your Bastille configurations. Of course, if your system became unusable due to Bastille, it will help you determine what went wrong. This is especially helpful if you are unable to access the /root/Bastille/ config file, which saves the administrator’s preferences based on the answers to the Bastille questions.
Follow these steps to install and configure Bastille:
1.Log in as root.
2.Copy the Bastille tarball to your root directory.You can access the tarball from the CD accompanying this book (Bastille-1.1.1.tar.gz), or from www.bastille-linux.org.This lab is written for version 1.1.1, so we recommend that you use the version on the CD.The filename will resemble:
www.syngress.com

66 Chapter 2 • Hardening the Operating System
Bastille-1.1.1.tar.gz
3. In the root directory, decompress the image by entering:
tar –zxvf Bastille-1.1.1.tar.gz
4. Access the newly created Bastille directory in your root directory.
cd Bastille
5.To run the Perl configuration scripts in the interactive text-based mode, enter the following in the Bastille directory:
./InteractiveBastille.pl
The opening Bastille screen appears, as shown in Figure 2.11.
Figure 2.11 Interactive Bastille Opening Screen
6.All choices you implement in Bastille are logged to the /root/Bastille/ config file. If you want to log your choices without implementing them, you can append the -v option.Your choices are still logged to the /root/Bastille/config file, which is the same file to which the actions are logged.Therefore, we strongly recommend that you make a backup of the config file before running Bastille and keep a manual log.
www.syngress.com
Hardening the Operating System • Chapter 2 |
67 |
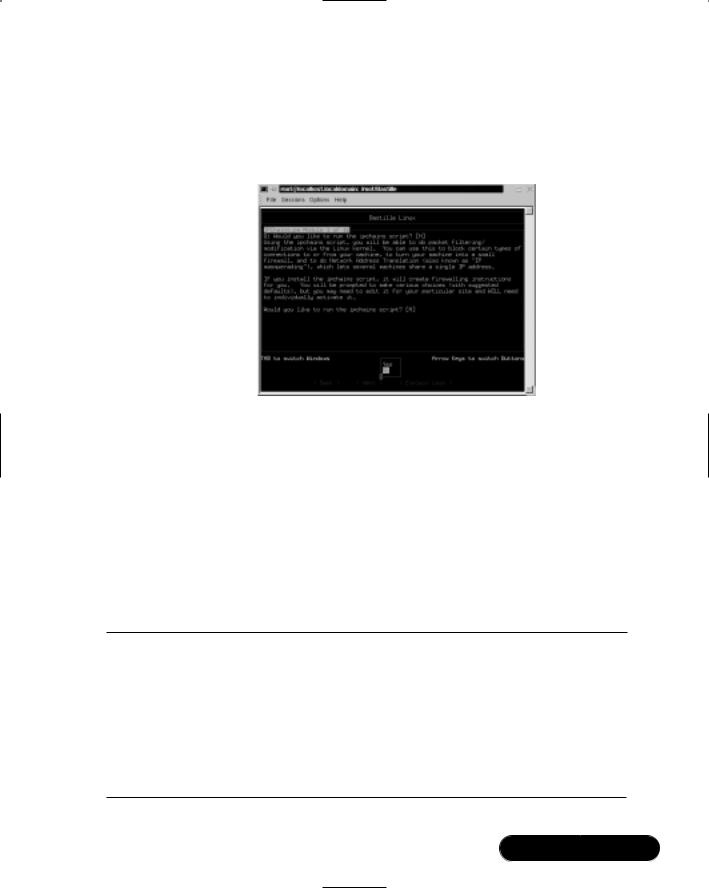
7.The opening screen appears, identifying how to navigate through the Bastille configuration process. Select Next to access the first configuration screen, as shown in Figure 2.12.
Figure 2.12 Bastille Linux Question-and-Answer Script
8.Table 2.5 leads you through the configuration process.The configuration used in this example performs a few basic hardening techniques on a Red Hat Linux 7.0 system with a custom installation with everything installed.The main purpose is to show you what Bastille offers and how to use it.You can use Bastille to secure a system based on your system’s services and needs, which will vary from the example.The bolded sections in the Choice column are choices you will skip for this example. The default answers are displayed for your interest.You will install many of these services later in this book, such as SSH.
Table 2.5 Simple Bastille Configurations
Question |
Choice |
|
|
|
|
Module 1: IPChains.pm |
|
|
|
|
|
1. |
Would you like to run the ipchains script? (Choosing |
No |
|
“No” will skip to Module 2; you will implement |
|
|
ipchains later in this book.) |
|
2. |
Do you need the advanced networking options? |
No |
3. |
DNS servers |
0.0.0.0/0 |
Continued
www.syngress.com

68 |
Chapter 2 • Hardening the Operating System |
|
|
||
|
|
|
|
|
|
|
|
Table 2.5 Continued |
|
|
|
|
|
|
|
|
|
|
|
Question |
Choice |
||
|
|
|
|
|
|
|
|
|
|
|
|
|
4. |
Public interfaces |
eth+ ppp+ slip+ |
||
|
5. |
TCP services to audit (name or port number). |
telnet ftp imap |
||
|
|
|
|
pop-3 finger |
|
|
|
|
|
sunrpc exec login |
|
|
|
|
|
linuxconf ssh |
|
|
6. |
UDP services to audit (name or port number); the |
31337 |
|
|
|
|
|
“Back Orifice” port number on Microsoft clients is |
|
|
|
|
|
listed by default. |
|
|
|
7. |
ICMP services to audit (name or port number); an |
(Blank) |
||
|
|
|
example is the Microsoft “echo-request” service |
|
|
|
|
|
(Microsoft ping and tracert commands). |
|
|
|
8. |
TCP service names or port numbers to allow on public |
(Blank) |
||
|
|
|
interfaces (typical workstations should not allow any |
|
|
|
|
|
services). |
|
|
|
9. |
UDP service names or port numbers to allow on |
(Blank) |
||
|
|
|
public interfaces (typical workstations should not |
|
|
|
|
|
allow any services). |
|
|
|
10. Force passive mode (i.e., for clients connecting to an |
No |
|||
|
|
|
FTP server). |
|
|
|
11. TCP services to block (if you force passive mode, you |
1024 2049 |
|
||
|
|
|
can skip this step). |
2065:2090 |
|
|
|
|
|
6000:6020 7100 |
|
|
12. UDP services to block. |
1066 2049 6770 |
|
||
|
13. ICMP allowed types. |
Destination- |
|||
|
|
|
|
unreachable |
|
echo-reply timeexceeded
14.Enable source address verification.
15.Reject method.
16.Interfaces for DHCP queries.
17.NTP servers to query.
18.ICMP types to disallow outbound.
Yes
DENY
(Blank)
(Blank)
Destinationunreachable timeexceeded
Continued
www.syngress.com

|
|
Hardening the Operating System • Chapter 2 |
69 |
||
|
|
|
|
|
|
|
Table 2.5 Continued |
|
|
|
|
|
|
|
|
|
|
|
Question |
Choice |
|
||
|
|
|
|
|
|
|
Module 2: PatchDownload.pm |
|
|
|
|
|
|
|
|
|
|
|
|
|
|
|
|
1. |
Would you like to download and install the updated |
No |
|
||
|
|
RPMs? |
|
|
|
|
|
|
|
|
|
|
Module 3: FilePermissions.pm |
|
|
|
|
|
|
|
|
||
|
|
|
|
|
|
1. |
Would you like to set more restrictive permissions on |
Yes |
|
||
|
|
the administration utilities? |
|
|
|
2. |
Would you like to disable SUID status for mount/ |
No |
|
||
|
|
umount? |
|
|
|
3. |
Would you like to disable SUID status for ping? |
Yes |
|
||
4. |
Would you like to disable SUID status for dump and |
No |
|
||
|
|
restore? |
|
|
|
5. |
Would you like to disable SUID status for cardctl? |
No |
|
||
6. |
Would you like to disable SUID status for at? |
No |
|
||
7. |
Would you like to disable SUID status for DOSEMU? |
No |
|
||
8. |
Would you like to disable SUID status for news server |
No |
|
||
|
|
tools? |
|
|
|
9. |
Would you like to disable SUID status for printing |
No |
|
||
|
|
utilities? |
|
|
|
10. Would you like to disable SUID status for the r-tools? |
No |
|
|||
11. Would you like to disable SUID status for usernetctl? |
No |
|
|||
12. Would you like to disable SUID status for traceroute? |
Yes |
|
|||
|
|
|
|
|
|
|
Module 4: AccountSecurity.pm |
|
|
|
|
|
|
|
|
||
|
|
|
|
|
|
1. |
Would you like to set up a second UID 0 account? |
No |
|
||
1a. What should we name the second UID 0 account? |
admin |
|
|||
2. |
May we take strong steps to disallow the dangerous |
No |
|
||
|
|
r-protocols? |
|
|
|
3. |
Would you like to enforce password aging? |
Yes |
|
||
4. |
Would you like to create a nonroot user account? |
Yes |
|
||
4a. What should we name your nonroot account? |
dave |
|
|||
5. |
Would you like to restrict the use of cron to adminis- |
No |
|
||
|
|
trator accounts? |
No |
|
|
|
|
|
|
||
Continued
www.syngress.com
70 |
Chapter 2 • Hardening the Operating System |
|
|
||
|
|
|
|
|
|
|
|
Table 2.5 Continued |
|
|
|
|
|
|
|
|
|
|
|
Question |
Choice |
||
|
|
|
|
|
|
|
|
Module 5: BootSecurity.pm |
|
|
|
|
|
|
|
|
|
|
|
|
|
|
|
|
1. |
Would you like to password protect the LILO prompt? |
No |
||
|
1a. Enter LILO password, please. |
(Blank) |
|||
|
2. |
Would you like to reduce the LILO delay time to zero? |
No |
||
|
3. |
Do you ever boot Linux from the hard drive? |
Yes |
||
|
4. |
Would you like to write the LILO changes to a boot |
No |
||
|
|
|
floppy? |
|
|
|
4a. Floppy drive device name. |
fd0 |
|||
5.Would you like to disable CTRL-ALT-DELETE rebooting? No
6.Would you like to password protect single-user mode? Yes
Module 6: SecureInetd.pm
1. |
Would you like to modify inetd.conf and /etc/hosts |
No |
||
|
|
.allow to optimize use of Wrappers? |
|
|
2. |
Would you like to set sshd to accept connections only |
No |
||
|
|
from a small list of IP addresses? |
|
|
2a. IP addresses to accept SSH from: |
(Blank) |
|||
3. |
Would you like to make Authorized Use banners? |
Yes |
||
|
|
|
|
|
|
Module 7: DisableUserTools.pm |
|
|
|
|
|
|
|
|
|
|
|
|
|
1. |
Would you like to disable the compiler? |
No |
||
Module 8: ConfigureMiscPAM.pm
1.Would you like to put limits on system resource usage? Yes
2.Should we restrict console access to a small group of
|
|
user accounts? |
No |
|
2a. What accounts should be able to log in at console? |
root |
|||
|
|
|
||
|
|
|
|
|
|
Module 9: Logging.pm |
|
|
|
|
|
|
|
|
|
|
|
|
|
1. |
Would you like to add additional logging? |
No |
||
2. |
Do you have a remote logging host? |
No |
||
2a. What is the IP address of the machine you want to |
127.0.0.1 |
|
||
|
|
log to? |
|
|
Continued
www.syngress.com

|
|
Hardening the Operating System • Chapter 2 |
71 |
||
|
|
|
|
|
|
|
Table 2.5 Continued |
|
|
|
|
|
|
|
|
|
|
|
Question |
Choice |
|
||
|
|
|
|
|
|
|
|
|
|
|
|
3. |
Would you like to set up process accounting? |
No |
|
||
|
|
|
|
|
|
|
Module 10: MiscellaneousDaemons.pm |
|
|
|
|
|
|
|
|
||
|
|
|
|
|
|
1. |
Would you like to disable apmd? |
No |
|
||
2. |
Would you like to deactivate NFS and Samba? |
No |
|
||
3. |
Would you like to disable atd? |
No |
|
||
4. |
Would you like to disable PCMCIA services? |
No |
|
||
5. |
Would you like to disable the DHCP daemon? |
No |
|
||
6. |
Would you like to disable GPM? |
No |
|
||
7. |
Would you like to disable the news server daemon? |
No |
|
||
8. |
Would you like to deactivate the routing daemons? |
No |
|
||
9. |
Would you like to deactivate NIS server and client |
No |
|
||
|
|
programs? |
|
|
|
10. Would you like to disable SNMPD? |
No |
|
|||
|
|
|
|
|
|
|
Module 11: Sendmail.pm |
|
|
|
|
|
|
|
|
||
|
|
|
|
|
|
1. |
Do you want to leave sendmail running in daemon |
Yes |
|
||
|
|
mode? |
|
|
|
2. |
Would you like to run sendmail via cron to process |
No |
|
||
|
|
the queue? |
|
|
|
3. |
Would you like to disable the VRFY and EXPN send- |
No |
|
||
|
|
mail commands? |
|
|
|
|
|
|
|
|
|
|
Module 12: RemoteAccess.pm |
|
|
|
|
|
|
|
|
||
|
|
|
|
|
|
1. |
Would you like to download and install SSH? |
No |
|
||
|
|
|
|
|
|
|
Module 13: DNS.pm |
|
|
|
|
|
|
|
|
||
|
|
|
|
|
|
1. |
Would you like to chroot named and set it to run as a |
No |
|
||
|
|
nonroot user? |
|
|
|
2. |
Would you like to deactivate named, at least for now? |
No |
|
||
|
|
|
|
|
|
|
Module 14: Apache.pm |
|
|
|
|
|
|
|
|
||
|
|
|
|
|
|
1. |
Would you like to deactivate the Apache Web server? |
No |
|
||
2. |
Would you like to bind the Web server to listen only to |
No |
|
||
|
|
the localhost? |
|
|
|
Continued
www.syngress.com

72 |
Chapter 2 • Hardening the Operating System |
|
|
||
|
|
Table 2.5 Continued |
|
|
|
|
|
|
|
|
|
|
|
Question |
Choice |
|
|
|
|
|
|
|
|
|
3. |
Would you like to bind the Web server to a particular |
No |
|
|
|
|
|
interface? |
|
|
|
3a. Address to bind the Web server to? |
127.0.0.1 |
|
||
|
4. |
Would you like to deactivate the following of |
No |
|
|
|
|
|
symbolic links? |
|
|
|
5. |
Would you like to deactivate server-side includes? |
No |
|
|
|
6. |
Would you like to disable CGI scripts, at least for |
No |
|
|
|
|
|
now? |
|
|
|
7. |
Would you like to disable indexes? |
No |
|
|
|
|
|
|
|
|
|
|
Module 15: Printing.pm |
|
|
|
|
|
|
|
|
|
|
1. |
Would you like to disable printing? |
No |
|
|
|
|
|
|
|
|
|
|
Module 16: FTP.pm |
|
|
|
|
|
|
|
|
|
|
1. |
Would you like to disable user privileges on the FTP |
No |
|
|
|
|
|
daemon? |
|
|
|
2. |
Would you like to disable anonymous download? |
No |
|
|
|
|
|
|
|
|
9.Bastille asks if you wish to implement these changes, as shown in Figure 2.13.
Figure 2.13 Implementing Bastille Changes
www.syngress.com

Hardening the Operating System • Chapter 2 |
73 |
10.Select Yes.The credits will appear. Press TAB to return to the prompt.
11.To test the changes you made to your system, enter the following ping and traceroute commands as root.The commands should run successfully.
ping www.bastille-linux.org
traceroute www.bastille-linux org
12. Create a password for the dave account you created in Bastille by entering:
passwd dave
Changing password for user dave
New UNIX password:
Retype new UNIX password:
passwd: all authentication tokens updated successfully
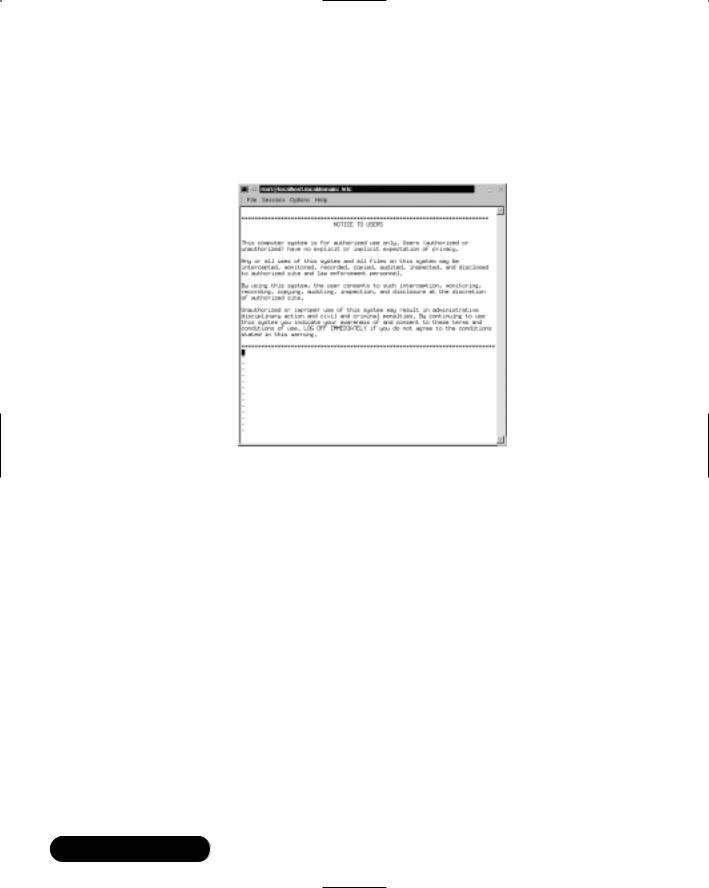
13.Log in as user dave.The “NOTICE TO USERS” authorization banner will appear (the etc/motd file), warning that the computer system is for authorized use only.The banner will appear when any user, including users with SUID status, log on to the system.
14.Enter the ping and traceroute commands again as dave.The commands should fail, because only users with SUID status are allowed to run these commands.The error messages will appear as follows:
ping www.bastille-linux.org
/bin/ping: Permission denied
traceroute www.bastille-linux.org
traceroute: command not found
15.You also implemented password aging to 180 days. Observe the changes you made to the login.def file by entering:
cat /etc/login.defs | less
Press any key to display the next page. Press q to access the prompt.
16.You applied limits to system resources by limiting individual file size to 40MB, limiting individual users to 150 processes, and configuring the allowable core files number to zero. Observe the changes you made to the limits.conf file by entering:
cat /etc/security/limits.conf | less
www.syngress.com

74 Chapter 2 • Hardening the Operating System
Press any key to display the next page. Press q to access the prompt.
17.Log in as root so you can add an account in the next step.
18.You password protected single-user mode. If a user gains access to your physical system, he or she must enter a password to enter single-user mode.This will keep anyone from accessing single-user mode, giving him or her root access and no one else access to the machine.The password is the root password.To test this action, follow these steps:
19.Reboot the system.
20.At the lilo prompt, enter:
linux init 1
21.The following instructions will appear. Enter your root password as requested:
Telling INIT to go to single user mode.
INIT: Going single user
Give root password for maintenance
(or type Control-D for normal startup): ********
22.You will access single-user mode, but only if you enter the root password. Access run-level 3 by entering:
init 3
Undoing Bastille Changes
At the time of this writing, a reliable automatic undo feature did not exist in Bastille.To undo the changes, you can run through the configuration questions again and select different answers.There are two other options.There is a Perl script named Undo.pl in the Bastille directory that is designed to undo all changes except for RPM installations.There is also a backup directory located at /root/Bastille/undo/backup that contains all the original system files that Bastille modified.The backup directory structure is the same as the system’s directory, so you can manually replace the files fairly easily.
You cannot undo your Bastille configurations by simply removing Bastille. If you do this, your changes will still be written to their specific files. If you want to remove the program and your settings, you must undo your changes, and then remove the Bastille directory.
www.syngress.com

Hardening the Operating System • Chapter 2 |
75 |
The following steps demonstrate three ways to undo the changes that you implemented in Table 2.5.
1. One method to undo Bastille configurations is to run through the configuration questions again and select different answers. If you choose this method, access the Bastille directory and enter:
./InteractiveBastille.pl
2.Run through the selection from Table 2.5 again, but replace several of the “Yes” configurations with a “No” answer, as shown in Table 2.6.
Table 2.6 Undoing Bastille Configurations
Question |
Choice |
|
|
|
|
Module 3: FilePermissions.pm |
|
|
|
|
|
1. |
Would you like to set more restrictive permissions on |
No |
|
the administration utilities? |
|
3. |
Would you like to disable SUID status for ping? |
No |
12. Would you like to disable SUID status for traceroute? |
No |
|
|
|
|
Module 4: AccountSecurity.pm |
|
|
|
|
|
3. |
Would you like to enforce password aging? |
No |
4. |
Would you like to create a nonroot user account? |
No |
|
|
|
Module 5: BootSecurity.pm |
|
|
|
|
|
6. |
Would you like to password protect single-user mode? |
No |
|
|
|
Module 6: SecureInetd.pm |
|
|
|
|
|
3. |
Would you like to make Authorized Use banners? |
No |
|
|
|
Module 8: ConfigureMiscPAM.pm |
|
|
|
|
|
1. |
Would you like to put limits on system resource usage? |
No |
|
|
|
3.Bastille asks if you wish to implement these changes. Select Yes.The credits will appear. Press TAB to return to the prompt.
www.syngress.com

76 Chapter 2 • Hardening the Operating System
4.The dave account you created will not be deleted because you only specified that you did not want to create a new account during the undo process.To delete the dave account, enter:
userdel –r dave
The command will remove all entries for dave in the system account files and the dave account’s home directory.
5.The Authorized Use banner may still appear at logon.To manually delete the Authorized Use banner, delete the banner text in the /etc/motd file, or replace the motd file with the backup file.The location of the backup file is explained in step 7.
6.A second method to undo Bastille configurations is to run the automated Perl script that will undo the changes.The script is named Undo.pl, and is designed to undo all changes except for RPM installations.To run the Undo.pl script, access the Bastille directory and enter:
./Undo
7.A third method to undo Bastille configurations is to manually remove the changes.This can be done by replacing each file that was changed with the backup files in the Bastille directory.The backup directory is located at:
/root/Bastille/undo/backup
The backup files contain the original files before they were changed, so the original configurations are intact. Bastille makes a backup file of each file before the file is modified. A Bastille backup directory is shown in Figure 2.14.
Figure 2.14 Bastille Backup Directory Example
www.syngress.com

Hardening the Operating System • Chapter 2 |
77 |
8.For example, to change password aging back to its default 99,999 days, replace the login.defs file with the backup file. Enter the following:
cd /root/Bastille/undo/backup/etc/login.defs
cp logindefs /etc/login.defs
cp: overwrite ‘/etc/login.defs’? y
The backup file replaces the current file, thus returning the password expiration configuration to its default setting.
As you can see, Bastille is a powerful security tool that helps you harden your system. It is relatively simple to use, and can save administrators a great deal of time because it automatically configures the required files for each selection. Administrators do not have to manually write to each file, or disable services individually. Bastille is recommended for any Unix system that offers services, whether it is a LAN or Internet server.
Controlling and Auditing
Root Access with Sudo
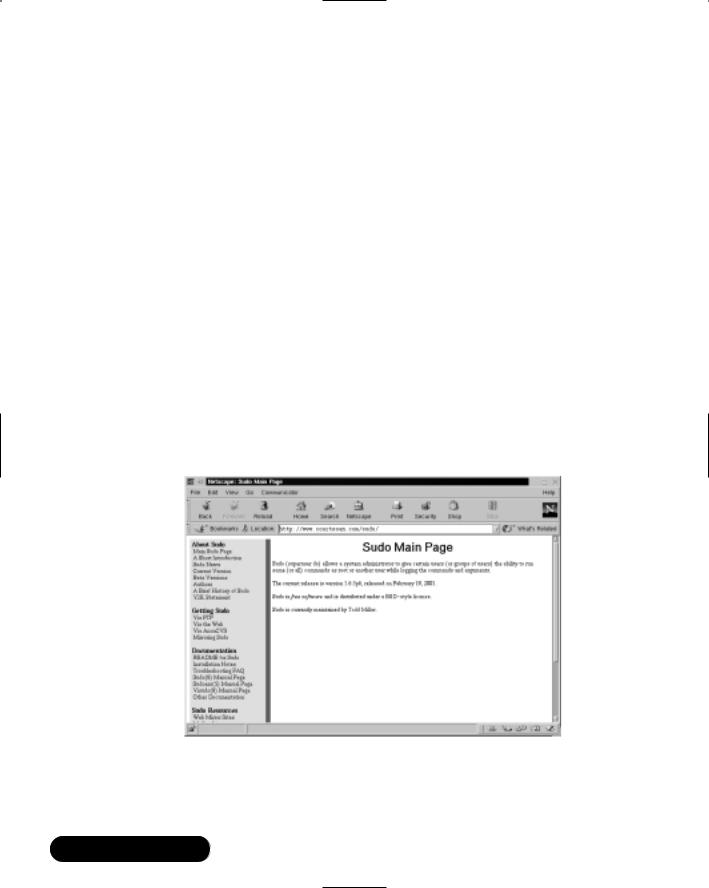
Superuser Do (sudo) is an open source security tool that allows an administrator to give specific users or groups the ability to run certain commands as root or as another user.The program can also log commands and arguments entered by specified system users.The developers of sudo state that the basic philosophy (www.courtesan.com/sudo/readme.html) of the program is to “give as few privileges as possible but still allow people to get their work done.” Sudo was first released to the public in the summer of 1986, and Todd Miller of Courtesan Consulting currently maintains the program and distributes it freely under a BSD-style license.The Sudo Main Page is located at www.courtesan.com/sudo, as shown in Figure 2.15.
The program is a command-line tool that operates one command at a time. Table 2.7 lists several important features of sudo.
Table 2.7 Sudo Features
Feature |
Description |
|
|
Command logging |
Commands and argument can be logged. |
|
Commands entered can be traced to the user. |
|
Ideal for system auditing. |
|
|
|
Continued |
www.syngress.com
78 |
Chapter 2 • Hardening the Operating System |
||
|
|
Table 2.7 Continued |
|
|
|
|
|
|
|
Feature |
Description |
|
|
|
|
|
|
Centralized logging of |
Sudo can be used with the system log daemon |
|
|
multiple systems |
(syslog) to log all commands to a central host. |
|
|
Command restrictions |
Each user or group of users can be limited to |
|
|
|
what commands they are allowed to enter on |
|
|
|
the system. |
|
|
Ticketing system |
The ticketing system sets a time limit by |
|
|
|
creating a ticket when a user logs on to sudo. |
|
|
|
The ticket is valid for a configurable amount of |
|
|
|
time. Each new command refreshes the ticket |
|
|
|
for the predefined amount of time. The |
|
|
|
default time is five minutes. |
|
|
Centralized administration of |
The sudo configurations are written to the |
|
|
multiple systems |
/etc/sudoers file. This file can be used on |
|
|
|
multiple systems and allows administration |
|
|
|
from a central host. The file is designed to |
|
|
|
allow user privileges on a host-by-host basis. |
|
|
|
|
Figure 2.15 Sudo Home Page
www.syngress.com

Hardening the Operating System • Chapter 2 |
79 |
Because sudo logs all commands run as root (or specified otherwise), many administrators use it instead of using the root shell.This allows them to log their own commands for troubleshooting and additional security.
The ticketing system is ideal because if the root user walks away from the system while still logged in (a very bad idea), another user cannot access the system simply because he or she has physical access to the keyboard.
After the ticket expires, users must log on to the system again. A shorter time is recommended, such as the default five minutes.The ticketing system also allows users to remove their ticket file.
System Requirements
To install and run sudo from the source distribution, you must have a system running Unix. Almost all versions of Unix support the sudo source distribution, including almost all flavors of POSIX, BSD, and SYSV.You must also install the C compiler and the make utility.
Sudo is known to run on the following Unix flavors: Auspex, SunOS, Solaris, ISC, RISCos, SCO, HP-UX, Ultrix, IRIX, NEXTSTEP, DEC Unix, AIX, ConvexOS, BSD/OS, OpenBSD, Linux, UnixWare, Pyramid, ATT, SINIX, ReliantUNIX, NCR, Unicos, DG/UX, Dynix/ptx, DC-Osx, HI-UX/MPP, SVR4, and NonStop-UX. It also runs on MacOSX Server.To see if your OS version is compatible, visit www.courtesan.com/sudo/runson.html. In the following examples, the Linux 2.2.16 kernel (included with Red Hat Linux 7) will be used on an i586 system.
The Sudo Command
The sudo command allows a user to execute a command as a superuser or another user. All configurations for sudo are written to the /etc/sudoers file.The sudoers file specifies whether that command is allowed by that particular user.
In order to use sudo, the user must have already supplied a username and password. If a user attempts to run the command via sudo and that user is not in the sudoers file, an e-mail is automatically sent to the administrator, indicating that an unauthorized user is accessing the system.
Once a user logs in to sudo, a ticket is issued that is valid by default for five minutes. A user can update the ticket by issuing the –v flag, which will validate the ticket for another five minutes.The command is entered as follows:
sudo –v
www.syngress.com
80 Chapter 2 • Hardening the Operating System
If an unauthorized user runs the -v flag, an e-mail will not be sent to the administrator.The -v flag informs the unauthorized user that he or she is not a valid user. If the user enters command via sudo anyway, an e-mail will then be sent to the administrator.
Sudo logs login attempts, successful and unsuccessful, to the syslog(3) file by default. However, this can be changed during sudo configuration. Some of the command-line options listed in Table 2.8 are used by sudo.
Table 2.8 Selected Sudo Command Options
Option |
Option Name |
Description |
|
|
|
-V |
Version |
Prints version number and exits. |
-l |
List |
Lists the commands that are allowed and |
|
|
denied by current user. |
-h |
Help |
Prints usage message and exits. |
-v |
Validate |
Updates the user’s ticket for a configured |
|
|
amount of time (default is five minutes). If |
|
|
required, the user must re-enter the user |
|
|
password. |
-k |
Kill |
Expires the user’s ticket. Completing this |
|
|
option requires the user to re-enter the user |
|
|
password to update the ticket. |
-K |
Sure kill |
Removes the user’s ticket entirely. User must |
|
|
log in with username and password after |
|
|
running this option. |
-u |
User |
Runs the specific command as the username |
|
|
specified. The user specified can be any user |
|
|
except root. If you want to enter a uid, |
|
|
enter #uid instead of the username. |
|
|
|
Downloading Sudo
Sudo can be downloaded from multiple sites, all specified at the sudo Web site (www.courtesan.com/sudo). For this demonstration, I used version 1.6.3p6, which is included on the companion CD (sudo-1.6.3p6.tar.gz). Other versions should be similar. For sudo download locations (many exist) via FTP and HTTP, visit the following Web addresses:
■FTP www.courtesan.com/sudo/ftp.html
■HTTP www.courtesan.com/sudo/www.html
www.syngress.com

Hardening the Operating System • Chapter 2 |
81 |
The master FTP and HTTP sites for sudo are located and maintained by Courtesan Consulting at:
■FTP ftp://ftp.courtesan.com/pub/sudo
■HTTP www.courtesan.com/sudo/dist
Many distributions exist for the different Unix flavors. Download the version specific to your system. For example, follow these steps to download sudo for Red Hat Linux:
1.Access the sudo master http download site at www.courtesan.com/ sudo/dist.
2.Download the latest version of sudo displayed at the bottom of the directory. For example, in Figure 2.16, you will select sudo- 1.6.3p6.tar.gz. Later versions will function in this example.
Figure 2.16 Downloading Sudo
3.Download the tarball to any directory you choose. Unlike Bastille, you are not required to run the program in the root directory only. Sudo has been downloaded to the /root directory for this example.
www.syngress.com

82 Chapter 2 • Hardening the Operating System
Installing Sudo
To install sudo, you must first download the specific sudo tarball. After download, locate the directory where you downloaded sudo and follow these steps:
1.Access the directory where you downloaded sudo, and decompress the tar file (your sudo version number will vary depending on the version of sudo that you downloaded) by entering:
tar –zxvf sudo-1.6.3p6.tar.gz
2.A directory will be created, such as sudo-1.6.3p6.
3.Access the sudo directory by entering:
cd sudo-1.6.3p6
4.To creates a makefile and config.h file that will allow you to configure sudo, enter:
./configure
5.You can add options to the ./configure command to customize your sudo installation. Simply append the options listed in Table 2.9 to your
./configure command.The entire list of options is available in the /sudo/INSTALL file.
Table 2.9 Sudo ./configure Options
|
|
|
|
|
Default |
|
Option |
|
Description |
(if applicable) |
|
|
|
|
|
|
|
|
|
|
|
|
EPREFIX/bin |
|
--bindir=DIR |
Sudo installed in DIR. |
|||
|
--sbindir=DIR |
|
Visudo installed in DIR. |
EPREFIX/sbin |
|
|
--sysconfdir=DIR |
|
Sudoers file installed in DIR. |
/etc |
|
|
--mandir=DIR |
|
Man pages installed in DIR. |
PREFIX/man |
|
|
--with-skey |
|
Support S/Key One Time |
n/a |
|
|
|
|
|
Password (OTP). |
|
|
--with-SecurID=DIR |
|
Support SecurID. DIR is the |
n/a |
|
|
|
|
|
directory where sdiclient.a, |
|
|
|
|
|
sdi_athd.h, sdconf.h, and |
|
|
|
|
|
sdacmvls.h will be located. |
|
|
|
|
|
|
|
|
|
|
|
|
|
|
|
|
|
|
Continued |
www.syngress.com

|
|
Hardening the Operating System • Chapter 2 |
83 |
||
|
|
|
|
|
|
|
Table 2.9 Continued |
|
|
|
|
|
|
|
|
|
|
|
|
|
Default |
|
|
|
Option |
Description |
(if applicable) |
|
|
|
|
|
|
|
|
|
|
|
|
|
|
|
--with-fwtk=DIR |
Support TIS Firewall Toolkit |
n/a |
|
|
|
|
(FWTK) ‘authsrv’. DIR is the |
|
|
|
|
|
base directory where the |
|
|
|
|
|
compiled FWTK package |
|
|
|
|
|
will be located. |
|
|
|
|
--with-kerb4 |
Support Kerberos v4. |
n/a |
|
|
|
|
Cygnus Network Security |
|
|
|
|
|
(CNS) is the only tested |
|
|
|
|
|
package. |
|
|
|
|
--with-kerb5 |
Support Kerberos v5. For |
n/a |
|
|
|
|
authentication, Kerberos |
|
|
|
|
|
passphrases are used, not |
|
|
|
|
|
the Kerberos cookie |
|
|
|
|
|
scheme. MIT Kerberos V, |
|
|
|
|
|
release 1.1 (will not work |
|
|
|
|
|
with versions earlier than |
|
|
|
|
|
1.1) is the only test |
|
|
|
|
|
package, but CNS should |
|
|
|
|
|
also work. |
|
|
|
|
--disable-shadow |
Disable shadow passwords. Supported. Shadow |
|
||
|
|
|
password used if it |
|
|
|
|
|
exists. |
|
|
|
--with-sudoers-uid |
Defines the UID (User ID) |
0 |
|
|
|
|
that owns the sudoers file. |
|
|
|
|
|
Actually configured in the |
|
|
|
|
|
makefile. |
|
|
|
|
--with-sudoers-gid |
Defines the GUI (Group ID) |
n/a |
|
|
|
|
that owns the sudoers file. |
|
|
|
|
|
Actually configured in the |
|
|
|
|
|
makefile. |
|
|
|
|
--without-passwd |
Disables authentication |
n/a |
|
|
|
|
using the passwd or |
|
|
|
|
|
shadow file. Do not disable |
|
|
|
this authentication method unless you are using another authentication method.
Continued
www.syngress.com

84 |
Chapter 2 • Hardening the Operating System |
|
|
||
|
|
|
|
|
|
|
|
Table 2.9 Continued |
|
|
|
|
|
|
|
|
|
|
|
|
|
Default |
|
|
|
Option |
Description |
(if applicable) |
|
|
|
|
|
|
|
|
|
|
|
|
|
|
|
--with-logging=TYPE |
Defines logging method. |
syslog |
|
|
|
|
The types include syslog, |
|
|
|
|
|
file, or both. syslog allows |
|
|
|
|
|
centralized logging and is |
|
|
|
|
|
recommended. |
|
|
|
|
--with-logpath=PATH |
Defines the location of the |
Default is /var/log/ |
|
|
|
|
sudo log file. |
sudo. If your system |
|
|
|
|
|
does not have this |
|
|
|
|
|
directory, it defaults |
|
|
|
|
|
to /var/adm/sudo |
|
|
|
|
|
.log or /usr/adm/ |
|
|
|
|
|
sudo.log. |
|
|
|
--with-mailto |
Defines the user account |
root |
|
|
|
|
that sudo mail will be sent. |
|
|
|
|
|
Mail usually indicates an |
|
|
|
|
|
alert. |
|
|
|
|
--with-mailsubject |
Defines the subject of the |
“*** SECURITY |
|
|
|
|
sudo mail. |
information for |
|
|
|
|
|
hostname***” |
|
|
|
--with-runas-default=USER |
Defines the default user for |
root |
|
|
|
|
the sudo command. By |
|
|
|
|
|
default, sudo gives root |
|
|
|
|
|
privileges if the –u flag is |
|
|
|
|
|
not specified. |
|
|
|
|
--with-passwd-tries=TRIES |
Defines the number of |
Three tries |
|
|
|
|
password attempts given to |
|
|
|
|
|
a user. |
|
|
|
|
--with-timeout=MINUTES |
Defines the number of min- |
Five minutes. |
|
|
|
|
utes before another sudo |
Configure minutes |
|
|
|
|
password is required |
to zero and sudo |
|
|
|
|
|
will always request |
|
|
|
|
|
a password. |
|
--with-password- |
Defines the number of min- |
timeout=MINUTES |
utes that sudo waits before |
|
the sudo password prompt |
|
times out. |
Five minutes. Configure minutes to zero for no password timeout.
Continued
www.syngress.com
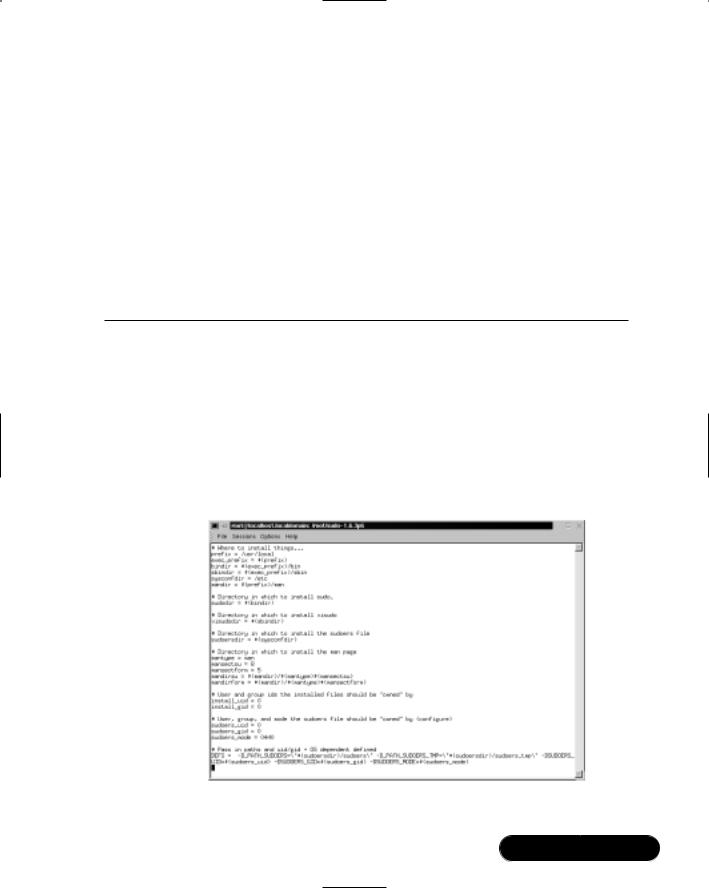
|
Hardening the Operating System • Chapter 2 |
85 |
|
Table 2.9 Continued |
|
|
|
|
|
|
|
|
|
Default |
|
Option |
Description |
(if applicable) |
|
|
|
|
|
--with-editor=PATH |
Defines the default editor |
vi system path |
|
path used by visudo. You can also list several editors in a colon-separated list. visudo checks the USER environment variable and selects the defined one. It can also select the first editor that is installed on the list.
6.You can also edit makefile to change the default paths for installation, as well as the other configurations listed in Table 2.8. If you require this change, open makefile in a text editor. For example, enter:
vi Makefile
7.Locate the “Where to install things...” section of makefile, as shown in Figure 2.17.
Figure 2.17 Sudo Makefile
www.syngress.com

86Chapter 2 • Hardening the Operating System
8.Change the default paths if necessary. For this example, we recommend that you use the default paths.
9.Quit the file. If you use the vi text editor, enter:
:q
10.(Optional) You can also change the default installation paths when you run the ./configure command (you ran the configure command in a previous step).To do this, enter an option after the command. For example, by default the sudoers file is installed in the /etc directory.You can change this location by entering:
./configure --sysconfdir=DIR
where DIR is the new installation directory.
11. To compile sudo, run the make command by entering:
make
12.(Optional) You will probably need GNU if you install sudo in a directory other than the source file directory. If you have errors during installation, read the TROUBLESHOOTING and PORTING files.
13.To install sudo, you must be the root user. Run the make install command to install the man pages, visudo, and a basic sudoers file by entering:
make install
NOTE
Any existing sudoers file will not be overwritten.
14.You have installed sudo.The next section explains how to configure it to suit your system’s needs.
Configuring Sudo
To configure sudo, you must edit the %/sudo-1.6.3p6/sudoers file.The sudoers file defines which users are allowed to execute what commands. Only the root user is
www.syngress.com

Hardening the Operating System • Chapter 2 |
87 |
allowed to edit the file, and it must be edited with the visudo command.A sample.sudoers file is included in the sudo directory, and is shown in Figure 2.18.
Figure 2.18 Sample.Sudoers File
The visudo command opens the sudoers file, by default, in the vi text editor. The vi commands are used to edit and write the file.You can change the default text editor used by visudo using the compile time option.Visudo uses the EDITOR environment variable.The visudo command performs the following tasks when editing the sudoers file:
■Checks for parse errors Visudo will not save any changes if a syntax error exists. It will state the line number of the error and prompt you for guidance.You will be offered a “What Now?” prompt and three choices: “e” to re-edit the file,“x” to exit without saving, and “Q” to quit and save changes. A syntax error result is shown in Figure 2.19.
NOTE
If a syntax error exists in the sudoers file and you choose Q to quit and save the visudo changes, sudo will not run until the problem is corrected. You must run visudo again, fix the problem, and save the file again. It is recommended that you select e to attempt to fix the problem, or x to exit without saving (if you are not sure of what went wrong).
www.syngress.com
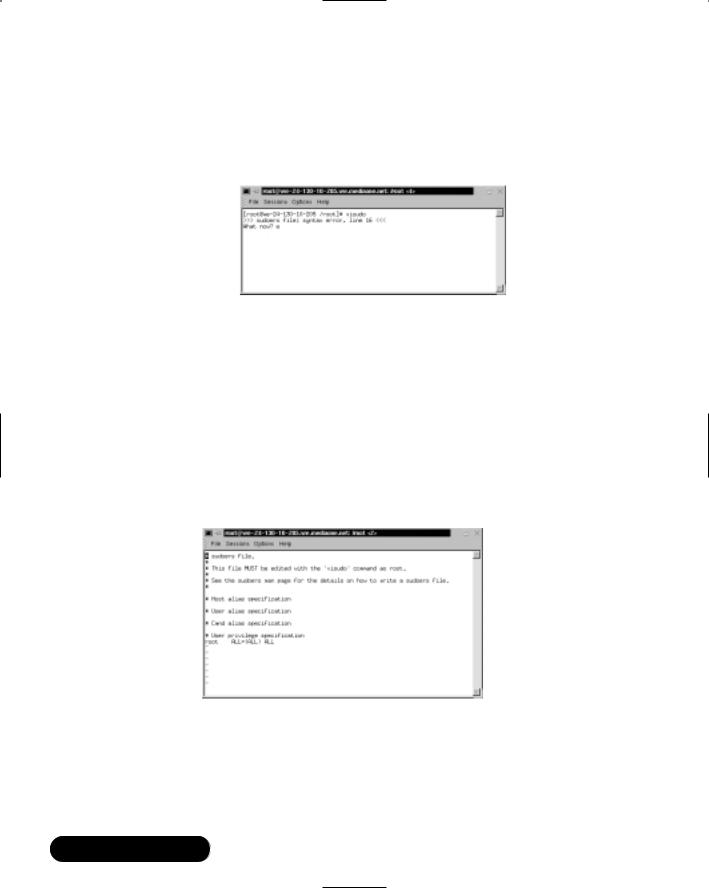
88Chapter 2 • Hardening the Operating System
■Prevents multiple edits to the file simultaneously If you attempt to run visudo while the sudoers file is being edited, you will receive an error message informing you to try again at a later time.
Figure 2.19 Visudo Parse Error
The sudoers file consists of two different types of entries, user specifications and aliases.The following examples show you how to use user specifications, which define which user is allowed to run what commands.Aliases are basically variables.
The sudoers file contains a root entry.The default sudoers file is shown in Figure 2.20.The user privilege specification is listed as:
root ALL=(ALL) ALL
This configuration allows the root user to issue all commands.
Figure 2.20 Default Sudoers File Allowing the Root User Access to All Commands
To allow other users to run commands as root, you must enter those users in the sudoers file.You must also list the host on which they are allowed to run the commands. Last, you must list the specific commands that those users are allowed to run as root. In the following steps, you will create user bob and allow him to run several commands as root using sudo on your system.
www.syngress.com
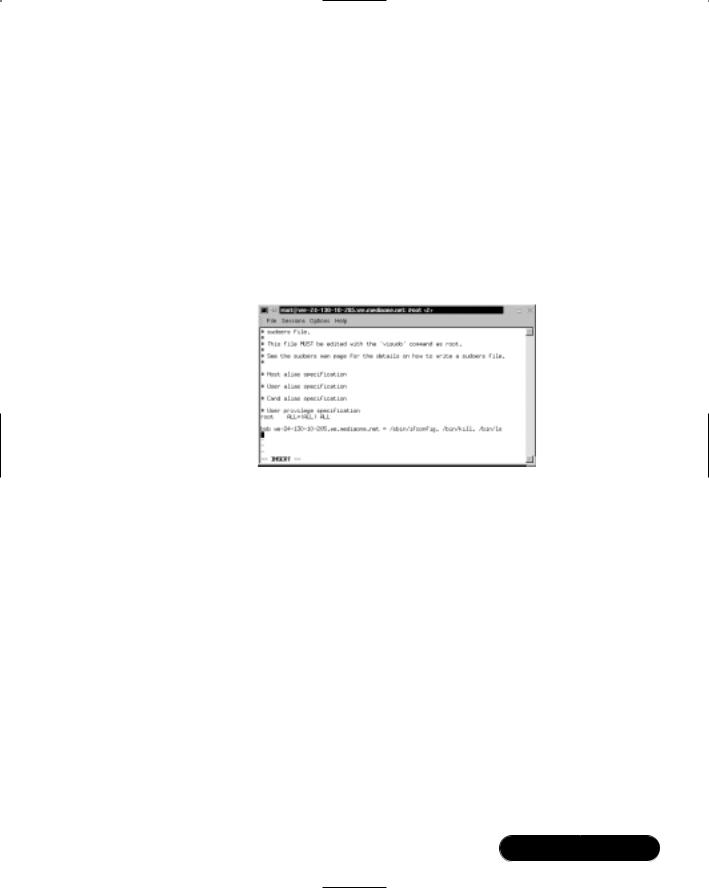
Hardening the Operating System • Chapter 2 |
89 |
1. Open the sudoers file by entering:
visudo
2.The sudoers file opens in vi. Locate the “User privilege specification” section. After the root entry, enter the following (press i to insert text):
bob your-hostname = /sbin/ifconfig, /bin/kill, /bin/ls
This line allows user bob to run the ifconfig, kill, and ls commands as root.Your screen should resemble Figure 2.21 (except the host name).
Figure 2.21 User Privilege Specification in Sudoers File
3. Press ESC to write and quit the file.Then, enter:
:wq
This command writes and quits the file using vi. 4. Now you must create user bob. Enter:
useradd bob
5. Create a password for user bob by entering:
passwd bob
Changing password for user bob
New UNIX password:
Retype new UNIX password:
passwd: all authentication tokens updated successfully
www.syngress.com
90 Chapter 2 • Hardening the Operating System
NOTE
By default, all commands you list in sudoers will run as root unless you specify otherwise. For example, bob could run commands as user bugman if desired. You would enter:
bob your-hostname = (bugman) /sbin/ifconfig
In this case, the ifconfig command will run as user bugman. You can allow bob to enter commands as several different users.
bob your-hostname = (bugman) /sbin/ifconfig, (root) /bin/kill,
/bin/ls
The kill and ls commands will run as root, while the ifconfig command runs as bugman. At the command line, bob will enter:
sudo –u bugman /sbin/ifconfig
Running Sudo
You have configured sudo to allow user bob root privileges for the ifconfig, kill, and ls commands.When bob wants to run these commands, he must first enter the sudo command, and then his password.
1.Log on as user bob.
2.To find out what commands bob has root access to, enter the following:
sudo –l
3. If this is your first time running sudo as user bob, a warning will display:
We trust you have received the usual lecture from the local System Administrator. It usually boils down to these two things: #1) Respect the privacy of others.
#2) Think before you type
4.A password prompt appears. Do not enter the root password. Enter bob’s password.
Password:
www.syngress.com

Hardening the Operating System • Chapter 2 |
91 |
5.The commands that bob is allowed to run on this host are listed, as shown in Figure 2.22.
Figure 2.22 Commands That User bob Can Run as Root
6.To test your sudo configurations, run an ifconfig option that requires root permission without using sudo. Enter:
/sbin/ifconfig eth0 down
Permission is denied because bob is not allowed to deactivate the system’s interface.
7. To deactivate the interface, bob must use sudo. Enter:
sudo /sbin/ifconfig eth0 down
You will be successful. Please note that sudo will ask for the bob’s password if bob’s ticket has expired (the default is five minutes). If you run this command within five minutes from the last, you will not be prompted for a password.
8.Reactivate the interface. Enter:
sudo /sbin/ifconfig eth0 up
9.Next, restart one of the httpd processes using the kill command by entering:
ps aux | grep httpd
10.Choose an Apache PID from the list that appears. (If Apache is not installed, select a different service process to restart.) Enter:
kill –HUP [PID NUMBER]
www.syngress.com

92 Chapter 2 • Hardening the Operating System
11.You are not allowed to restart the httpd process because you are not root.You will receive the following result:
bash: kill: (PID NUMBER) – Not owner
12. Instead, use sudo to run the command as root by entering:
sudo kill –HUP (PID NUMBER)
You should be successful.
13.Next, you will list the root user directory as user bob using the ls command. Enter:
ls /root
Permission is denied because you are not root. 14. Again, use sudo to run the command as root:
sudo ls /root
Permission is granted and the root user’s directory is displayed.
15.To expire bob’s timestamp, enter the command sudo -k. Bob will have to enter a password the next time he uses sudo.
No Password
In some situations, entering a password each time sudo is run is redundant because the user has already logged on to the system. Sudo offers a way around this monotonous task by using the NOPASSWD tag in the sudoers file.
1.To remove the password requirement in the sudoers file, log on as root and enter:
visudo
2.The sudoers file opens in vi. Modify bob’s user privilege specification to match the following (press i to insert text):
bob |
your-hostname = NOPASSWD: /sbin/ifconfig, /bin/kill, /bin/ls |
3.Press ESC. Enter :wq to write and quit the file.
4.Log on as bob. Deactivate the interface using sudo:
sudo /sbin/ifconfig eth0 down
www.syngress.com

Hardening the Operating System • Chapter 2 |
93 |
You will not be prompted for your password and the command will run as root.
5. Reactivate the interface. Enter:
sudo /sbin/ifconfig eth0 up
Sudo Logging
As mentioned previously, sudo logs which users run what commands. Logging does not occur automatically.You must set up sudo and syslogd to log commands. This involves two steps. First, you must create a sudo logfile in /var/log. Second, you must configure syslog.conf to log sudo commands.The following steps show you how to configure sudo logging.
1. Log on as root. Create a sudo log file in /var/log/. Enter:
touch /var/log/sudo
2.Next, you must add a line in the syslog.conf file to direct logging to your sudo logging file. Open syslog.conf by entering the following:
vi /etc/syslog.conf
3.Enter the following line at the end of the syslog.conf file (press i to insert text). If you installed Bastille earlier in this lesson, insert the line before or after the Bastille insert.The white space must be created using the TAB key, not the SPACEBAR.
local2.debug |
/var/log/sudo |
4.This syslog.conf entry logs all successful and unsuccessful sudo commands to the /var/log/sudo file.You can also log to a network host by indicating the network host instead of a local directory.The syslog.conf file is shown in Figure 2.23.
5.Press ESC to write and quit the file.Then, enter:
:wq
6.Since you have modified the syslog.conf file, you need to restart syslogd. To send a HUP signal to syslogd, you must first know the syslogd process identifier (PID).To identify the syslogd PID, enter:
ps aux | grep syslogd
www.syngress.com

94 Chapter 2 • Hardening the Operating System
Figure 2.23 Editing the Syslog.conf File for Sudo Logging
7.The second column lists the PID number.The last column lists the process using that PID.To restart syslogd, identify the PID number and enter:
kill –HUP [PID NUMBER]
8.First, you will generate log entries for user bob. Log on as user bob.
9.Enter the following ifconfig commands while logged on as user bob:
sudo –l
sudo /sbin/ifconfig eth0 down
sudo /sbin/ifconfig eth0 up
10.Restart one of the httpd processes (or another process) using the kill command by entering:
ps aux | grep httpd
11. Choose an Apache (httpd) PID from the list that appears. Enter:
sudo kill –HUP [PID NUMBER]
12. Now list the root user directory as user bob. Enter:
sudo ls /root
www.syngress.com

Hardening the Operating System • Chapter 2 |
95 |
13.Log on as root and view the sudo log file. All the sudo commands that bob entered are listed, as shown in Figure 2.24.
Figure 2.24 Sudo Log File Displaying User bob’s Commands
14.You can log any root commands by simply typing sudo before each command. For example, make sure that you are logged on as root and enter the following commands (or any commands you choose):
sudo useradd susan
sudo passwd susan
sudo vi /hosts
15. Access and view the sudo log file by entering:
sudo cat /var/log/sudo
All root user entries are logged, including the cat command you just entered, as shown in Figure 2.25.
Figure 2.25 Sudo Log File Displaying Root User Commands
www.syngress.com

96 Chapter 2 • Hardening the Operating System
As you can see, sudo is extremely helpful for controlling and auditing root access. It allows a system administrator to distribute root system tasks without distributing the root password. An administrator can control what root access is needed for each user, and can customize system access based on those needs.
Sudo is used almost entirely by system administrators, and is a great way to train new system administrators. New administrators can be given a new account with only selected root privileges.The master administrator can then review the work of the administrator in training.
This section discussed one of the many ways to use sudo; it focused primarily on user specifications in the sudoers file. For more information on extending sudo, such as using aliases, please consult the sudoers man file.
Managing Your Log Files
Another aspect of system security is managing your log files. By default, Linux offer modest logging so that administrators can see who and what has accessed their system. More logging is available (both more detail and logging on more services), but Linux keeps it brief so that you don’t fill your hard disk with log information.This section briefly discusses helpful commands and programs that provide access to system logs.
Linux offers commands that allow administrators to access useful log files. Two commands of interest are last and lastlog.The message file also offers useful data for determining possible security breaches on your system.
The last command displays data such as who is logged on to the system, who recently logged on, and when the system has rebooted. For example, you may receive data such as the following:
root |
tty1 |
|
Fri May 25 |
13:53 |
still |
logged on |
||
frank |
pts/0 |
209.113.84.112 |
Fri |
May |
25 |
12:13 – |
14:36 |
(02:22) |
reboot |
system boot |
2.2.12-20 |
Fri |
May |
25 |
12:06 |
|
(04:18) |
The lastlog command displays the users and services that have accounts on your machine. It lists the last time each account logged in to the system, or if the account has ever logged in. Each service in Linux is given an account.This is very helpful because if a service logged in without your knowledge, a hacker may be responsible.This would indicate that the hacker controls your system and is currently exploiting it. It could also mean that another administrator started the service without telling you.
www.syngress.com

Hardening the Operating System • Chapter 2 |
97 |
The messages file is a log file that displays a list of recent activity on the system. For example, it lists if a password was changed and who changed it. It identifies when a user session opens and closes. It also lists the time and data each event took place. It can be viewed by entering the following command:
tail /var/log/messages
If you prefer a GUI to view your log files, a program called SWATCH (not installed by default) allows an instant and real-time display for various log files. It can view any log files you specify and is discussed in the next section.
The Linux logs should be checked frequently to determine if any security violations have occurred on your system. Logs do not offer solutions, so you must analyze the data and decide how to counteract the attack.
Using Logging Enhancers
Logging enhancers are tools that simplify logging by allowing logging information to be filtered and often displaying logs in simplified formats. Many open source logging programs exist to make system administration much easier. Viewing text-based files with hundreds or thousands of entries can be burdensome, especially if you are only looking for one specific error entry. Logging enhancers can make logging a much more user-friendly experience, and greatly expand and customize the information you need to log.
The next sections explain three popular logging services used by administrators: SWATCH, scanlogd, and the next generation of syslogd (syslogd-ng).
SWATCH
Simple WATCHer or Simple WATCHdog (SWATCH) is an open source package that allows administrators to efficiently monitor system activity. It can monitor events on a system, or a large number of systems, by monitoring system logs for specified events. SWATCH’S main function is to monitor messages actively as they are written to a log files through the Unix syslog utility. SWATCH requires Perl 5 to function.
SWATCH is efficient because it allows administrators to modify the SWATCH configuration file (/etc/swatchrc) to filter logging entries and respond to certain events. For example, SWATCH can monitor the system for bad login attempts, and e-mail the administrator whenever this failed authentication event occurs. It can monitor and alter when system halts and reboots occur, when a user upgrades to root using the su command, when the file system is full, and
www.syngress.com
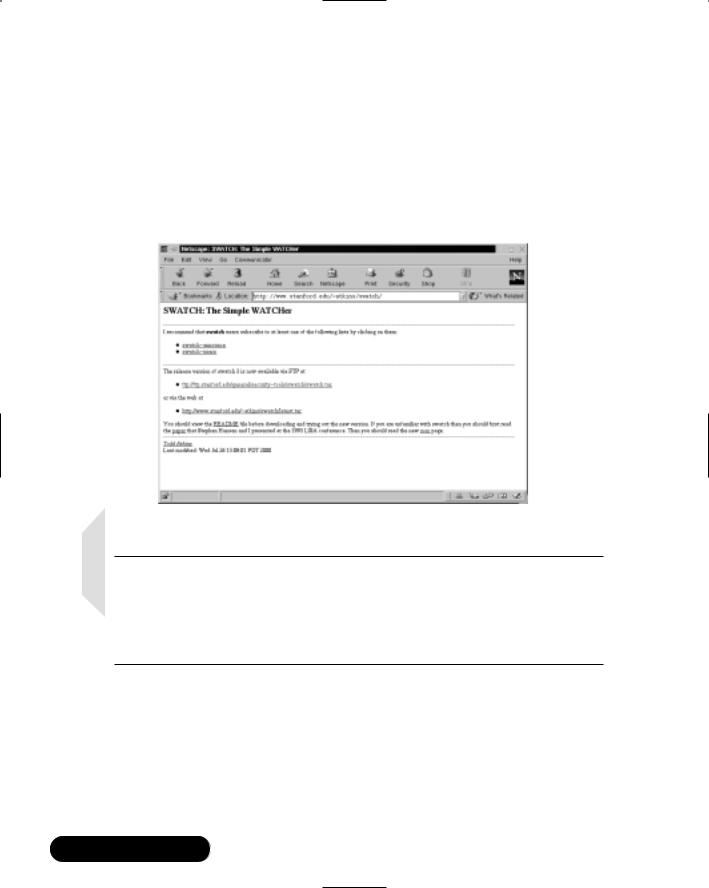
98 Chapter 2 • Hardening the Operating System
when someone is sniffing the system. It can monitor anything desired from the log files.
To learn about SWATCH and download the program, you need to visit the SWATCH home page (Figure 2.26) at www.stanford.edu/~atkins/swatch or at www.engr.ucsb.edu/~eta/swatch.This RPM is also available on the accompanying CD (swatch-3.064-1.noarch.rpm).
Figure 2.26 SWATCH Home Page
NOTE
At the time of this writing, version 3 of SWATCH was available for download. It has a different configuration file format than previous versions, and much of the code has been rewritten to take advantage of Perl 5. If you use previous configuration files, you must use the --old-style-config switch during configuration.
SWATCH uses two required fields: pattern(s) and action(s).
■Patterns The SWATCH configuration file looks for patterns in logging entries. For example, bad login attempts display a “Failed Authentication” error.
www.syngress.com

Hardening the Operating System • Chapter 2 |
99 |
■Actions Whenever a pattern is discovered, SWATCH seeks an action, such as e-mailing the administrator of the failed login attempt.
Two optional fields are used to further customize the configuration file:
■Throttle Throttle determines the amount of time that SWATCH will ignore repeated logged entries before listing the entry again.This saves administrators time from viewing 300 identical “Failed Authentication” errors. However, a secure system should limit the number of login attempts.The throttle entry is defined as HH:MM:SS, where H represents hours, M represents minutes, and S represents seconds.
■Timestamp Timestamp defines the length and location of the timestamp.The timestamp entry is defined as start:length.
The following are two examples from the SWATCH configuration file. SWATCH will actively watch for these messages as they are written to their respective log files through the syslog utility.The first example monitors logging for failed login attempts and e-mails root when a failed login attempt occurs.
#Failed login attempts
watchfor /failed/
echo bold
mail addresses=root,subject=Failed Authentication
The second example monitors your log files and e-mails root when a user sued to gain root access.
#Users sued to gain root access
watchfor /su:/
echo bold
mail addresses=root,subject=User sued to root
SWATCH filters logging files so that administrators only receive the information they require. It saves a lot of time and trouble once configured and is recommended for system administrators who are overwhelmed by log files (and perhaps do not use them for that reason).To download an RPM version of SWATCH, visit www.rpmfind.net.
www.syngress.com
100 Chapter 2 • Hardening the Operating System
Scanlogd
Scanlogd is an open source program that detects and logs TCP-port scanning on a system. For example, it can detect nmap scans. Nmap is a program used by hackers to create a “map” of your network. It is often the first step a hacker takes once he or she has access to your network to determine which system to hack. Nmap lists the systems and the services on the network. Scanlogd can alert an administrator when the network is being mapped, but it cannot stop the intrusion.
SECURITY ALERT!
Scanlogd was originally designed to illustrate attacks, not to fix them. Therefore, even though it is safe to run on your system, it does not prevent hacking attacks. You must read the system log to discover what happened to your system, and then determine the appropriate solution.
Scanlogd writes one line per scan using the syslog(3) mechanism. It also logs when a source address sends many packets to several different ports in a short amount of time.You can learn about scanlogd and download the program at www.openwall.com/scanlogd.The scanlogd home page is shown in Figure 2.27.
Figure 2.27 Scanlogd Home Page
www.syngress.com

Hardening the Operating System • Chapter 2 |
101 |
Because scanlogd is only meant to detect scans, it is totally safe to run on your system. It must have access to raw IP packets to function, and can capture packets coming in and out of the system interface, or across the network to which the system is attached. In addition, scanlogd v2 supports the raw socket interface on libnids, libpcap, and Linux.
Syslogd-ng
Syslogd-ng is a logging daemon that is the replacement for the traditional syslogd. The “ng” is an acronym for “next generation.”The original syslogd was the general Unix logging daemon that handled requests for syslog services, but was difficult to configure. Syslogd-ng is easier to configure and offers additional logging features, such as more configurations. For example, syslogd-ng allows administrators to filter messages based on priority, as well as the content of the messages. You can also forward logs on TCP, sort logs to different destinations, and create a direct log stream to various hosts. It will eventually support log files that are protected with hash encryption.The syslog-ng home page is shown in Figure 2.28 and is located at www.balabit.hu/en/products/syslog-ng.
Figure 2.28 Syslog-ng Home Page
The basic problem with system logs is that they contain a lot of unimportant information.This information is often called noise. Many events are lost because
www.syngress.com

102 Chapter 2 • Hardening the Operating System
they are buried in the noise. Syslogd made it difficult to choose only the important messages.
The reason this occurs is that messages are sent to different destinations depending on the assigned facility/priority pair.These destinations are very broad, and include general facilities such as mail, news, auth, and so forth, and priorities ranging from alert to debug. Many programs use the facilities, so many unneeded messages are written to their logs. In many cases, the message and the facility are not even related. Syslogd-ng filters messages based on message content in addition to the facility/priority pair. Using this method, only the messages that are needed are logged.
Syslogd-ng has been tested on Linux, BSDi, and Solaris. At the time of this writing, the latest stable version was 1.4.10.You can learn more about syslog-ng and download it from the Balabit site at www.balabit.hu/en/products/syslog-ng/ downloads.The site also contains information on installing and configuring the service.
www.syngress.com

Hardening the Operating System • Chapter 2 |
103 |
Summary
This chapter covered the basics of hardening a server to avoid security vulnerabilities using Linux.The main sections covered disabling unnecessary services, locking down ports, Bastille, sudo, and logging enhancers.
It is extremely important to install the latest service pack or updates to the operating system, which fix many security vulnerabilities and bugs before you install any programs. Many services provided with operating systems are not required and can be removed.The key to remember is that the fewer services running, the less potential vulnerability.TCP/UDP ports were covered in this chapter, and how each port is used by specific services. If you block ports on your server, you block the services that use those ports. Locking down ports is an excellent way to reduce exploitations of your system.
Maintaining your server involves downloading service packs and updates, and requires regularly installing bug fixes, security patches, and software updates.These items are available through the operating system vendors, as well as the specific vendors that created the software that you implement.
Bastille is an open source program that facilitates the hardening of a Linux system. It performs many of the tasks listed previously, including downloading operating system updates and disabling services and ports that are not required for the system’s job functions. Bastille is powerful and can save administrators time from configuring each individual file and program throughout the operating system. Instead, administrators answer a series of “Yes” and “No” questions through an interactive text-based interface.The program automatically implements the administrators’ preferences based on the answers to the questions.
Superuser Do (sudo) is an open source security tool that allows an administrator to give specific users or groups the ability to run certain commands as root or as another user.The program can also log commands and arguments entered by specified system users.The developers of sudo state that the basic philosophy (www.courtesan.com/sudo/readme.html) of the program is to “give as few privileges as possible, but still allow people to get their work done.”
Logging enhancers are tools that simplify logging by allowing logging information to be filtered and often displaying logs in simplified formats. Many open source logging programs exist to make system administration easier.You were introduced in this chapter to SWATCH, scanlogd, and syslog-ng.
SWATCH is an open source package that allows administrators to efficiently monitor system activity. It can monitor events on a system, or a large number of systems, by monitoring system logs for specified events. SWATCH’s main function
www.syngress.com

104 Chapter 2 • Hardening the Operating System
is to monitor messages actively as they are written to log files through the Unix syslog utility.
Scanlogd is an open source program that detects and logs TCP-port scanning on a system. Scanlogd can alert an administrator when the network is being mapped, but it cannot stop the intrusion.
Syslogd-ng is a logging daemon that is the replacement for the traditional syslogd.The “ng” is an acronym for “next generation.”The original syslogd was the general Unix logging daemon that handled request for syslog services, but was difficult to configure. Syslogd-ng is easier to configure and offers additional logging features, such as more configurations. For example, syslogd-ng allows administrators to filter messages based on priority, as well as the content of the messages.
Solutions Fast Track
Updating the Operating Systems
;Operating system releases usually contain software bugs and security vulnerabilities.
;Operating system vendors or organizations offer fixes, corrections, and updates to the system. For example, Red Hat offers this material at its Web site, which includes Update Service Packages and the Red Hat Network.
;You should always ensure your system has the latest necessary upgrades. Many errata and Update Service Packages are not required for every system.You should always read the associated documentation to determine if you need to install it.
Handling Maintenance Issues
;After your system goes live, you must always maintain it by making sure the most current patches and errata are installed, which include the fixes, corrections, and updates to the system, as well as the applications running on it.
;You should always check the Red Hat site at www.redhat.com/apps/ support/updates.html for the latest errata news.
www.syngress.com

Hardening the Operating System • Chapter 2 |
105 |
;For example, Red Hat security advisories provide updates that eliminate security vulnerabilities on the system. Red Hat recommends that all administrators download and install the security upgrades to avoid denial-of-service (DoS) and intrusion attacks that can result from these weaknesses.
Manually Disabling Unnecessary Services and Ports
;You should always disable vulnerable services and ports on your system that are not used.You are removing risk when you remove unnecessary services.
;The /etc/xinetd.d directory makes it simple to disable services that your system is not using. For example, you can disable the FTP and Telnet services by commenting out the FTP and Telnet entries in the respective file and restarting the service. If the service is commented out, it will not restart.
Locking Down Ports
;When determining which ports to block on your server, you must first determine which services you require. In most cases, block all ports that are not exclusively required by these services.
;To block TCP/UDP services in Linux, you must disable the service that uses the specific port.
Hardening the System with Bastille
;The Bastille program facilitates the hardening of a Linux system. It saves administrators time from configuring each individual file and program throughout the operating system.
;Administrators answer a series of “Yes” and “No” questions through an interactive text-based interface.The program automatically implements the administrators’ preferences based on the answers to the questions.
www.syngress.com

106Chapter 2 • Hardening the Operating System
;Bastille can download and install RPM updates, apply restrictive permissions on administrator utilities, disable unnecessary services and ports, and much more.
Controlling and Auditing Root Access with Sudo
;Sudo (Superuser Do) allows an administrator to give specific users or groups the ability to run certain commands as root or as another user.
;Sudo features command logging, command restrictions, centralized administration of multiple systems, and much more.
;The sudo command is used to execute a command as a superuser or another user. In order to use the sudo command, the user must supply a username and password. If a user attempts to run the command via sudo and that user is not entered in the sudoers file, an e-mail is automatically sent to the administrator, indicating that an unauthorized user is accessing the system.
Managing Your Log Files
;Logging allows administrators to see who and what has accessed their system. Many helpful Linux log files are located in the /var/log directory.
;Linux offers commands that allow administrators to access useful log files.Two commands of interest are last and lastlog.The message file also offers useful data for determining possible security breaches on your system.
;The Linux logs should be checked frequently to determine if any security violations have occurred on your system. Logs do not offer solutions, so you must analyze the data and decide how to counteract the attack.
Using Logging Enhancers
;Logging enhancers are tools that simplify logging by allowing logging information to be filtered and often displaying logs in simplified formats.
www.syngress.com

Hardening the Operating System • Chapter 2 |
107 |
;Viewing text-based files with hundreds or thousands of entries can be burdensome, especially if you are only looking for one specific error entry.
;Three popular logging services used by administrators are SWATCH, scanlogd, and the next generation of syslogd (syslogd-ng).
Frequently Asked Questions
The following Frequently Asked Questions, answered by the authors of this book, are designed to both measure your understanding of the concepts presented in this chapter and to assist you with real-life implementation of these concepts. To have your questions about this chapter answered by the author, browse to www.syngress.com/solutions and click on the “Ask the Author” form.
Q:I have a server that is strictly a mail server and uses SMTP and POP3. However, I want to download security patches from my vendor’s Web site directly to the server. Even though I open the TCP/UDP port 80 (HTTP) and port 53 (DNS), I am unable to download the patches on the mail server.
A:If security is a priority, you should order update CDs through your vendor, such Red Hat’s Update Service Packages, and install them via your CD drive. You can also simply download your updates from another system on your network.
Q:Should I place my e-mail server behind the firewall, or in a service network (that is, a “demilitarized zone”)?
A:Standard practice is to place the e-mail server in the DMZ.A DMZ is usually comprised of a screening router that blocks most attacks (denial-of-service, system scanning, attacks against Microsoft NetBIOS ports, etc.), and a firewall device that authoritatively blocks incoming traffic, effectively separating the internal network from the world.The DMZ exists between the screening router and the firewall. However, it is often a best practice to place the e-mail server behind the firewall itself. If you do this, however, you must make sure your firewall is configured correctly. Otherwise, a malicious user can take advantage of a misconfigured firewall and gain access to your internal network.
www.syngress.com

108 Chapter 2 • Hardening the Operating System
Q:When I install Bastille and run configure, why does the program report that the C compiler cannot create an executable?
A:This error most likely indicates that your system does not have a functioning compiler. If often occurs because you do not have a license, or part of the compiler suite cannot be located. Access and view the config.log to determine the cause. Many compiler components are found in /usr/css/bin.This path may not be identified in the environment variable PATH.
Q:By default, sudo uses syslog(3) for logging. Since I did not change this default during setup, why am I not generating any logging messages?
A:In order to generate sudo log files, you need to create a /var/log/sudo file, and add an entry to the syslog.conf file. Since the default log facility is local2, you must add the following line with TAB keys separating the facility (local2.debug) from the destination (a local logging file).
local2.debug |
/var/log/sudo |
You must then restart syslogd to ensure that it re-reads the file.
Q:I am tired of entering my password in sudo each time my ticket expires. How can I avoid this hassle?
A:Use the NOPASSWD tag in sudoers for specific users and commands by inserting the tag before the command list. If you want to disable all sudo passwords, there are two methods.You can run configure with the --without- passwd option, or you can add !authenticate to the Default line in sudoers. Finally, you can disable passwords to users and hosts in sudoers by adding specific user or host Defaults entries. See the sudo man file for specifics on disabling sudo password prompts.
www.syngress.com