

Chapter 6 Configuring X-Windows 185
Configuring X Window Systems
3.1 Reconfigure Xwindow with automated utilities (e.g., Xconfigurator, XF86Setup)
You are often required to configure or reconfigure the X Window System, after the installation of Linux. This may be because you didn’t have the proper drivers or the correct configuration when you first installed Linux. To complete this configuration, you will often use several tools and files, including X, xinit, .xinitrc, XF86Setup, and xf86config. The X file is a symbolic link, or symlink, to the X Server that is being used for the system — usually located at /usr/X11R6/bin/ directory. The xinit program is used to start the X Window System. After it starts, the X Window System uses the file .xinitrc, which contains the configuration information. If there is no
.xinitrc file, then xinit uses the following default configuration:
xterm -geometry +1+1 -n login -display :0
This file can be manually edited to configure the X Window System; however, the XF86Setup and xf86config tools can also be used to configure the system with menu-driven programs. XF86Setup is a GUI program that starts a default X Window System, which allows the configuration of the X Window System.
For more information about configuration of the X Window System during installation, see the section “Configuring the X Windows System” in Chapter 4.
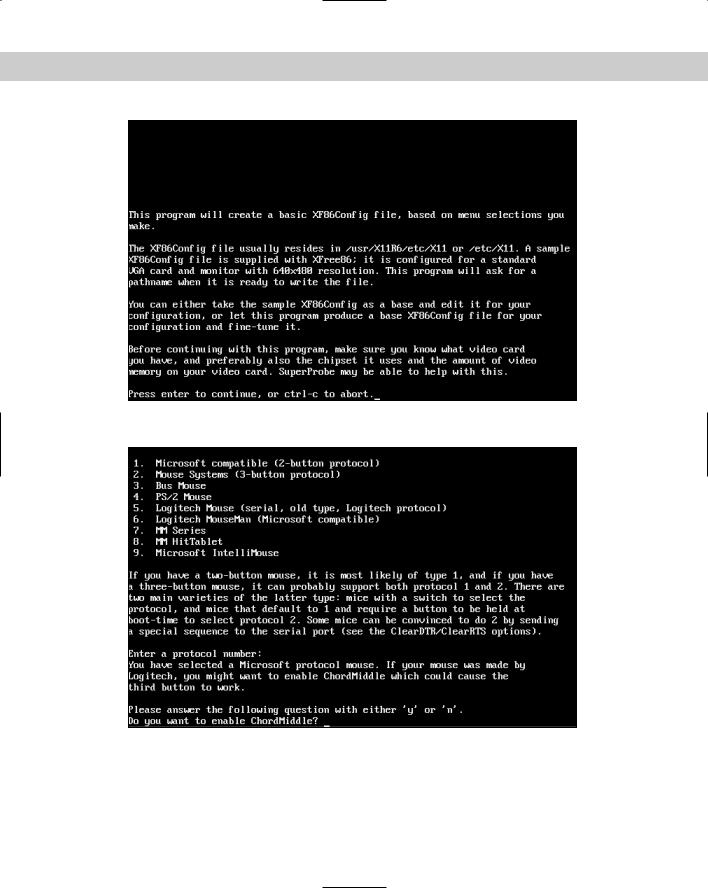
Sometimes, however, the default system won’t work; in such a case, the xf86config program can be used to configure the X Window System at the command line. To use xf86config to configure the X Window System, the user must be logged in as the root user. Then the user can type xf86config at the command prompt to launch the program. The text shown in Figure 6-3 displays the initial configuration screen of xf86config.
This screen provides information about the program xf86config, such as the location of the file. The screen also informs you that the program creates a basic configuration, and that should know as much as possible about your video card to aid in the configuration. After reading this information, press Enter to continue to the next screen, as shown in Figure 6-4.
186 Part III Configuration
Figure 6-3: The Initial xf86config Screen
Figure 6-4: The xf86config Mouse Configuration Screen

Chapter 6 Configuring X-Windows 187
Figure 6-4 shows the mouse type selected and includes the selection of several mouse types. The following is a list of selections that you will make at this point:
1.Select the mouse type that most represents the mouse attached to your system. If you need help in this area, I recommend using the MAN pages. In the case of x86config, however, the MAN page is not very helpful — so some trial- and-error testing of the mouse configuration may be required.
2.Select CordMiddle if you have a third button on a Logitech mouse with Microsoft compatibility. After you have selected the mouse type in Step 1, the program prompts for the use of CordMiddle, which enables the use of a third button on some mouse devices.
3.Enable Emulate3Buttons if CordMiddle does not work with your mouse.
This selection is prompted on all mouse types.
4.Give the full device name for the attached mouse. This is the physical location of the mouse on the system and is most likely functional with the default selection of /dev/mouse. If possible, use this for ease of identification.
If the selection of /dev/mouse does not work, then you probably need to do some investigation of the mouse interface. A Serial port mouse may be mapped to /dev/ttys0 and a PS2 mouse may be on /dev/psaux. You have many options to help you install your particular type of mouse. For example, /dev/tsmo will work for a PS2 mouse, so your best option is to probe for the mouse information when configuring a mouse. Information about the detected devices can be found in the dmesg file and in /proc. Using the information found in these locations should eliminate or narrow the choices for the full device name for the attached mouse.
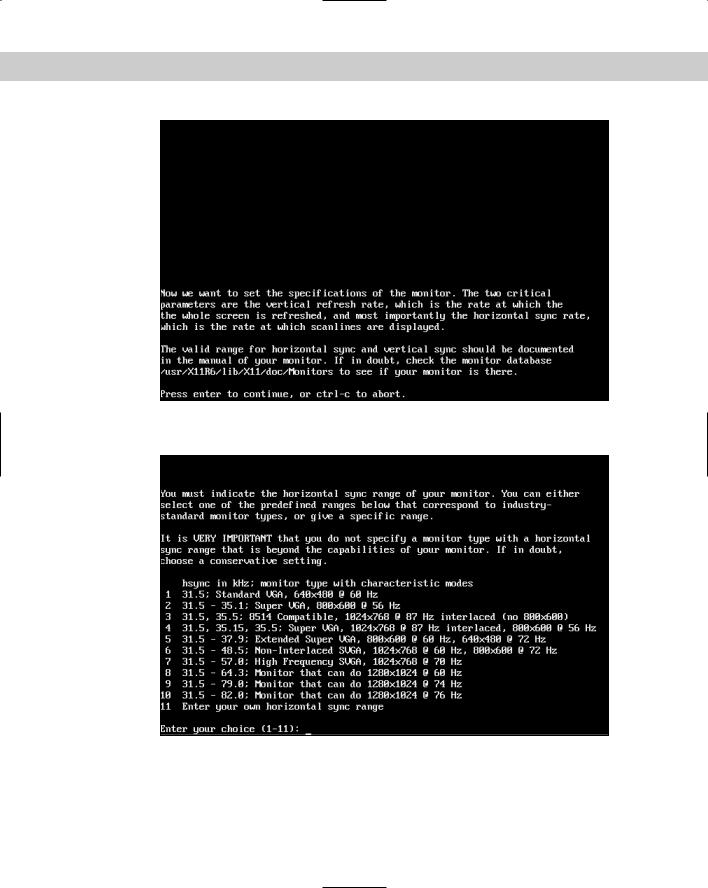
5.Configure the monitor. The screen shown in Figure 6-5 provides important information required for the configuration of the monitor in xf86config, including the vertical refresh rate and the horizontal sync rate. (You should have included these rates when gathering information prior to installation.) With this documented information, you can select the monitor’s horizontal sync capabilities at display resolutions. Select a predefined range or manually select the range from the list shown in Figure 6-6. However, don’t select a monitor setting that is outside the capabilities of the monitor in use.
188 Part III Configuration
Figure 6-5: The xf86config Monitor Warning Screen
Figure 6-6: The xf86config Monitor Configuration Screen