

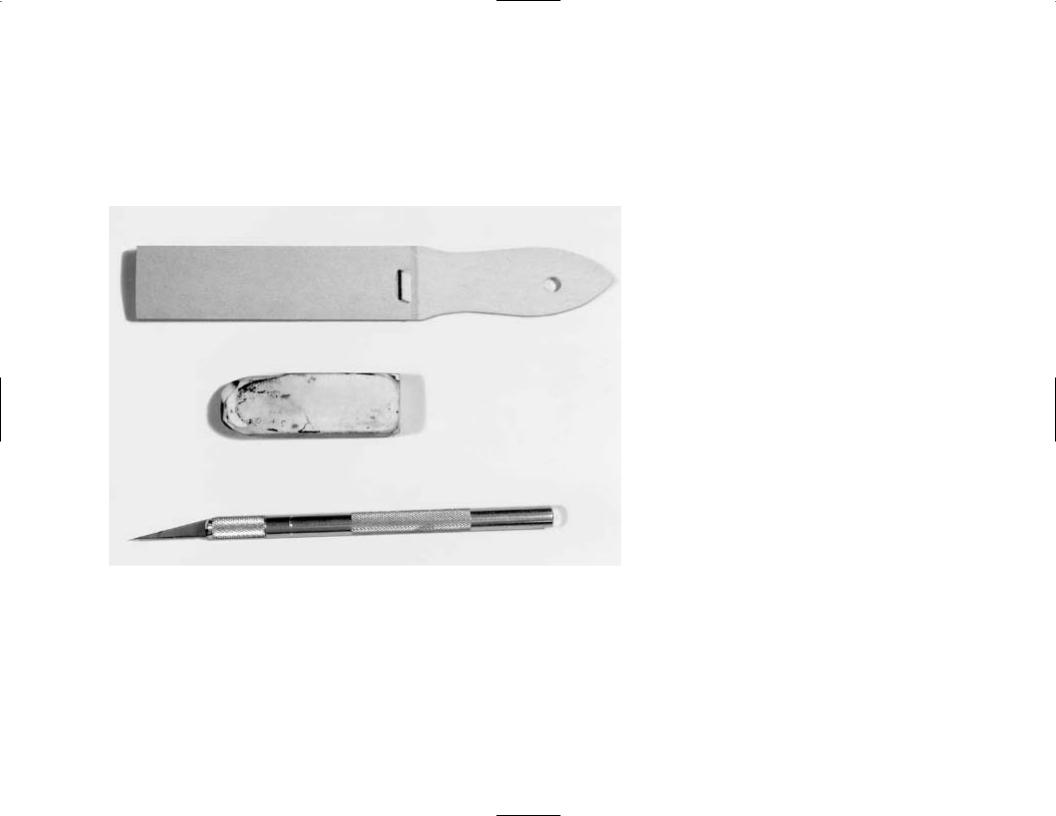
Accessories
You can sharpen your pencil with a small pocket knife if you don’t have an electric pencil sharpener, but I prefer the latter because it tends to produce a longer exposed tip, which is good for the very reasons discussed in the first section of this chapter. A longer tip also prolongs the life of the sharpened lead and thus maximizes the time intervals between each sharpening. Sanding boards, emory pads, and sandpaper are all improvised devices to help keep the tip sharp. Use whatever you prefer. Strike on a piece of rock or pavement if you don’t have any of the above.
I am not a fan of erasers because I think they produce an attitude of dependency, and this is counterproductive to improvement. I prefer sketching over the mistakes or building on them to create something new and non-static. In case you need one, use either a kneaded eraser or a soft white plastic one. The soft rubber of the kneaded eraser simply absorbs and picks up the unwanted graphic markings without leaving crumbs on the drawings. The plastic white eraser can pick up a great deal of the residue, but leaves crumbs that require sweeping. Neither eraser can erase cleanly. Each will mar the sketching surface and change the texture of the paper. A smooth paper is very unforgiving and any attempt to erase can easily lead to disaster.
17

LINE DRAWING
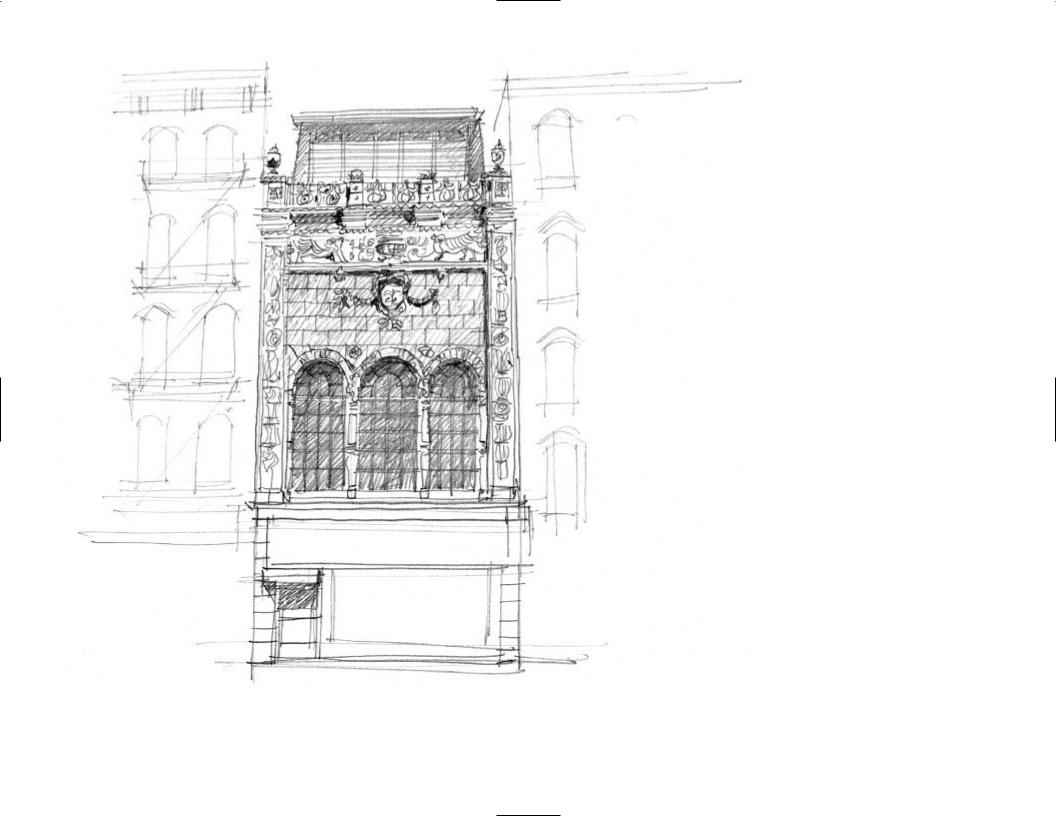
The use of simple pencil lines to describe the object. Except in the areas under the arches where spacing between lines becomes very close, the rest of the lines are independent, with clean and single pencil strokes clarifying the spatial edges of the tower.
LINE AND TONE DRAWING
Shading is used to differentiate the light and shaded planes. Short and continuous pencil strokes are used to give a suggestion of shadows; this technique
tends to reinforce the three-dimensional quality of the tower.
LINE AND TONE DRAWING DONE WITH 314 PENCIL
The softness of the lead gives a better value definition of the black. It also simplifies the shading process because you can actually use fewer strokes to cover the same area than when you use a traditional No. 2 pencil.
18

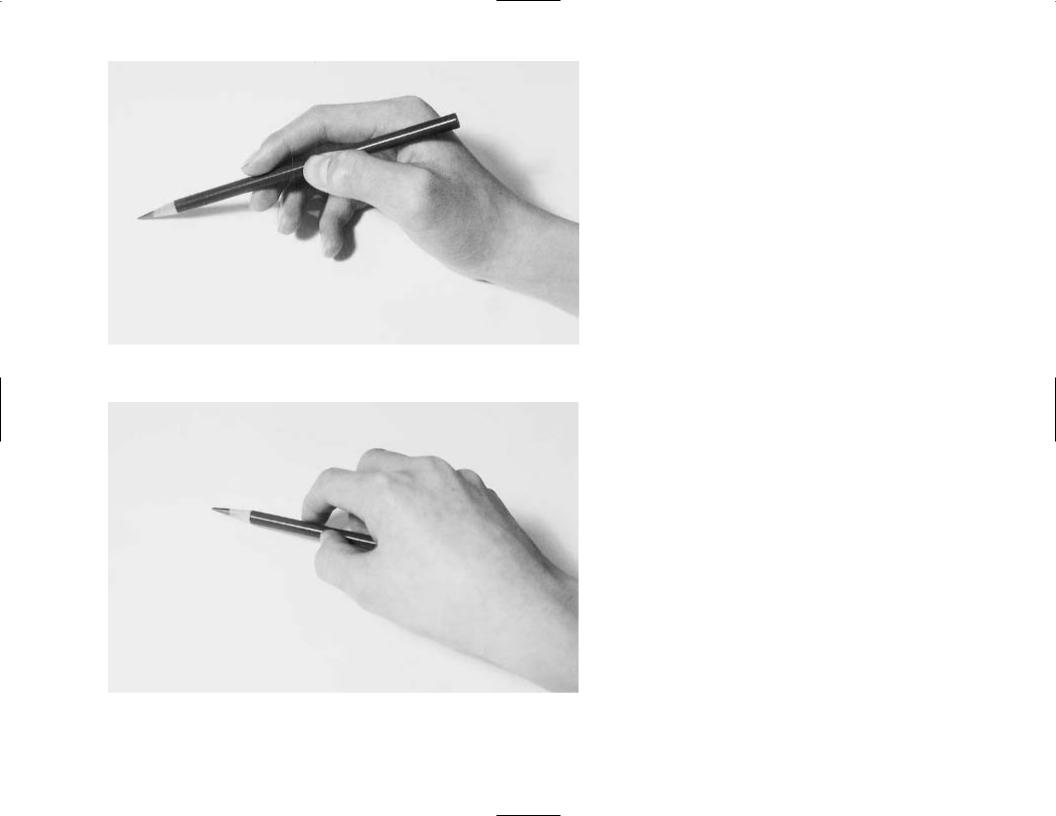
Control the pencil with three fingers.
The grip should be relaxed but firm. Control the movement with the same three fingers.
TECHNIQUES 3
Holding the Pencil
There are many ways to hold the pencil but the key word to remember when sketching is “relax.” Avoid holding the pencil as if you were writing because the writing grip is rather firm and tight. The sketching grip is comparatively looser and easier. Hold the pencil approximately two to three inches from the tip of the lead. The grip position should involve the thumb and the first two fingers only, with the pencil resting comfortably on the inside of the tip of the third finger. Use the second finger and the thumb to stabilize the pencil and to prevent it from slipping out.
The relationship between the second finger and the thumb usually dictates the type of lines and sketching style. When the tips of the two are relatively close together, anchoring the pencil,
the entire hand generally folds inward; and thus the mobility and reach of the pencil movement is limited by how far the fingers can stretch. This position is called Position A and is quite similar to the writing grip. It is very useful in sketching short strokes and details, and it gives the artist more control of the tool while it is less prone to making mistakes.
19
WRITING POSITION
• |
tight |
grip |
• |
no flexibility |
|
• |
hold |
very close to lead |
SKETCHING POSITIONS
• |
looser grip |
• |
flexible |
• |
hold farther up the shaft |
POSITION A
20
Position B is when the tips of the second finger and thumb are far apart. The second and third fingers are usually straight instead of being curled inward, increasing the mobility and reach of the pencil. By sweeping up and down with the extended second and third fingers, the strokes can reach six to seven inches. This is an ideal position for shading because the grip is loose and the fingers are much easier to move. This position also allows the artist to hold the pencil sideways and maximizes the effectiveness of the entire pencil tip. Broad strokes are one result of this grip. Simply extend the fingers of the entire hand with the palm down and glide the pencil across the page. The angle of the pencil must be adjusted to the individual artist’s hand and degree of
POSITION B flexibility. One should be able to switch from Position A to Position B in a continuous movement without hesitation or stoppage.
The third position (Position C) involves holding the pencil as if holding a putty knife or small hand tool. The pencil is held between the thumb and the second finger. This eliminates any form of finger or hand movement and is therefore mainly suited for long and broad strokes. The entire forearm is used, giving the artist maximum reach. Depending on the size of paper available and the reach of the artist’s arm, pencil strokes can reach over three feet. This position can also be used to create chisel strokes. Just hold the pencil and strike it up and down using short and abrupt strokes.
POSITION C
21
Perfect example of sketching in Position A. Focusing on architectural details requires a tight grip of the pencil (for better control). Down/up and lateral movement is minimal. Mars Lumograph H pencil was chosen for the hard lead.
Lower Manhattan, New York; H pencil
22