

imit_model / AnyLogic / UsersManual(AnyLogic)
.pdfAnyLogic V User’s Manual
AnyLogic standard distribution includes several state-of-the-art examples, organized by categories (education, logistics, mechanics, traffic, etc.). Have a look at these examples to get an idea of how to develop your own models.
►To open an AnyLogic example
1.Click the Examples tab of the Start Page.
The list of AnyLogic examples appears in the right panel of the Start Page.
2.If needed, choose By category option to sort examples by AnyLogic categories. The list of example categories appears in the right panel. To show all examples in the category, click the plus icon to the left of the category item.
If needed, choose Sorted alphabetically option to sort examples alphabetically.
3.Click the example item.
The example description is displayed.
4.Click Open button.
From the Start Page, you can examine AnyLogic online resources and documentation.
►To view online resources
1.Click the Online Resources tab of the Start Page.
The list of AnyLogic online resources and documentation appears in the right panel of the Start Page.
2.Click the online resource you want to examine.
3.Click the Open button.
►To save the current project
1.Click the Save  toolbar button, or Choose File|Save from the main menu, or Press Ctrl+S.
© 1992-2004 XJ Technologies http://www.xjtek.com |
7 |

Chapter 1. Creating AnyLogic model
►To save the current project with a new name
1.Choose File|Save As… from the main menu. The Save As dialog box is displayed.
2.Specify the new name and location of the project.
3.Click the Save button.
►To save all projects
1.Click the Save All  toolbar button, or Choose File|Save All from the main menu.
►To close the current project
1.Choose File|Close from the main menu.
AnyLogic can open one project at a time. However, it is possible to run several instances of AnyLogic and open different projects in different instances.
►To run two or more AnyLogic instances simultaneously
1.While running AnyLogic, invoke AnyLogic shortcut from Windows Start menu.
2.In a newly opened instance of AnyLogic, open the desired project.
This is the way to work on several projects simultaneously and to copy classes from one project to another.
1.3 Editing the project
AnyLogic development environment is built up to the state-of-the-art Windows UI level. It features:
•Customizable windows, toolbars, colors, images
•Drag and drop editing
8 |
© 1992-2004 XJ Technologies http://www.xjtek.com |

AnyLogic V User’s Manual
•Diagram zooming
•Easy navigation throughout the project using the classes tree
•On-the-fly checking of types, parameters, and diagram syntax
•Graphical errors highlighting
You edit the project using several AnyLogic editor windows. When a new project is created, the Project window and the Properties window are displayed (see Figure 3). The Project window is used to create, view and manipulate model elements. The Properties window is used to view and modify the properties of model elements. This section gives the description of these windows.
Figure 3. Windows used to edit the project
1.3.1Project window
The Project window (a page in the Workspace window - see Figure 4) provides access to various project elements such as packages, classes, etc. As the project is organized hierarchically, it is displayed as a tree: the project itself forms the top level, packages are the
© 1992-2004 XJ Technologies http://www.xjtek.com |
9 |

Chapter 1. Creating AnyLogic model
next level items, active object and message classes – one level down, etc. The workspace tree provides easy navigation throughout the project.
Figure 4. Project window
►To show the Project window
1.Click the Project  toolbar button, or Choose View|Project from the main menu, or Press Alt+0.
There are some common operations you can perform with items in the Project window. You can copy, move and delete items. Thus, you can easily manage your project. When copying or deleting, you should select the item.
10 |
© 1992-2004 XJ Technologies http://www.xjtek.com |

AnyLogic V User’s Manual
►To select an item
1.Click on the item.
The Properties window will display the properties of the selection.
►To delete the item
1.Click the Delete  toolbar button, or Choose Edit|Delete from the main menu, or
Right-click the item and choose Delete from the popup menu, or Press Del.
2.Confirm the deletion by clicking Yes button.
►To copy the item
1.Click the Copy  toolbar button, or Choose Edit|Copy from the main menu, or
Right-click the item and choose Copy from the popup menu, or Press Ctrl+Ins.
►To cut the item
1.Click the Cut  toolbar button, or Choose Edit|Cut from the main menu, or
Right-click the item and choose Cut from the popup menu, or Press Shift+Del.
2.Confirm cutting by clicking Yes button.
►To paste the item
1.Select the parent item you want to paste into.
For example, you can paste an active object class into a package.
2.Click the Paste  toolbar button, or Choose Edit|Paste from the main menu, or
Right-click the parent item and choose Paste from the popup menu, or Press Shift+Ins.
© 1992-2004 XJ Technologies http://www.xjtek.com |
11 |

Chapter 1. Creating AnyLogic model
If needed, you can exclude the project element from the model. Thus, you can adjust your model structure by excluding one element and including other ones at the design time.
►To exclude/include an item from/to a model
1.Right-click the item and choose Exclude from Build from the popup menu. The item image becomes diffuse/sharp.
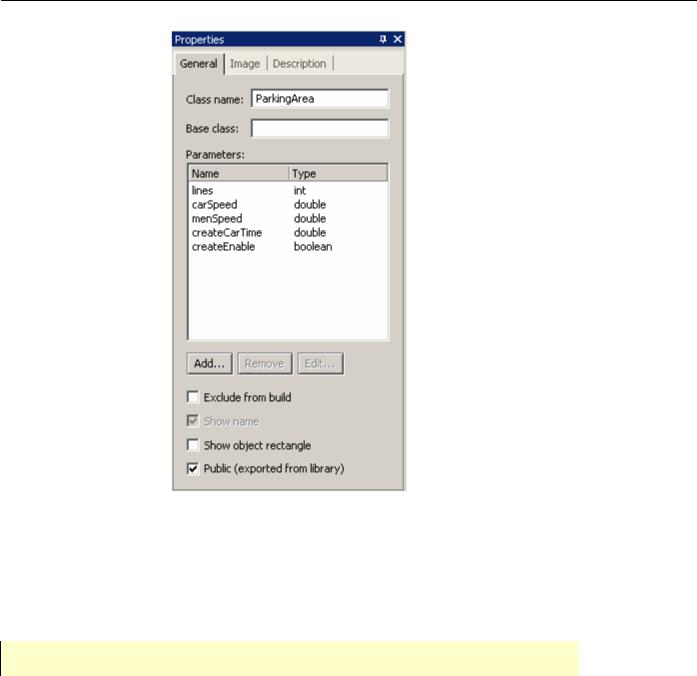
1.3.2Properties window
The Properties window is used to view and modify the properties of a currently selected object. When you select something – e.g., in the Project window or in a diagram editor window (see section 1.5.2, “Diagram editors. Generic operations”) – the Properties window (see Figure 5) displays the properties of the selection.
12 |
© 1992-2004 XJ Technologies http://www.xjtek.com |
AnyLogic V User’s Manual
Figure 5. Properties window
The Properties window consists of several pages. Every page contains controls such as edit boxes, check boxes, buttons etc., used to view and modify properties. The number of pages and their appearance depend on the type of a selected object.
You can directly drag an item from the model tree to a field in the Properties window.
►To show/hide the Properties window
1.Click the Properties  toolbar button, or Choose View|Properties from the main menu, or Press Alt+Enter.
© 1992-2004 XJ Technologies http://www.xjtek.com |
13 |

Chapter 1. Creating AnyLogic model
►To display a particular page of the Properties window
1.Click the corresponding tab in the top of the Properties window.
Each model element can have a descriptive text associated with it to make the model easier to understand.
►To set an element description
1.Select the model element.
2.Enter your text on the Description page of the Properties window.
AnyLogic displays tooltips with the detailed description of properties of a currently selected element.
► To get an information about a property
1.Point the mouse cursor to the required control on the Properties window and wait for tooltip to appear.
If needed, you can tell AnyLogic not to show tooltips for properties.
►To show/hide tooltips for properties
1.Choose Tools|Options… from the main menu. The Options dialog box is displayed.
2.On the Miscellaneous page, select/clear the Enable property tips check box.
3.Click OK.
1.3.3Arranging windows
When editing your project you actually work with several windows. Names of open windows are listed at the foot of the AnyLogic Window menu. Use the Window menu options to arrange open windows.
14 |
© 1992-2004 XJ Technologies http://www.xjtek.com |

AnyLogic V User’s Manual
►To display model windows in a cascading style
1.Choose Window|Cascade from the main menu.
►To display model windows vertically across the width of the AnyLogic window
1.Choose Window|Tile Vertically from the main menu.
►To display model windows horizontally down the length of the AnyLogic window
1.Choose Window|Tile Horizontally from the main menu.
►To close all the windows
1.Choose Window|Close All from the main menu.
►To make a window active
1.Choose the window name from the Window menu.
2.If too many windows are opened, the windows list displays only some of them. Choose Window|More Windows… from the main menu, select the window you want to make active in the Select window dialog and click OK.
►To make the next window from the list active
1.Choose Window|Next from the main menu, or Press Ctrl+F6.
►To make the previous window from the list active
1.Choose Window|Previous from the main menu, or Press Ctrl+Shift+F6.
© 1992-2004 XJ Technologies http://www.xjtek.com |
15 |

Chapter 1. Creating AnyLogic model
1.4 Model elements
AnyLogic models are hierarchically organized. An AnyLogic project consists of packages used for better structuring of a project. A project may use other projects as libraries — collections of classes developed for some particular application area. To facilitate your work, AnyLogic enables you to specify several experiments with different model execution parameters depending on experiments you need to carry out with your model.
This section describes these AnyLogic model elements.
1.4.1Project
A working unit of AnyLogic is called a project. A project completely defines a model or a library. A project is a root item in the Project window.
The following project properties are specified on the General page of the Properties window.
General properties
Name – name of the project, usually the same as the model file name.
Loaded from – [read only] the project (.alp) file location.
Target file – [optional] name of the file to which the generated code is packed. You have to specify this property if you wish to use a project as a library, see Chapter 19, “Libraries”.
Additional library files – [optional] semicolon-separated list of Java archives you wish to add to the project at the compile time.
Folder for generated files – [optional] path to the folder where AnyLogic should store generated files. If not specified, AnyLogic puts generated files into Windows temporary directory.
16 |
© 1992-2004 XJ Technologies http://www.xjtek.com |