

Visual CSharp .NET Developer's Handbook (2002) [eng]
.pdfIn this case, the System Monitor and the Performance Logs and Alerts are actually two separate MMC snap-ins that appear together in this console. You can use the File → Add/Remove Snap-in command to display the Add/Remove Snap-in dialog box, which contains a list of snap-ins used to create a particular console, as shown in Figure C.2. Note that the folders beneath the Performance Logs and Alerts entry are actually part of a single MMC snap-in.
Figure C.2: Many consoles appear to contain just one control, but are actually made of several controls.
You should also notice that the System Monitor is an ActiveX Control snap-in, not a standard MMC snap-in. You can always use standard ActiveX controls as MMC snap-ins, but most ActiveX controls lack the interfaces required to interact with the MMC container application. For example, I created a special type of pushbutton and inserted in MMC (just to see what it would do); yes, I could see the button and it reacted when I clicked it, but that's it. However, my pushbutton example does demonstrate that MMC is just another way to use COM, nothing more or less.
The "magic" for the MMC application is the MSC file. This file contains the information required to create a console. In fact, if you look in the \System32 folder, you'll find the PerfMon.MSC file that contains the information to create the Performance console. Interestingly enough, this file uses XML to store information and has used it long before XML was very popular on the Internet. Figure C.3 shows a view of the MSC file using XML Notepad (see Chapter 13 for details on this useful utility).
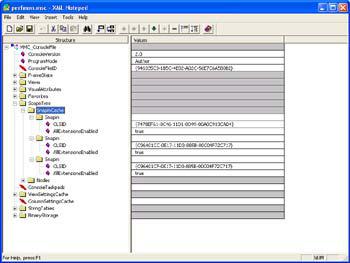
Figure C.3: MMC relies on MSC files that contain information in XML format to store configuration information.
Figure C.3 shows an important bit of information about the MMC application. The first and third MMC snap-in Globally Unique Identifier (GUID) entries correspond to the MMC snapins for the console. (You can validate this information by looking the GUIDs up in the registry using RegEdit.) The third entry actually points to the control responsible for handling ActiveX controls. If you look up the GUID for the second GUID entry, you'll notice that it's for a folder snap-in, the Console Root folder in Figure C.1.
MMC does have quite a bit to offer in the way of control organization and presentation. While this appendix won't explore every MMC feature, you'll learn about quite a few of them. We'll explore the MMC application in more detail later as part of the example. For now, you have enough information to understand some MMC basics and why I chose this particular example for the appendix.
Why Library Code?
Visual Studio .NET and the .NET Framework were originally supposed to alleviate many of the problems that developers had with Windows code. No longer would you need to manage memory, and the fear of DLL hell would be a thing of the past. Microsoft has achieved that goal to a large extent. I have written more than a few applications that never call on anything but the functionality provided by the .NET Framework. In fact, it's the specialty applications that require the use of Windows API or C library calls—they are the exception to the rule.
There probably isn't a succinct answer to the question of why Microsoft chose to incorporate some functionality within easily accessible DLLs in the Windows API and hide other functionality within C library files. Because Microsoft uses C/C++ to write Windows, the use of C library files for some types of functionality doesn't present a problem. Consequently, the developers at Microsoft probably used whatever form of storage looked most convenient at the time. For the C# developer, a function that appears in a C library file always requires an external wrapper DLL for access.
The use of two methods of storing functions for the Windows API begs the question of whether there's an easy way to determine which access method to use. The answer to the question comes from the Platform SDK documentation in at least some cases. Near the
bottom of the page documenting a function, you'll find that the listed functionality appears within a certain library and you need to use a specific C header (H) file to access it. The implicit addition of a library file often signals the need to use an external DLL to access the required functionality. However, the documentation fails to include the requisite LIB file entry for the MMC, so you either need to know that there's no DLL with which to perform the task or search fruitlessly for hours to locate the information. In some cases, a quick check of the \Program Files\Microsoft Visual Studio .NET\Vc7\PlatformSDK\lib folder will provide clues about the form of access you'll need to use for a given function.
In the end, you'll find that the combination of DLLs and C library files provides you with complete access to all of the functionality that Windows has to offer. You need to use both in order to gain complete access, but you'll normally find that you use the .NET Framework first, DLLs second, and C library files as a third (and occasional) option.
A Short View of Data
Working with C library files means converting data from the managed environment into a form that the library functions will understand. Of course, C# doesn't provide support for an HRESULT or a LPTSTR, which are the standard fare of C library routines. This means that you need to know the underlying data type for the C library types that you'll encounter. For example, you'll find that an HRESULT converts quite easily to a System.Int32 value.
The following sections will provide you with some guidelines for working with various C library data types. You'll find additional examples and help in the example program for this appendix.
Working with Variables and Pointers
The difference between reference and value types becomes critical when working with C libraries. You can pass most value types such as int directly to a C library routine without any problem. In fact, the example will pass several value types to the C library. Enumeration also falls into the value category. Unless an enumeration contains both positive and negative values, use the uint type to represent it in your code.
Once you get past basic value types, it's time to convert the C library data type into something C# can understand (and vice versa). Generally, you'll find that pointers convert well to the IntPtr type. For example, you can convert a HANDLE to an IntPtr in most cases. Pointers to numeric values such as the LPARAM also convert to the IntPtr with relative ease. Sometimes odd-looking types like MMC_COOKIE are actually long pointers in disguise, so you can use IntPtr to represent them.
Tip Hover the mouse over a value in the header file to discover how Visual C++ defines it. In most cases, you'll see a typedef in the balloon that makes the base type of the value clear. For example, the balloon for MMC_COOKIE contains typedef LONG_PTR MMC_COOKIE, which makes it clear that you can use an IntPtr to represent the MMC_COOKIE.
There are some situations where there's less of a need to use an IntPtr; if a function only requires an integer value as input, you don't need to use an IntPtr. The int will transfer the cookie value to the C library just as easily as the IntPtr will. For example, if you want to
destroy a snap-in component, you need to provide a cookie (MMC_COOKIE type) as either an int or an IntPtr. Using an int reduces the overhead of your code but may leave other developers scratching their heads, since the use of an int is inconsistent with the use of an IntPtr in other cases. If in doubt, always use an IntPtr, but be aware that there are some situations where an int will work just as well.
Tip The typedefs used within C headers help make the code easier to read by documenting the data type. Needless to say, when you convert a variety of pointers to the IntPtr type, some of that documentation is lost. Generally, this means you'll have to provide additional comments in the code. Because you're replicating a documented interface, function, or enumeration, you'll want to avoid changing the variable names. The help file provided with Visual Studio can still help the user, if you maintain the same basic function name and argument names as part of your code.
Objects can prove troublesome to convert because of the way that the C language handles classes and structures. Remember that classes and structures are somewhat interchangeable under C and that C views both of them as reference types. C# views classes as reference type and structures as value types. Consequently, conversion can prove difficult.
As a general rule of thumb, if the C library call defines the argument as an interface or other pure reference type, you can use the Object data type in your code. On the other hand, if the C library defines the object as a structure, you'll need to replicate the structure in your code and then pass the structure to the calling routine. In some cases, you'll need to marshal the object to ensure that the C library views it correctly. For example, if the object is an interface, then you'll need to add the following attribute to your object definition:
[MarshalAs(UnmanagedType.Interface)]
As part of the data conversion process, you need to consider the direction of data travel between your application and the C library. The C header files commonly mark arguments as [IN], [OUT], or [OUT][IN]. When working with values marked as [OUT] you need to add the out (for uninitialized values) or the ref (for initialized values) keyword to ensure your application sees the return value. Any argument marked as [OUT][IN] must use the ref keyword. In addition, you must initialize the argument before you pass it to the C library.
It's important to differentiate between ref and out values. Remember that the application must provide an initialized argument for ref values, but can include an uninitialized argument for out values. While C# makes the distinction clear through the use of native keywords, you'll find that other languages such as Visual C++ aren't quite as adept. For example, when working with Visual C++, you'll find that a double pointer will create a ref value, while the [Out] attribute is used to create an out value, as shown here. Notice that out values begin as ref values because they also require a double pointer. Also notice that the [Out] attribute is captialized—using the lowercase [out] attribute will result in errors.
//Create a ref value. MMCHelper::IDataObject **ppDataObject
//Create an out value. [Out]MMCHelper::IDataObject **ppDataObject
One final concern about Windows library calls is that they often use keywords for arguments. For example, the Notify() method shown here normally uses event as one of the argument names.
virtual /* [helpstring] */ HRESULT Notify(
/* [in] */ MMCHelper::IDataObject *lpDataObject, /* [in] */ MMCHelper::MMC_NOTIFY_TYPE *aevent, /* [in] */ IntPtr arg,
/* [in] */ IntPtr param) = 0;
Notice that the source code changes the name to aevent. If you don't make this change, the argument name will appear in a decorated form within the managed environment. For example, C# decorates the event as @event, making the argument difficult to read.
Working with Data Structures
Sometimes you can't easily convert a C library input into a type that C# will understand. This is especially true when working with structure. Windows relies on structures to pass large amounts of data between an application and the operating system as part of a system call. Consequently, any wrapper you create will also need to work with the plethora of data structures that Windows uses. Ultimately, the content of the structure must break down into types that C# will understand, as shown in the following code.
[StructLayout(LayoutKind::Sequential)] public __gc struct DVTARGETDEVICE
{ |
|
public: |
tdSize; |
UInt32 |
|
short |
tdDriverNameOffset; |
short |
tdDeviceNameOffset; |
short |
tdPortNameOffset; |
short |
tdExtDevmodeOffset; |
char |
tdData; |
}; |
|
Notice that the structure relies on native Visual C++ types in many cases, because these types translate well into standard .NET Framework types. However, there are some situations where a native Visual C++ type could cause problems, as in the case of an unsigned integer (UINT). In this case, make sure you use the .NET Framework equivalent type directly (UInt32).
There are other problems to consider when working with structures. For example, a structure must include the [StructLayout] attribute so CLR knows how to work with the data it contains. Generally, you'll use the LayoutKind::Sequential argument for Windows function calls. This value ensures that CLR doesn't rearrange or optimize the structure in any way. Note that Visual C++ requires the use of the __gc keyword for managed structures and that you must make all of the data elements public so they appear within C#.
Structures become problematic in some situations. For example, you'll find that some structures contain other structures. The level of nesting can become absurd in some situations. In these situations, you need to determine if the level of nesting is warranted. If not, you can usually provide a substitute value. For example, if the code you create will never pass the structure to Windows (in other words, the structure is always passed as a NULL value), you
can normally use an int as a substitute for the structure. Make sure you document any deviations within the DLL source code and as part of the DLL documentation.
Working with Enumerations
Windows relies extensively on enumerated data types. These data types normally begin with the enum keyword. Unfortunately, duplicating enumerated types with the .NET Framework proves difficult for a number of reasons. The most important reason is that the enum will never appear in the Object Browser and the DLL user won't be able to access it. Consequently, you need an alternative for creating enumerated types. In most cases, using a class is the best answer because you have good control over how the class will appear to the end user. Here's an example of the class version of the enumerated data type.
public __gc class DATA_OBJECT_TYPES
{ |
|
public: |
= 0x8000; |
static const CCT_SCOPE |
|
static const CCT_RESULT |
= 0x8001; |
static const CCT_SNAPIN_MANAGER = 0x8002; |
|
static const CCT_UNINITIALIZED |
= 0xffff; |
}; |
|
Notice that you still declare the enumerated type as before using hexadecimal notation, but the enum is gone and there are some new keywords involved in the declaration. As with all managed elements of a DLL, you must declare the class as a public __gc. The entries appear as static const values.
When you use this new enumeration within interfaces or structures, you'll need to access it as a class. This means adding a pointer for Visual C++ DLLs. Generally, you'll find that C# will view the enumeration as a class with constant values, similar to enumeration values within the
.NET Framework.
Creating the Visual C++ Wrapper DLL
You could create the wrapper DLL for this example using any of a number of languages, including C#. However, using other languages would prove difficult, in this case, because there are so many items you have to access from within Windows itself. Even though a C# DLL would work, using Visual C++ to write the DLL is more efficient in this case, because you'll experience fewer interface issues. The following sections provide an overview of the Visual C++ DLL used for this example. You'll find the complete source code in the \Appendix C\MMCHelper folder on the CD.
Note This discussion assumes the reader is familiar with Visual C++. If you only want to know the C# portion of the example, you can safely skip this section. The DLL on the CD is complete enough to create simple MMC snap-ins with any .NET language. However, it isn't a full implementation of the MMC snap-in DLLs that come with Windows, so you'll find that some advanced functionality is missing. The MMCHelper.DLL is the only extra DLL required for the MMC snap-in example under Windows 2000/XP.

Special Considerations for #include Directives
When you write an unmanaged application in Visual C++, you normally place all of the #include directive statements in the file where they're used. In many cases, such as the example in Chapter 9, this also works for a managed DLL. However, in some cases, you'll receive an ambiguous reference error when you try to compile a header in a managed DLL. This is true with the MMC.H header used in this example. To see what this error looks like, create a Managed C++ Class Library project and add this simple statement to the top of the project CPP file:
#include <MMC.H>
Compile the DLL project and you'll receive a list of errors similar to the ones shown in Figure C.4. Looking at this list of errors doesn't tell you anything about the actual problem. In fact, the error message would lead you to believe that the header file is incompatible with the managed DLL project.
Figure C.4: The placement of header files in your managed DLL makes a difference in the error messages you receive.
Now, move the #include <MMC.H> statement from the top of the CPP file to the top of the STDAFX.H file (before the #using <mscorlib.dll> statement). Compile the code again. The build should succeed without error. The only difference is the placement of the header file within the code.
This little trick works, in many cases, when you can't compile the managed DLL any other way. Unfortunately, it doesn't work in every case. There are some situations where you'll need to build an unmanaged DLL to create a wrapper for C library code. Even if you have to go the unmanaged route, the wrapper will work fine. The only difference is that you might need to work a little harder to create the interface with C#, and you'll have to remember to compensate for the lack of automatic variable handling within the unmanaged DLL.
Adding the Library Reference
Generally, you'll find that you need to add a library reference to your project if you're working with a specialty library such as MMC.LIB. Visual C++ includes some libraries by default when the project inherits from the project defaults (the standard configuration). However, MMC.LIB isn't in the list, so you need to add it by right-clicking MMCHelper in Solution Explorer and then selecting Properties from the context menu. Locate the \Linker\Input folder shown in Figure C.5 and type MMC.LIB in the Additional Dependencies field. The IDE will now link the MMC.LIB file with the rest of the DLL.

Figure C.5: Make sure you add any special libraries to your project before you compile it. Note If you don't know which libraries Visual C++ supports by default, click the ellipsis
button next to the Additional Dependencies field. You'll see an Additional Dependencies dialog box. The Inherited Values field of this dialog box contains the default list of libraries that Visual C++ links into the DLL.
Creating an Interface
There are a few problems you need to address when creating wrapper interfaces using Visual C++. We've already addressed the problems of values, structures, and enumerated types in previous sections. It's important to reiterate, however, that you must construct .NET Framework equivalents of all the data types used for the Windows calls, which might mean deriving a creative alternative in some cases.
One of the first problems that you'll need to consider is how to create a managed version of a COM interface. The best way to do this is to add three attributes to the interface description. The following list tells you about each of the attributes.
[ComImport] This attribute tells the compiler that the interface is based on a COM interface with the same name.
[InterfaceType] This attribute describes the type of exposure to provide for the interface when it's exposed to COM. The acceptable values include dual, IUnknown, and IDispatch.
[Guid] This attribute assigns a globally unique identifier (GUID) to the interface. This must be the same GUID used by the COM unmanaged counterpart.
Now that you know how to identify a COM interface substitute, let's look at a typical interface example. Here's the ISnapinHelp2 interface used to add help support to an MMC snap-in. The ISnapinHelp2 interface was introduced for MMC 1.1 and includes a second method for adding web-based help to your snap-in.
[ComImport,
InterfaceType(ComInterfaceType::InterfaceIsIUnknown), Guid("4861A010-20F9-11d2-A510-00C04FB6DD2C")]
public __gc __interface ISnapinHelp2
{
public:
virtual /* [helpstring] */ |
HRESULT GetHelpTopic( |
/* [out] */ [Out]IntPtr |
*lpCompiledHelpFile) = 0; |
virtual /* [helpstring] */ |
HRESULT GetLinkedTopics( |
/* [out] */ [Out]IntPtr |
*lpCompiledHelpFiles) = 0; |
};
The first thing you need to notice about the interface is the __interface keyword. Visual C++ will compile an interface that uses the interface keyword without a single word of complaint, until you attempt to use attributes with it. Because you won't always need to use attributes with interfaces, it's possible to create an interface that relies on the interface keyword instead of the __interface keyword. The interface version will never work properly in a managed environment.
If you're familiar with the ISnapinHelp2 declaration in MMC.H, you'll know that it derives from ISnapinHelp and lacks the GetHelpTopic() method declaration shown in the example code. It's impossible to derive a managed interface from an unmanaged interface.
Consequently, it's often easier to create a combined managed interface as shown in the example. (That is, unless, you expect someone to use the older interface for some reason; in which case, you should implement both.)
Because an MMC snap-in is normally an unmanaged COM object, your managed MMC snapin will have to mimic its behavior. This means implementing at least the minimal subset of interfaces to create an operational MMC snap-in. The following list shows which interfaces the example will use.
•IDataObject
•IComponent
•IComponentData
•ISnapinAbout
Note The smallest possible MMC snap-in implementation must contain four interfaces: IDataObject, IComponent, IComponentData, and IClassFactory. You don't need to implement IClassFactory, but the other three interfaces must appear within your code.
A fully functional MMC snap-in will include several other interfaces. These interfaces aren't required to make the MMC snap-in work—you implement them to ensure the user can access features such as help and context menus. In other words, these are helpful user interface features. Generally, you'll want to implement the following list of interfaces to ensure the MMC snap-in will meet all users needs.
•ISnapinHelp2
•IDisplayHelp
•IExtendContextMenu
•IExtendControlbar
•IExtendPropertySheet
There are a number of other interfaces you can implement as part of an MMC snap-in; all of which appear in the MMC.H file. MMC also implements a number of interfaces for you. While you can override these interfaces to provide special behavior, you don't need to create them for a simple MMC snap-in. These MMC provided interfaces include:
•IPropertySheetProvider
•IPropertySheetCallback
•IConsoleNamespace2
•IHeaderCtrl
•IResultData
•IImageList
•IConsole2
•IContextMenuCallback
•IControlbar
•IToolbar
•IConsoleVerb
As you can see, creating a wrapper DLL for COM is often a matter of knowing which interfaces to implement. Ultimately, the interfaces you implement affect the functionality of the resulting component and determine the utility of the component you create. For example, you don't have to implement the ISnapinAbout interface to create a functional MMC snap-in, but this interface is required if you want to provide at least some information to the user about the purpose of the MMC snap-in.
Even the optional interfaces will have a place in the wrapper DLL. For example, the IConsole2 interface provides the means to access the MMC environment. Therefore, even though you don't have to implement the IConsole2 interface, you'll need to include it in the DLL so that you can gain access to required MMC functionality. Another example is the IControlbar interface. This interface is used by the IExtendControlbar interface to add and remove toolbars and other controls to the MMC environment. Even though you don't need to implement the IControlbar interface, the IExtendControlbar interface requires access to it. These reference interfaces are clearly identified in the source code so you can see how they interact with the snap-in as a whole.
One of the best ways that I've found to learn about COM interfaces is to view implementations of similar controls using the OLE/COM Object Viewer utility. This utility shows which interfaces are implemented by an existing control and therefore provides valuable clues for implementing similar controls when working with .NET. You'll also find clues in the various C/C++ header files, because they normally define the interfaces for a particular type of control or component. The Microsoft documentation and online sources often point to the interface requirements for certain types of components as well. All it takes is a little detective work to learn which interfaces you must implement to create a basic component and which interfaces to add in order to gain some level of component functionality.
Tip Even though you don't have to create multiple files when working with Visual Studio
.NET, it's often helpful to do so when working with moderateto large-sized wrapper DLLs, such as the one used in this example. Dividing code by type makes it easier to locate a specific piece of code. The example uses separate files for function implementations, structures, enumerations, and interfaces.
Adding the MMC Functions
One of the reasons for using a wrapper DLL is to access the Windows functions used to perform a specific task. There are a number of MMC-related functions, but all we need for