

Visual CSharp .NET Developer's Handbook (2002) [eng]
.pdfimpossible to determine what features you can rely on finding. In short, standardization within the company is essential, even if there's chaos outside.
These special add-ons can also work to your advantage. Imagine creating an application to work with one of the camera attachments for a PDA. Each picture is automatically transferred to a remote-processing center as the photographer takes pictures. SOAP could make this task relatively easy and automatic. The pictures would be ready for viewing by the time the photographer reaches the home office.
In sum, special PDA add-ons present problems because they create a non-standard programming environment. On the other hand, these add-ons can create new productivity situations where a developer can provide functionality that no one has ever seen before. The optimum setup is to standardize features required to make SOAP work, such as the type of network interface card (NIC). On the other hand, it's important to consider specialization. Adding a camera to a PDA turns it into a direct image transfer device. PDAs provide the means to extend what computers can do, as long as you configure them with application connectivity in mind.
Networking
Distributed application development relies on a connection between the client and the server. Because PDAs have limited processing capability, distributed applications are especially important in this situation. It's easy to create a connection when you're working with a desktop machine. If you can't create a direct connection using a LAN, there are always alternatives, such as using dial-up support. However, networking with a PDA can prove problematic.
A PDA may not offer much in the way of a network connection. In many cases, they'll offer a method to synchronize the PDA with the desktop. The synchronization process works with static data and won't provide you with a live connection to the network. It helps to have a wireless network setup when working with a PDA since many vendors design PDAs to use this connection type. I was able to find a third-party product for connecting a Pocket PC directly to the network using a special NIC.
Every PDA that I looked at does provide some type of modem support, but the modem is usually an add-on and doesn't come with the device. Again, you'll need to standardize on the kind of modem support you need for your application. You'll also want to be sure that you can create the desired connection and view material using a browser. if you decide to go that route.
The bottom line is that the original purpose of a PDA conflicts with the ways that some people use them today. Vendors design the PDA to provide electronic versions of calendars and address books. Yes, you can run distributed applications on a PDA, but only if you have the required live network connection. Obtaining that connection can prove difficult, to say the least.
Operating System
You probably know about the major PDA operating systems on the market today. PDA vendors supply their own operating system. Windows CE is a favorite because it looks and acts much like Windows for the desktop. What you should realize is that the operating system
the PDA package says it uses isn't the operating system you'll get. Small variations between machines make the difference between a distributed application (or application support such as a SOAP toolkit) that works and one that won't even install.
Windows CE allows for multiple levels of development. The operating system provides a subset of the features found in the Windows API. This means that you can use the programming techniques you learned in the past, if you're already a Windows developer. There's even a special toolkit for working with Windows CE devices (see the "Obtaining the Required Tools" section for details).
Because Windows CE also contains Internet Explorer, you can interact with it using a browser application. In fact, this is the method that I recommend, because it opens a number of timesaving possibilities; not the least is developing the application on your desktop system before you move it to the PDA. Be warned, though, that the version of Internet Explorer that ships with Windows CE doesn't include full scripting support. You can use JScript (Microsoft's form of JavaScript), but not VBScript (see Internet Programming with Windows CE at http://www.microsoft.com/mind/0599/webce/webce.htm for details).
Windows CE will simply ignore any script commands that it doesn't understand in the HTML file. In addition to JScript, you also have access to some Internet Explorer functions such as Alert() and you can use standard HTML tags. The Windows CE version of Internet Explorer will also work with Java applets. This means that you can create complex browser applications that don't rely on VBScript.
Note You might wonder where the C# connection is for a PDA if the client can't run much more than JScript. Microsoft is currently working on a version of the .NET Framework for the Pocket PC, so you'll eventually be able to move .NET applications to your PDA. Of course, they'll likely have the same limitations as current embedded applications have. In addition to developing applications that run only on the client, you can run the required mobile code on the server and use it to create content acceptable to the PDA. That's the purpose of MMIT discussed in this chapter.
Addressing PDA Display Issues
Most developers realize that working with a PDA is going to be a challenge before they begin their first project. The problem is that the challenge usually turns out even larger than expected. Small displays with limited color capability are something that most developers consigned to the past. The old techniques that developers used to conserve screen space on desktop computers are suddenly appearing again in the form of PDAs.
The following sections discuss several important display issues you'll confront when working with a PDA. This section won't provide an in-depth treatise on the subject, but you'll walk away with some fresh ideas for your next PDA application.
Screen Size
Many users have 17" or 19" monitors capable of a minimum of 1280 × 1024 resolution today. Developers have taken advantage of the screen real estate to create better applications that display more data at one time. Even Microsoft uses higher resolutions as a baseline for applications—many of their application screens won't fit on an 800 × 600 display anymore.

Everything you want to do with your PDA has to fit within a small screen space (320 × 200 pixels if you're using a Pocket PC model like the Casio Cassiopeia). That's a lot smaller than the typical computer screen. In addition, some PDAs use black and white displays in place of color, so you can't even use some of the modern tricks to make the display look nicer. In short, PDA screens tend to look a bit plain and developers normally find themselves feverishly cutting their application screens down to size.
No matter what you do, it's impossible to fit 1280 × 1024 worth of application screen in a 320 × 200 space in many cases. When this happens you'll find that you need to make some compromises in the display. For example, I created a SOAP application to test the capabilities of a third-party toolkit on my PDA. The example retrieves computer name information from the server. Unfortunately, while the information fits fine on my desktop monitor, it doesn't fit on a PDA screen, so I had to get creative in cutting and pasting the data to fit the PDA screen. Figure 17.1 shows the results of screen configuration I performed in order to make the application data fit and still look reasonably nice.
Figure 17.1: You'll need to size the data to fit within the PDA screen real estate limits.
In this case, I indented the second line of each data entry to allow enough space for long entries. Notice that the data is still readable, and the user won't have to guess about the formatting. Of course, this is still a less-than-perfect solution since the data does appear on two lines.
It's important to keep every application element on a single screen if possible. The example application does this by sacrificing application data display space. The user can scroll through the data in the Result values field without moving other screen elements around. The stylus provided with a PDA doesn't lend itself to mouse-like movement.
Make sure you consider XHTML for complex applications with many elements. It helps you to display your application in segments with relative ease. Other options include using the Handheld Device Markup Language (HDML) (http://www.w3.org/TR/NOTE-Submission- HDML-spec.html) or Wireless Markup Language (WML) (http://www.oasis- open.org/cover/wap-wml.html). Both of these technologies use the concept of cards and decks
to break information up into easily managed pieces. Of course, the PDA you use has to provide support for these standards before you can use the tags within a document. As with XHTML, using either HDML or WML will prevent your page from appearing properly on a desktop machine.
Using Color
Developers have gotten used to seeing colors on their applications. Color dresses up a drab display and makes the application more fun to use. In addition, using color presents cues to the user about the information provided. For example, many users associate green with a good condition and red with something bad. Color can also make it easier to pick out specific application elements. In short, most applications rely heavily on color today and with good reason.
Depending on the PDA you use, you may not have any color at all. For example, many Palm models present the world in shades of gray. Even if a PDA does provide color support akin to the Pocket PC, the developer still has to use color carefully.
The problem for PDA users is that the screen is already small. If they get into an area with bright sunlight, seeing the screen might become impossible, especially if it's filled with colors that don't work well in such an environment. Notice that the PDA screenshots in this chapter are mainly black and white. The actual screens contain some color for the icons, but that's about it. Since these applications don't need color to present the information they can provide, it's possible to rely on a black and white image.
Using color to display icons or to convey a message is still a good idea, even in the world of the PDA. For example, a red icon could signal danger or tell the user to wait without using up screen real estate for words. Of course, you need to explain the meaning of the color changes within a manual or help file (preferably both).
Pointer Pointers
Most PDA users rely on a pointer to do all of their work. Sure, a few PDAs do offer a keyboard and mouse as separate items, but most of these offerings are bulky and difficult to use. Pointer use is one of the reasons that you want to keep your application on one screen, or use multiple screens when necessary. Scrolling on a PDA screen is less than intuitive and requires some level of skill to master.
The applications that you move from the desktop to the PDA will require some modification for screen size in many cases. While you're working on the screen, it might be a good time to add some pointer-friendly features as well. For example, try to make as many tasks into single-pointer options as possible. The user should be able to point to what they want and allow the PDA to complete it for them.
You can also build intelligence into the application. A distributed application normally has a direct connection to the server. You can use some of the server's processing power to make things easier on the user. Most PDAs already include predictive logic as part of their setup. For example, as you write something, the PDA tries to guess the entire word. When it guesses the correct word, you can click on it and save some writing time. The same principle works for other activities as well. For example, a distributed application could automatically display
a data screen that the user needs most often, rather than force the user to dig through several screens to find it. Pointer-friendly programs also make tasks yes or no propositions. Again, this allows the user to accomplish the task with a single click, rather than have to write something down. The point is to make the PDA as efficient as possible so the user doesn't get frustrated trying to do something that should be easy.
Writing a Microsoft Mobile Internet Toolkit (MMIT) PDA Application
The MMIT is a new addition to the list of tools you can use to create an application for a PDA. MMIT has the advantage of relying on the .NET Framework, which means you can use C# to write the code. However, you still need to rely on skills that you developed for other platforms. The fact that you're using new technology doesn't change the need for emulators and local programming elements, such as controls and components. The following sections provide an overview of the PDA development process when using MMIT. We'll take some quick departures into other areas as needed, simply to show the tools you'll need to use for development purposes.
Obtaining the Required Tools
The example application in this section relies on C# and the MMIT. The MMIT enables you to create ASP.NET applications for a wide range of mobile devices including cellular telephones, HTML pagers, and PDAs using several standardized access methods. Download this toolkit from Microsoft's website at http://msdn.microsoft.com/downloads/default.asp?url=/downloads/sample.asp?url=/msdnfiles/027/001/817/msdncompositedoc.xml and install it prior to creating the example. Note that MMIT is very dependent on the version of the .NET Framework you've installed. At the time of this writing, the two versions of MMIT supported either the release candidate (RC1) or the released version of the .NET Framework.
You may also want to download the Microsoft Embedded Visual Tools from http://www.microsoft.com/mobile/downloads/emvt30.asp. (Note that the download size for this toolkit is 304MB, which means you'll have a bit of a wait when using a dial-up connection.) This toolkit provides an array of development tools including a special IDE for Visual Basic and Visual C++ developers. The tool of greatest interest for C# developers is the Pocket PC emulator. You can place this utility on your development machine and use it to emulate the handheld device. The result is time saved in transferring a test application from your desktop machine to the handheld device. Of course, you still need to perform final testing on the Pocket PC or handheld of your choice.
The Microsoft Embedded Visual Tools also comes with both a Visual Basic and a Visual C++ compiler for embedded applications. The IDEs for these two products look similar to the IDEs found in Visual Studio 6. The Visual Basic compiler seems oriented toward prototyping applications for a particular platform quickly, while the Visual C++ compiler provides a wealth of non-platform specific projects oriented toward low-level needs such as components. Even if you decide to use MMIT or SOAP for your application, you might find the need to write local desktop applications or support components using this compiler. Here's a simple example of a Visual Basic application for the Pocket PC (found in the \Chapter 17\PocketPC folder on the CD).
Private Sub cmdClickMe_Click()

'Determine the button type.
If cmdClickMe.Caption = "Click Me" Then
'Display some text.
txtTest.Text = "This is some text."
'Change the button caption. cmdClickMe.Caption = "Display Message"
Else
'Display a message box. MsgBox txtTest.Text
'Change the button caption. cmdClickMe.Caption = "Click Me"
End If
End Sub
Private Sub Form_OKClick()
App.End
End Sub
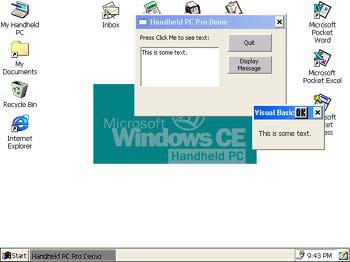
As you can see, the example isn't anything spectacular, but it does get the point across. Writing an application for the Pocket PC (or any other platform supported by the Microsoft Embedded Visual Tools) need not be difficult. Notice the Form_OKClick() method. This is one example of a special addition for the Pocket PC. The form has a ShowOK property that controls the display of the OK circle button on the title bar. When the user clicks this button, the application ends. Figure 17.2 shows the output of this application.
Figure 17.2: This simple application shows that embedded programming can be as easy as the desktop version.
Note You'll also find versions of the text application for the Palm-size and Handheld PC Pro emulators in the \Chapter 17\PalmSize and \Chapter 17\HPCPro folders on the CD. We'll view these versions in the "Using Emulators" section of the chapter.
Using the Emulators
The Microsoft Embedded Visual Tools actually comes with three emulators: Pocket PC, Handheld PC Pro, and Palm-size. Each of these emulators has a different target platform and different size screen. None of the emulators match an actual PDA implementation precisely, because each vendor adds a few features to their handheld and you also need access to PDA controls that don't appear on your desktop machine. The emulators do serve an important function in that they help you debug your application so you don't waste a lot of time working with the real device. Normally, an application that runs on the emulator also runs on the device.
You can run the emulators individually, or as part of the embedded IDE. Starting Debug also starts a copy of the appropriate emulator for your application. The emulators present the application in about the same amount of screen space that the actual device will provide. Consequently, the Handheld PC Pro has the most amount of screen real estate, as shown in Figure 17.3, while the Palm-size has the smallest amount of screen space to offer as shown in Figure 17.4.
Figure 17.3: The Handheld PC Pro provides the greatest amount of screen space.
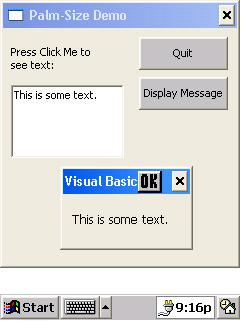
Figure 17.4: Likewise, the Palmsize screen is the smallest that you'll use when deveioping application.
Notice that Figures 17.3 and 17.4 have different sizes than the screen from the Pocket PC shown in Figure 17.2. In addition, you'll find that the Pocket PC is the only device that supports the ShowOK property, so the examples for the other two devices contain Quit buttons. It's little differences like these that will drive a developer crazy, but these are also the differences you need to observe when working on PDA applications.
Creating the Project
Creating a Mobile Web Application is akin to creating an ASP.NET project in that you create it directly on the test server and not on the local machine. We discussed ASP.NET development in Chapter 15, so I won't reiterate the need to use a two-machine setup, if at all possible, to realistically model an actual web application setup. This section of the chapter will discuss the nuances of creating a Mobile Web Application project. (The project also appears in the \Chapter 17\MobileWebApp folder on the CD—you'll need to change the web server information to match your server setup.)
To create the Mobile Web Application project, select the project in the Visual C# Projects folder on the New Project dialog box. Instead of a project name and directory, you'll need to supply a Location field value for a location on your local server. The sample application uses http://WinServer/0111/Chapter 17/MobileWebApp for the Location. You'll need to change this value to match your server setup. Click OK. You'll see a Create New Web dialog box while the IDE creates the project on the web server for you. The Create New Web dialog box will go away, but the wizard will continue working for a while—be patient and you'll eventually see a MobileWebForm designer appear on screen.
Note There are some situations when the IDE mysteriously displays a message that it can't find one or more of the Mobile namespaces. Make sure you install the MMIT on both machines. If you still receive the message, make sure that the System.Web.Mobile.DLL appears in the \Microsoft.NET\Framework\Version folder (where Version is the version number of the .NET Framework). If you have multiple versions of the .NET Framework

installed, try manually selecting the System.Web.Mobile.DLL by right-clicking References in System Explorer and choosing the Add Reference option from the context menu. You might also need to use the Browse button on the .NET tab to select the DLL manually. If all else fails, reinstall the MITT before you proceed with the example.
An MMIT project doesn't look at all like an ASP .NET project. The Designer is set up to allow multiple forms on the same page. This enables you to break up content that might not fit on a single mobile device screen into multiple screens without having to work with multiple pages. Figure 17.5 shows an example of this process at work with the example for this chapter. Notice that the figure shows some database objects already in place—we'll use the SQL Server 2000 MovieGuide database from Chapter 12 for this example.
Figure 17.5: The design environment for MMIT enables you to have multiple forms on a single page.
The user will see these forms one at a time, but you'll work with them as if they appeared on a single page. This technique provides definite advantages to the developer who needs to transfer existing ASP.NET projects to MMIT, because you can move the code for your application without rewriting it in many cases. The biggest part of the effort involves redrawing the content so it fits within the confines of the mobile device display area.
Tip Microsoft installs the MMIT with default settings that might not match your web server. As a result, the example application will fail to run. Make sure you check the event log for clues about errors in your MMIT setup. For example, if you see a mysterious error about the username and password being wrong in the processModel section of the config file, the error is probably in the Machine.CONFIG file located in the \WINNT\Microsoft.NET\Framework\v1.0.3705\CONFIG folder on your server. The Machine.CONFIG file also contains settings that determine how long cookies last and other session timeout values (a constant source of problems during IIS tuning). Microsoft has provided copious notes within this file that explain the various configuration options.

Coding Techniques
Except for screen real estate, the coding techniques you use for MMIT are the same as the ones you'd use for an ASP.NET application. The problem is getting the information that normally appears on a full browser to appear on the screen of a PDA (or even worse, a wireless telephone). One of the techniques you can use to get around this problem is data hiding—the data is fully formed and ready to display, the user just doesn't see it until necessary. For example, the linking information on the first form of the example remains hidden until the application displays it using the following code.
private void cmdContinue_Click(object sender, System.EventArgs e)
{
// Create some output for the application based on the button click. lbl2ndPageMsg.Visible = true;
lnkSecondPage.Visible = true;
}
Using local scripting would enable the client to display the information as needed locally. The only problem with this approach is that it assumes the client has enough processing power to perform this task. Depending on the target client, you might need to use the post back method illustrated in this example to ensure the client actually sees the data once the user decides to display it.
Tip It usually pays to create a prototype of your product using standard ASP.NET programming techniques so you can judge how well a particular scenario will work. You'll find the prototype for the application in this section in the \Chapter 17\WebApp folder on the CD.
The database development portion of the applications follows very closely with the process for ADO.NET found in Chapter 13. Because this application displays a single record at a time, you won't need the fancy DataGrid object manipulation code, nor will you need to synchronize the Detail and Grid views. Consequently, the code is much simpler and executes more quickly (a good feature, since MMIT applications seem to run relatively slow). Listing 17.1 shows the code you'll need to add to the second form.
Listing 17.1: The Data Viewing Code for This Example
// Keep track of the current record. int CurrRec;
private void SecondPage_Load(object sender, System.EventArgs e)
{
//Get the current record counter pointer. CurrRec = Int32.Parse(lblCurrentRecord.Text);
//Fill the dataset with data. sqlDataAdapter1.Fill(dataSet11);
//Display the initial record.
DoFill();
}
private void DoFill()
{