

Visual CSharp .NET Developer's Handbook (2002) [eng]
.pdfFigure 12.1: Server Explorer not only gives you the grand view of your network to start but allows you to drill down as needed.
Notice that I opened the SQL Server connection to the server, WinServer. If you get the idea that you won't need to use the server-side tools much anymore, you'd be correct. You can perform most (but not all) tasks right from Server Explorer. If you need to make a new database, reconfigure a table, or create a query, Server Explorer does it all. In fact, we'll take a quick look at these features when creating the example in the "Creating a SQL Server Database" section of the chapter.
Working with the Event Log
One of the features that developers come to appreciate about Server Explorer is that it helps you categorize information. You can drill down to the information you need but ignore everything else. For example, when you open the Application Event Log, you need to connect to the remote server, locate the log, and then search through the list of messages for the particular message you need. Server Explorer categorizes event messages by type, so all you see is the message you want.
If you want to build a quick application to monitor just certain types of messages, all you need to do is drag the requisite folder to a form and add some quick code to monitor it. (You'll find examples of Server Explorer usage in the \Chapter 12\ServerExplorer folder on the CD.)
Here's a short example of how you could use this feature in an application.
private void btnCreateEvent_Click(object sender, System.EventArgs e)

{
// Create an event entry. ApplicationEvents.WriteEntry("This is a test message",
EventLogEntryType.Information,
1001,
1);
}
private void ApplicationEvents_EntryWritten(object sender, System.Diagnostics.EntryWrittenEventArgs e)
{
// Respond to the entry written event. MessageBox.Show("The Application Generated an Event!" +
"\r\nType:\t\t" + e.Entry.EntryType.ToString() + "\r\nCategory:\t" + e.Entry.Category.ToString() + "\r\nEvent ID:\t\t" + e.Entry.EventID.ToString() + "\r\nSource:\t\t" + e.Entry.Source.ToString() + "\r\nMessage:\t\t" + e.Entry.Message.ToString() + "\r\nTime Created:\t" + e.Entry.TimeGenerated.ToString(),
"Application Event",
MessageBoxButtons.OK,
MessageBoxIcon.Information);
}
You could place such code in a Taskbar Tray (Notification Area) application, such as the Typing Buddy example in Chapter 5. The application will continuously monitor the event log in the background and let you know if something happens. This particular feature is even good for debugging, because many server-side controls only log errors in the event logs.
Note The Event Log entry created by dragging the event log from the Server Explorer will have a default configuration. The EnableRaisingEvents property will enable your application to detect changes to the log and notify you. However, this feature only works on the local machine. If you want to monitor events on a remote machine, your application will have to perform some form of polling or use a remote component that connects to your local application.
Working with Performance Counters
While event logs are an essential part of the Windows experience, monitoring them isn't so difficult that you'd want to spend a lot of time doing it. However, one type of monitoring that's a little more difficult involves the performance counters. Working with performance counters has been notoriously difficult in the past. Server Explorer makes it almost too simple to monitor all of the performance counters on your machine. Again, all you need to do is drag the counter of interest from Server Explorer to the application form. This example uses a DataSet to store the intermediate values and a DataGrid to show the values. A Timer provides the means for obtaining constant data updates. Listing 12.1 shows the code you'll need for this example (note that it doesn't include the report setup, which you can view in the source code on the CD).
Listing 12.1: Server Explorer Makes It Easy to Use Performance Counters
private void DataTimer_Elapsed(object sender, System.Timers.ElapsedEventArgs e)
{
DataTable CounterTable;
DataRow NewRow;
// Create the data table object.
CounterTable = CounterData.Tables["UserProcessorTime"];
//Create a new row for the data table. NewRow = CounterTable.NewRow();
//Obtain the current performance counter value. NewRow["Total Percent User Time"] =
UserProcessorTime.NextValue();
//Store the value in the data table. CounterTable.Rows.Add(NewRow);
//Verify the size of the data table and remove
//a record if necessary.
if (CounterTable.Rows.Count >= CounterDataView.VisibleRowCount) CounterTable.Rows.RemoveAt(0);
}
private void btnStopCounter_Click(object sender, System.EventArgs e)
{
//Start and stop the timer as needed. Change the
//caption to show the current timer state.
if (btnStopCounter.Text == "Stop Counter")
{
DataTimer.Stop();
btnStopCounter.Text = "Start Counter";
}
else
{
DataTimer.Start(); btnStopCounter.Text = "Stop Counter";
}
}
private void txtTimerInterval_TextChanged(object sender, System.EventArgs e)
{
try
{
// Verify the timer change value has a number in it. if (Int64.Parse(txtTimerInterval.Text) == 0)
// If not, reset the value.
txtTimerInterval.Text = DataTimer.Interval.ToString(); else
// If so, use the new value.
DataTimer.Interval = Int64.Parse(txtTimerInterval.Text);
}
catch
{
// Catch invalid values. MessageBox.Show("Type Only Numeric Values!",
"Input Error", MessageBoxButtons.OK, MessageBoxIcon.Error);
txtTimerInterval.Text = DataTimer.Interval.ToString();
}
}

Notice that most of the code in this part of the example relates to the presentation of data. For example, the txtTimerInterval_TextChanged() method modifies the display speed of the application, while the btnStopCounter_Click() method enables and disables the timer. Disabling the DataTimer has the effect of stopping the display so you can see the current data value, along with the value history.
The DataTimer_Elapsed() method contains the code that updates the display at the interval specified by DataTimer.Interval. CounterTable contains the entire data table used for the example. The NewRow() method of this object creates a new row represented by NewRow. The Item property, Total Percent User Time is a particular column within the table, and we'll fill it with the current processed value for the UserProcessorTime performance counter using the NextValue() method. The final step is to add the new row to the data table using the Add() method. Figure 12.2 shows an example of the output from this application.
Figure 12.2: The Server Explorer example shows how easy it is to use performance counters in C#.
One of the interesting things about this example is that this view isn't available using the System Monitor component of the Performance console. The Report View of the utility shows the current counter value, but doesn't provide any history. The Graph View and Histogram View might prove less than accurate for developer needs. So this report view with history fulfills a developer need. It enables you to capture precise counter values over a period of time in a way that helps you look for data patterns. The fact that the table automatically sizes itself
ensures that you won't end up with too much data in the table. Of course, you can always change the method used to delete excess records to meet specific needs.
Tip It's interesting to note that Visual Studio installs a number of .NET CLR–specific performance counters for you. For example, you have access to memory, network, and data-related counters to adjust the performance of your application. A special Interop object contains counters that measure the impact of external calls on application performance. Not only do these counters help you work on performance issues, but you can also use them to locate bugs or enable an application to tune itself. For example, you could monitor memory usage and get rid of non-essential features when application memory is low. In addition, a special Exceptions object contains counters that help you monitor application exceptions, including those that your application handles without any other visible signs.
Creating a SQL Server Database
The ADO programming example in this chapter will require use of a SQL Server 2000 database. Normally, you'd use the tools provided with SQL Server to create and manage your database. In some situations, you'll still need those tools, because they provide essential functions that the Visual Studio .NET IDE can't provide. However, in many cases, you can at least begin the design process and perform some testing without ever leaving the IDE. The following steps show how to create the database used for this example and for databases in general. (You'll find a script for creating this database in the \Chapter 12\Data folder on the CD. This folder also contains some exported data used for the example.)
1.Open Server Explorer, locate the server with SQL Server installed on it, open the SQL Servers folder, and open the SQL Server instance of interest. In most cases, you'll only see one. My server is named WinServer—your server will probably have a different name.
2.Right-click the SQL Server instance and choose New Database from the context menu. You'll see a Create Database dialog box.
3.Type a name in the New Database Name field. The example uses MovieGuide as the database name.
4.Choose between Windows NT integrated security and SQL Server authentication. The example uses SQL Server authentication with the sa username and appropriate password. (See the "Database Security in Focus" sidebar for some thoughts on which type of security to use.)
5.Click OK, and SQL Server will create a new database for you (which will appear in the Visual Studio .NET IDE). Now it's time to create a table for the database.
Tip If you click on the new MovieGuide entry, you'll notice that one of the properties in the Properties window is ConnectString. You can normally use this value as a starting point when configuring the ADO connection. Simply double-click the property and press Ctrl+C to copy it to the clipboard, then paste as needed in your application code.
6.Right-click Tables and choose New Table from the context menu. You'll see a blank table form similar to the one shown in Figure 12.3. (Note that this table is already filled out and ready for use.)

Figure 12.3: This form shows the table structure for the database in the ADO example.
7.Fill in the required table entries.
8.Save the table and close it. The example uses a table name of ExistingMovies. You're ready to create the ADO application.
This is obviously the short tour of working with Server Explorer to create a database. You'll also need to add indexes, primary keys, queries, and other entries to make a complete database. In fact, the example application does use the InventoryID column as the primary key and has indexes for the Name, LeadActor, LeadActress, Director, Producer, and DatePurchased columns. Of course, the database will require some data as well.
Tip To add a primary key to the table, Ctrl-click the columns you want to use for the primary key, right-click the table, and choose Set Primary key from the context menu. To add new indexes to the table, right-click the table and choose Indexes/Keys from the context menu. Use the Property Pages dialog to add new indexes to the table. Note that you'll have the same index creation tools as in SQL Server, but some of the dialog boxes may look slightly different.
The example does show what you can do without leaving the IDE. The most important consideration is that using Server Explorer saves time and effort by making the database creation and usage process easier.
Database Security in Focus
Database applications represent the most critical applications for most organizations. The data stored in the database is often worth more than anything the company might possess, including all of the computer equipment used to store that data. Needless to say, pressure to maintain the security of company data is high for the database developer, making the choice of security policies difficult at best. A developer must satisfy the security requirements of today, as well as anticipate the needs of tomorrow.
The decision of which type of security to use begins early in the SQL Server design process and is often difficult (or impossible) to change later. The innocuous question of whether to use Windows NT–integrated security or SQL Server authentication means more than many developers think, because this choice could mean the difference between a secure computing environment and one that crackers overcome quickly.
In general, you'll find that the Windows NT–integrated security option is better for distributed applications, because it offers single sign-on security and you have more options for implementing the security. However, the SQL Server authentication can actually work better for local applications where you want to provide a single sign-on for classes of users that differs from their standard logon. The use of groups in SQL Server transcends those groups that the user might ordinarily participate in.
The importance of flexible security implementation is becoming greater as more companies use alternatives to the standard username and password. For example, St. Vincent Hospital and Health Services in Indianapolis has begun a pilot program that depends on biometric authentication for enterprise users. Imagine you're a doctor making your rounds. Logging in at every terminal to learn patient statistics would become a painful experience, an ordeal that the use of biometric authentication overcomes (not to mention making the authentication process more secure). The hospital's authentication system relies on Saflink (http://www.saflink.com/), a product that can tie-in with Windows security but not directly to SQL Server authentication (at least not without a lot of work).
Microsoft is also making an effort to create better connectivity between third-party security products and the operating system. For example, Windows XP includes functionality that makes biometric security integration easier. DigitalPersona's (http://www.digitalpersona.com/) U.Are.U personal fingerprint system directly integrates with Windows XP security to create a seamless solution. Several organizations such as California Commerce Bank and Coca-Cola are already using this technology in their database development projects. Unfortunately, this is another solution where Windows-integrated security reigns supreme over SQL Server authentication.
Lest you think that you'll need to continue working in the dark on database security issues, the National Information Assurance Partnership (NIAP) (http://niap.nist.gov/) and many IT vendors are currently working on a set of common criteria for testing and evaluating security products—especially those used for databases. Members of the National Institute of Standards and Technology (NIST) and the National Security Agency (NSA) are taking the lead in NIAP. The current security standards include the Trusted Computer System Evaluation Criteria (TCSEC) introduced as the "Orange Book" in 1985, the Information Technology Security Evaluation Criteria (ITSEC) introduced in 1991, and the Canadian Trusted Computer Product Evaluation Criteria (CTCPEC) introduced in 1993. One of the major recent security events was the signing of an agreement between the US, Canada, France, Germany, and the United Kingdom that details a need for common security criteria. Hopefully, the wheels of government will begin turning swiftly enough that you as a developer will have some guidelines to use in the near future when developing applications.
An Overview of the ADO Classes
We've partially discussed the ADO classes as part of the discussion in Chapter 11. For example, in the "Understanding ADO" section, you learned about the basic object types used
by ADO. In addition, that section provided you with some basic information on how ADO makes data access easier. However, you also need to know about the mechanics of ADO access. For one thing, ADO is a COM technology, not a .NET Framework technology. Like OLE-DB, Microsoft provides wrappers for the various ADO classes. Unlike OLE-DB, you can't access ADO objects from the Toolbox; they're part of an import library.
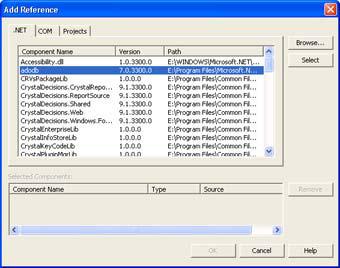
You'll find ADODB.DLL in the \Program Files\Microsoft.NET\Primary Interop Assemblies folder. You'll need to add a reference to this DLL in your application by right-clicking the References folder in Solution Explorer and choosing Add Reference from the context menu. The ADODB.DLL reference appears on the .NET tab of the Add Reference dialog box, as shown in Figure 12.4.
Figure 12.4: The .NET Framework provides an interoperability DLL you can use for ADO.
It's important to note that this isn't your only way to access ADO and that you might have to use another technique in the future. You can also use the Browse button on the COM tab to locate the type library (TLB) files found in the \Program Files\Common Files\System\ado folder. These TLB files contain everything you'll need to use ADO in an application. At some point, the TLB files found on your drive might provide better input than the .NET Framework files, so it's best to know how to use both access techniques.
Writing an ADO Application
This section of the chapter shows how to create a basic ADO application that relies on a detail form for display purposes. We'll create the connection and recordset by hand, and you'll see how using ADO differs from using other database technologies. The application includes the capability to add and delete records, as well as a print routine. By the time you complete the example, you'll have a good idea of why Microsoft sees ADO as a better technology for many database applications. You'll also understand why ADO isn't the best answer when you need complete control over the data management environment.
Note You'll find an OLE-DB test application for the MovieGuide table in the \Extras\DataFill folder on the CD. This application is an extra example that you can use for comparison purposes. It shows how to access a SQL Server database using OLE-DB, rather than the ADO methods used in this chapter. Make sure you view the README file in the folder
for additional details.
The following sections discuss the important differences between ADO and OLE-DB application development. This includes manipulating the data, moving between records, and some (but not all) printing issues. The full source code appears in the \Chapter 12\ADO folder on the CD.
Understanding Data Manipulation
Before you can manipulate application data, you need a recordset and a connection to the database. Developers use different techniques for gaining access to the data they require; but, in most cases, you'll find that creating a global connection and recordset is the easiest method of performing this task. In addition, this technique generally produces the most efficient code. The following code shows what you'll need to add to the MainForm() constructor to create the global database and print objects required for the example.
public MainForm()
{
//Required for Windows Form Designer support InitializeComponent();
//Initialize the database components.
//Open the database connection.
DBConnect = new Connection(); DBConnect.Open("Provider=SQLOLEDB;" +
"Data Source=WINSERVER;" + "Initial Catalog=MovieGuide", "sa",
"",
0);
// Create and open the recordset. DBRecordset = new Recordset();
DBRecordset.Open("Select * From ExistingMovies " + "Order By InventoryID", DBConnect, CursorTypeEnum.adOpenDynamic, LockTypeEnum.adLockOptimistic,
(int)ExecuteOptionEnum.adOptionUnspecified);
//Fill the dialog with data. DoFill();
//Initialize the print elements. PrnDialog = new PrintDialog(); PrnSettings = new PrinterSettings();
}
As you can see, the process of creating and using both DBConnect and DBRecordset is about the same. First, you instantiate the object, and then you use the Open() method to activate it.
Notice the three items supplied as the first argument to the DBConnect.Open() method. You must always supply a data provider, the data source (even for a local data source), and the catalog or database that you'll use. Some DBMS might require more information, but you'll never provide less than that. Notice that the example supplies a username and a blank

password. In this case, we don't require any of the optional parameters for the DBConnect.Open() method, so the final argument is a 0 (not a null as you might expect).
The DBRecordset.Open() method requires a query string of some type as the first entry. The example uses a SQL query, but you can also choose to use a table name or a stored procedure name for most DBMS. Notice that you must provide DBConnect or another connection as the second argument. One of the reasons to use ADO instead of ADO.NET is that you have full control over the type of cursor used to manage the record pointer. ADO.NET won't allow you to use server-side cursors, so you'll have to use ADO in this case. (See the "Comparing ADO to ADO.NET" section of Chapter 13 for more details about differences between ADO and ADO.NET.)
Note The execution option, the last argument in the DBRecordset.Open() method call, requires a typecast as shown here: (int)ExecuteOptionEnum.adOptionUnspecified. This is due to an error in the COM implementation of the ADO object. You're going to find that some methods won't compile unless you perform the typecast. The enumeration still works, but the method expects an integer value, rather than the enumeration as input.
Now that we have a connection and a recordset to use, there are four tasks that we need to perform: update, delete, add, and fill. Interestingly, this comes very close the same four functions provided by a data adapter (update, delete, insert, and select). In fact, you could substitute those terms if desired. Listing 12.2 shows the data manipulation source code for this example.
Listing 12.2: The Data Manipulation Methods for the ADO Example
private void DoFill()
{
//Create a list of fields to retrieve. Object []FieldArray =
new Object[] {0, 1, 2, 3, 4, 5, 6, 7, 8, 9, 10, 11, 12};
//Locate the current record.
Object Retrieved = DBRecordset.GetRows(1, 0, FieldArray);
//Getting the record moves the record pointer, so we need
//to move it back.
DBRecordset.MovePrevious();
// Convert the object into an array. Object [,]Data = new Object[13, 1]; Array.Copy((Array)Retrieved, Data, 13);
// Fill the text fields with data. txtInventoryID.Text = Data[0, 0].ToString(); txtName.Text = Data[1, 0].ToString(); txtRating.Text = Data[2, 0].ToString(); txtDescription.Text = Data[3, 0].ToString(); txtLeadActor.Text = Data[4, 0].ToString(); txtLeadActress.Text = Data[5, 0].ToString(); txtSupportingCast.Text = Data[6, 0].ToString(); txtDirector.Text = Data[7, 0].ToString(); txtProducer.Text = Data[8, 0].ToString(); txtNotes.Text = Data[9, 0].ToString(); txtDatePurchased.Text = Data[10, 0].ToString(); txtFormat.Text = Data[11, 0].ToString();