

Basic for PIC Microcontrollers (M. Nebojsa, 2001)
.PDFBasic for PIC Microcontrollers |
141 |
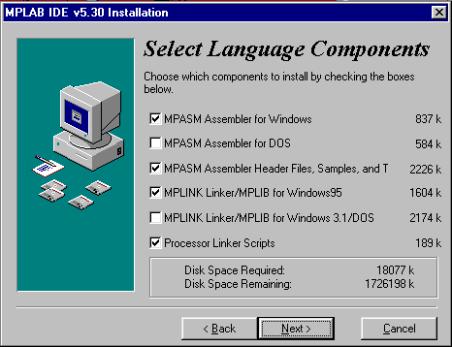
Selection of the components of the MPLAB development environment
The second supposition is that the OS will be Windows 95 (or some more recent version), so that in the selection of the assembler language is taken out everything that is connected to DOS operating system. However if you nevertheless wish to work in DOS, it is necessary to perform the deselecting of all the options connected with Windows, and choose the corresponding DOS components.
Basic for PIC Microcontrollers |
142 |
Selection of the assembler and OS
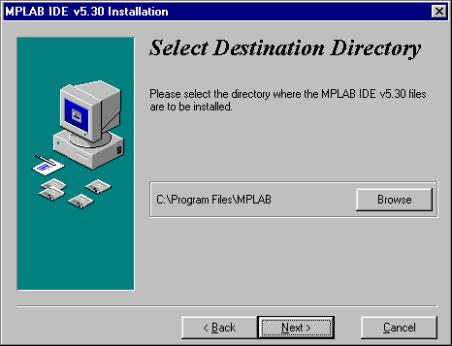
As it is normal for any program, MPLAB should be installed into a defined directory. This option can be changed into any directory on any hard disk of your PC. Unless you have some specific reason, it should be left on the selected location.
Basic for PIC Microcontrollers |
143 |
Selection of the directory for the MPLAB installation
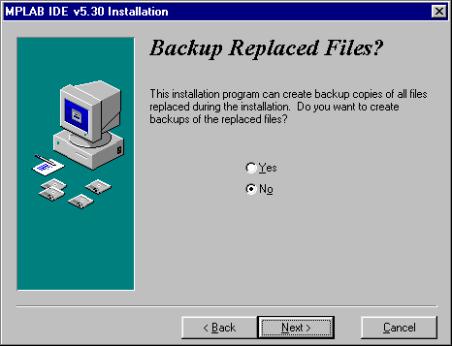
The next option is necessary for the users who already had some previous MPLAB version (different from one that is being installed). It's purpose is to save all the file copies that are subject to change upon the transition to an updated version. In our case the selection of NO assumes that the installation in course is the first one.
Basic for PIC Microcontrollers |
144 |
The option necessary to the users who install the new version of MPLAB over some already existing installation
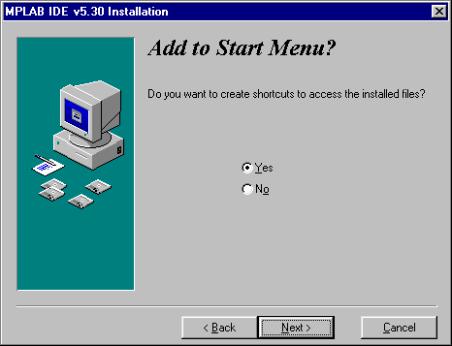
The start menu is the set of the pointers onto the programs opened by the click onto the START button in the lower left corner of the screen. It is necessary to leave this option exactly as it is offered, since MPLAB is going to be started from here.
Basic for PIC Microcontrollers |
145 |
Adding MPLAB into the START menu
Location mentioned next is related to the part of MPLAB which will not be explained here as it is insignificant for users. By selecting an apposite directory, MPLAB will keep all the files in connection with the linker in that directory.
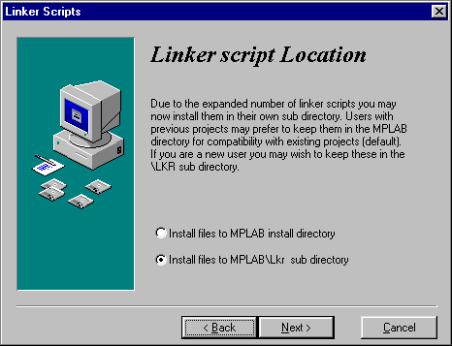
Basic for PIC Microcontrollers |
146 |
Selection of the directory for the linker files
Every Windows program has the system files, usually stored in the same directory as the Windows itself. After numerous installations, the Windows directory has a tendency of becoming too big and encumbered. Therefore, some of the programs permit their system files to be kept in the same directory as the program itself. MPLAB is one such program so tha t the option below should be selected.
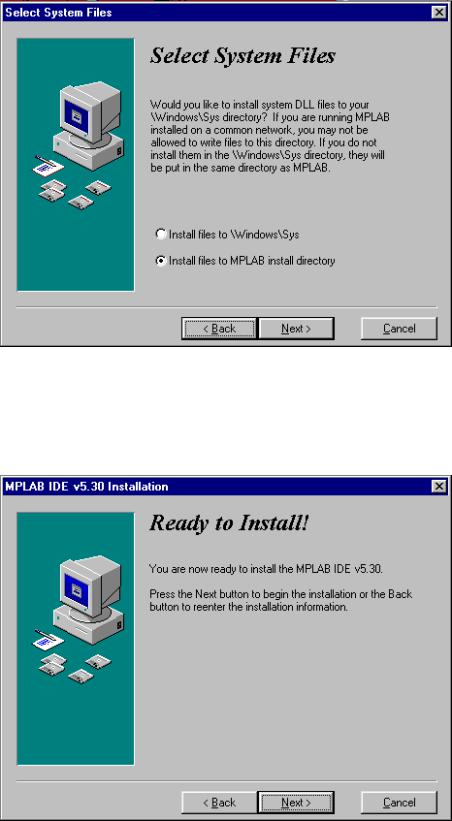
Basic for PIC Microcontrollers |
147 |
Selection of the system files directory
Following all steps up to now after pressing the button ‘Next’ the installation is under way
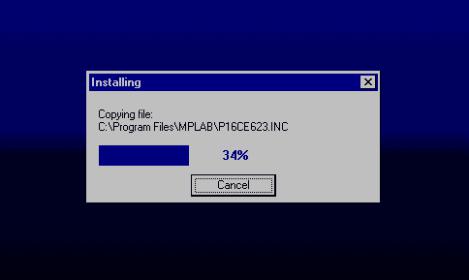
Basic for PIC Microcontrollers |
148 |
The screen exactly before the installation
The installation itself is brief and the course of the copying can be monitored on the small screen in the right corner.
The installation in course
When the installation is terminated, two dialog boxes are present on the screen – one for the last information concerning corrections and the version of the program, the other greeting one. If the text files (Readme.txt) are opened they should be closed.
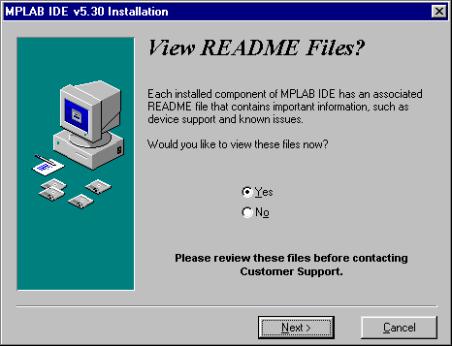
Basic for PIC Microcontrollers |
149 |
The last information concerning version and the corrections on the program
By clicking on the Finish button the installation of the program is thereby terminated.
A.2 Connection of PIC BASIC and MPLAB
To make work as easy as possible to those who already got used to the assembler’s compiler and MPLAB, Microchip has left the option of using, besides its proper, the compilers of the other manufacturers in its MPLAB development tool. Before starting to write a program, it is necessary to undertake some adjustments. Let's assume that, for example MPLAB is installed in directory: C:\ Program Files \ MPLAB and PIC BASIC Pro compiler in C:\ PBP.
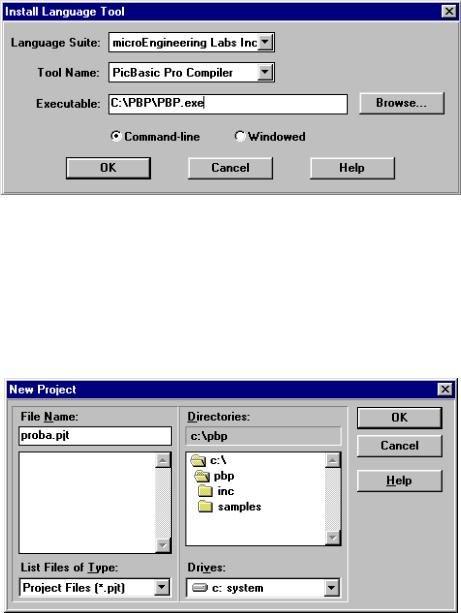
You just start the MPLAB and choose Install Language Tool from the Project menu. The dialog box where the corresponding options is to be set, the manufacturer first, (whereby directly in the next option comes the list of compilers by the same manufacturer) and accordingly the compiler itself – in our case Pic Basic Pro Compiler- and exactly as the one on the pict ure bellow will appear then. At the end on should click at the option “browse” and find PBP.EXE file on the disk (in this case C: PBP \). By clicking on OK the basic settings are completed.
Basic for PIC Microcontrollers |
150 |
Start MPLAB and choose the Install Language Toolfrom the Project menu.
Next step is the creation of the project that is done in a standard way by selecting New Project from the Project menu and by assigning the project name e.g. “probe.pjt”. A special care is to be given to the project storage location. The new project and all its components must be located in the same directory as PicBasic Pro! For this case, the project must be stored in C:/PBP.
Creating project by selecting New Project from Project menu and assigning the project name as, e.g. “probe.pjt”.
By clicking OK the new window Edit Project appears. In Language Tool “microEngeneering Labs” is to be selected (answer the incoming question with OK). It is, hence, necessary to click on ‘probe [.hex]’ in the lower part of the window whereby the option Node Properties is activated.