


Twitter Bootstrap Web Development How-To
There's more…
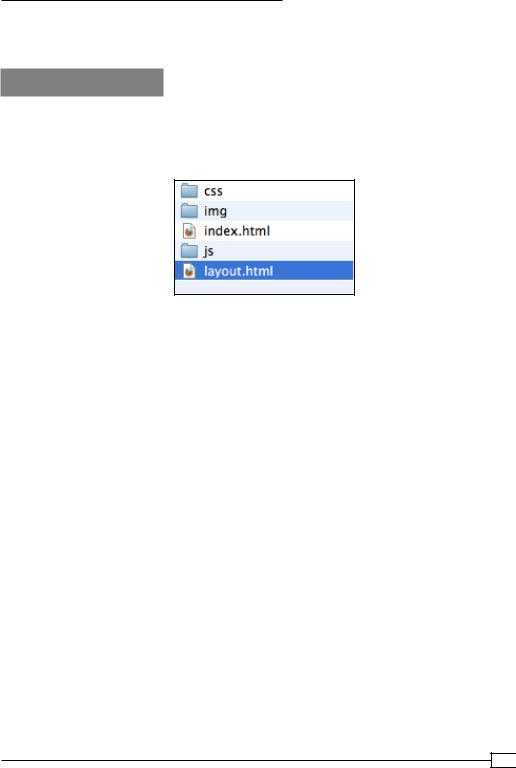
Of course, this is not the only way you could organize your files. Some developers prefer to place stylesheets, images, and JavaScript files all within a larger folder named assets or library. The organization method I've presented is recommended by the developers who contribute to the HTML5 Boilerplate. One advantage of this approach is that it reduces the length of the paths to our site assets.
Thus, whereas others might have a path to a background image such as this:
url('assets/img/bg.jpg');
In the organization scheme I've recommended it will be shorter:
url('img/bg.jpg');
This is not a big deal for a single line of code. However, when you consider that there will be many links to stylesheets, JavaScript files, and images running throughout your site files, when we reduce each path a few characters, this can add up. And in a world where speed matters, every bit counts. Shorter paths save characters, reduce file size, and help support faster
web browsing.
Headings, links, and buttons (Must know)
If you're familiar with HTML, you'll quickly be able to size up the sample content provided in our index.html (formerly hero.html). But there are a few Bootstrap-specific opportunities that I'll raise to your attention.
Getting ready
If you're new to HTML, then let me point you to some assistance. The excellent HTML tutorials and references at http://htmldog.com will help you get up to speed quickly. The HTML Beginner Tutorial will equip you with the baseline essentials, though I would encourage you to work through intermediate and advanced versions as well. Additionally, I would strongly encourage you to work through the corresponding CSS tutorials, as you'll gain a much better understanding of the fundamentals behind Twitter Bootstrap. Then come back and continue!
11 
www.it-ebooks.info
Twitter Bootstrap Web Development How-To
If you're familiar with HTML (or once you've tackled these tutorials), take a moment to note the headings and the class hero-unit. We'll do some further customization using our own headings.
With index.html opened in your editor, scroll down to approximately line 76, where you'll find the h1 heading, <h1>Hello, world!</h1>. Scrolling on down, you'll see a couple of h2 headings at lines 84, 89, and 94, roughly. (Note that the precise line numbers and some elements may change in future versions of Twitter Bootstrap.)
Observe that headings get considerably larger when nested inside the div of class hero-unit. Back up around the first h1 heading, you'll see the following tag structure:
<div class="hero-unit"> <h1>Hello, world!</h1> <p>This is a template ...</p>
...
</div>
The hero-unit class calls in Bootstrap CSS rules that scale up font sizes, creating
a welcome message that can't be missed. You'll note that things aren't too large outside the hero-unit in the headings and paragraphs below.
Now it's time to customize your own content!
How to do it…
1.Edit the h1 heading, and add a <small> tag within it. Edit the text to read as follows, adding small tags in the mix as follows:
<h1>Welcome to my site! <small>I think you'll like it.</small></ h1>
2.Save the file, then view it in your browser (and refresh the page if needed).
You'll see that Bootstrap styles the text between the small tags in a way that creates what we might call a pseudo-subheading.
When needed, you can provide similar <small> pseudo-subheadings within all headings, h2 through h6. (See bootstrap.css for styles for h1 small, and others.). This is one of the many small touches that makes Twitter Bootstrap so fun to use.
We can also turn links into buttons. Let's note how easy it is to turn a standard link into a button in Twitter Bootstrap.
 12
12
www.it-ebooks.info

Twitter Bootstrap Web Development How-To
1.Viewing index.html in your editor, scroll down below the comment, <!-- Example row of columns --> and look under the sample h2 heading and paragraph.
2.You'll find the following. Be sure to notice the class:
<p><a class="btn" href="#">View details »</a></p>
In your browser the result is a very respectable looking button!
The class "btn" does the magic! (If you'd like, search .btn in bootstrap.css to see the relevant styles.)
3.Experiment with these related button classes.
4.Now scroll back up index.html in your editor to find the sample link inside the div class hero-unit, and notice the classes used for this link:
<p><a class="btn btn-primary btn-large">Learn more »</a></p>
The btn-primary class gives this button its blue color, and btn-large increases its size. (Again, you may search to find the relevant lines of CSS in the bootstrap. css stylesheet.)
There are more pre-built sizes and colors available, which you should take a few minutes to experiment with. Available classes include the following:
ff Colors:
btn-primary
btn-info
btn-success
btn-warning
btn-danger
btn-inverse
ff Sizes:
btn-large
btn-smallbtn-mini
13 
www.it-ebooks.info

Twitter Bootstrap Web Development How-To
You can find these and other available styles documented in Twitter Bootstrap's documentation pages at http://twitter.github.com/bootstrap/base-css.
html#buttons.
How it works…
As you have begun to see, Twitter Bootstrap provides a number of handy styles to meet the needs of many frequently occurring circumstances—including some style options that you may not have considered before but that could be useful to you! If you've not read carefully through Twitter Bootstrap's online documentation, be sure to do so.
In addition, you will learn a great deal by opening the bootstrap.css file and reading through it yourself. Grab a cup of coffee, break the task into manageable chunks of time, and tackle a few lines. You'll become more familiar with how Twitter Bootstrap works. And if you run across something that's new to you, you can research it and build up your own knowledge base as a bonus.
There's more…
When you're ready, you can build your own customized color scheme using Twitter Bootstrap's excellent Customize page, found in their documentation at:
http://twitter.github.com/bootstrap/customize.html
Once there, you will see options to customize a number of things. If you'd like to focus primarily on the color scheme, scroll down to the appropriate section—Customize Variables. Update the color variables with your desired values, and click on the large Customize and Download button at the bottom to get your customized version of Bootstrap! Customization will be important, as it will help you to distinguish your site from the many other Bootstrap sites out there.
First things first, however. Before we start innovating, we need to get familiar with the fundamentals. Next up, we'll experiment with page layout using Twitter Bootstrap's excellent grid system.
Conquering the layout (Must know)
One of the persistent problems of web design is achieving an effective, cross-browser compatible layout. Over the years, some excellent frameworks have been developed to tackle this problem. Twitter Bootstrap features a variation on the popular 960 grid system (see it at http://960.gs/). By comparison, Bootstrap's grid system offers a simpler syntax. It is also responsive, so that the layout can adjust to devices of varying sizes, from desktop computers to tablets and handheld devices.
 14
14
www.it-ebooks.info
Twitter Bootstrap Web Development How-To
Soon we'll use this grid system to create a few new pages for our custom site. First, let's get familiar with the basic features of the Bootstrap grid system.
Getting ready
Let's begin by creating a page that we'll use as a "Layout Playground".
1.Create a copy of index.html, and name the new file layout.html.
(Make sure this new file is in the same folder as index.html.):
2.Open layout.html in your code editor.
3.Customize the content of the title tag, so that you may easily recognize this file when it's open in your browser. Make it read something similar to the following code.
(Note that I've used the pipe symbol, which you should find above the return orEnter key on your keyboard—Shift + \ (backslash). This is not absolutely necessary, however.)
<title>Layout Playground | My Bootstrap Site</title>
4.Also customize the content of the h1 heading, to read similarly. (You'll find this heading at approximately line 59, inside the div tag of the hero-unit class).
<!-- Main hero unit for a primary marketing message or call to action -->
<div class="hero-unit">
<h1>Layout Playground</h1>
15 
www.it-ebooks.info
Twitter Bootstrap Web Development How-To
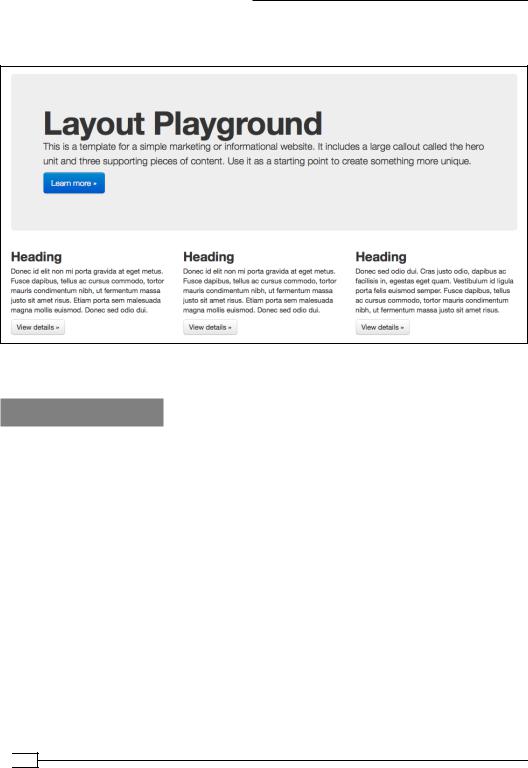
5.Open layout.html in your browser. You should see the content and layout, as shown in the following screenshot, in the area below the top navigation:
Your playground is ready! Time to start having some fun.
How to do it…
We won't experiment with every possibility right now. (Let's save some fun for future steps!) But we'll take a few minutes to experiment with some of the basic options for setting up rows with columns of varying widths.
1.In layout.html, find the comment which reads <!-- Example row of columns -->. (This should be at line 64, approximately.)
2.Beneath that, you'll find these lines:
<div class="row">
<div class="span4">
3.Scan on down, and you'll notice that there are two more div tags with class="span4". We're going to adjust these span classes to adjust the widths of these three columns.
4.Change the first span4 to span6, and the second and third to span3:
<div class="row"> <div class="span6">
...
<div class="span3">
 16
16
www.it-ebooks.info

Twitter Bootstrap Web Development How-To
...
<div class="span3">
...
5.Save the file and refresh your browser. The left column should grow wider, and the second and third columns should be narrower, as shown in the following screenshot:
6.Now let's make a new row and lay it out differently! In your editor, scan further down the file to the <hr> tag just before the <footer> tag. Above this, locate the last closing </div> tag. This is the end of the example row. Add a comment as follows:
</div><!-- end .row -->
7.Select the entire row and its contents (all lines including <!-- Example row of
columns --> through <!-- end .row -->).
8.Copy this content by either navigating to Edit | Copy, or pressing Ctrl + C (on a PC) or cmd + C (on a Mac).
9.Paste the new row just after the current one.
10.Change the span classes in the new row so that they read as follows:
<div class="row"> <div class="span2">
...
<div class="span4">
...
<div class="span6">
...
11.Remove roughly two-thirds of the paragraph text from the div class="span2".
17 
www.it-ebooks.info

Twitter Bootstrap Web Development How-To
12.Save the file. Refresh your browser, and you should see something very much like the following!
13.If your results are different, take a few minutes to review the previous steps and troubleshoot. For instance, you might double-check to make sure that you pasted your new row after the closing div tag for the original row.
</div><!-- end .row -->
<!-- Example row of columns --> <div class="row">
...
14.Now take a few minutes to experiment on your own, creating new rows, new columns, and experimenting with span values. Knock yourself out! If your results get out of whack, don't worry! This is a playground. You've got rubber flooring and padded equipment. No permanent damage will be done. Play around. We'll leave
the playground and do some serious work soon enough.
How it works…
Twitter Bootstrap uses a 12-column grid system. Thus, its span values run from 1 through 12. span12 is full-width, span8 is two-thirds, span6 is half width, and so on. The div class="row" is built to contain a row of columns. Each new row creates a new zone for laying out columns as desired. (If you're familiar with floats and clearfixes, the columns float left and the row includes a clearfix to ensure that the columns don't get tangled.)
There's a lot of power available in this system. We'll be leveraging some of that power in our next steps. But feel free to visit Twitter Bootstrap's documentation under the Scaffolding section to learn more:
 18
18
www.it-ebooks.info