

Beginning Visual Basic 2005 (2006)
.pdfChapter 19
How It Works
This time you have a new Address object added to the XML document. It is contained within the Addresses element, so you know that it is part of the same array.
The implementation was very simple — all you had to do was ask AddressBook to create a new address, and then you updated the CurrentAddressIndex property so that it equaled the number of items in the AddressBook. This had the effect of changing the display so that it went to record 2 of 2, ready for editing.
However, it is important that, before you actually do this, you save any changes that the user might have made. With this application, you are ensuring that any changes the user makes will always find themselves being persisted into the XML file. Whenever the user closes the application, creates a new record, or moves backward or forward in the list, you want to call UpdateCurrentAddress so that any changes will be saved:
Public Function AddNewAddress() As Address
‘ save the current address...
UpdateCurrentAddress()
After you’ve saved any changes, it is safe to create the new record and show the new record to the user:
‘ create a new address...
Dim newAddress As Address = AddressBook.AddAddress
‘ update the display...
CurrentAddressIndex = AddressBook.Items.Count
‘ return the new address...
Return newAddress
End Function
Navigating Addresses
Now that you can add new addresses to the address book, you need to wire up the Next and Previous buttons so that you can move through the list. In this Try It Out, you’ll be adding the code that will read the next or previous address from the array of addresses maintained by the AddressBook class. Before reading the next or previous address, however, you’ll also want to ensure that any updates made to the current address are updated, and you’ll be calling the appropriate procedures to update the current address before navigating to a new address.
Try It Out |
Navigating Addresses |
1.Open the Form Designer for Form1. Double-click the Next button to create a new Click handler. Add this code and the associated MoveNext method:
Private Sub btnNext_Click(ByVal sender As System.Object, _ ByVal e As System.EventArgs) Handles btnNext.Click MoveNext()
End Sub
Public Sub MoveNext()
‘ get the next index...
Dim newIndex As Integer = CurrentAddressIndex + 1 If newIndex > AddressBook.Items.Count Then
newIndex = 1
636

Visual Basic 2005 and XML
End If
‘save any changes...
UpdateCurrentAddress()
‘move the record...
CurrentAddressIndex = newIndex
End Sub
2.Next, flip back to the Form Designer and double-click the Previous button. Add the highlighted code:
Private Sub btnPrevious_Click(ByVal sender As System.Object, _ ByVal e As System.EventArgs) Handles btnPrevious.Click MovePrevious()
End Sub
Public Sub MovePrevious()
‘ get the previous index...
Dim newIndex As Integer = CurrentAddressIndex - 1 If newIndex = 0 Then
newIndex = AddressBook.Items.Count End If
‘save changes...
UpdateCurrentAddress()
‘move the record...
CurrentAddressIndex = newIndex
End Sub
3.Run the project. You should now be able to move between addresses.
How It Works
All you’ve done here is wire up the buttons so that each one changes the current index. By incrementing the current index, you move forward in the list. By decrementing it, you move backward.
However, it’s very important that you don’t move outside the bounds of the list (in other words, try to move to a position before the first record or to a position after the last record), which is why you check the value and adjust it as appropriate. When you move forward (MoveNext), you flip to the beginning of the list if you go off the end. When you move backward (MovePrevious), you flip to the end if you go off the start.
In both cases, you make sure that before you actually change the CurrentAddressIndex property, you call UpdateCurrentAddress to save any changes:
Public Sub MoveNext()
‘ get the next index...
Dim newIndex As Integer = CurrentAddressIndex + 1 If newIndex > AddressBook.Items.Count Then
newIndex = 1 End If
‘save any changes...
UpdateCurrentAddress()
‘move the record...
CurrentAddressIndex = newIndex
End Sub
637

Chapter 19
Deleting Addresses
To finish the functionality of your address book, you’ll deal with deleting items. When deleting items, you must take into account that the item you are deleting is the last remaining item. In this case, you’ll have to provide the appropriate code to add a new blank address. This Try It Out will provide this and all necessary functionality to delete an address properly.
Try It Out |
Deleting Addresses |
1.Go back to the Form Designer for Form1 and double-click the Delete button. Add this code to the event handler, and also add the DeleteAddress method:
Private Sub btnDelete_Click(ByVal sender As System.Object, _ ByVal e As System.EventArgs) Handles btnDelete.Click
‘ ask the user if they are ok with this?
If MsgBox (“Are you sure you want to delete this address?”, _ MsgBoxStyle.Question Or MsgBoxStyle.YesNo) = _
MsgBoxResult.Yes Then DeleteAddress(CurrentAddressIndex)
End If End Sub
‘ DeleteAddress - delete an address from the list...
Public Sub DeleteAddress(ByVal index As Integer)
‘delete the item from the list...
AddressBook.Items.RemoveAt(index - 1)
‘was that the last address?
If AddressBook.Items.Count = 0 Then ‘ add a new address? AddressBook.AddAddress()
Else
‘ make sure you have something to show...
If index > AddressBook.Items.Count Then index = AddressBook.Items.Count
End If End If
‘ display the record...
CurrentAddressIndex = index End Sub
2.Run the project. You should be able to delete records from the address book. Note that if you delete the last record, a new record will automatically be created.
How It Works
The algorithm you’ve used here to delete the records is an example of how to solve another classic programming problem.
Your application is set up so that it always has to display a record. That’s why, when the program is first run and there is no AddressBook.xml, you automatically create a new record. Likewise, when an item is deleted from the address book, you have to find something to present to the user.
To physically delete an address from the disk, you use the RemoveAt method on the ArrayList that holds the Address objects.
638

Visual Basic 2005 and XML
‘ DeleteAddress - delete an address from the list...
Public Sub DeleteAddress(ByVal index As Integer)
‘ delete the item from the list...
AddressBook.Items.RemoveAt(index - 1)
Again, notice here that, because you’re working with a zero-based array, when you ask to delete the address with an index of 3, you actually have to delete the address at position 2 in the array.
The problems start after you’ve done that. It could be that you’ve deleted the one remaining address in the book. In this case, because you always have to display an address, you create a new one:
‘ was that the last address?
If AddressBook.Items.Count = 0 Then ‘ add a new address? AddressBook.AddAddress()
Alternatively, if there are items in the address book, you have to change the display. In some cases, the value that’s currently stored in CurrentAddressIndex will be valid. For example, if you had five records and are looking at the third one, _currentAddressIndex will be 3. If you delete that record, you have four records, but the third one as reported by _currentAddressIndex will still be 3 and will still be valid. However, as 4 has now shuffled into 3’s place, you need to update the display.
It could be the case that you’ve deleted the last item in the list. When this happens, the index isn’t valid, because the index would be positioned over the end of the list. (Suppose you have four items in the list; delete the fourth one, and you only have three, but _currentAddressIndex would be 4, which isn’t valid.) So, when the last item is deleted, the index will be over the end of the list, so you set it to be the last item in the list:
Else
‘ make sure you have something to show...
If index > AddressBook.Items.Count Then
index = AddressBook.Items.Count
End If
End If
Whatever actually happens, you still need to update the display. As you know, the CurrentAddressIndex property can do this for you:
‘ display the record...
CurrentAddressIndex = index End Sub
Testing at the Edges
This brings us on to a programming technique that can greatly help you test your applications. When writing software, things usually go wrong at the “edge”. For example, you have a function that takes an integer value, but in order for the method to work properly, the value supplied must lie between 0 and 99.
Once you’re satisfied that your algorithm works properly when you give it a valid value, test some values at the “edge” of the problem (in other words, at the boundaries of the valid data). For example: _1, 0, 99, and 100. In most cases, if your method works properly for one or two of the possible valid values, it
639

Chapter 19
will work properly for the entire set of valid values. Testing a few values at the edge will show you where potential problems with the method lie.
A classic example of this is with your MoveNext and MovePrevious methods. If you had a hundred addresses in your address book and only tested that MoveNext and MovePrevious worked between numbers 10 and 20, it most likely would have worked between 1 and 100. However, the moment you move past 100 (in other words “go over the edge”), problems can occur. If you hadn’t handled this case properly by flipping back to 1, your program would have crashed.
Integrating with the Address Book
Application
So far, you’ve built an application that is able to save and load its data as an XML document. You’ve also taken a look at the document as it’s been changing over the course of the chapter, so by now you should have a pretty good idea of what an XML document looks like and how it works.
The beginning of this chapter pitched XML as a technology for integrating software applications. It then went on to say that for newcomers to Visual Basic, using XML for integration is unlikely to be something that you would do on a day-to-day basis, and so you’ve been using XML to store data. In the rest of this chapter, we’re going to demonstrate why XML is such a good technology for integration. What you’ll do is build a separate application that, with very little work, is able to read in and understand the proprietary data format that you’ve used in AddressBook.xml.
Using XML is an advanced topic, so, if you would like to learn more about the technology and its application, try the following books:
Beginning XML, 2nd Edition (ISBN 1-86100-559-8)
Visual Basic .NET and XML: Harness the Power of XML in VB.NET Applications (ISBN 0-471-26509-8)
Demonstrating the Principle of Integration
Before you build the application that can integrate with your address book application, you should try to understand the principles involved. Basically, XML documents are good for integration because they can be easily read, understood, and changed by other people. Old-school file formats require detailed documentation to understand and often don’t “evolve” well — that is, when new versions of the format are released, software that worked with the old formats often breaks.
XML documents are typically easily understood. Imagine you’d never seen or heard of your address book before, and look at this XML document:
<Addresses>
<Address>
<FirstName>Bryan</FirstName>
<LastName>Newsome</LastName>
<CompanyName>Wiley</CompanyName> <Address1>123 Main St</Address1>
640

Visual Basic 2005 and XML
<Address2 /> <City>Big City</City> <Region>SE</Region>
<PostalCode>28222</PostalCode>
<Country>USA</Country>
<Email>Bryan@email.com</Email>
</Address>
</Addresses>
Common sense tells you what this document represents. You can also perceive how the program that generated it uses it. In addition, you can use the various tools in .NET to load, manipulate, and work with this document. To an extent, you still need to work with the people that designed the structure of the document, especially when more esoteric elements come into play, but you can use this document to some meaningful effect without too much stress.
Providing you know what structure the document takes, you can build your own document or add new things to it. For example, if you know that the Addresses element contains a list of Address elements, and that each Address element contains a bunch of elements that describe the address, you can add your own Address element using your own application.
To see this happening, you can open the AddressBook.xml file in Notepad. You need to copy the last Address element (complete with the contents) to the bottom of the document, but make sure it remains inside the Addresses element. Change the address data to something else. Here’s mine:
<?xml version=”1.0” encoding=”utf-8”?>
<AddressBook xmlns:xsi=”http://www.w3.org/2001/XMLSchema-instance” xmlns:xsd=”http://www.w3.org/2001/XMLSchema”>
<Addresses>
<Address>
<FirstName>Bryan</FirstName>
<LastName>Newsome</LastName>
<CompanyName>Wiley</CompanyName> <Address1>123 Main St</Address1> <Address2 />
<City>Big City</City> <Region>SE</Region> <PostalCode>28222</PostalCode> <Country>USA</Country> <Email>Bryan@email.com</Email>
</Address>
<Address>
<FirstName>Jennifer</FirstName>
<LastName>Newsome</LastName> <CompanyName />
<Address1>123 Main St</Address1> <Address2 />
<City>Big City</City> <Region>SE</Region> <PostalCode>28222</PostalCode> <Country>USA</Country>
<Email /> </Address> </Addresses> </AddressBook>
641
Chapter 19
Finally, if you save the file and run the address book application, you should find that you have two addresses and that the last one is the new one that you added. What this shows is that, providing you understand the format of the XML that the application uses, you can manipulate the document and gain some level of integration.
Reading the Address Book from Another Application
To further the illustration, what you’ll do in the next Try It Out is build a completely separate application from Address Book that’s able to load in the XML file that Address Book uses and do something useful with it. Specifically, you’ll extract all of the addresses in the file and display a list of names together with their matching e-mail addresses.
Try It Out |
Reading Address Book Data |
1.Create a new Visual Basic .NET Windows Application project. Call it Address List.
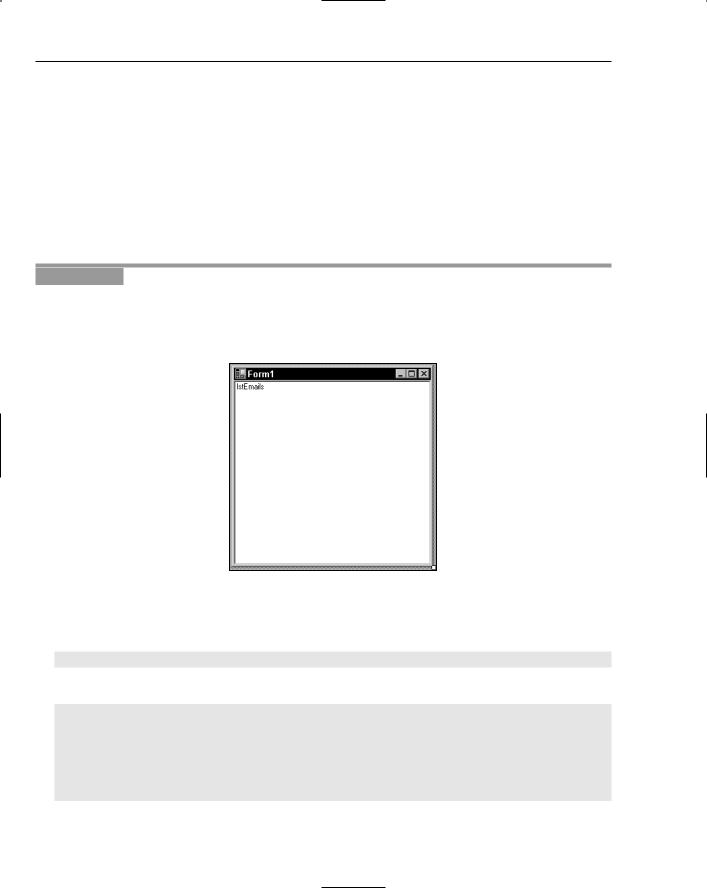
2.On Form1, draw a ListBox control. Change its IntegralHeight property to False, its Dock property to Fill, and its Name to lstEmails, as shown in Figure 19-7.
Figure 19-7
3.Double-click the form’s title bar. Add this code to the Load event handler. Remember to add a reference to System.Xml.dll this namespace declaration:
Imports System.Xml
Public Class Form1
Private Sub Form1_Load(ByVal sender As System.Object, _
ByVal e As System.EventArgs) Handles MyBase.Load
‘where do we want to get the XML from...
Dim filename As String = _
“C:\Documents and Settings\Administrator\My Documents\Visual Studio 2005\Projects\Address Book\Address Book\bin\Debug\AddressBook.xml”
‘open the document...
Dim reader As New XmlTextReader(filename)
‘ move to the start of the document...
642

Visual Basic 2005 and XML
reader.MoveToContent()
‘ start working through the document...
Dim addressData As Collection = Nothing Dim elementName As String = Nothing
Do While reader.Read
‘ what kind of node to we have? Select Case reader.NodeType
‘ is it the start of an element? Case XmlNodeType.Element
‘ if it’s an element start, is it “Address”? If reader.Name = “Address” Then
‘ if so, create a new collection...
addressData = New Collection()
Else
‘ if not, record the name of the element...
elementName = reader.Name End If
‘if we have some text, try storing it in the
‘collection...
Case XmlNodeType.Text
‘ do we have an address?
If Not addressData Is Nothing Then addressData.Add(reader.Value, elementName)
End If
‘ is it the end of an element? Case XmlNodeType.EndElement
‘ if it is, we should have an entire address stored...
If reader.Name = “Address” Then
‘ try to create a new listview item...
Dim item As String = Nothing Try
item = addressData(“firstname”) & _ “ “ & addressData(“lastname”)
item &= “ (“ & addressData(“email”) & “)” Catch
End Try
‘add the item to the list...
lstEmails.Items.Add(item)
‘reset...
addressData = Nothing End If
End Select
Loop End Sub
We’ve assumed in this code listing that your AddressBook.xml will be in C:\Documents and Settings\Administrator\My Documents\Visual Studio 2005\Projects\Address Book\Address Book\bin\Debug. If yours isn’t, change the filename value specified at the top of the code.
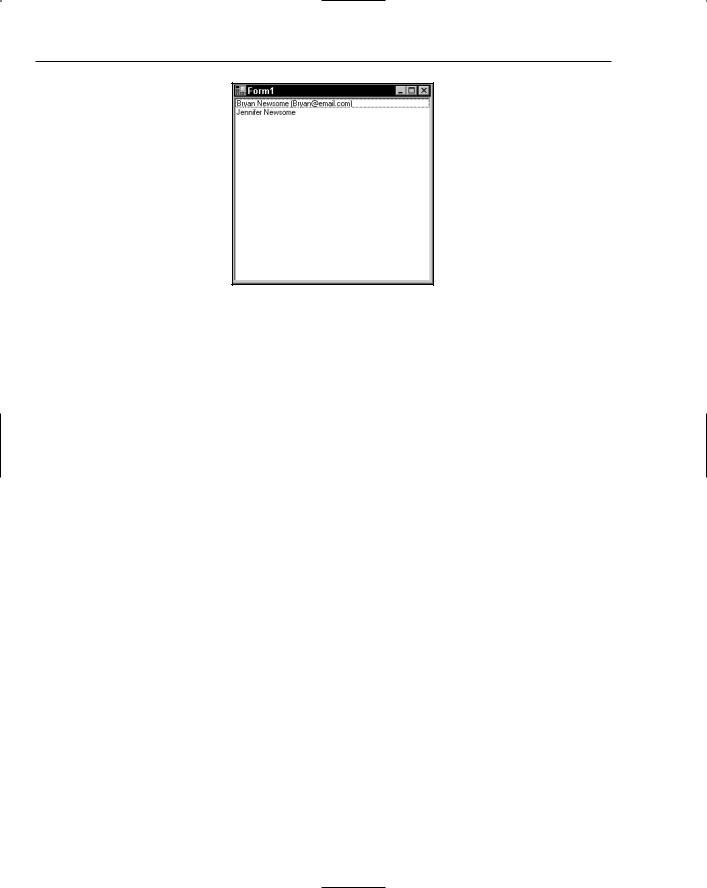
4.Run the project; you should see something like what is shown in Figure 19-8. Notice that addresses that don’t have an e-mail address display without problems, as the Email element in your XML file contains an empty string value instead of a null value as is typically found in databases.
643
Chapter 19
Figure 19-8
How It Works
To fully appreciate the benefit of this exercise (and therefore the benefit of XML), imagine that before writing the application you’d never seen the XML format used by the Address Book application. Since XML is a text-based format, you’re able to open it in a normal text editor, read it, and make assumptions about how it works. You know that you want to get a list of names and e-mail addresses, and you understand that you have an array of Address elements, each one containing the three elements you need: FirstName, LastName, and Email. All that remains is to extract and present the information.
Since announcing .NET, Microsoft has a made a big play about how it is built on XML. This shows in the
.NET Framework support for XML — there is a dazzling array of classes for reading and writing XML documents. The XmlSerializer object that you’ve been using up until now is by far the easiest one to use, but it relies on your having classes that match the document structure exactly. Therefore, if you are given a document from a business partner, you won’t have a set of classes that matches the document. As a result, you need some other way to read the document and fit it into whatever classes you do have.
In your Address List project, you don’t have applicable AddressBook or Address classes, so you had to use some classes to “walk” through a file. The one you’re using is System.Xml.XmlTextReader. This class provides a “pointer” that starts at the top of the document and, on command, moves to the next part of the document. (Each of these parts is called a node.) The pointer will stop at anything, and this includes start tags, end tags, data values, and white space.
So, when you start walking, the first thing XmlTextReader will tell you about is this node:
<?xml version=”1.0” encoding=”utf-8”?>
When you ask it to move on, it will tell you about this node:
<AddressBook xmlns:xsi=”http://www.w3.org/2001/XMLSchema-instance” xmlns:xsd=”http://www.w3.org/2001/XMLSchema”>
Then, when you ask it to move on again, it will tell you about this node:
<Addresses>
644

Visual Basic 2005 and XML
Then it will tell you about <Address>, <FirstName>, Bryan, </FirstName>, and <LastName>, and so on until it gets to the end of the document. In between each one of these, you may or may not get told about white space nodes. By and large, you can ignore these.
What your algorithm has to do, then, is get hold of an XmlTextReader and start moving through the document one piece at a time. When you first start, the pointer will be set ahead of the first node in the document. Each call to Read moves the pointer along one node, so the first call to Read that you see at the start of the Do . . . While loop actually sets the pointer to the first node:
Private Sub Form1_Load(ByVal sender As System.Object, _ ByVal e As System.EventArgs) Handles MyBase.Load
‘ where do you want to get the XML from...
Dim filename As String = _
“C:\Documents and Settings\Administrator\My Documents\” & _ “Visual Studio\Projects\Address Book\Address Book\bin\Debug\” & _ “AddressBook.xml”
‘ open the document...
Dim reader As New XmlTextReader(filename)
‘move to the start of the document...
reader.MoveToContent()
‘start working through the document...
Dim addressData As Collection, elementName As String
Do While reader.Read
You can use the NodeType property of XmlTextReader to find out what kind of node you’re looking at. If you have an Element node, this maps directly onto a start tag in the document. You can use the Name property to get the name of the tag. When you find the <Address> start tag, you create a new collection called addressData. If the start tag that you’re looking at isn’t the <Address> tag, you store the name in elementName for later use:
‘ what kind of node to we have? Select Case reader.NodeType
‘ is it the start of an element? Case XmlNodeType.Element
‘ if it’s an element start, is it “Address”? If reader.Name = “Address” Then
‘ if so, create a new collection...
addressData = New Collection()
Else
‘ if not, record the name of the element...
elementName = reader.Name End If
Alternatively, the node you get might be a lump of text. If this is the case, you check to see whether addressData points to a Collection object. If it does, you know that you are inside an Address element. Remember, you’ve also stored the name of the element that you are looking at inside elementName. This means that if elementName is set to FirstName, you know you’re in the FirstName element, and therefore the text element you’re looking at must be the first name in the address. You then add this element name and the value into the collection for later use:
‘if we have some text, try storing it in the
‘collection...
645