


Chapter 5 - MPLAB
5.4 Designing a project
In order to start writing a program you need to create a project first. By clicking on PROJECT --> NEW PROJECT you are able to name your project and store it in a directory of your choice. In the picture below, a project named 'proba.pjt' is being created and stored in c:\PIC\PROJEKTI\ directory.
This directory is chosen because authors had such directory set up of on their computer. Generally speaking, directory with files is usually placed in a larger directory whose name is unmistakably associated with its contents.
Opening a new project
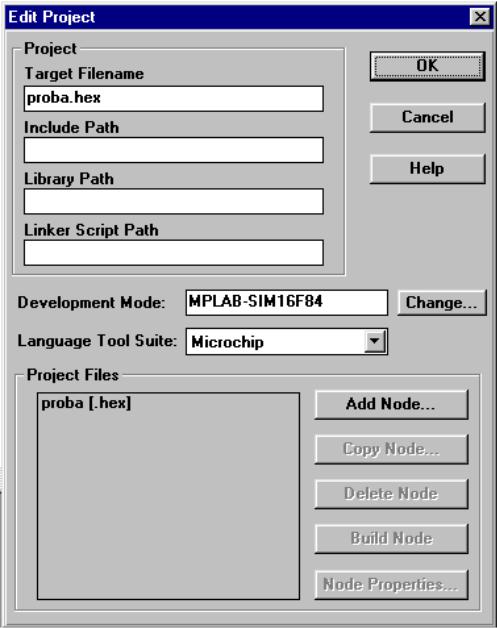
After naming the project, click on OK. New window comes up as in the next picture.
http://www.mikroelektronika.co.yu/english/books/5_04Poglavlje.htm (1 of 6) [30/12/2001 16:54:07]
Chapter 5 - MPLAB
Adjusting project elements
Using a mouse click on "proba [.hex]" which activates 'Node properties' option in the bottom right corner of a window. By clicking on it you get the following window.
http://www.mikroelektronika.co.yu/english/books/5_04Poglavlje.htm (2 of 6) [30/12/2001 16:54:07]
Chapter 5 - MPLAB
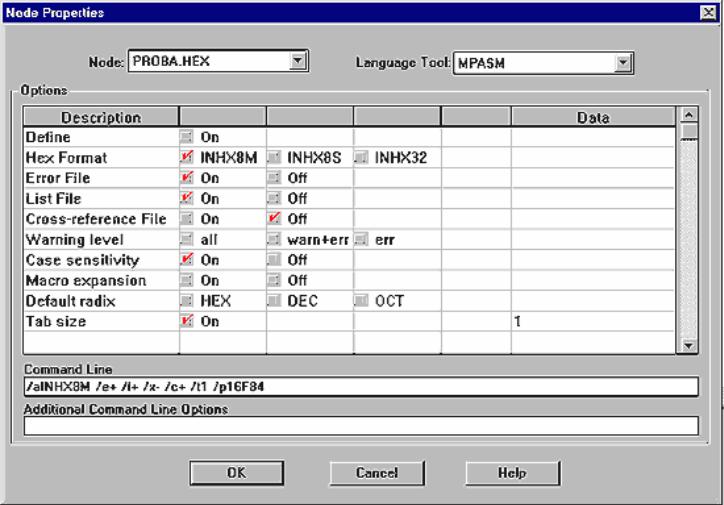
Defining parameters of MPASM assembler
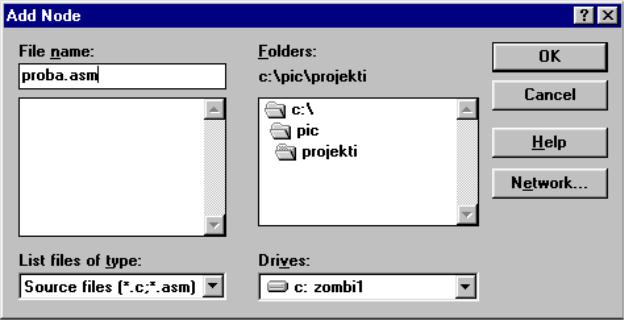
From the picture we see that there are many different parameters. Each kind corresponds to one parameter in "Command line" term. As memorizing these parameters is very uncomfortable, even forbidding for beginners, graphic adjustment has been introduced. From the picture we see which options need to be turned on. By clicking on OK we go back to previous window where "Add node" is an active option. By clicking on it we get the following window where we name our assembler program. Let's name it "Proba.asm" since this is our first program in MPLAB.
http://www.mikroelektronika.co.yu/english/books/5_04Poglavlje.htm (3 of 6) [30/12/2001 16:54:07]
Chapter 5 - MPLAB
Opening a new project
By clicking on OK we go back to the starting window where we see added an assembler file.
http://www.mikroelektronika.co.yu/english/books/5_04Poglavlje.htm (4 of 6) [30/12/2001 16:54:07]

Chapter 5 - MPLAB
Assembler file added
By clicking on OK we return to MPLAB environment.
http://www.mikroelektronika.co.yu/english/books/5_04Poglavlje.htm (5 of 6) [30/12/2001 16:54:07]
Chapter 5 - MPLAB
© Copyright 1999. mikroElektronika. All Rights Reserved. For any comments contact webmaster.
http://www.mikroelektronika.co.yu/english/books/5_04Poglavlje.htm (6 of 6) [30/12/2001 16:54:07]