СУБД Oracle / Литература / PowerDesigner 9 / GeneralFeatures
.pdf&KDSWHU 0RGHO *UDSKLFV
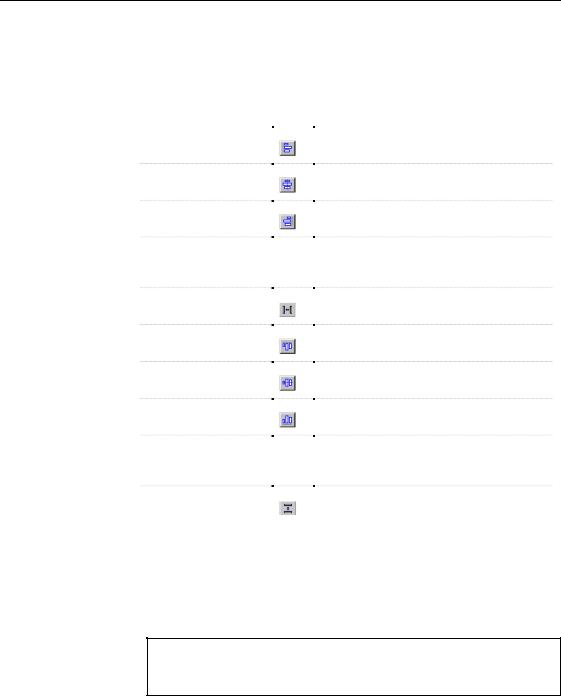
The following shape types are available for selection:
7\SH |
'HVFULSWLRQ |
7RRO |
)RUPDW |
|
Predefined |
Default shape assigned to |
PowerDesigner |
— |
|
symbol |
symbols in PowerDesigner |
|
|
|
Metafile |
Representation using |
Draw editors |
EMF, WMF |
|
|
geometrical formulas allowing |
PowerDesigner |
|
|
|
for resizing and stretching |
|
|
|
Bitmap |
Representation of a graphics |
Paint editors |
DIB, RLE, |
|
|
image consisting of rows and |
|
JPG, JPEG, |
|
|
columns of dots |
|
TIF, TIFF |
|
Icon |
Small picture representing an |
Icon editors |
ICO |
|
|
object, usually smaller than |
|
|
|
|
standard PowerDesigner |
|
|
|
|
symbols |
|
|
|
|
|
|
|
Custom shape |
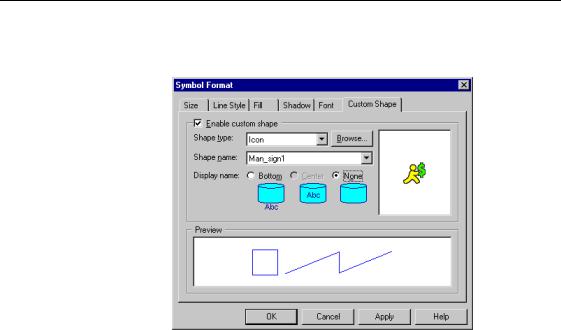
When you define a custom shape for a selected symbol, you have to define |
||
parameters |
the following parameters: |
||
|
3DUDPHWHU |
|
'HVFULSWLRQ |
|
|
||
|
Enable custom shape |
|
Enables or disables the customization of a symbol |
|
|
|
shape |
|
Shape Type |
|
Used to select a symbol shape, the available types are |
|
|
||
|
|
|
predefined symbol, bitmap, metafile and icon |
|
Shape Name |
|
Dropdown listbox automatically filled with available |
|
|
||
|
|
|
shapes of the type selected in the Shape Type box. You |
|
|
|
can use the Browse button to select shapes |
|
Display name |
|
Allows you to define where the symbol name should |
|
|
||
|
|
|
appear (Center option is not available for icon shapes) |
|
|
|
|
ϖ7R FXVWRPL]H WKH VKDSH RI D V\PERO
1 Select a symbol in the diagram.
2 Select Symbol→Format to display the Symbol Format dialog box. 3 Click the Custom Shape tab to display the Custom Shape page.
4 Select the Enable Custom Shape check box.
5 Select a type in the Shape Type dropdown listbox.
6 Select a name in the Shape Name dropdown listbox or click the Browse button to browse to the directory where the shapes are stored.
General Features Guide |
|

&KDSWHU 0RGHO *UDSKLFV
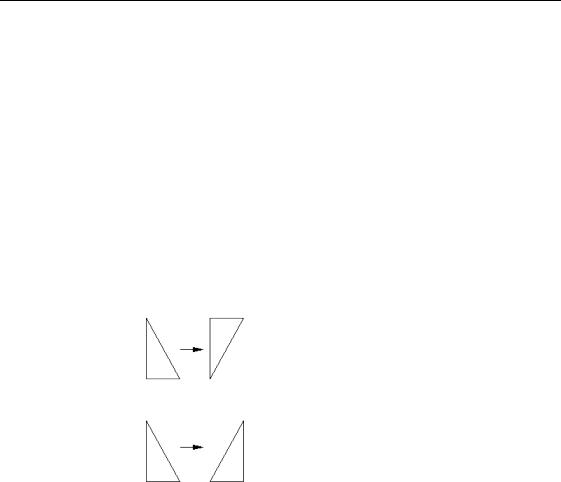
9Drag and drop the handle.
The angle takes on the indicated style.
6WUDLJKWHQLQJ D OLQH
You can straighten any line that has one or more angles.
ϖ7R VWUDLJKWHQ D OLQH
1Click a line that has angles. Handles appear on the line.
2Press the CTRL key while you click a handle. The handle and its angle disappear.
'UDJJLQJ D OLQN V\PERO IURP RQH REMHFW WR DQRWKHU
You can drag a link symbol from one object to another.
ϖ7R GUDJ D OLQN V\PERO WR DQRWKHU REMHFW
1 Click a link symbol in the diagram.
2 Press CTRL while you drag one of its attach points to a different object.
$GGLQJ DQG UHPRYLQJ VKDGRZ
You can use standard shadow, 3D effect, or gradient with the following selection of symbols:
♦Add shadow, 3D effect, or gradient to all selected symbols
♦Remove shadow, 3D effect, or gradient from selected symbols
♦Add shadow, 3D effect, or gradient to all new symbols
For example, in the following model, the Member table has a 3D effect and the Team table has a shadow.
General Features Guide |
|
&KDSWHU 0RGHO *UDSKLFV
ϖ7R VL]H D V\PERO
1 Select a symbol.
2 Drag and drop any symbol handle to the size of an area to be filled by the selected symbols.
ϖ7R VL]H DOO V\PEROV
1 Click the Grabber tool in the Palette to select all symbols in the diagram.
2 Drag and drop any handle surrounding the symbols to the size of an area to be filled by the selected symbols.
8QVHOHFWHG V\PEROV LQ ODVVR DUHD
If you first select symbols then select the lasso tool, eight handles mark the larger area that contains the selected symbols. By dragging these handles, you resize only the symbols previously selected. You do not necessarily resize all symbols in the lasso area.
$SSO\LQJ VL]H SUHIHUHQFHV WR D V\PERO
When you define size preferences for height and width of symbols, these preferences apply to new symbols only. You can apply size preferences to existing symbols or to symbols that you have resized.
For more information on how to define size preferences, see the section Selecting format display preferences.
ϖ7R DSSO\ VL]H SUHIHUHQFHV WR D V\PERO
1 Select one or more symbols.
2 Select Symbol→Normal Size.
The selected symbol is resized according to the size display preferences.
$GMXVWLQJ D V\PERO VL]H WR WH[W
Adjusting symbols to text resizes symbols so that they display all the text they contain. For example, a rectangle adjusts its size to fit closely around its text. A table symbol adjusts its size to display full column names, or column codes, up to the truncation or word wrap length. You can define default adjustment to all symbols.
General Features Guide |
|


&KDSWHU 0RGHO *UDSKLFV
Ungrouping symbols returns them to their original, individually selectable state.
ϖ7R JURXS V\PEROV
1 Select one or more symbols.
2 Select Symbol→Group.
ϖ7R XQJURXS V\PEROV
1 Select a group of symbols.
2 Select Symbol→Ungroup.
3URWHFWLQJ DQG XQSURWHFWLQJ V\PEROV
If you protect a symbol, you cannot select or modify it. Unprotecting symbols returns all symbols in the model to their original, modifiable state.
ϖ7R SURWHFW V\PEROV
1 Select one or more symbols.
2 Select Symbol→Protect Symbols.
ϖ7R XQSURWHFW DOO V\PEROV
♦ Select Symbol→Unprotect Symbols.
General Features Guide |
|


&KDSWHU 0RGHO *UDSKLFV
5 Click OK.
$XWR OD\RXW
The auto-layout function automatically rearranges symbols in a diagram. The symbols are arranged in horizontal rows from left to right, according to the way they are currently positioned in the diagram.
You can rearrange selected symbols or all symbols in the diagram.
ϖ7R DUUDQJH DXWRPDWLFDOO\ VHOHFWHG V\PEROV
1 Select one or more symbols.
2 Select Symbol→Auto-Layout.
The symbols are arranged horizontally in rows.
ϖ7R DUUDQJH DXWRPDWLFDOO\ DOO V\PEROV
1 Select all symbols by double-clicking the Pointer tool. 2 Select Symbol→Auto-Layout.
All the symbols are arranged horizontally in rows.
General Features Guide |
|