


Chapter 5 — Protecting and Mounting Your GPS 113
FIGURE 5-35: A layer of tape enables you to tighten the clip without damaging the metal. Even with this protection, however, remember to take it easy when tightening the nuts.
Making a Personalized Case
To close this chapter, I’m going to take you through the steps necessary to build your own GPS holster. In order to build this type of holster, you will need the following materials:
Kydex or Concealex sheet (12 inch × 12 inch square). This will cost a few dollars (see www.sdplastics.com/kydex/kydex.html).
A belt clip (under $10; see www.blade-tech.com)
Chicago screws (used in leatherwork extensively; see www.eleathersupply.com/ fasteners.shtml)
Closed-cell foam
Sharp knife and scissors
Hair dryer/hot-air paint-stripping gun
Access to an oven
114 Part I — Hardware Hacks
Heat-resistant gloves
Workbench
Vice/clamps
Teflon-coated tray or baking sheet
Sandpaper (various grades)
Damp cotton rags
Electric drill and 1⁄16 size drill bit
Kydex and Concealex are types of plastics called high-performance thermoplastics that are supplied in sheet form. Concealex is tougher and more robust than Kydex because of the carbon fiber reinforcement it contains.
Both of these plastics can be heated up and molded to form all kinds of shapes. Figure 5-36 shows a sheet of Concealex. Both of these materials have been used extensively in the automotive and aerospace industry, but are nowadays also used to make holsters for firearms and sheathes for knives.
FIGURE 5-36: A sheet of Concealex

Chapter 5 — Protecting and Mounting Your GPS 115
These materials can be purchased in a variety of sheet sizes, thicknesses, and colors. The best thickness for our purpose is 0.06 or 0.093 (measured in inches).
The best way to buy it is to search the web for a nearby retailer or a mail-order supplier.
You are now ready to start making the holster for your GPS. Because Kydex and Concealex are both thermoplastics, the plastic needs to be heated in order for it to become supple enough to be molded. The following table shows the typical temperatures to which you need to heat the plastic in order to make it moldable.
Thermoplastic |
Celsius |
Fahrenheit |
|
|
|
Kydex (0.06) |
154 |
310 |
|
|
|
Kydex (0.093) |
163 |
325 |
|
|
|
Concealex (0.06) |
around 70–120 |
around 160–250 |
|
|
|
Concealex (0.093) |
around 70–150 |
around 160–300 |
|
|
|
You will have to experiment with the temperature to get it right, and you should expect some failures.
Kydex is easier to work with than Concealex, and as such, I would recommend that you start off with that, rather than Concealex. However, if you plan on using your GPS in cold conditions, Kydex can become brittle at temperatures below 32o Fahrenheit (0o Celsius).
Here’s the procedure for creating your own thermoplastic holster:
1.Gather all your materials together. Make sure that you have a clear access from the oven to your work area. Remove any clutter and give yourself a clear work area.
After you have done that, set the oven to the right temperature and let it heat up. Oven temperature sensors are notoriously inaccurate, so if you have access to a temperature probe, use that in conjunction with the oven temperature gauge. Figure 5-37 shows a multimeter that also has a temperature probe.
Heating thermoplastics releases minute quantities of hydrofluoric acid, so I wouldn’t recommend cooking anything in the oven while it is being used to heat up the plastic.

116 Part I — Hardware Hacks
FIGURE 5-37: A multimeter with a temperature probe makes the job much easier.
2.Cut the thermoplastic into a shape for the holster. This shape will depend on the GPS for which you are making the holster, so I would experiment by making a template from cardboard and seeing how it fits. The thermoplastic can expand or contract after heating, so make the template a little larger initially because you can always cut it down and sand it to size.
Figure 5-38 shows a template that I made for the Garmin eTrex Vista.
3.Use your template to cut out a portion of the thermoplastic sheet to the shape you want. Take care when cutting the plastic, as it is quite dense and hard. The best way to cut the plastic is to score it before the final cutting, as shown in Figure 5-39.
4.Take the sheet of thermoplastic and place it on a clean baking sheet in the oven or use a portable toaster oven (which you could take outside to minimize the smell generated from heating Kydex). This will take several minutes to heat up. Don’t rush this process because repeatedly heating and cooling the plastic will cause it to thicken significantly.
5.After the plastic reaches the required temperature, remove the baking sheet and take it to your work area. This is where heat-resistant gloves come in handy. Be quick, however, as you have about a minute before the Kydex cools too much to mold.

Chapter 5 — Protecting and Mounting Your GPS 117
FIGURE 5-38: Garmin eTrex template
FIGURE 5-39: Score the Concealex before cutting it. If you make a mistake, you can just rescore it and cut along the right score, ignoring the mistake.
118 Part I — Hardware Hacks
6.Place the GPS face down on the workbench and lift the warm plastic off the sheet, placing it on the back of the GPS receiver and molding it around the GPS. This is shown in Figure 5-40.
FIGURE 5-40: Mold the warm Concealex on the GPS.
Heating the thermoplastic to too high a temperature can not only damage the plastic but also damage the GPS itself. Keep the temperatures to those listed in this chapter and keep damp cotton cloths handy to cool the plastic quickly as it molds. If you overheat a sheet of Kydex, it’s best to throw it away and start with a new piece.
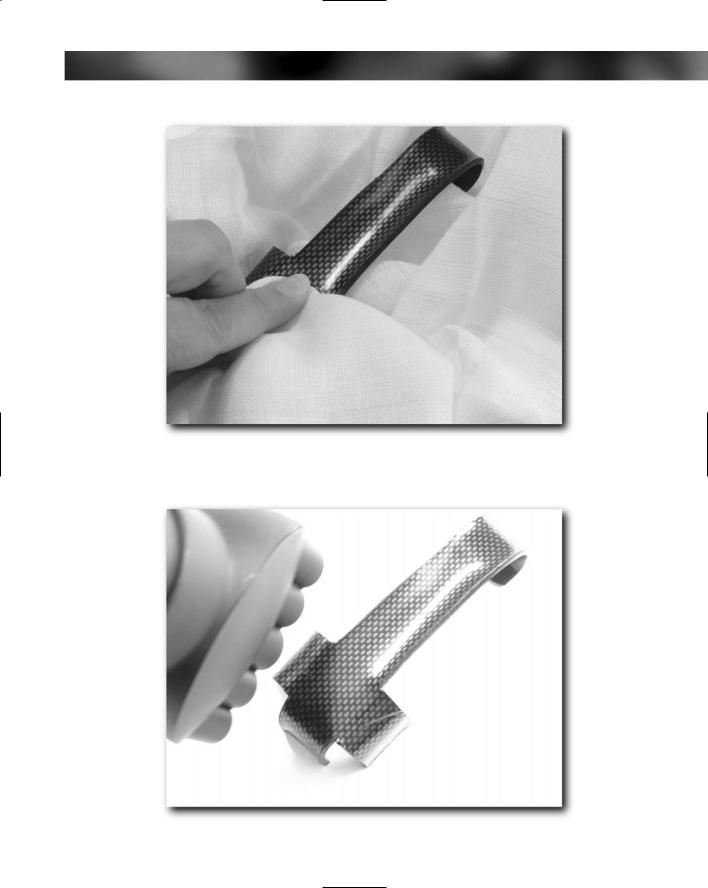
7.Gloves and a piece of closed-cell foam can help you to press on the plastic to mold it around the GPS receiver better. Use the damp cotton rags to cool the plastic down selectively as shown in Figure 5-41.
8.Remove the GPS. You can now use a hair dryer or hot-air heat gun (or you can use boiling water) to heat up small parts of the plastic to help you finish the molding process (see Figure 5-42). Take your time at this stage because going too fast could result in a mistake that takes you back to Step 1.
Chapter 5 — Protecting and Mounting Your GPS 119
FIGURE 5-41: Damp cloths enable you to selectively cool down areas of the plastic quickly, minimizing the time you have to hold it in place.
FIGURE 5-42: Heating up parts of the plastic

120 Part I — Hardware Hacks
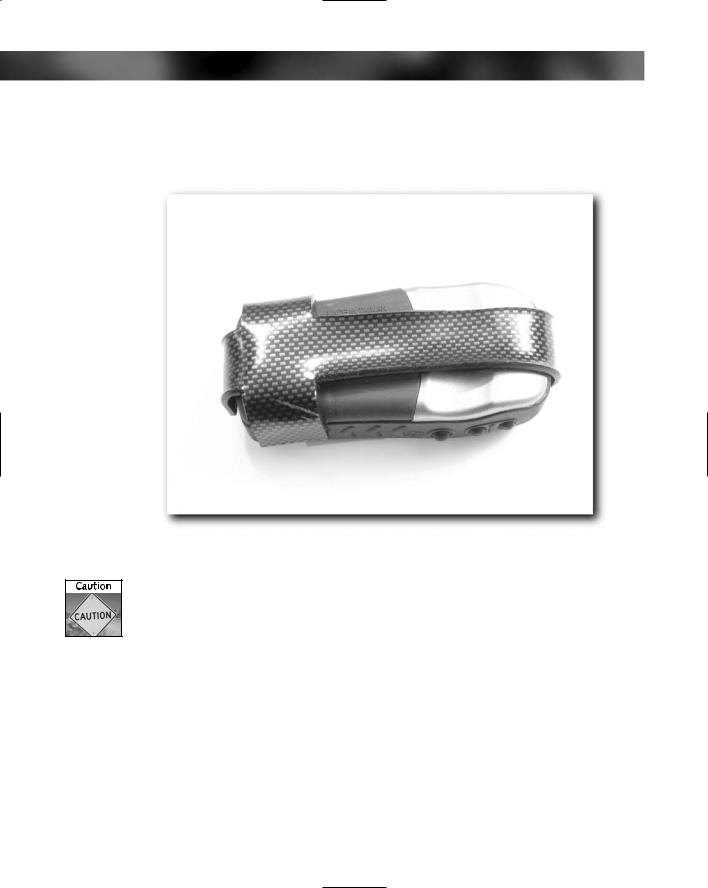
9.After you have finished the molding and shaping process, you should have a holster that enables you to easily access or remove your GPS (see Figure 5-43).
FIGURE 5-43: Testing the holster
10.Finish off the edges with sandpaper to remove any sharp edges that might be on the holster.
11.Now that the thermoplastic forming is completed, it’s time to add the fittings. Figure 5-44 shows a belt loop called a Tek Lok (see www.blade-tech.com).
12.To fit the Tek Lok, decide where you want it (I left a space for it on the template) or you can create a new piece and attach it with Chicago screws. Now mark (see Figure 5-45) and drill the holes for the Tek Lok.

Chapter 5 — Protecting and Mounting Your GPS 121
FIGURE 5-44: A large Tek Lok clip
FIGURE 5-45: Drilling the holes to attach the Tek Lok