- •Contents at a Glance
- •Contents
- •Hardware Hacks
- •GPS Secrets
- •Hidden Secrets
- •Garmin Secret Screens
- •Hard Resets
- •Soft Resets
- •Warm Resets
- •Full GPS Resets
- •Diagnostic Screens
- •Autolocating
- •Magellan Secret Screens
- •Magellan Meridian Series
- •After a Hard or Soft Reset
- •Summary
- •Cables Demystified
- •The Data Cable
- •Power Cords
- •Combo Cables
- •Combining Cable Types
- •Multi-GPS Cables
- •Multi-Data Cables
- •Multi-Data/Power Cables
- •Multi-Data/Power/GPS Cables
- •Making Your Own Data Cables
- •Materials You Will Need
- •Don’t Want to Buy a Connector?
- •Making Power Cords
- •Power Cord Assembly
- •Testing
- •Precautions
- •GPS/iPAQ Connections
- •Cradle Modification
- •Testing the Connection
- •Making Combo Cables
- •Making Multi Cables
- •Summary
- •Power Hacks
- •GPS Power Needs
- •Alkaline Batteries
- •Lithium Batteries
- •Rechargeable (NiMH) Batteries
- •Battery Do’s and Don’ts
- •Power Hacks
- •Carrying Your Own 12-Volt Power Supply
- •Battery Packs
- •A Different Kind of Battery Pack
- •Alternative Power Supplies
- •Summary
- •Antenna Hacks
- •The GPS Antenna
- •Quad-Helix Orientation
- •Patch Antenna Orientation
- •Best Performance Summary
- •External Antennas
- •Antenna Placement
- •Other Things to Avoid
- •Reradiating Antennas
- •Personal Reradiating Antenna
- •Communal Reradiating Antenna
- •Reradiating Antenna Considerations
- •Setting Up a Reradiating Antenna in a Car
- •Testing the System
- •Making the System Permanent
- •Carrying a GPS Signal via Cable
- •How Much Signal Do You Need?
- •Cable Losses
- •Connector Losses
- •Using a Signal Repeater
- •Building Your Own Mega GPS Antenna
- •Materials
- •Building the Antenna
- •Summary
- •Screen Damage
- •Screen Protectors
- •More Screen Armoring
- •Commercial Protection for GPS and PDAs
- •Mounting GPS
- •Car Mounting
- •Mounting a GPS for Biking, Hiking, and Skiing
- •Making a Personalized Case
- •Summary
- •Software Hacks
- •Hacking the Firmware
- •Firmware
- •Updating Warnings
- •Updating the Firmware
- •Hacking GPS Firmware
- •Bypassing the Garmin eTrex Vista Startup Screen
- •Bypassing the Garmin eTrex Legend Startup Screen
- •Bypassing the Garmin eTrex Venture Startup Screen
- •MeMap Personalization
- •Manual Firmware Editing
- •Magellan GPS Firmware Modifications
- •Recovering from a Failed Firmware Load
- •Garmin
- •Magellan
- •Summary
- •Connection Types
- •Which Connection Is Best?
- •Troubleshooting Problems
- •PC Connection Trouble
- •General PDA Connection Trouble
- •General Bluetooth Connection Trouble
- •Software-Specific Issues
- •Erratic Mouse Pointer after Connecting a GPS
- •Windows XP Problem: Microsoft Ball Point
- •Microsoft MapPoint Troubleshooting
- •USB-to-Serial Converters
- •Summary
- •GPS Data Collection
- •Position, Velocity, Time
- •Waypoints
- •Working with the Data
- •EasyGPS
- •G7toWin
- •Creative Uses of GPS Data
- •Sharing Waypoints
- •Adding GPS Information to Digital Photos
- •Lightning Detector and Plotter
- •Wardriving
- •GPS in Programming
- •Summary
- •Examining the Data
- •NMEA
- •NMEA Sentences
- •NMEA Sentence Structure
- •A Closer Look at NMEA Sentences
- •Examining NMEA Sentences
- •NMEA Checksum
- •SiRF
- •Using NMEA Sentences
- •GPS NMEA LOG
- •GPS Diagnostic
- •RECSIM III
- •Using NMEA
- •GpsGate
- •Recording Actual NMEA Sentences with GpsGate
- •Recording Simulated NMEA Using GpsGate
- •Data Playback
- •Why Bother with NMEA?
- •Ensuring That Your GPS Works
- •Avoiding Data Corruption
- •Summary
- •More Data Tricks
- •Screenshots
- •G7toWin
- •G7toCE
- •Turning Your PC into a High-Precision Atomic Clock
- •Setting Up the Software
- •Setting Up the Hardware
- •Hooking Up Hardware to Software
- •Bringing a GPS Signal Indoors
- •Other Uses for GPS Data
- •Azimuth and Elevation Graphs
- •Surveying
- •Navigation
- •Signal Quality/SNR Window
- •NMEA Command Monitor
- •Experiment for Yourself
- •Summary
- •Playtime
- •Hacking Geocaching
- •GPS Accuracy
- •The Birth of Geocaching
- •Geocaching Made Simple
- •What Is Geocaching?
- •Geocaching from Beginning to End
- •The Final 20 Yards
- •Geocaching Hacks
- •Go Paper-free
- •Plan Before You Leave
- •Sort Out Cabling
- •Power for the Trip
- •Better Antennas
- •Protecting the GPS
- •Summary
- •GPS Games
- •The Dawn of GPS Games
- •Points of Confluence
- •Benchmarking/Trigpointing
- •GPS Drawing
- •Hide-and-Seek
- •Foxhunt
- •Other Games
- •Summary
- •GPS Primer
- •The GPS Network
- •How GPS Works
- •GPS Signal Errors
- •Summary
- •Glossary
- •Index
Chapter 2 — Building GPS Data Cables and Power Cords |
37 |
The easiest way to solder these is to heat up the wire from the cable, coat that in solder, and then put the coated wire against the appropriate pin. Using the soldering iron, heat up the appropriate pin in the cradle and when the solder melts, take the soldering iron away to fix it. This minimizes the risk of short circuits and splashing solder on something important.
8.Make a hole in the cradle exterior for the wire to come out of. Once you have done that, reassemble the cradle and then confirm that you can access your GPS from the iPAQ via the cradle.
Testing the Connection
The easiest way to test the connection is to use simple software, and software doesn’t come much simpler than WinFast Navigator. This application is available free for download (the best, most reliable source for this can be found at www.pocketgpsworld.com/modules.php?name= Downloads&d_op=getit&lid=15) and can be installed and up and running on a Pocket PC device in minutes. Once installed, you should find Navigator showing on your Start menu.
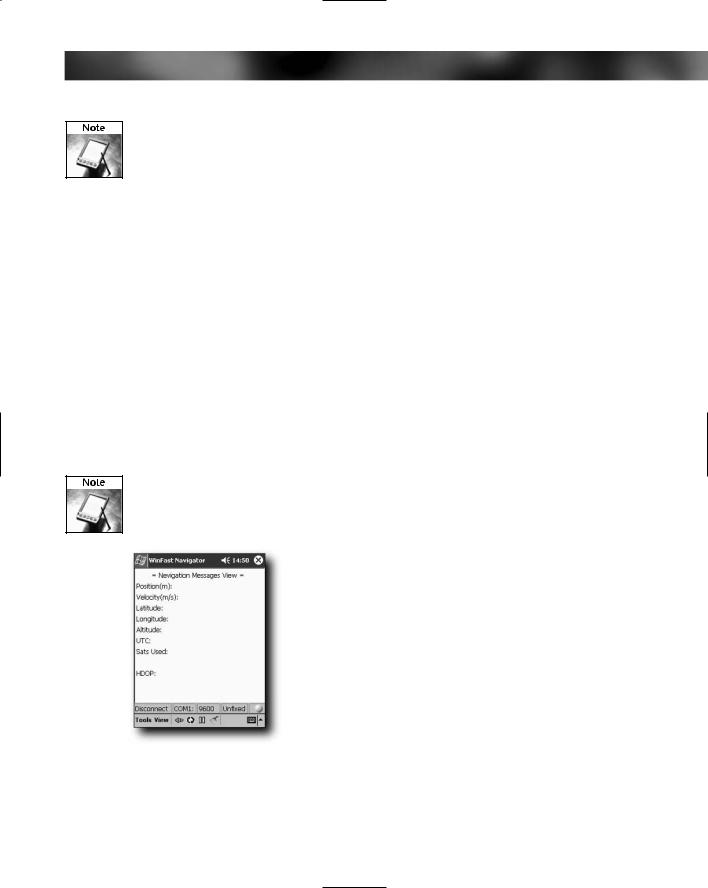
Set your GPS to the NMEA data transfer protocol (more than 95 percent of units support this standard, and although it is old and a bit slow compared to the more modern SiRF, it is still likely to remain popular for a long time to come). Now connect the GPS to the cable connected to the cradle and seat the iPAQ in the cradle. Tap View and then Diagnostics. This will present you with another screen devoid of data, as shown in Figure 2-28. This is the diagnostics screen, and it’s best to be sitting on this when you try to connect.
You can find more information on these protocols in Chapter 9.
FIGURE 2-28: WinFast Navigator
If you don’t see any data appear onscreen when connected, there is a problem somewhere — usually the wrong settings have been input. Connecting to the GPS unit can involve quite a lot of trial and error until you find the correct settings.
38 Part I — Hardware Hacks
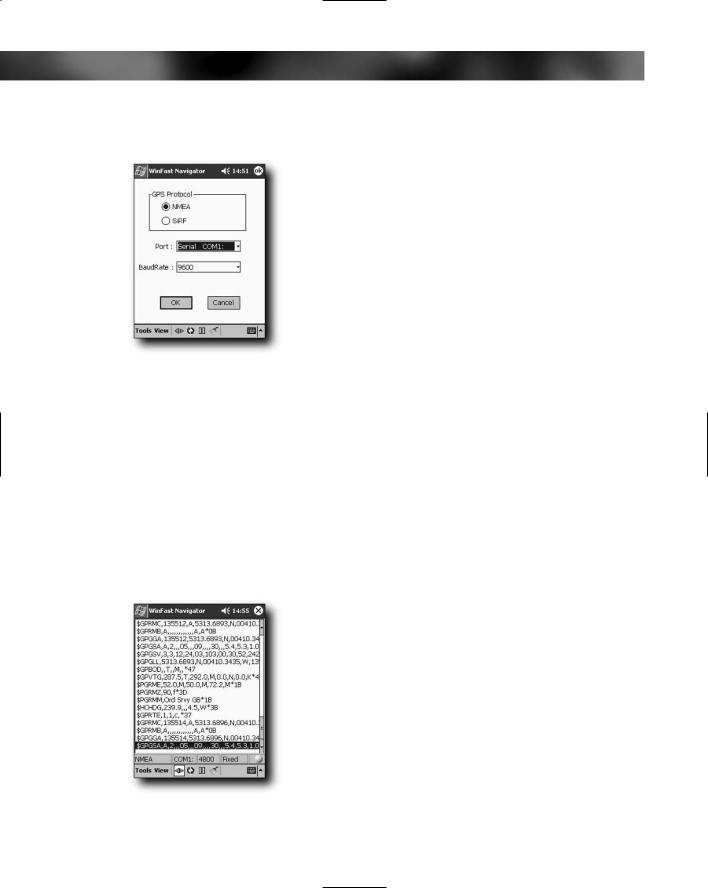
Now tap Tools followed by Settings and you will see the window shown in Figure 2-29.
FIGURE 2-29: The settings window
This shows you the protocols available (e.g., NMEA and SiRF), the serial port on which you will connect, and the baud rate to use.
I recommend that you always try out NMEA first, so make sure this is selected. When it comes to baud rate (the rate at which communication should occur, measured in bits per second), generally NMEA prefers to use 4800, so make sure it’s set to that.
For the Port setting, you know that you are connecting to a GPS receiver that plugs into the bottom of the sync port, and most of the time this is regarded as Serial1 COM1, so you can set it to this.
Tap the OK button. You should be taken back to the Development window in WinFast Navigator, where you should see a screen like the one shown in Figure 2-30.
FIGURE 2-30: Development window in WinFast